
Use and Care Manual

User Manual of LV-D2104CS,LV-D2108CS,LV-D2116CS Series DVR
26
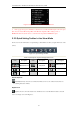
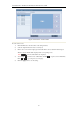
Figure 3.5 Digital Zoom
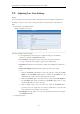
Image Settings
Image Settings icon can be selected to enter the Image Settings menu.
Steps:
1. Set the period of a day for configuring independent image parameters so as to satisfy different light
conditions, e.g., daylight and night time. Two periods can be configured. When you have configured
Period 1, the Period 2 is remained as the Other Time.
2. Select the mode from the drop-down menu according to different light conditions.
Four modes are selectable:
Standard: in general lighting conditions (default).
Indoor: the image is relatively smoother.
Dim Light: the image is smoother than the other three modes.
Outdoor: the image is relatively clearer and sharper. The degree of contrast and saturation is high.
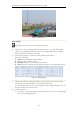
Figure 3.6 Image Settings
3. Adjust the image parameters including the brightness, contrast, saturation, hue, sharpness level and
denoising level by moving the sliding bar or increasing/decreasing the value.
Note: The adjustable value range is 0~255 for the brightness, contrast, saturation and hue, 0~15 for the
sharpness level and 0~5 for the denoising level.
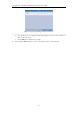
4. Copy image parameters.
1) If you want to copy the image parameters of the current camera to other camera (s), click the Copy
button to enter the Copy to interface: