
User's Manual


1.1 Description On The Indoor Monitoring(Please take actual model as quasi)
Speaker
TFT display
View visitor's image displayed on the TFT screen with visual
indoor unit.
Microphone
Sound from outdoor camera
Transmit the voice to outdoor camera.
Name
Descriptions
Power LED
8
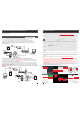
1. Description Of The Indoor Unit
The power indicator of the indoor unit
1.3 Description On Symbol
6
Release the door lock by pressing this button.
Activate conversation mode by pressing this button.
Hang up
Unlock
Talk
Monitoring
5
Non-visual Indoor Unit
Visual Indoor Unit with 7 inch TFT LCD
Monitoring
Unlock
Hang up
Talk
1
2
1
2
3
4
5
6
7
8
9
10
9
10
End conversation mode by pressing this button and the indoor unit
will go into standby mode.
5
8
9
10
Talk
Unlock
Hang up
1
The door 1 LED
2
The door 2 LED
The light is on when the door 1 works.
The light is on when the door 2 works.
SD
11
13
12
14
11
12
13
14
SD
Indoor Ringer Volume
Indoor Call Volume
SD card slot
(optional)
Adjust the ringer volume of indoor device manually.
Adjust volume for the indoor device during intercom.
SD card interface, support up to 32GB card for recording.
15
DC 12V(Optional)
Ethernet Connector
RJ-45 10/100 Base-T Ethernet network. On some models, the
Ethernet connector is on back panel.
External switching power supply DC 12V. On some models, the
power input socket is on back panel.
4
/
Color Setup for LCD
screen
Make adjustments to the brightness, chrome and contrast of the
LCD screen. When the LCD screen is highlighted, press this button
to bring up the option brightness “ ”, press this button again to
bring up the option of chrome “ ”, press this button once again to
bring up the option contrast “ ”. During adjust values, scroll the
button upwards to decrease, and scroll the button downward to
increase. By default, the values of the brightness, chrome, contrast
are set at 20, 35, 20.
16
LAN
DC 12V
15
16
13
/
Observe the image of camera view at entrance in real time with
visual indoor unit. For some models, click “Monitoring 1 ” to
observe the image of Door 1, and click “Monitoring 2 ” to observe
the image of Door 2.