
Installation Guide
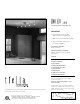
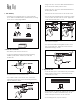
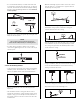

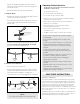
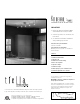
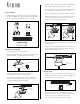
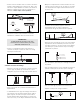
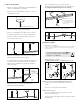
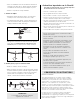
Table Of Contents

R
ail
K
it
5
head
Installing Your tiella Rail Kit
IMPORTANT:
1. Use maximum 12 volt, 20 watt,
MR16 halogen bulbs with this kit.
2. Make sure all connections are very tight.
3. These instructions show a typical
rail system installation.
Tools Needed For Installation:
Phillips Screwdriver
Optional Tools Needed For Installation:
Hammer, Needle Nose Pliers, Hacksaw &
Tape Measure
Contents
1. Take Inventory
2. Install the Transformer
3. Prepare the Rail
4. Install the Mounting Hardware
5. Secure the Rail to the Ceiling
6. Prepare the Heads
7. Install the Heads
8. Check for Loose Connections
9. Important Safety Instructions
This system may be dimmed with a standard
incandescent dimmer.
Important: Combined bulb wattage can not
exceed 100 watts
To get the most out of your new rail system we
recommend you make a sketch of your space and
how the rail will look on the ceiling. Some sample
sketches are shown below.
One Rail Kit (Spire Rail Kit Shown Above)
*The drawings in this document show the tiella Sola Head. Your heads may not look like
the Sola Head, but they install the same way.
A Generation Brands Company
800RAL5AMN; 800RAL5AMZ; 800RAL5ASZ; 800RAL5BLN; 800RAL5CWZ; 800RAL5FCN;
800RAL5MKN; 800RAL5NAN; 800RAL5RCP; 800RAL5WHN; 800RAL5WHW
This product is suitable for indoor dry locations only.
© 2010 Tech Lighting L.L.C., All Rights Reserved.