V-BOX 48A EV Charging Station for NACS (Tesla) USER MANUAL
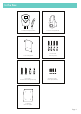
In the Box 1 x V-BOX charging station 1 x Tesla Charger Mount 1 x mounting plate 1 x set screws anchors (plate) 2 x screws + anchors (Tesla charger mount) 4 x small screws + screw caps (V-BOX) 1 x drilling reference paper Page 1
Safety Information 1. HARDWIRING IS RECOMMENDED IF YOU INTEND TO CHARGE AT 48 AMPS. Important: Always shut off your circuit breaker before any hardwire installation. Hardwiring should only be done by a qualified electrician. 2. We recommend that electrical outlets for your charging station be installed by a licensed and qualified electrician. To avoid serious injury or death, the installation must comply with the provisions of the National Electric Code (NEC) and all local codes.
Charging Status Status Disconnected Connected Charging Charge Complete Fault Solid blue Rolling blue Rolling green Solid green Solid red LED Pre-Installation Remove the short screws and lift up on the mounting plate. Dial Position Current (A) 0 16 A 23 1 24 A 1 By default, the V-BOX has been set to 3 (40A). To adjust the amps, unscrew and remove the plastic cover from the back of the V-BOX, and turn the dial on the inside to your preferred setting.
Hardwiring the V-BOX Important: Always shut off your circuit breaker before any hardwire installation. Hardwiring should only be done by a qualified electrician. Installing the V-BOX The V-BOX must be hardwired to charge at 48A. 1. Using the drilling reference paper for guidance, mark the wall where you plan to install the mounting plate. Then, drill the holes.
2. Insert the wall anchors. Then, align the mounting plate with the holes and fix it to the wall using the screws provided.
3. Fix the Tesla charger mount to the wall, approximately 8 inches from the mounting plate. 4. Attach the V-BOX by lining up the slots at the back with the tabs on the mounting plate. Note: Adjust the the amp setting on the back of the V-BOX prior to mounting.
5. Insert the short screws into the holes at the sides of the V-BOX, and place the screw caps on top. 6. Plug the power cable into a NEMA 14-50 outlet.
Charging Your Vehicle Note: Before you begin charging, make sure that your vehicle is parked and the engine is turned off. 1. Plug the charging handle into your vehicle’s charging port. 2. Press the power button on the side of the V-BOX to turn it on/off.
3. The LEDs on the V-BOX will display a 'rolling green' status to indicate that your vehicle is successfully charging. You can also verify the charging status by checking your vehicle dashboard. Disconnecting from Your Vehicle 1. The LEDs turn solid green when charging is complete. Eject the handle by pressing the button at the top and pulling it out.
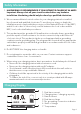
2. Neatly wrap up your charging cable and hang it on the Tesla charger mount. Place the handle in the holster at the top. Specifications Input / output: Frequency: Maximum current: Cable length: Plug: EV connector: Dimensions: Weight: Operating temperature: Materials: 208V ~ 240V 50 / 60 Hz 48 A 20 ft NEMA 14-50 NACS (Tesla) 13.4 x 9.6 x 4 in 16.
Get More Support Scan the QR code below or email us at contact@ev-lectron.com. www.ev-lectron.