
User's Manual

UHF Digital Hybrid Wireless
®
Rio Rancho, NM
23
PHASE
This setup screen allows the audio output polarity to be
inverted to match other microphones or audio sources.
TXBAT
• AA - Transmitter uses a AA alkaline battery.
• AAL - Transmitter uses a AA lithium battery (not
rechargeable).
• AAT - Transmitter uses an alkaline, lithium or
rechargeable AA battery. Monitor the battery status
with the timer in the receiver.
• LB - Transmitter uses a Lectrosonics LB-50 re-
chargeable battery.
• LBT - Transmitter uses a Lectrosonics LB-50 re-
chargeable battery.
• 9V - Transmitter uses a 9V alkaline battery.
• 9VL - Transmitter uses a 9V lithium battery (not
rechargeable).
• 9VT - Transmitter uses a 9V battery of any type.
Monitor its status with the timer in the LCD Main
Window.
MIXTRIM and MIXMODE
When set to the SWITCHED (dual channel mode),
special options are available to allow the audio from the
receivers to be mixed to either one or both audio output
channels.
The MIXMODE setting determines which audio signal
appears at which output channel:
• MIXBOTH mixes the audio and delivers the mix to
both output channels.
• MIXTO 1 mixes the audio and delivers the mix to
output channel 1.
• MIXTO 2 mixes the audio and delivers the mix to
output channel 2.
• DIRECT keeps the audio separated and delivers
receiver 1 audio to output channel 1, and receiver 2
audio to output channel 2.
The MIXTRIM setting applies attenuation up to 20dB in
1 dB steps to adjust the ratio of the two audio signals in
the mix. This adjustment takes effect only when a mix
mode is selected (it is ignored when the mix mode is
set to DIRECT).
IMPORTANT: The output level of each receiver
is adjusted with the LEVEL setup screen, which
is hardware-based, so it affects the output level
regardless of which mix mode is selected. MIXTRIM
then applies attenuation to that level setting resulting in
the final level delivered to the output channel. It is good
practice to set the output level of both receivers to
the same value when using a mix mode.
When a MIXMODE is selected, each audio signal is au-
tomatically attenuated by 6 dB prior to the mixing. This
is done to avoid overload and potential distortion since
mixing increases the level by 6 dB.
TONE
The TONE setup screen enables an audio test tone at
the receiver output for precise level matching with other
equipment. The first screen prompts you to press the
UP or DOWN button to enable the tone at the receiver
output. Press MENU/SEL to toggle between receivers.
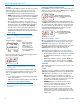
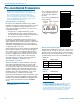
The first screen prompts you to
press the UP or DOWN button to
start the tone.
RECEIVER 2
TONE?
00+05
Once the button is pressed, a 1 kHz tone is enabled,
and its level can be adjusted with additional presses on
the UP or DOWN buttons.
The level set here will be retained in the regular operat-
ing mode. It will supersede the setting made in the
LEVEL setup screen. The test tone has 1% distortion
and is intended for confirmation of output levels only.
To exit the test tone screen and stop the tone press the
BACK button.
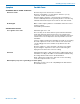
Front Panel Shortcuts
A convenient shortcut is available from any setup
screen that displays the two receiver selection options
next to each other, such as the LEVELS and STEPSIZE
screens. Once the value has been set on one receiver,
the same value can be copied to the other receiver with
a simple button push combination.
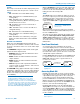
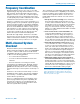
Hold the MENU/SEL button and press the DOWN arrow
to copy the value set on receiver 1 to receiver 2. Hold
MENU/SEL and press UP to copy the value set on
receiver 2 to receiver 1.
+05
00 00
LEVEL LEVEL
00
Hold MENU and
press UP arrow
NOTE: It does not matter which receiver is selected
(highlighted).
Accessing Block 606
Band B1, B2 and C1 SRc receivers can be used with
legacy Block 606 Lectrosonics transmitters by invoking
a special Block 606 legacy mode so the correct pilot
tones will be present. To invoke the Block 606 mode,
press the BACK button as needed to move to the Main
Window, then press the PWR/BACK and DOWN arrow
buttons simultaneously. Use the UP and DOWN arrows
buttons to select the desired tuning range.
Beginning with firmware v1.13, the LCD will simply
display 606 on the setup screen. Previous firmware ver-
sions display 606B or 606C if you are a using Band B1
or C1 unit. When the mode is enabled, 606 will appear
in the frequency selection screen as a reminder that the
mode is enabled.
Note: Neither Band B1 nor Band C1 includes all Block
606 frequencies.