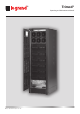
® Trimod® Operating and Maintenance Manual Part.
® Trimod® EN 2 ENGLISH 3
Index of contents 1 2 3 Foreword 6 1.1 Overview 6 1.2 Purpose of the manual 6 1.3 Where nad how to keep the manual 7 1.4 Manual update 7 1.5 Collaboration with the user 7 1.6 Manufacturer 7 1.7 Responsabilities of the manufacturer and guarantee 7 1.8 Copyright 8 Technological description 9 2.1 Technology Trimod® 9 2.2 Features 9 2.3 Models 12 2.4 Communications device 20 2.4.1 RS232 serial ports 20 2.4.2 Relay interface 20 2.4.
® Index of contents 4 Unpacking 28 4.1 28 Visual inspection 4.1.1 Checking the equipment and accessories supplied 28 4.2 Unpacking 28 4.3 Checking the contents of the pack 28 4.4 Storing 29 4.4.1 UPS 5 4 29 4.4.2 Batteries 29 4.5 Handling 30 4.6 Positioning 30 4.7 Last operations 31 Installation 32 5.1 32 Safety rules and regulations 5.1.1 Mains connections for TN systems 33 5.1.2 Mains connections for TT systems 34 5.
6 7 Configuration and Start-up 53 6.1 Input configuration 53 6.2 Output configuration 53 6.3 Checks prior to switching ON 53 6.4 Starting procedure 53 Control panel 56 7.1 “Service Mode” function 57 7.2 Main menu and submenus 57 7.2.1 UPS status 61 7.2.2 UPS settings 64 7.2.3 Power Modules 67 7.2.4 Events 69 7.2.5 Tools 69 7.2.6 Logout 70 7.2.7 Turning the single output phases ON and OFF 70 7.2.8 Shutting down the UPS Trimod® 70 8.
® 1. Foreword 1.1 Overview Congratulations for having bought a LEGRAND® UPS Trimod® product. Thanks to UPS Trimod® unit your critical equipment will be protected by a constant and reliable supply of power for years to come. LEGRAND® is based in Italy and specializes in designing and producing UPS units. The UPS Trimod® system is unique, modular and the last generation of three-phase medium power UPS units.
Any other use or configuration must be agreed on beforehand with the Manufacturer in writing and, in such a case, will be an enclosure to the manual. For its use the user must also comply with the specific laws on work that exist in the country where the equipment is installed. Reference is also made in this manual to laws, directives, etc., that the user must know and consult in order to fulfil the purposes established by the manual. 1.
® 1. Foreword - changes made to the equipment, software, operating logic that were not authorised by the Manufacturer in writing; - unauthorised repairs; - exceptional events. When the equipment is sold to a third party this manual has to go with it; if the manual is not given to the new user then all purchaser rights are automatically invalidated, including guarantee terms where applicable.
2. Technological description 2.1 Trimod® Technology Congratulations on your purchase of a UPS Trimod® product from LEGRAND®. Thanks to the UPS Trimod® your critical equipment will be protected by a constant and reliable supply of power for years to come.
® 2. Technological description Advantages: - A UPS with a modular redundant architecture can be configured as an N+X system redundant in power; even in the case of a failing module the equipment carries on working and there is no stop in work. - Clear indications and a large display speed up troubleshooting. - The modular architecture makes short work of repairing a failure by simply replacing the module in question without interrupting service.
All informations about BCM are indicated by LED on the front of the module and described on the display menu. The module is controlled by a microprocessor to optimize performance and reliability, we recommend the use in combination with higher than 60Ah capacity batteries. Input voltage 230V +15% -20%, rated output power 4kW, maximum rated current 15Adc, maintenance voltage 13.75Vdc/ battery.
® 2. Technological description 2.
UPS Trimod® 10/15/20 UPS Trimod® 30 TT 13 Operating and Maintenance Manual Trimod®
® 2.
UPS Trimod® 60 15 Operating and Maintenance Manual Trimod®
® 2.
UPS Trimod® BATTERY UPS Trimod® BATTERY/2 17 Operating and Maintenance Manual Trimod®
® 2.
Batteries 3 104 22 3 104 31 10 kVA Type of batteries 3 104 23 3 104 32 3 104 33 15 kVA 3 104 23 3 104 24 3 104 32 3 104 25 3 104 26 3 104 34 3 104 33 30 kVA TM 40 kVA 30 kVA TT 20 kVA 3 104 27 60 kVA 12V 7.
® 2. Technological description Environmental conditions 3 104 36 10 kVA Operating temperature 3 104 37 15 kVA 3 104 37 3 104 39 3 104 38 3 104 40 20 kVA 30 kVA TM 30 kVA TT 40 kVA 0°C ÷ 40°C Relative humidity 20% ÷ 80% non-condensing Noise level at 1m 58 ÷ 62 dBA Grade of protection IP 21 Maximum altitude up to 1000m without derating Bcm technical specifications INPUT Rated voltage and tolerance 230 Vac +15% -20% Rated current 19.3 Arms Power Factor PF > 0.
2.4 Communication devices The uninterrupted power supplies of the UPS Trimod® family have 2 RS 232 serial ports, 1 relay interface and 1 output on a 9-pole male tray-shaped connector, logic level SELV. insulated.
® 2. Technological description 2.4.
2.4.5 Power module block diagram 2.4.6 Trimod® 30KVA TM Interconnection block diagram All UPS Trimod® models have a similar block diagram.
® 3. Safety Provisions 3.1 General notes WARNING Before doing any operation on the equipment, it is necessary to read through the whole manual carefully, paying attention to this chapter in particular. The equipment has been built for the application specified in the declaration of conformity enclosed with this manual. For no reason whatsoever it is allowed to use it for purposes other than those for which it has been designed, nor in ways different to those explained in the manual.
3.3.2 Qualification required to the specialized technician The professional person who has to look after installation, starting and extraordinary maintenance is defined by the term “specialized technician”. With such a definition we mean people with knowledge of the procedures for installing, assembling, repairing and servicing the equipment and who have specific technical qualification.
® 3. Safety Provisions 3.5 Indications of danger in the work place The following signs must be placed in all points of access to the premises where the equipment is installed. Electric current It indicates the presence of live parts. Emergency interventions Do not use water to extinguish a fire but only the extinguishers designed specifically for putting fires out on electronic equipment. No smoking This indication explains that it is forbidden to smoke in the area where the sign is affixed. 3.5.
- Only specialized and specifically instructed personnel must be allowed to access the equipment for maintenance work. All the time such maintenance work is being done, ‘Work underway’ signs must be affixed in the department that can be seen from all access points. - Connection of the equipment (and of any accessory devices) must include standard earthing to discharge short circuit current and electrostatic voltages. Mains voltage must correspond to the value on the ID plate.
® 4. Unpacking 4.1 Visual inspection When the UPS is delivered, examine the packaging and product carefully to see if any damage was done during transport. In particular check the integrity of the indicator on the external “Shock Watch” label. If either possible or ascertained damage is found report it immediately to: - the carrier; - the LEGRAND® Technical Assistance Centre Make sure that the unit received corresponds to the material specified on the delivery document.
Trimod® INVERTER - No. 1 UPS Trimod® unit; - No. 1 bag of accessories with a set of screws for installing the unit correctly; - No. 1 front closing panel; - No. 2 base strips for side closing; - Operating and maintenance manual - International guarantee. Trimod® BATTERY - No. 1 Trimod® BATTERY cabinet; - Operating and maintenance manual - No. 1 multicore cable for connecting to the UPS Trimod® inverter; - No. 1 bag containing fuses and keys for the front door. Trimod®/2 BATTERY - No.
® 4. Unpacking 4.5 Handling WARNING Handle with great care, lifting it only to the extent necessary, keep it well balanced and avoid swinging which could be dangerous. If it weighs less than 30 kg (check on the transport document) the equipment can be moved around by hand as it has two wheels. Do not forget that the equipment must always be handled by trained personnel, equipped with the Individual Protective Gear as specified in Chapter 3.
Before commencing installation, make sure there is enough lighting on the equipment so that each single detail can be seen easily. Use artificial lighting if natural lighting is not enough for the aforementioned requirements. If maintenance work has to be done on parts that are insufficiently illuminated, it is compulsory to use portable lighting, being careful not to create shadows that will prevent or reduce visibility on the point you are working on or on the surrounding areas. 4.
® 5. Installation WARNING The instructions in this chapter are not addressed to a normal operator but to a specialized technician, authorised to work only if he uses the Individual Protective Gear mentioned in Chapter 3. 5.1 Safety rules and regulations Prima di eseguire qualsiasi operazione di installazione, leggere e applicare quanto di seguito riportato: 1. The installation of the UPS Trimod® units must be provided with a fixed type circuit breaker.
5.1.1 Mains connection and Backfeed protection drawings for TN systems Three-Phase/Three-Phase Configuration Three-Phase/Single-Phase Configuration Single-Phase/Single-Phase Configuration Single-Phase/Three-Phase Configuration In the diagrams: “S1” is the circuit breaker required. “S3” is bypass line breaker contact “S4” are backfeed protection circuit contacts.
® 5. Installation 5.1.2 Mains connection and Backfeed protection drawings for TT systems Three-Phase/Three-Phase Configuration Three-Phase/Single-Phase Configuration Single-Phase/Single-Phase Configuration Single-Phase/Three-Phase Configuration In the diagrams: “S1” is the circuit breaker required. “S3” is input line breaker contact “S4” are backfeed protection circuit contacts. WARNING In case of Backfeed Protection warning, please contact Technical Support.
5.2 Electrical connections The electrical connection of the UPS to the switchboard is part of the installation and is usually done by the user and not by the UPS manufacturer; therefore the following indications are purely an example and the actual electrical connections must be done in accordance with local standards. Once the UPS has been removed from the packaging and positioned in its final place of installation, the authorised technician can start its installation. 5.2.
® 5. Installation 5.2.4 Emergency Power Off (Remote E.P.O.) In accordance with the standards, the UPS is fitted with an emergency device that uses a normally closed contact (already installed on the UPS) that can be opened to activate the emergency machine power off. The E.P.O. terminals are in the UPS’s rear panel on pins 3 and 4 of the 6-pole Combicon connector installed on contact interface.
To ensure that the UPS Trimod® has stopped completely if you want to add a Trimod® BATTERY in an existing installation, follow the steps illustrated in the MAINTENANCE chapter. The connection of a Trimod® BATTERY to the UPS Trimod® must be done according to the following diagram and the steps listed below: UPS Trimod® BATTERY UPS Trimod® BATTERY UPS Trimod® 1. Make sure that all the battery fuse carrier isolating switches are open; 2.
® 5. Installation UPS Trimod® 40/60 The connection of a Trimod® BATTERY to the UPS Trimod® 40 - 60 must be done accoring to the diagram above and the steps listed below: 1. Make sure that all the battery fuse carrier isolating switches are open; 2. In each Trimod® BATTERY remove the lower front panel; 3. In each Trimod® BATTERY remove the terminal block loosening the 2 securing screws; 4. Connect the UPS and the additional battery cabinet using the earth cable (yellow-green); 5.
WARNING The connection of a Trimod® BATTERY to the UPS Trimod® 40 must be done using BOTH wirings supplied with the Trimod® BATTERY. The connection of a Trimod® BATTERY to the UPS Trimod® 60 must be done using BOTH wirings supplied with the Trimod® BATTERY. 6. In each Trimod® BATTERY insert the terminal block securing it with the 2 screws provided; 7. In each Trimod® BATTERY secure the lower front panel. 5.2.
® 5. Installation WARNING The neutral conductor cable in input must ALWAYS be connected! If the neutral is not connected the UPS could be seriously damaged when powered by the mains. 5.2.9 Wiring The UPS has holes in the base for putting cables through if they are coming from underneath. It also has a pre-punched metal plate at the back arranged for inserting fairleads of different diameters. The fairleads are supplied in the accessories kit. The plate is fixed to the UPS with four screws. 5.
5.3.1 Factory set configuration: THREE-PHASE input, THREE-PHASE output The UPS is dispatched with the connections as per the following diagram. To use it with this configuration no interventions are required. We do however suggest that you check beforehand that the wiring in input, output and the connection of the modular terminals is correct.
® 5.
UPS Trimod® 30kVA with internal batteries 43 Operating and Maintenance Manual Trimod®
® 5.
5.3.2 THREE-PHASE input, SINGLE-PHASE output connection For this type of connection, besides the wiring shown in the following figure, the software has to be configured via the instrument panel as illustrated in paragraph 6.4 STARTING PROCEDURE. UPS Trimod® 10/15/20/30TM ATTENTION If the UPS is used with a single-phase output (available on 10/15/20/30TM models) you will have to plug in all the ‘Back Panel’ cards in the connector supplied in the accessory kit.
® 5.
5.3.3 SINGLE-PHASE input, SINGLE-PHASE output connection For this type of connection, besides the wiring shown in the following figure, the software has to be configured via the instrument panel as illustrated in paragraph 6.4 STARTING PROCEDURE. UPS Trimod® 10/15/20/30TM ATTENTION If the UPS is used with a single-phase output (available on 10/15/20/30TM models) you will have to plug in all the ‘Back Panel’ cards in the connector supplied in the accessory kit.
® 5. Installation 5.3.4 SINGLE-PHASE input, THREE-PHASE 120° output connection For this type of connection, besides the wiring shown in the following figure, the software has to be configured via the instrument panel as illustrated in paragraph 6.4 STARTING PROCEDURE. UPS Trimod® 10/15/20/30TM WARNING In the Trimod® models 10, 15, 20 and 30TM, in the case of a single-phase input and three-phase output configuration, the manual by-pass S1 MUST NOT be activated for any reason whatsoever.
5.3.5 SINGLE-PHASE input connection, no. 3 separate outputs For this type of connection, besides the wiring shown in the following figure, the software has to be configured via the instrument panel as illustrated in paragraph 6.4 STARTING PROCEDURE.
® 5. Installation Take from the packet of accessories one cross-connector and cut it in order to get the required length. Insert the cross-connector into modular terminals as shown in connection blocks. Insert the cross-connector into modular terminals as shown in connection blocks. Secure the cross-connector to modular terminal with all the provided screws.
Screw all cross connectors Remove the plastic cover Check all cross connectors have been screwed properly Insert the plastic cover 51 Operating and Maintenance Manual Trimod®
® 5. Installation 5.3.6 UPS Trimod® 30TM connections To properly connect the UPS Trimod® ® 30TM it is necessary to remove both panels illustrated in the following figures.
6. Configuration and Start-up WARNING The instructions given in this chapter are not for an ordinary operator but for a specialized, authorised technician only if he is using the Individual Protective Gear specified in chapter 3. As illustrated in the previous chapter the default configuration for the Trimod® UPS unitsentails a THREE-PHASE INPUT and a THREE-PHASE OUTPUT. If this type of connection is used, the equipment requires no additional configuration as it has already been set in the factory.
® 6. Configuration and Start-up UPS Trimod® 10/15/20 UPS Trimod® 30TT/40/60 UPS Trimod® 30TM 6.4 Starting procedure 1. Insert the battery fuses in the relative isolating switches (F B+ and F B-) and, if applicable, those in the Trimod® BATTERY cabinets (if they exist). 2. Close UPS Trimod® and Trimod® BATTERY (if they exist) battery breakers. WARNING Before switching the unit ON the correct output configuration must be selected (Single-phase/Three-phase 120°/ Three separate phases).
Capacity in Ah to enter is the one of a single string (1KB). UPS calculates the total capacity of the battery as a product of KB * Total Capacity. 7. Exit the Service Mode by pressing the ON/OFF pushbutton. 8. Provide power to the UPS input and close the switch network UPS; ATTENTION When the unit detects the input voltage it automatically proposes starting a battery charging cycle. Press the ‘ESC’ key to proceed to switching the UPS Trimod® ON. 9. 10. 11. 12.
® 7. Control Panel The control panel, at the front of the unit, has a 4-line, 20-character LCD display, a backlit multicolour status indicator and a 5-key keypad. The keys on the front panel are used to gain access to the UPS menus.
5 - ENTER key Main functions: - Confirms a value; - Accesses a menu item; - Goes from a higher to a lower menu level; - It starts the service mode on; 6 - ON/OFF key Main functions: - it allows starting and stopping the UPS. Keep pressed for at least 2 seconds to shut down; - it allows the output phases to be turned off individually, only with the UPS set as 3 independent phases in output. Press for at least 0.5 sec; 7 - Multicolour backlit status indicator. 7.
® 7. Control Panel The images of the different main frame pages are given below. MAIN PAGE DATA DISPLAYED 1 Input – output – battery TRIMOD λ IN 230V/226V/227V OUT λ230V 93W Batt. 12h 0% 1st line: UPS operating status; 2nd line: Input voltages; 3rd line: Voltage set in output, active power absorbed by the load and total load applied percentage 4th line: Bar showing residual battery capacity and actual time of operation in the case of a power failure.
MAIN PAGE DATA DISPLAYED 8 Measurements on the input L1i229V L2i228V L3i230V TRIMOD 3.4A 2.9A 2.6A 408W 162W 228W 1st line: 2nd line: 3rd line: 4th line: UPS operating status; Phase L1 in input: Voltage, current and active power; Phase L2 in input: Voltage, current and active power; Phase L3 in input: Voltage, current and active power. 9 Bypass line voltages TRIMOD L1b-L2b 401V L2b-L3b 402V L3b-L1b 400V 10 Battery status Batt. C 50% In carica TRIMOD λ 288V -0,3A R 12h T 24h - mant.
® 7. Control Panel UPS STATUS UPS SETTINGS POWER MODULES EVENTS TOOLS LOG OUT (o) UPS Info Options PM status Visualization Batteries - UPS config.
7.2.1 UPS status Trimod® Model Equipment model Synchr. address Synchronisation address for this command CM number UPS Info Max VA Maximum suppliable apparent power [kVA] Max W Maximum suppliable active power [kW] Max Icgh Maximum current that can be supplied for charging the batteries [A] SW vers. Firmware version of the control PM SW vers. Boot Ver. UPS config.
® 7. Control Panel Power Appar.
Internal Temp. Measurements Misc. Temperature inside the UPS [°C] H.V. Bus Pos. Voltage on the DC BUS positive [V] H.V. Bus neg. Voltage on the DC BUS negative [V] Alarms Alarm Register. See chapter 8. Note: press the “ARROW UP” and “ARROW DOWN” keys to scroll the list of alarms. UPS operation With battery Total time the UPS has been running on battery Battery charger Op. Total time the battery charger has been working Tot.
® 7. Control Panel 7.2.2 UPS settings Options Output Startup with Battery If enabled, it allows the UPS to be started when there is a power failure Restart If enabled, it allows automatic restarts Voltage It sets the output voltage value [V] Frequency It sets the output frequency value [Hz] - Rated Value: it allows the output frequency value to be set (50 or 60 [Hz]) regardless of the supply voltage frequency. - Automatic Select.
Bypass Enabling Forced Mode Bypass DIP speed Start with Bypass Threshold Values Batteries Battery Charger If enabled, the UPS controls triggering of the bypass automatically. If disabled, the UPS will never switch over to bypass and, therefore, in the case of a prolonged overload (see “Overloaded permitted” in Chap. Technical Description), or In the case of a failure and redundancy absence, the UPS switches off. If enabled, the UPS activates the bypass permanently.
® 7. Control Panel Language Sets the display language Buzzer Enables/disables all acoustic signals Keyboard Beep Enables/disables the acoustic signalling when the keys are pressed Shutting down block (*) Operator Panel If enabled a password is required to shut the UPS down.
7.2.3 Power Modules Mod PM X Info Model of power module X SW Vers. Firmware version inside the power module X HW Vers. Hardware version of the power module X S/N Serial number of the power module X Max VA Maximum apparent power suppliable by the power module X [VA] Max W Maximum active power suppliable by the power module X [W] Max Icgh Maximum current suppliable by the battery charger of the power module X [A] Power Appar. Power Vrms.
® 7. Control Panel (following) Battery X Voltage Voltage measured at the ends of the batteries by the power module X [V] Current Current required to the batteries from the power module X (negative if the batteries are being charged) [A] Batt. Charger Status of the battery charger inside module X INV. dissip. Temp. Temperature of the INV dissipater (Inverter) of the power module X [°C] BST dissip. Temp. Temperature of the Booster /PFC dissipater of the power module X [°C] Misc.
7.2.4 Events All Events Visual display Deletion Displays all the events Critical Displays events that have generated critical alarms Warning Displays events that have generated non critical alarms Info Displays events that have generated simple information All Deletes all the events 7.2.5 Tools Battery test Batteries Batt.
® 7. Control Panel 7.2.6 Log Out A password can be set to protect the UPS from changes to settings by unauthorised personnel. Choosing a password each time the UPS settings need changing is necessary to access a private session. Use the “Log Out” menu to exit the private session when finished. If you forget the password contact the assistance centre. 7.2.
8. Diagnostics 8.1 Luminous and acoustic signals The operating status indicator, on the front panel of the UPS, and the LED on the front of each power module, change colour depending on the actual operating status of the UPS or of them single power module, according to the following table: INDICATION Some luminous signals can be accompanied by an acoustic signal. Press the ‘ESC’ key to turn the acoustic signal off; each time it is pressed after this you will either enable or disable the acoustic signal.
® 8.
8.2 Messages In this paragraph the messages that appear on the unit’s display are listed, also giving the most likely cause that could have generated them. If you are unable to solve the problem then please contact the Technical Service. FIRST LINE OF THE MAIN FRAME MESSAGE BUZZER OFF SERVICE MODE BATTERIES BEING CHARGED MAINTENANCE REQUIRED CHECK THE BATTERIES 3V BATTERY FLAT MEANING The buzzer is turned off. UPS in the Service Mode.
® 8. Diagnostics MESSAGE BIG OVERLOAD BATTERY CHARGER FAILED MODULE FAILED LOAD OFF! The load in output has caused an excessive drop in the output voltage. The battery charger circuit of one or more Power Modules has failed. It must be either repaired or changed. One or more Power Modules have failed. They must be either repaired or changed. An excessive load (e.g.
FRAMES DISPLAYED WHEN SHUTTING DOWN MESSAGE MEANING First start-up: connectthe mains! The UPS has never been switched on. No mains supply. Start-up not allowed. Make sure the mains are present before starting up. No mains! start-up not allowed No mains supply. Start-up not allowed. To start the UPS on battery, select this configuration via the display.
® 8. Diagnostics IMPORTANT EVENTS MESSAGE Inverter failure Failure occurred in the Inverter circuit. Booster failure Failure occurred in the Booster / PFC circuit. Battery charger failure Overheating Overload Excessive voltage on the H.V. BUS Excessive DC level in output Excessive battery voltage Power module communication failure Emergency Load not powered.
SIGNALLING EVENTS MESSAGE Shutting down due to end of autonomy Shutting down due to incorrect three-phase sequence Batt.cal.interrupted Maximum time on battery Start-up error Start-up authorised when there are ongoing alarms MEANING UPS shut down due to the end of autonomy. UPS shut down due to an incorrect three-phase sequence in input. Battery calibration interrupted by user. Maximum time on battery. Error in starting up. UPS start-up authorised in the presence of alarms.
® 8. Diagnostics INFORMATION EVENTS MESSAGE Startup by user UPS start-up by user. Shutting down by user UPS shut down by user. Automatic startup: Automatic UPS start-up. Delayed shutting down Battery charger start in stand-by The UPS was shut down by programming a delayed shutdown. The battery charger started in standby. UPS on battery UPS on battery. UPS on mains UPS on mains. Output off Battery test executed The output is off.
ALARMS MESSAGE MEANING INVERTER FAILURE Failure occurred in the Inverter circuit. BOOSTER FAILURE Failure occurred in the Booster /PFC circuit. BATTERY CHARGER FAILURE OVERHEATING OVERLOAD HVBUS RUNAWAY Failure occurred in the Battery Charger circuit. Overheating. Check the UPS ventilation system. Overload. Check the load level connected to the UPS. Anomalous high voltage on the DC BUS. EXC. IN OUTPUT DC LEVEL Excessive DC voltage in output. EXCESS.BATTERY VOLTAGE Battery voltage too high.
® 9. Maintenance WARNING The instructions given in this chapter are not addressed to a normal operator but to a specialised technician, authorised to work only if he uses the Individual Protective Gear mentioned in Chapter 3. 9.1 Introduction This chapter contains all the information necessary for a correct maintenance of the UPS Trimod® unit. All the operations described in this section must be carried out by authorised technicians or qualified personnel.
panel flashes quickly. Likewise, the LEDs on the various power modules also flash quickly. 3. Turn the manual switch (manual bypass) to the ON position. The load is now being powered directly by the mains. The wording MANUAL BYPASS appears on the panel. 4. Turn the output switch to the OFF position; 5. Turn the unit off, holding the ‘ON/OFF’ pushbutton down on the control panel for a few seconds; 6. Confirm UPS shutdown holding the ENTER pushbutton when required. 7.
® 9. Maintenance 9.4.3 Battery Drawers There are two different procedures for installing/replacing battery drawers inside UPS Trimod® and UPS BATTERY Trimod®. Carefully read all instructions before operating on the equipment. WARNING A battery can be a potential electric shock risk and a high short circuit current.
10. Dismantling ATTENTION The instructions in this chapter are to be considered indicative. Please refer to the laws in the country where the unit is used. 10.1 Disposing of the batteries At the end of their life, the batteries must be disposed of in a place set aside for the collection of such waste. Since batteries are toxic waste it is not allowed to dispose of them like traditional waste. For the correct procedure please contact the relevant Authorities in your area. 10.
® 11. Tables ATTENTION the type and cross section of the connecting cables must be chosen according to their operating current and laying must be as established by existing laws; this is the responsibility of the installer. The UPS input current and output power are given in paragraph 2.4 and the battery current in Table 8.
TABLE 3 UPS Trimod® BATTERY Recommended Battery Fuse Ratings POWER BATTERY FUSE Trimod® BATTERY 4KB 10/15/20/30/40/60 kVA F B+ F B- N.4 - 50A 500V gG (14 x 51 mm) N.4 - 50A 500V gG (14 x 51 mm) TABLE 4 UPS Trimod® BATTERY/2 Recommended Battery Fuse Ratings POWER BATTERY FUSE Trimod® BATTERY/2 5KB 10/15/20/30/40/60 kVA F B+ F B- N.5 - 50A 500V gG (14 x 51 mm) N.
® 11.
TABLE 8 Battery Current (100% Load) and Minimal Recommended Cable Sections POWER BATTERY CURRENT MINIMAL RECOMMENDED CABLE SECTION 10 kVA 47A 1 x 10 mm2 for each pole 15 kVA 70A 1 x 16 mm2 for each pole 20 kVA 94A 1 x 25 mm2 for each pole 30 kVA TT/TM 141A 1 x 50 mm2 for each pole 40 kVA 188A 2 x 25 mm2 for each pole 60 kVA 282A 2 x 50 mm2 for each pole 87 Operating and Maintenance Manual Trimod®
® World Headquarters and International Department 87045 LIMOGES CEDEX FRANCE : 33 5 55 06 87 87 Fax : 33 5 55 06 74 55 www.legrandelectric.com Installer stamp Legrand reserves at any time the right to modify the contents of this booklet and to communicate, in any form and modality, the changes brought to the same.