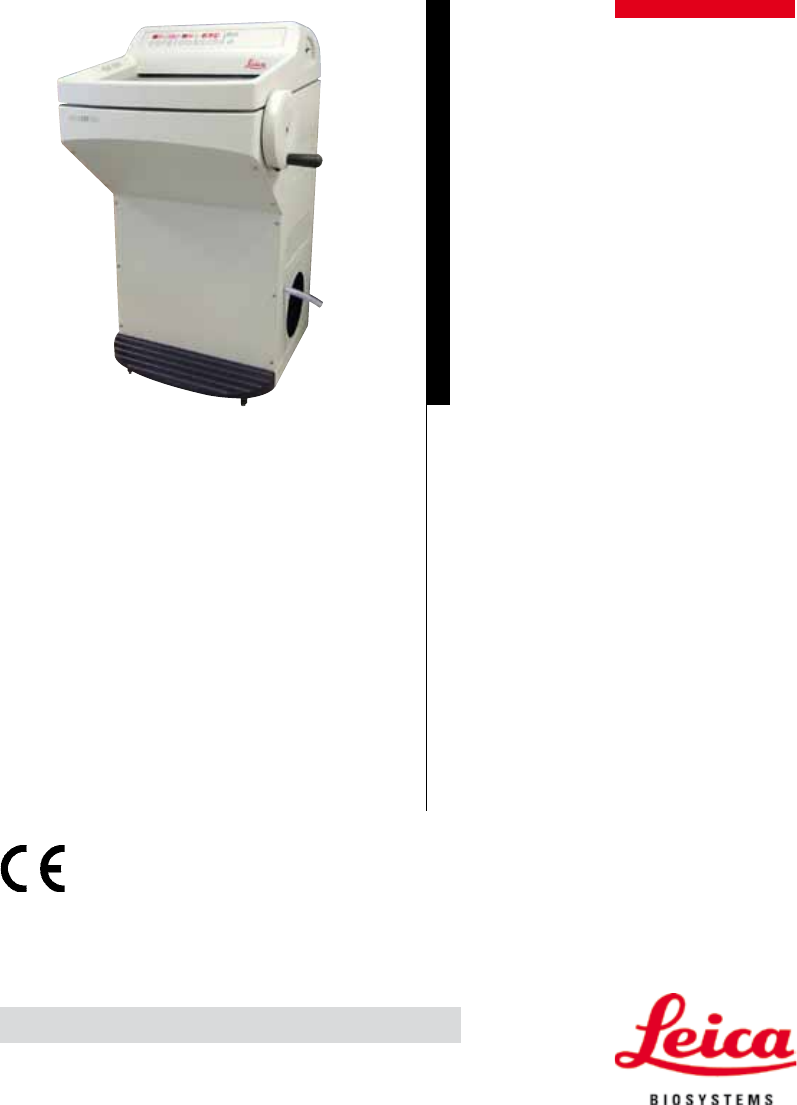
Leica CM1520 Cryostat Instructions for Use Leica CM1520, V1.3 – 10/2012, English Order No.: 14 0491 81101 RevD Always keep this manual with the instrument. Read carefully before working with the instrument.
NOTE The information, numerical data, notes and value judgments contained in this manual represent the current state of scientific knowledge and state-of-the-art technology as we understand it following thorough investigation in this field. We are under no obligation to update the present manual periodically and on an ongoing basis according to the latest technical developments, nor to provide our customers with additional copies, updates etc. of this manual.
Table of Contents Table of Contents.................................................................................................................................................. 5 1. Important Information.............................................................................................................................. 6 1.1 1.2 1.3 1.4 2. Safety....................................................................................................................................................
Table of Contents 7. Daily Use of the Instrument................................................................................................................... 31 7.1 Specimen freezing...................................................................................................................................... 31 7.1.1 Quick freeze shelf........................................................................................................................................ 31 7.1.
1. Important Information 1.1 Symbols in the text and their meanings Warnings appear in a gray box and are marked by a warning triangle . Useful tips, i.e. important information for the user, appear in gray boxes and are marked by an . (5) (Fig.5) Numbers in parentheses refer to item numbers in illustrations or to the illustrations themselves. Manufacturer This product fulfills the requirements of the Council's Directive 98/79/EC concerning in vitro diagnostics (IVD) medical devices.
1. Important Information The package contents are fragile and must be handled with care. Indicates the correct upright position of the package. The package must be kept in a dry environment. It is not permitted to stack packages, and no loads may be placed on top of the package. Indicates the temperature range permitted for storing and handling the package. Minimum +5 °C Maximum +50 °C Indicates the temperature range permitted for transporting the package.
1. Important Information 1.2 Qualification of personnel Only trained laboratory personnel may operate the Leica CM1520. Prior to operating the instrument, the operator must thoroughly read and understand these Instructions for Use and must familiarize him/ herself with all technical details of the instrument. In no case does chemical disinfection replace the manual protection as per the applicable laboratory regulations (i.e. safety goggles, gloves, laboratory coat and mask must be worn). 1.
2. Safety The safety and caution notes in this chapter must be observed at all times. Be sure to read these notes even if you are already familiar with the operation and use of other Leica products. 2.1 Safety notes These Instructions for Use include important instructions and information related to the operating safety and maintenance of the instrument.
2. Safety 2.3 Safety devices The instrument is equipped with the following safety devices: Handwheel lock and knife guard on the knife holder. The consistent use of these safety features and strict observation of the warnings and cautions in these Instructions for Use will safeguard the operator from accidents and/or personal injury to a great extent. Personal safety precautions When working with cryostats, personal safety precautions must always be taken.
2. Safety 2.4 Operating conditions Transport and installation • After transporting, do not turn the instrument on for a minimum of 4 hours. • Do not operate the instrument in rooms with explosion hazard.
2. Safety 2.5 Operating the instrument • Take care when handling microtome knives and disposable blades. The cutting edge is extremely sharp and can cause serious injuries! We strongly recommend using the safety gloves included with the standard delivery! • • • • • Never leave knives and knife holders with an exposed knife/blade mounted lying around! Never place a knife on a table with the cutting edge facing upward! Never try to catch a falling knife! Always clamp the specimen first, then the knife.
2. Safety • Do not use organic solvents or other aggressive substances for cleaning. Use only disinfectants listed in these Instructions for Use, such as Leica Cryofect (alcohol or other common alcohol-based disinfectants). For additional detailed information about disinfection, contact Leica Biosystems. 2.7 Removing the microtome • The microtome is encapsulated and therefore does not require removal by the user. 2.
3. Technical Data Type test symbol Nominal voltage CM1520 100 VAC ±10 % Nominal frequency 50/60 Hz Power input 1440 VA Max. start-up current for 5 sec 45 A eff. Protective class I Pollution degree 2 Overvoltage inst. category II Heat emission (max.) 1600 J/s CM1520 c_CSA_us 120-127 VAC ±10 % 60 Hz 1440 VA 45 A eff. I 2 II 1600 J/s CM1520 220-230 VAC ±10 % 60 Hz 1440 VA 45 A eff. I 2 II 1600 J/s CM1520 220-230 VAC ±10 % 50 Hz 1440 VA 45 A eff.
3. Technical Data *) Refrigerant and compressor oil must be replaced by qualified, authorized service personnel only.
4. Setting up the Instrument 4.1 Installation site requirements Do not operate in rooms with explosion hazard! To ensure proper function of the instrument, it must be set up with a minimum distance on all sides from walls and furniture (see "Transport and installation"). The place of installation must meet the following requirements: - The instrument requires an installation area of approx. 600 x 730 mm. - Room volume must be at least 8 m3.
4. Setting up the Instrument 4.2 Unpacking instructions for the CM1520 cryostat When the instrument is delivered, check the tilt indicators on the packaging. If the arrowhead is blue, the shipment was transported laying flat, was tilted at too great an angle or fell over during transport. Note this on the shipping documents and check the shipment for possible damage. Fig.
4. Setting up the instrument 8 Transport grip points Fig. 7 Fig. 8 6 • Lift and remove the wooden edge (6). • Remove the ramp (5) on the front side of the pallet (see Fig. 6) and correctly attach it to the back (see Fig. 8). 5 7 5 Do not push the device by its hood (8)! Use the transport grip points ( , Fig. 8). The rollers (7) must run over the ramp (5) at the front and rear. Danger of tipping! • Carefully roll the instrument backwards over the ramp from the pallet.
4. Setting up the Instrument Transport to the site • First, check if the location meets the conditions specified in 'Installation site requirements'. • Transport the instrument to the desired location. • Observe the following: The instrument must be transported in an upright position or slightly tilted (max.
4. Setting up the instrument 4.3 Standard delivery Basic instrument in the respective voltage variant: 1 knob with marking, antibacterial............................................. 14 0491 42558 1 Set of specimen discs................................................................ 14 0470 43550 - 4 specimen discs, 25 mm........................................................ 14 0416 19275 - 4 specimen discs, 30 mm........................................................
4. Setting up the Instrument 4.4 Assembling the handwheel The handwheel and all parts for installation are included in the carton with the accessories. The handwheel can be dismounted f o r transporting (e.g. narrow doors). 1 4 2 3 4 Fig. 10 To install the handwheel, follow these steps: • Insert the pin (1) of the handwheel shaft into the hole (2) of the handwheel. • Attach the spring washer (3) to the screw (4) as shown in Fig. 10. • Tighten the screw (4) using an Allen key (6 mm).
5. Instrument Setup 5.1 Electrical connection During the start-up of the refrigeration system, the minimum nominal voltage must not drop below the values specified in Chapter 3, "Technical Data". The compressor draws a starting current between 45 and 50 A. Therefore, the electric circuit at the installation site must be inspected by an electrical engineer to ensure that it meets the requirements for a smooth operation of the instrument.
5. Instrument Setup • • • • • • • • Place the storage shelves in the cryochamber. Place the section waste tray and brush shelf in the cryochamber. Place the knife holder base on the microtome base plate. Set and clamp the blade/knife and knife holders in place (see Chap. 7.3). Open the knife box with the knife and place it in the cryochamber for precooling. Place all tools needed for specimen preparation in the cryochamber. Close the sliding window. Plug the power plug into the power socket.
5. Instrument Setup 5.3 Overview of the Leica CM1520 4 14 16 12 15 20 19 11 12 12 10 18 17 Fig. 11 24 13 9 8 Instructions for Use V 1.
5.
5. Instrument Setup 5.4 Power switch and circuit breaker The switch must be in the top position (switch position 1) for switching on the circuit breaker. The switch must be in the bottom position (switch position 0) for switching off the circuit breaker. Fig. 13 Automatic cutout 5.5 Switching on the instrument After transporting, wait at least 4 hours before turning the instrument on.
6. Operating the Instrument 6.1 Control panel 1 Fig. 14 Function keys Lamp button ON/OFF switch for cryochamber illumination Manual defrost button To activate and deactivate manual defrosting. Key button To lock and unlock the control panel to protect the entered parameters from unintended modifications. To lock or unlock, hold down for approximately 5 seconds. 6.2 Programming the desired values 6.2.1 Setting the time Use the function button labeled with a clock symbol to set the time of day.
6. Operating the Instrument 6.2.2 Setting the automatic defrost time (cryochamber) Fig. 16 The automatic defrost cycle takes place once every 24 hours. Briefly touch the or button to display the beginning of the defrost cycle which has currently been set. At the same time, the LEDs between the indication of hours and minutes are flashing. To change the beginning of the defrost cycle in 15-minute increments, press the or button. The defrost time is 12 minutes. 6.2.
6. Operating the Instrument 6.2.5 Manual defrosting of the cryochamber You can activate manual defrosting of the cryochamber by pressing the key (continuous tone sounds), followed immediately by the key in the cryochamber temperature selection field (continuous tone stops). The display flashes during the defrosting (duration 12 min.). To shut off the manual defrost early, press the key, followed immediately by the button in the cryochamber temperature selection field. Fig. 19 6.2.
6. Operating the Instrument 6.3 Display lock After the display is locked using the key button (press and hold for 5 sec.), set values can no longer be changed. Push the key button once more for 5 seconds to unlock the display. When the display is locked, the LEDs between the hour and minute indication on the time panel are turned off. Fig. 21 6.4 Control panel 2 - Electric coarse feed Move the specimen away from the knife • Starts fast retraction to the rear end position.
7. Daily Use of the Instrument 7.1 Specimen freezing • Select the sectioning temperature (chamber temperature) according to the tissue type to be sectioned (see "7.4 Temperature selection chart"). 7.1.1 Quick freeze shelf The cryochamber is equipped with a quick freeze shelf (5, Fig. 23) on which up to 10 specimen stages with specimens can be attached. The temperature of the quick freeze shelf is always lower than the cryochamber temperature. • Cut the specimen to size.
7. Daily Use of the Instrument 7.1.2 Stationary heat extractor (optional) • Fasten the support (1, Fig. 23) of the heat extractor (2, Fig. 23) to the left side panel of the cryochamber using two screws in the provided holes and insert the heat extractor. • Lower the heat extractor cylinder on the specimen surface. After at least 30 seconds, the specimen is completely frozen. • After the specimen is frozen, move the heat extractor into resting position at the parking station (3, Fig. 23). 7.
7. Daily Use of the Instrument 7.3 Sectioning 7.3.1 Blade holder CE If an additional blade holder instruction manual has been provided, read and follow the instructions and safety information carefully! Inserting the base 1. To insert the blade/knife holder base (1), move the lever (2) to the back. Slide the base onto the T-piece (3) of the baseplate.
7. Daily Use of the Instrument Inserting the blades into blade holder CE Caution! Microtome blades are extremely sharp! The blade holder CE can be used either for the low-profile, narrow-band and high-profile, broad-band blades. Inserting the high-profile blades 4 The safety gloves included in the standard scope of delivery must be worn when inserting the blade! 9 11 10 Fig. 27 10 4 11 Fig. 28 Inserting low-profile blades 1.
7. Daily Use of the Instrument Inserting low-profile blades (continued) Fig. 30 Two magnets are attached to the rear side of the guide. These point away from the operator after the guide has been inserted (towards the rear pressure plate). Then insert the blade as described (for highprofile blade). Removing the blades 4 9 11 10 1.
7. Daily Use of the Instrument The safety gloves included in the standard scope of delivery must be worn when disposing of the blade! 5. Once the blade has been removed from the blade holder, it is disposed of into the dispenser container (storage compartment in bottom, Fig. 33). Fig. 33 Lateral movement 14 Fig.
7. Daily Use of the Instrument Clearance angle adjustment The harder the specimen is, the larger the clearance angle must be. However: The larger the clearance angle is, the larger the section buckling becomes. If the clearance angle is too small, sections that are too thick or thin can result. Also consider that the position of the knife edge relative to the specimen can change when the clearance angle is adjusted.
7. Daily Use of the Instrument Adjusting the anti-roll guide system You can adjust the height of the anti-roll guide system using the knurled nut (8): • If you turn the nut counterclockwise, the anti-roll guide system moves toward the blade. • If you turn the nut clockwise, the anti-roll guide system moves away from the blade. If the anti-roll guide system is in the wrong position relative to the blade, the following problems will result: I II Fig.
7. Daily Use of the Instrument Assembling the anti-roll guide system/replacing the anti-roll plate 6 7 8 10 9 Fig. 37 1. Insert the glass into the interchangeable frame and tighten it evenly using the knurled screws (7). 2. Insert the shaft (8) of the metal frame for exchangeable glass inserts from above into the bore of the swinging arm (6) in such a way that the pin rests in the notch. 3. Push the white plastic plate (9) from below onto the shaft (8). 4.
7. Daily Use of the Instrument 7.3.3 Knife holder CN Inserting the base 1. To insert the blade/knife holder base (1), move the lever (2) to the back. Slide the base onto the T-piece (3) of the baseplate. 1 2 When inserting the blade/knife holder base, you have to overcome the resistance of a spring (located in the foot of the knife holder) by applying a little pressure towards the left. 3 Fig. 39 2. To clamp the blade/knife holder base, turn the lever (2) to the front. Inserting knife holder CN 3.
7. Daily Use of the Instrument Inserting/removing the knife The height of resharpened knives must be adjusted using knurled screws (3a) (approx. 1 mm under the edge of the clamping jaw). Make sure that the knife is parallel from one end to the other. The safety gloves included in the standard scope of delivery must be worn when inserting/ejecting the knife! 7 7 3a 3a 3 24 Fig. 41 • To remove the knife, follow these instructions in opposite order.
7. Daily Use of the Instrument Knife guard/lateral movement for knife holder CN 19 18 19 17 16 Fig. 43 The knife guard (18) is fixed and integrated into the clamping jaws. The knife guard has handles (19) that allow it to be moved. The knife guard is suitable for knife lengths up to 16 cm. Always cover exposed parts of the knife blade after sectioning. The anti-roll guide system can be moved sideways (only for the 84 mm variant).
7. Daily Use of the Instrument Knife holder CN with anti-roll guide – Moving the clamping chucks If large specimen discs are to be used with the knife holder (e . g . 50 x 80 mm), it is possible to shift the clamping jaws laterally. 23 3a 3a 2 3 4 4 Fig. 44 The clamping jaws are factory-installed in the knife holder with a clearance of 64 mm. If necessary, both clamping jaws can be offset with a clearance of 84 mm.
7. Daily Use of the Instrument 7.3.4 Knife holder CN-Z with anti-roll guide This is used for holding conventional and carbide-metal knives up to 16 cm in length. The pressure plate ensures extreme stability and the full utilization of the knife blade. The height of the knife edge is adjustable, and the clearance angle adjustment must be adjusted separately (see Knife holder CN). The knife guard (18) is moveable. The height of resharpened knives must be adjusted using knurled screws (3a) (approx.
7. Daily Use of the Instrument Blade holder CE 10 4 23 2 12 11 36 Fig. 47 Knife holder CN 1. To release the segment arc (2) from the base, use a 4 mm Allen key to loosen the screw over the clearance angle adjustment (23) and remove the segment arc (2) from the blade/ knife holder base. 2. Fold the anti-roll guide system (4) to the left while holding the lever (11). 3. Open the clamping lever (10, Fig. 47) by turning it counterclockwise and pull it out. 4.
7. Daily Use of the Instrument Trimming the specimen Take care when handling microtome knives and disposable blades. The cutting edge is extremely sharp and can cause serious injuries. For that reason, always wear the cutresistant safety gloves included in the standard scope of delivery! Always clamp the specimen block BEFORE clamping the knife or the blade.
7. Daily Use of the Instrument 7.
7. Daily Use of the Instrument 7.5 Defrosting Defrosting the cryochamber actually means defrosting the evaporator to prevent excessive frost buildup. The evaporator is flushed with hot gas during defrosting. The cryochamber is virtually frostfree and does not need to be defrosted. The condensation water that is produced during defrosting is collected in a container, which is located next to the instrument.
7. Daily Use of the Instrument 7.5.3 Manual defrosting of the quick freeze shelf The quick freeze shelf can become hot during the defrosting process. Therefore, do not touch it! In case of heavy frost formation on the quick freeze shelf, which can occur particularly after the spray disinfection, a defrost can be activated manually (see point 6.2.4). which can be terminated when required. To avoid frost formation always put the cover on the quick freeze shelf.
7. Daily Use of the Instrument 7.6.2 Shutdown for a longer period If you do not intend to use the instrument for several weeks you may turn it off. Please note, however, that it may take up to several hours to cool the cryochamber down to very low temperatures after turning the instrument on again. After turning off, the instrument should be cleaned and disinfected thoroughly (see chapter "9. Cleaning, Disinfection, Maintenance").
8. Troubleshooting 8.1 Error messages in the display Error messages are displayed on the clock panel as follows EO: XX . The following error messages might occur during operation: Fig. 50 Error 20 Cause Calibration error; possibly defective controller board. Remedy 21 23 Clock battery on the controller board empty. Cryochamber temperature out of display range of 35 °C to -55 °C. Temperature sensor for cryochamber temperature defective. Temperature sensor for defrost limiter defective.
8. Troubleshooting 8.2 Temperature control button On the back of the cryostat cabinet there is a temperature control button (1, Fig. 51). If the temperature of the cryochamber exceeds 60 °C the switch is automatically activated and turns the instrument off. 1 Fig. 51 Possible causes and remedies: • Temperature of the direct surroundings is constantly higher than 40 °C. -->Drop the temperature of the direct surroundings.
8. Troubleshooting 8.3 Possible sources of error, causes and remedies Problem Cause Remedy Frost on chamber walls and microtome. - Cryostat is exposed to air currents (open windows and doors, air conditioning). - Sliding window was open and exposed to air currents too long. - Frost built up by breathing into the cryochamber. - Change place of installation for the cryostat. Ice formation on the bottom of the cryochamber - Drain of the quick freeze shelf defrosting water obstructed.
8. Troubleshooting Problem Cause Remedy Sections not properly flattened despite correct temperature and correctly aligned anti-roll plate. - Knife/blade and/or anti-roll plate dirty. - Edge of anti-roll plate damaged. - Blunt knife/blade. - Clean with dry cloth or brush. Sections curl on the anti-roll plate. - Anti-roll plate does not protrude far enough beyond the cutting edge. - Readjust correctly. Scraping noise during sectioning and specimen return movement.
8. Troubleshooting Problem Cause Remedy Condensation on anti-roll plate and knife during cleaning. - Brush, forceps and/or cloth are too warm. - Use components and cleaning materials only after cooling them. Store all tools on storage shelf in the cryochamber. Anti-roll plate damaged after adjustment. - Plate too high above the cutting edge. The adjustment was carried out in the direction of the knife. - Replace anti-roll plate; then lift it during adjustment.
8. Troubleshooting Problem Cause Remedy Tissue adheres to the anti-roll guide. - Dried specimen. - Anti-roll plate is too warm or incorrectly positioned. - Static charge. - Fat on the corner or edge of antiroll plate. - Rust on the knife. - Cool down anti-roll plate or reposition correctly. Flattened sections curl up when anti-roll plate is folded up. - Static charge or air current. - Anti-roll plate too warm. - Remove static electricity. - Cool down the anti-roll plate.
8. Troubleshooting Problem Cause No or insufficient refrigeration - Compressor defective. - Leak in the cooling system. - Inappropriate site conditions. Scraping noise at the slot cover of the microtome - Friction between the slot cover and the microtome housing. Remedy - Call technical service. - Call technical service. - Check Installation site requirements (item 4.1) - Ventilation grilles of the condens- - Clean air inlet opening. er dirty.
9. Cleaning, Disinfection, Maintenance 9.1 Cleaning • • • • Remove frozen section waste from the cryostat with a cold brush every day. Remove the section waste tray for emptying. Remove the storage shelves and the brush shelf for cleaning. Remove the closed sliding window from the front by gently lifting it (see 9.3.3, "Replacing the fluorescent lamp"). The use of flammable sprays within the cryostat chamber is permitted only with the Leica Cryofect tested by us.
9. Cleaning, Disinfection, Maintenance 9.2 Spray disinfection with Leica Cryofect For easy-to-use spray disinfection we recommend Leica Cryofect. (Leica Cryofect is not available in the USA!) We recommend wearing the safety gloves provided in the standard scope of delivery when disinfecting! Exercise caution when cleaning the chamber – the plug in the rear on the left has sharp edges and can lead to cutting injuries. The cryostat, including all components, has to be disinfected after each daily use.
9. Cleaning, Disinfection, Maintenance 9.3 Maintenance 9.3.1 General maintenance instructions The microtome is virtually maintenance-free. To ensure a smooth operation of the instrument over several years we recommend the following: 1 • At least once a year, have the instrument inspected by a qualified service engineer authorized by Leica. • Enter into a service contract at the end of the warranty period. For further information, please contact your local Leica service center. 4 3 2 Fig.
9. Cleaning, Disinfection, Maintenance • Oiling the slot cover (4, Fig. 53). To do so, first move the specimen head all the way upwards by turning the handwheel, apply a few drops of cryostat oil (Type 407) to the slit cover; then, move the specimen head all the way down and apply a few drops of cryostat oil. Distribute the oil by turning the handwheel or using a clean tissue. • In case of visible pollution (such as dust), clean the air inlet opening (5, Fig.
9. Cleaning, Disinfection, Maintenance 9.3.2 Replacing the fuses Turn the instrument off and disconnect the power plug before replacing the fuses. Use only the fuse types specified in Chapter "3. Technical Data". Failure to comply with this can cause severe damage to the instrument and its surroundings and a risk of fatal injury! On the back of the instrument there is a fuse box with 4 fuses: Fig. 56 Fuse Protection Type F1 F2 F3 F4 Display Coarse feed Processor board supply Peltier element T 0.
9. Cleaning, Disinfection, Maintenance 9.3.3 Replacing the fluorescent lamp 1 • Switch off the instrument at the circuit breaker. • Disconnect the power plug. • Slightly lift the sliding window (1) holding it by the grip (2) and pull it out to the front. • For lamp data, refer to Chapter 3, "Technical Data". If the lamp breaks, it is mandatory to call Technical Service for replacement. RISK OF INJURY! If any metallic mercury is released, handle it carefully and dispose of it properly! 2 Fig.
10. Ordering Information, Components and Consumables 10.1 Ordering information Blade/knife holder and blade/knife holder base Blade/knife holder base for CN, CE............................................................................................. 14 0491 47875 Knife holder CN for standard microtome knife.......................................................................... 14 0477 42358 Knife holder CN-Z for TC microtome knife.....................................................................
10. Ordering Information, Components and Consumables Embedding well bar, 4 x 18 mm.................................................................................................... 14 0201 39120 Embedding well bar, 4 x 24 mm.................................................................................................... 14 0201 39121 Embedding well bar, 3 x 30 mm....................................................................................................
10. Ordering Information, Components and Consumables Transfer block for specimen discs, large (holder for specimen discs)................................. 14 0491 47786 Thermal block Intended use: helps to warm up the specimen if too cold or pick up specimen from specimen disc ....................................................................................... 14 0398 18542 Miles adapter, for TissueTek specimen discs...........................................................................
10. Ordering Information, Components and Consumables Knife/blade holder base, for knife holder CN, blade holder CE Order No. ............................................ 14 0491 47875 Fig. 60 Knife holder CN, for standard microtome knives or magnetic blade rails. Clearance angle adjustment and knife height adjustment. Support rails for long and short knives. Anti-roll guide and adjustable knife guard. Order No. ............................................ 14 0477 42358 Fig.
10. Ordering Information, Components and Consumables Blade holder CE, universal (high-profile and lowprofile disposable blades) with lateral movement and glass anti-roll guide. Adjustable clearance angle. Order No. ............................................ 14 0491 47873 Fig. 63 Blade holder CE, for low-profile disposable blades, without clearance angle adjustment, including blade/knife holder base and pressure plates Order No. ............................................ 14 0419 33992 Fig.
10. Ordering Information, Components and Consumables Blade holder pressure plate, 22°, for high-profile microtome blades Order No. ............................................ 14 0491 48004 Fig. 66 Anti-static kit, blade holder CE Order No. ............................................ 14 0800 37740 Fig. 67 Knife support for knife holder CN, for short knives Order No. ������������������������������������������� 14 0419 19426 Fig.
10. Ordering Information, Components and Consumables Fig. 69 Disposable blades Leica TC-65, Leica TC-65 microtome, disposable blade system for sectioning hard specimen materials. The Leica TC-65 carbide metal disposable blades were specially developed for the requirements in labs where hard, blunt materials are routinely sectioned. The one-of-a-kind fine-grain carbide metal guarantees sections to approx. 1 µm. The blades are fully recyclable.
10. Ordering Information, Components and Consumables Knife, 16 cm length, profile c (flat on both sides, for wax and frozen sections) Note: including knife case 14 0213 11140 Order No. ............................................ 14 0216 07100 Profile Fig. 72 Knife, 16 cm carbide metal blade, profile c Note: including knife case 14 0213 11140 Order No. ............................................ 14 0216 04206 Knife, 12 cm length, profile c Note: including knife case, 14 0213 11140 Order No. .........
10. Ordering Information, Components and Consumables Knife, 12 cm length, profile d, for Leica cm1500 / cm1800 Note: including knife case 14 0213 11140 Order No. ............................................ 14 0216 07130 Fig. 75 Variable knife case, for 1 to 2 knives from 10 to 16 cm in length Order No. ............................................ 14 0213 11140 Variable knife case, for 1 or 2 knives with length of 18.
10. Ordering Information, Components and Consumables Fig. 78 Cryoembedding system, complete consisting of: - 3 embedding well bars with recesses, in three sizes: 18 mm, 24 mm, 30 mm - 6 specimen stages, small - 4 specimen stages, large - 4 heat extractors - 1 container for specimen stages - 16 dispensing slides - 1 sectioning board/freezing griddle - 1 heat extractor, elevated - 1 embedding forceps, angled Order No. ............................................
10. Ordering Information, Components and Consumables Set of freezing griddle/heat extractor, elevated consisting of: - 1 forceps, epoxy-coated - 1 putty knife - Extra elevating bars Order No. ............................................ 14 0201 39119 Fig. 80 Fig. 81 74 Embedding well bar Height: 25.4 mm with 4 recesses, size 18 mm, stainless steel Order No. ............................................ 14 0201 39120 Height: 25.4 mm with 4 recesses, size 24 mm, stainless steel Order No. .................
10. Ordering Information, Components and Consumables Specimen stage, rectangular, stainless steel, small - 28 mm Pack of 1. Order No. ............................................ 14 0201 39123 Fig. 82 Specimen stage, rectangular, stainless steel, large - 36 mm Pack of 1. Order No. ............................................ 14 0201 39124 Heat extractor Order No. ............................................ 14 0201 39125 Fig. 83 Container for specimen stages Order No. .................................
10. Ordering Information, Components and Consumables Blue O-ring, for color marking of the specimen disc 20 and 30 mm pack of 10. Order No. ............................................ 14 0477 43247 Red O-ring, for color-marking the 20 mm and 30 mm specimen disc pack of 10. Order No. ............................................ 14 0477 43248 Fig. 86 Blue O-ring, for color-marking the 40 mm specimen disc pack of 10. Order No. ............................................
10. Ordering Information, Components and Consumables Fig. 87 Toolset for cryostats, consisting of: - 1 brush, narrow - 1 Leica brush with magnet - 1 key with handle, No. 5 - 1 Allen key, No. 2.5 - 1 Allen key, No. 3.0 - 1 Allen key, No. 4.0 - 1 Allen key, No. 5.0 - 1 Allen key, No. 6.0 - 1 Allen key, No. 1.5 - 1 Allen key, ball-cage, No. 4 - 1 single-head wrench, No. 16 - 1 single-head wrench, No.
10. Ordering Information, Components and Consumables Easy Dip, staining container Color: white pack of 6 Order No. ............................................ 14 0712 40150 Color: pink pack of 6 Order No. ............................................ 14 0712 40151 Fig. 89 Color: green pack of 6 Order No. ............................................ 14 0712 40152 Color: Yellow pack of 6 Order No. ............................................ 14 0712 40153 Color: Blue pack of 6 Order No. ....................
10. Ordering Information, Components and Consumables Specimen disc, 20 mm.................................Order No. 14 0370 08636 25 mm................................................... 14 0416 19275 30 mm................................................... 14 0370 08587 40 mm................................................... 14 0370 08637 55 mm................................................... 14 0419 26491 50 x 80 mm........................................... 14 0419 26750 Fig.
Ordering Information, View into the Cryochamber 10. 6 2 1 2 7 Enlarged detail 4a 4 5 3 Fig. 91 - Heat extractor, stationary (optional) - Freeze shelf, 10 positions - Shelf, movable (optional) - Blade holder CE with anti-roll guide (4a) – anti-roll guide also acts as knife guard (optional) 5 - Brush shelf 1 2 3 4 80 6 - Object head, directional 7 - Waste tray Enlarged detail - Storage space for both transfer blocks Instructions for Use V 1.
10. Ordering Information, Components and Consumables Transfer block for specimen discs, large (13 holes) Order No. ............................................. 14 049147786 Fig. 92 Transfer block for specimen discs, small (5 holes) – combinable with transfer block for specimen discs, large Order No. .............. 14 0491 47787 Fig. 93 Heat extractor, mobile Order No. ............................................ 14 0443 26836 Fig.
10. Ordering Information, Components and Consumables Adapter, for Miles Tissue Tek specimen discs Order No. ............................................ 14 0436 26747 Fig. 96 Fig. 97 Anti-roll guide system CE, glass - 70 mm consisting of: - Glass insert 70 mm - Metal frame for exchangeable glass inserts CE - 100 µm spacer - Recommended section thickness 5 µm-50 µm Fig.
10. Ordering Information, Components and Consumables Fig. 99 Anti-roll guide system CE, glass - 70 mm For specific application consisting of: - Glass insert 70 mm - Metal frame for exchangeable glass inserts CE - 50 µm spacer - Recommended section thickness up to 4 µm For blade holder CE: (14 0491 47873, 14 0419 33992) Order No. ............................................
10. Ordering Information, Components and Consumables Fig. 102 Glass plate, glare-reducing, 70 mm wide Spare glass for anti-roll guide systems CE-BB: (14 0477 42491, 14 0477 42492, 14 0477 42493) for blade holder CE-BB (14 0477 43005) Order No. ............................................ 14 0477 42497 Glass insert - 50 mm For knife holder CN (14 0477 42358) Order No. ............................................ 14 0419 33816 Fig.
10. Ordering Information, Components and Consumables Caution: Dangerous goods! Leica Cryofect, Low-temperature disinfectant, 4 x 350 ml bottles. For temperatures down to -20 °C. Order No. ............................................ 14 0419 33816 Fig. 106 Cut-resistant safety gloves, 1 pair, size S Order No. ............................................ 14 0340 40859 Cut-resistant safety gloves, 1 pair, size M Order No. ............................................ 14 0340 29011 Fig.
10. Ordering Information, Components and Consumables Lapping device for knife, Profile c, 16 cm length Order No. ............................................ 14 0337 08687 Fig. 109 Lapping device for knife, Profile c, 12 cm length Order No. ............................................ 14 0337 08688 Lapping device for knife, Profile c, 10 cm length Order No. ............................................ 14 0337 08689 Lapping device for knife, Profile d, length: 16 cm Order No. .............................
10. Ordering Information, Components and Consumables Lapping stone (fine), Yellow with dark back, approx. 25 x 5.5 cm Order No. ............................................ 14 0210 04070 Fig. 111 Lapping stone (coarse), blue-green, with scraper, approx. 25 x 5.5 cm Order No. ............................................ 14 0210 04071 Fig. 112 Metal case, for storing lapping stones Order No. 14 0337 04070 or 14 0337 04071 Order No. ............................................ 14 0210 04073 Fig.
10. Ordering Information, Components and Consumables Screw clamp, for fastening strop of type "Heidelberg" Order No. ............................................ 14 0285 07057 Fig. 115 Strop paste, red Order No. ............................................ 14 0209 04064 Fig. 116 Storage system, movable for installation in the front part of the cryostat for cooled storage of preparation aids Order No. ............................................ 14 0491 46750 Fig. 117 88 Instructions for Use V 1.
10. Ordering Information, Components and Consumables 10.2 Mobile heat extractor – application Specimen freezing with the freezing shelf can be accelerated by the additional use of a heat extractor. • Store the heat extractor in the cryochamber. • Place it on the specimen surface to accelerate freezing. • Remove it once the specimen is entirely frozen. Fig. 118 Recommendation: It is recommended to precool the heat extractor in liquid nitrogen or other refrigerant. 10.
11. Warranty and Service Warranty Leica Biosystems Nussloch GmbH guarantees that the contractual product delivered has been subjected to a comprehensive quality control procedure based on the Leica in-house testing standards, and that the product is faultless and complies with all technical specifications and/or agreed characteristics warranted. The scope of the warranty is based on the content of the concluded agreement.
12. Decontamination Certificate (master) Dear Customer, Any product that is to be returned to Leica Biosystems or serviced on site must be cleaned and decontaminated in the appropriate manner. Since it is not possible to decontaminate for prion diseases, such as CJD, BSE, CWD etc., equipment exposed to specimens containing prion diseases cannot be returned to Leica Biosystems for repair.
12. Decontamination Certificate (Master) 3 Yes No The equipment has been prepared to ensure safe handling/transportation. Whenever possible, please use the original packaging. Important - to avoid refusal of shipment: Place one copy in the unit prior to packaging or hand it over to the service engineer. Customer assumes all responsibility for the immediate return shipment of articles sent to Leica without proper decontamination documentation.