
User Manual


132
4K Photo and Drive Settings
Taking Pictures Automatically at Set Intervals [Time Lapse Shot]
4
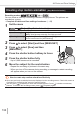
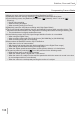
Press the shutter button fully
• The recording starts automatically.
• During recording standby, the camera turns off automatically when no operation
is performed for a preset interval. The [Time Lapse Shot] recording will continue
even if the camera is turned off, and it is automatically turned on at the recording
start time. If you want to turn on the camera manually, press the shutter button
halfway.
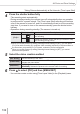
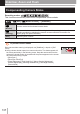
• Operations during recording standby (The camera is turned on)
Operation Touch operation Description
[Fn1]
*
2
*
3
Displays a selection screen that lets you pause or stop
the recording
Displays a selection screen that lets you resume or stop
the recording (during pause)
*
2
When you record pictures by setting [Shooting Interval Setting] to [OFF], you can press
[Fn1] even while recording is in progress. After recording (exposure) of a picture taken at
the time when you pressed [Fn1] is finished, a selection screen is displayed.
*
3
When you record pictures by setting [Shooting Interval Setting] to [OFF], you cannot
perform touch operation.
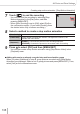
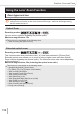
5
Select the video creation method
[Rec Quality] Sets the resolution of the video.
[Frame Rate]
Set the number of frames per second. The higher the number is, the
smoother the video will be.
[Sequence]
[NORMAL]: Stitches the pictures in the recording sequence.
[REVERSE]: Stitches the pictures in the reverse order of recording.
6
Press to select [OK] and then [MENU/SET]
• You can also create a video using [Time Lapse Video] in the [Playback] menu.