
Installation Manual

ProVision 3 Installation Manual
8100-35521-00
Rev. A1
Leidos Security Detection & Automation, Inc. – Proprietary Page 59 of 119
© 2020 Leidos. All rights reserved
11.16 Outer Windows
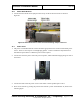
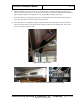
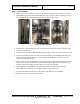
1. There are two outer windows: one with a figure demonstrating the pose to hold for 3 seconds
(3810-10062-01) and one plain (3100-10062-00). There is also the option of having two plain
outer windows. If the system has two plain outer windows skip to step 4.
Figure 64: Outer Windows
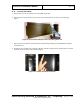
2. Install the outer window with the stance on the right side of the scanner when viewed from the
electrical enclosure end.
3. Orient the outer window so “PLEASE HOLD POSE 3 SEC” can be read from inside the scanner.
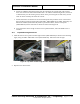
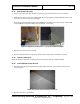
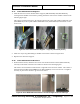
4. Clean the inward-facing side of the outer window with ESD wipes (490-26003), then slide one
edge of the outer window behind the column until it is flush against the entrance/exit cover,
which was installed previously.
5. Flex the outer window around the curve of the top and bottom angle brackets and tuck the other
edge of the outer window behind the column and foot bracket. Because of the thickness and
stiffness of the outer window, this will require some force to accomplish.
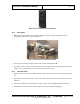
6. Install eight M6 x 16mm FBHS screws (0201-10291-16), each with an M6 flat washer
(0221-10027-00), to hold the outer window in place. Leave screws loose.
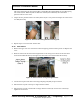
7. Clean the outward-facing side of the outer window with ESD wipes (490-26003).
8. Repeat steps 4 to 7 for the plain outer window.