USER’S MANUAL Xemio-658 UK MP3 / MP4 player with Bluetooth For more information: www.lenco.
Cautions • Do not place naked flames, such as lighted candles on or near the product. • Do not place objects filled with liquids, such as vases on or near the product. • Do not use or store this product in a place where it is subject to direct sunlight, heat, excessive dust or vibration. • Do not use this product with wet hands. • Do not clean this product with water or other liquids. • Do not block or cover the slots and holes in the product.
1. Get to know the controls on Player Item 1 2 3 4 5 6 7 8 9 10 11 12 Description TFT LCD Display Button (On / Off, Play / Pause) Button (Previous / Fast-Rewind) Button (Next / Fast-Forward) M Button (Menu) Button (Previous Menu / Exit) Micro USB Port (PC Connection / Charge) Microphone Position (mono, inside USB port) Micro SD Memory Card Slot Earphone Output Jack (3.5mm Stereo) Button (Volume Down) Button (Volume Up) 2. About Player Battery Player has an internal, non–user-replaceable battery.
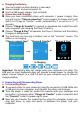
a. Charging the Battery: You can charge the player battery in two ways: Connect player to your computer. Or, Use the USB power charger. (not included) b. Connection and Charging: Once you have connected player with computer / power charger, then you will see the “Choose connection” screen appear to choose and it will switch to Charge & Transfer” mode automatically if no action in 4 ~ 5 seconds.
b. To Disconnecting Player: It’s important not to disconnect player while it’s syncing or transferring files. Eject the player before disconnect it. To eject player, press once M button, the “Connect” screen will switch to “Main Menu” screen. And now is safe to disconnect the player with your computer. Unplug the USB cable from the player.
To go into setup menu, from main menu, choose “Setup” by using / and buttons, a “Setup” menu appears to use; For back to previous menu or main menu, press or pressing button during in setup menu and submenu. “Setup” Menu a. Sleep timer: In Setup menu, choose “Sleep timer”, by using / and buttons then choose “Off” to switch off it.
Finally, you need to press the button to confirm the adjustment and the screen will back to previous menu. Set Date Choose “Date settings” to date, then choose “Set date format” or “Set date” as you want; Choose “Set date format” then choose “MM DD YYYY / YYYY MM DD” which format as you desired. Choose “ Set date”, a date interface will appear to set; The “MM / DD / YY” set item is highlighted, press M button to switch in between day, month and year which you want to set.
Before pairing, please make sure your Bluetooth Receiver Device supports Bluetooth A2DP profile. Keep the device in 1 meter of your Bluetooth receiver device. Switch on your Bluetooth receiver device and enable it to searching / pairing mode. a. Search Device Choose “Search Device” to enter into the Bluetooth searching mode by using / and buttons on player, the device searching mode is starting, for approximate 10 ~ 20 seconds, a device(s) name list will appear to choose for pairing.
On” again for reconnecting. If not; Manual connecting: some Bluetooth receiver device may need to reconnect manually; turn it power Off and On again for reconnecting. Or; Choose “Device’s List” again by using / and buttons, then choose the known device and choose “Connect” for reconnecting. c. All Music Choose “All Music” to enter into music list, you can direct select the wanted music for play and transmitting by using / and buttons d.
Choose “All song” to enter all songs list menu to select a song where start the play. (Depend on current location of Local Folder and Card Folder last chosen. And default is Local folder if Micro SD card is not inserted) Choose “Update playlist” to update the playlist when you found it show incorrect; actually, it is normal due to some media files could be manual deleted in player’s memory by user in some case. However, update the playlist when necessary.
Press button to play previous music. Press and hold button to use fast-forward Press and hold button to use fast-backward. Adjust volume level Press or pressing / button to adjust volume levels to up / down and a volume control screen is appear for viewing. Wait for 6 seconds or press button to return to music now playing screen.
9. Movie Menu To Play Movie From Main Menu, choose “Movie” by using / and buttons, a files list appears to choose; Choose the desired movie file to start the play and the screen switch to movie now playing screen. The movie is playing automatically. Play /Pause Movie In movie now playing screen, press button to pause the playing. Press it again to continue the play. Press button to go back files list screen for choose another movie file to play if you want it.
c. Update playlist: Choose “Update playlist” to update the playlist when you found it show incorrect; actually, it is normal due to some media files could be manual deleted in player’s memory by user in some case. However, update the playlist when necessary. 11. Convert Video files into AVI This tool can be used to transform those video files into AVI files on the computer before upload them to your player.
Move the mouse arrow and left click mouse on the unconverted source files to select with highlight in the file window, then the icon will be highlighted into icon. Now click this icon and a dialog box will be shown. Now click this icon and a dialog box will be shown.
Make sure Video type is “AVI”, Screen width and height is “160x120 / 320x240” selected. Video convert and Image quality should be “Normal” and “High” as defaulted. Click “OK” to confirm the setting. Now click to start converting. After conversion, the AVI files will play automatically for preview. And now, the converted AVI file is ready to transfer, you can simply copy and place those converted AVI files to the media player. Note: Only pixels in “160x120 / 320x240 (max.
To Start / Pause Recording In recording mode, press button to pause the recording. Press button again to start the recording again. To Save and Stop Recording File Press button, a “save recording?” dialog pop up to confirm; Choose “Yes” to confirm, the recorded file will save into memory and back to the list menu for next action. Choose “No” to abort. b.
desired for recording. d. Record Settings: From list menu, choose “Record Settings” > Choose “Set REC bitrate”, a list menu appear to choose; Then choose “32kbps/ 64kbps / 128kbps / 192kbps” if MP3 record format is chosen. Or, Choose “512kbps / 768kbps / 1024kbps / 1536kbps” if WAV record format is chosen. Remark: higher number of kbps will higher the recording quality but will use more memory capacity in recording file. 13.
b. Delete picture: Choose “Delete picture”, a “file name.*” delete? dialog is appear to confirm, choose “Yes” to confirm delete the selected file or current playing file in memory; A “deleting” dialog is appears for few seconds and the current playing file is deleted. If in file playing, the next file is selected to play automatically. Choose “No” to abort. c.
b. Delete eBook: Choose “Delete”, a “file name.*” delete? dialog is appear to confirm, choose “Yes” to confirm delete the selected file or current reading file in memory; A “deleting” dialog is appears for few seconds and the current playing file is deleted. If in file playing, the next file is selected to play automatically. Choose “No” to abort. c.
When Micro SD Card has been inserted, then two items “Local Folder” and “Card Folder” will be existed for choose. Go into the card folder and choose you desired folder(s) and file(s) to play. To take out the Micro SD memory card, please turn Off the player before you do. 18. Reset Device In some circumstances, the device may encounter dead halt during use.
20. Frequently Asked Question Where can I find • Check for latest Software update at updates and http://www.lenco.com/support/firmware/ download? 21. Specification Dimension Weight LCD PC connection Earphone Impedance Internal Memory Memory Card Slot 85mm (H) x 41.5mm (W) x 9.0mm (D) 28.5g 1.8 inches, Resolution (RGB) 128 x 160 USB 2.0 (High Speed) 32 Ohm See carton or giftbox Micro SD Card (support up to 16GB and possible for 32GB) Lithium 3.7V, 250mAh Max. Play Time: 11.5 ~ 14.
This product operates at 2400 - 2483.5 MHz and is designated only to be used inside a normal household environment. This product is suited for this purpose within all EU counties. 22. Disclaimer Updates to Firmware and/or hardware components are made regularly. Therefore some of the instruction, specifications and pictures in this documentation may differ slightly from your particular situation. All items described in this guide for illustration purposes only and may not apply to particular situation.
This symbol indicates that the relevant electrical product or battery should not be disposed of as general household waste in Europe. To ensure the correct waste treatment of the product and battery, please dispose them in accordance to any applicable local laws of requirement for disposal of electrical equipment or batteries.