
User Manual
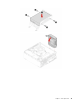
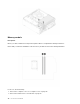
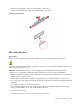
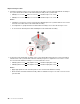

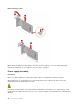
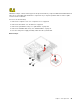

Table Of Contents
- Discover your Lenovo computer
- Chapter 1. Meet your computer
- Chapter 2. Get started with your computer
- Chapter 3. Explore your computer
- Chapter 4. Secure your computer and information
- Chapter 5. UEFI BIOS
- What is UEFI BIOS
- Enter the BIOS menu
- Navigate in the BIOS interface
- Change the display language of UEFI BIOS
- Set the system date and time
- Change the boot priority order
- Enable or disable the configuration change detection feature
- Enable or disable the automatic power-on feature
- Enable or disable the smart power-on feature (for selected models)
- Enable or disable the ErP LPS compliance mode
- Change the ITS performance mode
- Change BIOS settings before installing a new operating system
- Update UEFI BIOS
- Recover from a BIOS update failure
- Clear CMOS
- Chapter 6. Diagnostics
- Chapter 7. CRU replacement
- Chapter 8. Help and support
- Appendix A. Compliance information
- Appendix B. Notices and trademarks

2. Remove the front bezel. See “Front bezel” on page 29.
3. Remove the optical drive, if any. See “Optical drive” on page 30.
4. Remove the hard disk drive, if any. See “Hard disk drive” on page 31.
Removal steps
Remove the M.2 solid-state drive depending on the computer model:
• Type 1
• Type 2
Note: Remove the film that covers the thermal pad (if any) when installing the M.2 solid-state drive.
Coin-cell battery
Prerequisite
Before you start, read Generic Safety and Compliance Notices, and print the following instructions.
38
neo 50s Gen 3 User Guide