
User Manual


Chapter 3� 3-5
Manually installing the monitor driver
Below are steps for manually installing the monitor driver in Microsoft Windows 7, Microsoft
Windows 10�
Installing the monitor driver in Windows 7
To use the Plug and Play feature in Microsoft Windows 7, do the following:
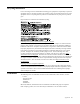
1� Turn off the computer, all attached devices�
2� Ensure that the monitor is connected correctly.
3� Turn on the monitor and then the system unit� Allow your computer to start the Windows 7
operating system�
4� From the Lenovo website /L24q_ 20, nd the corresponding
monitor driver and download it to a PC to which this monitor is connected (such as a desktop)�
5� Open the Display Properties window by clicking Start, Control Panel and Hardware and
Sound icon� and then clicking the Display icon�
6� Click the Change the display settings tab�
7� Click the Advanced Settings icon�
8� Click the Monitor tab�
9� Click the Properties button�
10� Click the Driver tab�
11� Click Update Driver, then click Browse the computer to nd the driver program�
12� Select Pick from the list of device driver program on the computer�
13� Click the Hard Disk button� By clicking the Browse button, browse and point to the following
path:
X:\Monitor Drivers\Windows 7
(where X indicates "the folder in which the downloaded driver is located" (such as a
desktop))�
14� Select the " L24q-20�inf" le and click the Open button� Click the OK button�
15� In the new window, select L24q-20 and click Next�
16� After the installation is complete, delete all downloaded les and close all windows.
17� Restart the system� The system will automatically select the maximum refresh rate and
corresponding Color Matching Proles.
Note: On LCD monitors, unlike CRTs, a faster refresh rate does not improve display quality.
Lenovo recommends using either 2560 x 1440 at a refresh rate of 60 Hz, or 1920 x 1080 at a
refresh rate of 60 Hz�
http://www.lenovo.com/support