
User Manual


Replacing the mouse
Attention
Do not open your computer or attempt any repair before reading and understanding the
“Important safety information” in the ThinkCentre Safety and Warranty Guide that came with
your computer. To obtain a copy of the ThinkCentre Safety and Warranty Guide, go to:
http://www.lenovo.com/support
This section provides instructions on how to replace the mouse.
To replace the mouse:
1. Remove any media from the drives, shut down your operating system, and
turn off all attached devices and the computer.
2. Unplug all power cords from electrical outlets.
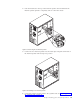
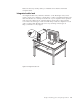
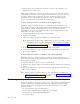
3. Locate the connector for the mouse.
Note: Your mouse might be connected to a standard mouse connector 1 or a
USB connector 2. Depending on where your mouse is connected, see
“Locating connectors on the rear of your computer” on page 8 or
“Locating connectors on the front of your computer” on page 7.
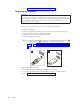
4. Disconnect the failing mouse cable from the computer.
5. Connect a new mouse cable to the appropriate connector on the computer.
6. Go to “Completing the parts replacement.”
Completing the parts replacement
After completing all parts replacements, you need to reinstall the computer cover
and reconnect cables, such as power cords. Depending on the parts replaced, you
might need to confirm the updated information in the Setup Utility program. Refer
to Chapter 4, “Using the Setup Utility,” on page 59.
To reinstall the computer cover and reconnect cables to your computer:
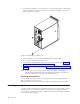
1. Ensure that all components have been reassembled correctly and that no tools
or loose screws are left inside your computer. See “Locating components” on
page 10 for the location of various components.
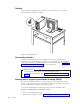
Figure 38. Mouse connectors
Chapter 2. Installing options and replacing hardware 45