
Users Manual


Lenovo (Beijing) Limited
1. Highlight a profile in the Auto Selected Profiles box.
2. Click Move Up, Move Down, or Remove as appropriate. The first profile in the Auto
Selected Profiles box has highest priority, and the last profile has lowest priority.
3. Click OK.
4. Check the Auto Select Profiles box.
5. Save the modified configuration file.
When auto profile selection is enabled by checking Auto Select Profiles on the Profile
Management tab, the adapter scans for an available network. The profile with the
highest priority and the same SSID as one of the found networks is the one that is used
to connect to the network. If the connection fails, the adapter tries the next highest
priority profile that matches the SSID, and so on.
With auto profile selection enabled, the wireless adapter scans for available networks.
The highest priority profile with the same SSID as a found network is used to connect to
the network. On a failed connection, the adapter tries with the next highest priority
profile.
Switching to a Different Configuration Profile
1. To switch to a different profile, go to the Profile Management tab.
2. Click on the profile name in the Profile List.
3. Click the Activate button.
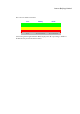
The Profile List provides icons that specify the operational state for that profile. The list
also provides icons that specify the signal strength for that profile.
Import and Export Profiles
Importing a Profile
1. From the Profile Management tab, click the Import button. The Import
Profile window appears.
2. Browse to the directory where the profile is located.
3. Highlight the profile name.
4. Click Open. The imported profile appears in the profiles list.
Exporting a Profile
1. From the Profile Management tab, highlight the profile to export.
2. Click the Export button. The Export Profile window appears.
3. Browse to the directory to export the profile to.
4. Click Save. The profile is exported to the specified location.