Lenovo IdeaPad S110 Hardware Maintenance Manual
Note: Before using this information and the product it supports, be sure to read the general information under “Notices” on page 81. First Edition (August 2011) © Copyright Lenovo 2011. LIMITED AND RESTRICTED RIGHTS NOTICE: If data or software is delivered pursuant a General Services Administration “GSA” contract, use, reproduction, or disclosure is subject to restrictions set forth in Contract No. GS-35F-05925.
Contents About this manual......................................... iv Safety information.......................................... 1 General safety.................................................. 1 Electrical safety ................................................ 2 Safety inspection guide .................................... 3 Handling devices that are sensitive to electrostatic discharge ..................................... 4 Grounding requirements ..................................
About this manual This manual contains service and reference information for the following Lenovo IdeaPad product: Lenovo IdeaPad S110 Use this manual to troubleshoot problems. The manual is divided into the following sections: • The common sections provide general information, guidelines, and safety information required for servicing computers. • The product-specific section includes service, reference, and product-specific parts information.
Lenovo IdeaPad S110 Hardware Maintenance Manual Safety information This chapter presents the following safety information that you need to get familiar with before you service an Lenovo IdeaPad S110 computer: • “General safety” on page 1 • “Electrical safety” on page 2 • “Safety inspection guide” on page 3 • “Handling devices that are sensitive to electrostatic discharge” on page 4 • “Grounding requirements” on page 4 • “Safety notices: multilingual translations” on page 5 • “Laser compliance statement” on
Lenovo IdeaPad S110 Hardware Maintenance Manual Electrical safety Observe the following rules when working on electrical equipments. Important Use only approved tools and test equipments. Some hand tools have handles covered with a soft material that does not insulate you when working with live electrical currents. Many customers have rubber floor mats near their machines that contain small conductive fibers to decrease electrostatic discharges.
Lenovo IdeaPad S110 Hardware Maintenance Manual • Do not touch live electrical circuits with the reflective surface of a plastic dental mirror. The surface is conductive; such touching can cause personal injury and machine damage. • Do not service the following parts with the power on when they are removed from their normal operating places in a machine: – Power supply units – Pumps – Blowers and fans – Motor generators and similar units. (This practice ensures correct grounding of the units.
Lenovo IdeaPad S110 Hardware Maintenance Manual 7. Check inside the unit for any obvious unsafe conditions, such as metal filings, contamination, water or other liquids, or signs of fire or smoke damage. 8. Check for worn, frayed, or pinched cables. Handling devices that are sensitive to electrostatic discharge Any computer part containing transistors or integrated circuits (ICs) should be considered sensitive to electrostatic discharge (ESD).
Lenovo IdeaPad S110 Hardware Maintenance Manual Safety notices: multilingual translations The safety notices in this section are provided in English, French, German, Hebrew, Italian, Japanese, and Spanish. Safety notice 1 Before the computer is powered on after FRU replacement, make sure all screws, springs, and other small parts are in place and are not left loose inside the computer. Verify this by shaking the computer and listening for rattling sounds.
Lenovo IdeaPad S110 Hardware Maintenance Manual Safety notice 2 DANGER Some standby batteries contain a small amount of nickel and cadmium. Do not disassemble a standby battery, recharge it, throw it into fire or water, or shortcircuit it. Dispose of the battery as required by local ordinances or regulations. Use only the battery in the appropriate parts listing. Use of an incorrect battery can result in ignition or explosion of the battery.
Lenovo IdeaPad S110 Hardware Maintenance Manual Safety notice 3 DANGER The battery pack contains small amounts of nickel. Do not disassemble it, throw it into fire or water, or short-circuit it. Dispose of the battery pack as required by local ordinances or regulations. Use only the battery in the appropriate parts listing when replacing the battery pack. Use of an incorrect battery can result in ignition or explosion of the battery. La batterie contient du nickel.
Lenovo IdeaPad S110 Hardware Maintenance Manual Safety notice 4 DANGER The lithium battery can cause a fire, an explosion, or a severe burn. Do not recharge it, remove its polarized connector, disassemble it, heat it above 100°C (212°F), incinerate it, or expose its cell contents to water. Dispose of the battery as required by local ordinances or regulations. Use only the battery in the appropriate parts listing. Use of an incorrect battery can result in ignition or explosion of the battery.
Lenovo IdeaPad S110 Hardware Maintenance Manual Safety notice 5 If the LCD breaks and the fluid from inside the LCD gets into your eyes or on your hands, immediately wash the affected areas with water at least for 15 minutes. Seek medical care if any symptoms caused by the fluid are present after washing. Si le panneau d’affichage à cristaux liquides se brise et que vous recevez dans les yeux ou sur les mains une partie du fluide, rincez-les abondamment pendant au moins quinze minutes.
Lenovo IdeaPad S110 Hardware Maintenance Manual Safety notice 6 DANGER To avoid shock, do not remove the plastic cover that protects the lower part of the inverter card. Afin d’éviter tout risque de choc électrique, ne retirez pas le cache en plastique protégeant la partie inférieure de la carte d’alimentation. Aus Sicherheitsgründen die Kunststoffabdeckung, die den unteren Teil der Spannungswandlerplatine umgibt, nicht entfernen..
Lenovo IdeaPad S110 Hardware Maintenance Manual Safety notice 8 DANGER Before removing any FRU, turn off the computer, unplug all power cords from electrical outlets, remove the battery pack, and then disconnect any interconnecting cables. Avant de retirer une unité remplaçable en clientèle, mettez le système hors tension, débranchez tous les cordons d’alimentation des socles de prise de courant, retirez la batterie et déconnectez tous les cordons d’interface.
Lenovo IdeaPad S110 Hardware Maintenance Manual CAUTION Use of controls or adjustments or performance of procedures other than those specified herein might result in hazardous radiation exposure. O uso de controles, ajustes ou desempenho de procedimentos diferentes daqueles aqui especificados pode resultar em perigosa exposição à radiação. Pour éviter tout risque d’exposition au rayon laser, respectez les consignes de réglage et d’utilisation des commandes, ainsi que les procédures décrites.
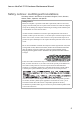
Lenovo IdeaPad S110 Hardware Maintenance Manual DANGER Emits visible and invisible laser radiation when open. Do not stare into the beam, do not view directly with optical instruments, and avoid direct exposure to the beam. Radiação por raio laser ao abrir. Não olhe fixo no feixe de luz, não olhe diretamente por meio de instrumentos óticos e evite exposição direta com o feixe de luz.. Rayonnement laser si carter ouvert.
Lenovo IdeaPad S110 Hardware Maintenance Manual Important service information This chapter presents the following important service information: • “Strategy for replacing FRUs” on page 14 – “Strategy for replacing a hard disk drive” on page 15 – “Important notice for replacing a system board” on page 15 • “Important information about replacing RoHS compliant FRUs” on page 15 Important: BIOS and device driver fixes are customer-installable.
Lenovo IdeaPad S110 Hardware Maintenance Manual Strategy for replacing a hard disk drive Always try to run a low-level format before replacing a hard disk drive. This will cause all customer data on the hard disk to be lost. Make sure that the customer has a current backup of the data before performing this action. Attention: The drive startup sequence in the computer you are servicing may have been changed. Be extremely careful during write operations such as copying, saving, or formatting.
Lenovo IdeaPad S110 Hardware Maintenance Manual Products marketed before June 2006 Products marketed after June 2006 Current or original part Replacement FRU Current or original part Replacement FRU Non-RoHS Can be Non-RoHS Non-RoHS Can be RoHS Must be RoHS Must be RoHS Non-RoHS Can sub to RoHS RoHS Must be RoHS Note: A direct substitution is a part with a different FRU part number that is automatically shipped by the distribution center at the time of the order.
Lenovo IdeaPad S110 Hardware Maintenance Manual General checkout This chapter presents the following information: • “What to do first” on page 17 • “Power system checkout” on page 18 Before you go to the checkout, make sure to read the following important notes: Notes: • Only certified trained personnel can service the computer. • Before replacing any FRU, read the entire page on removing and replacing FRUs. • When you replace FRUs, use new nylon-coated screws.
Lenovo IdeaPad S110 Hardware Maintenance Manual The following is a list of some common items that are not covered under warranty and some symptoms that might indicate that the system was subjected to stress beyond normal use.
Lenovo IdeaPad S110 Hardware Maintenance Manual Checking the AC adapter You are here because the computer fails only when the AC adapter is used. • If the power-on indicator does not turn on, check the power cord of the AC adapter for correct continuity and installation. • If the computer does not charge during operation, go to “Checking operational charging”. To check the AC adapter, follow the steps below: 1. Unplug the AC adapter cable from the computer. 2.
Lenovo IdeaPad S110 Hardware Maintenance Manual percentage of battery power remaining is displayed. To get detailed information about the battery, double-click the Power Meter icon. Note: If the battery pack becomes hot, it may not be able to be charged. Remove it from the computer and leave it at room temperature for a while. After it cools down, reinstall and recharge it. To check the battery pack, follow the steps below: 1. Turn off the computer. 2.
Lenovo IdeaPad S110 Hardware Maintenance Manual Related service information This chapter presents the following information: • “Restoring the factory contents by using OneKey Recovery” on page 21 • “Passwords” on page 22 • “Power management” on page 22 Restoring the factory contents by using OneKey Recovery Restore of factory default The Lenovo IdeaPad S110 computers come with pre-installed OneKey Rescue System.
Lenovo IdeaPad S110 Hardware Maintenance Manual Passwords As many as two passwords may be needed for any Lenovo IdeaPad computer: the power-on password (POP) and the supervisor password (SVP). If any of these passwords has been set, a prompt for it appears on the screen whenever the computer is turned on. The computer does not start until the password is entered. Exception: If only an SVP is installed, the password prompt does not appear when the operating system is booted.
Lenovo IdeaPad S110 Hardware Maintenance Manual • If a “suspend time” has been set on the timer, and the user does not do any operation with the keyboard, the hard disk, the parallel connector, or the diskette drive within that time. • If the battery indicator is amber, indicating that the battery power is low. (Alternatively, if Hibernate when battery becomes low has been selected in the “Power Management Properties” window, the computer goes into hibernation mode.
Lenovo IdeaPad S110 Hardware Maintenance Manual Lenovo IdeaPad S110 This chapter presents the following product-specific service references and product-specific parts information: • “Specifications” on page 24 • “Status indicators” on page 26 • “Fn key combinations” on page 28 • “FRU replacement notices” on page 29 • “Removing and replacing an FRU” on page 30 • “Locations” on page 59 • “Parts list” on page 63 Specifications The following table lists the specifications of the Lenovo IdeaPad S110: Table 1.
Lenovo IdeaPad S110 Hardware Maintenance Manual Table 1.Specifications (Continued) Feature Description Integrated audio • Built-in stereo microphone • Built-in speakers Ethernet chip Realtek RTL8105E-GR, 10/100 Mbps WLAN/WiMAX card • • • • Intel 622ANXHMW Intel 612BNxHMW Atheros AR5B95 Realtek RTL8188CE WLAN/ Bluetooth combo card • Atheros AR5B195 • Realtek RTL8188CEBT Integrated camera Fixed-focus CMOS, 0.3 or 2.
Lenovo IdeaPad S110 Hardware Maintenance Manual Status indicators The system status indicators below show the computer status: Table 2.Status indicators No. Symbol Indicator Indicator Meaning status Power 26 On (solid white) The computer is powered on. Blinking Blinking The computer is in sleep mode. Off The computer is powered off.
Lenovo IdeaPad S110 Hardware Maintenance Manual Table 2.Status indicators (Continued) No. Symbol Indicator Indicator Meaning status Battery On (solid white) The battery has more than 20% charge. Solid amber The battery has between 5% and 20% charge. Fast blinking amber The battery has less than 5% charge. Slow blinking amber The battery is being charged. When battery charge reaches 20%, the blinking color changes to white.
Lenovo IdeaPad S110 Hardware Maintenance Manual Fn key combinations The following table shows the function of each combination of Fn with a function key. Table 3.Fn key combinations 28 Fn + Esc: Turn on/off the integrated camera. Fn + F1: Enter sleep mode. Fn + F2: Turn on/off the backlight of the LCD screen. Fn + F3: Open the interface for the display device switch to select this notebook or an external display. Fn + F5: Open the interface for integrated wireless devices settings (On/Off).
Lenovo IdeaPad S110 Hardware Maintenance Manual FRU replacement notices This section presents notices related to removing and replacing parts. Read this section carefully before replacing any FRU. Screw notices Loose screws can cause a reliability problem. In the Lenovo IdeaPad computer, this problem is addressed with special nylon-coated screws that have the following characteristics: • They maintain tight connections. • They do not easily come loose, even with shock or vibration.
Lenovo IdeaPad S110 Hardware Maintenance Manual Removing and replacing an FRU This section presents exploded figures with instructions indicating how to remove and replace an FRU. Make sure to observe the following general rules: 1. Do not attempt to service any computer unless you have been trained and certified. An untrained person may damage parts. 2. Before replacing any FRU, review the “FRU replacement notices” on page 29. 3. Start by removing any FRUs that must be removed to access the failing FRU.
Lenovo IdeaPad S110 Hardware Maintenance Manual Battery pack Figure 1: Removal steps of Battery pack Unlock the battery release slider on the left as shown in release slider on the right lever in the unlocked position pack in the direction shown by arrow . . Hold the battery . Remove the battery When installing: Install the battery pack using the slide rails of the slot. Then make sure that the battery release sliders are set to the locked position.
Lenovo IdeaPad S110 Hardware Maintenance Manual Keyboard For access, remove this FRU: • “Battery pack” on page 31 Figure 2: Removal steps of keyboard 1 1 1 Step Screw (quantity) Color Torque M2.0 × 1.7 mm, flat-head, nylon-coated (3) Black 1.0 kgfcm Remove the three screws 32 .
Lenovo IdeaPad S110 Hardware Maintenance Manual Figure 3: Removal steps of keyboard (continued) 2 3 4 Lift the keyboard . Unlock the PFC connector connector in the direction shown by arrow . and then detach the When installing: Make sure that the FPC connector is attached firmly and then lock the FPC connector.
Lenovo IdeaPad S110 Hardware Maintenance Manual Base cover For access, remove these FRUs in order: • “Battery pack” on page 31 • “Keyboard” on page 32 Figure 4: Removal steps of base cover 1 1 1 1 1 1 1 Step Screw (quantity) Color Torque M2.0 × 6.0 mm, flat round-head, nylon-coated (7) Black 1.85 kgfcm Remove the eight screws 34 .
Lenovo IdeaPad S110 Hardware Maintenance Manual Figure 5: Removal steps of base cover (continued) 1 1 1 1 1 1 Step Screw (quantity) Color Torque M2.0 × 6.0 mm, flat round-head, nylon-coated (6) Black 1.85 kgfcm Remove the six screws .
Lenovo IdeaPad S110 Hardware Maintenance Manual Figure 6: Removal steps of base cover (continued) Lift the base cover as shown by the arrow.
Lenovo IdeaPad S110 Hardware Maintenance Manual Note: Applying labels to the base cover The new base cover FRU is shipped with a kit containing several kinds of labels. When you replace the base cover, you need to apply the following labels: The following labels need to be peeled off from the old base cover and put on the new base cover.
Lenovo IdeaPad S110 Hardware Maintenance Manual DIMM For access, remove these FRUs in order: • “Battery pack” on page 31 • “Keyboard” on page 32 • “Base cover” on page 34 Figure 7: Procedure to remove the DIMM 2 1 1 Release the latches on both edges of the socket at the same time in the direction shown by arrows , and then unplug the DIMM in the direction shown by arrow .
Lenovo IdeaPad S110 Hardware Maintenance Manual Hard disk drive For access, remove these FRUs in order: • “Battery pack” on page 31 • “Keyboard” on page 32 • “Base cover” on page 34 Attention: • Do not drop the hard disk drive or apply any physical shock to it. The hard disk drive is sensitive to physical shock. Improper handling can cause damage and permanent loss of data. • Before removing the drive, suggest to the customer that they should back up all the information on it if possible.
Lenovo IdeaPad S110 Hardware Maintenance Manual Figure 9: Removal steps of hard disk drive (continued) 1 2 1 Step Screw (quantity) Color Torque M3.0 × 3.0 mm, flat round-head, nylon-coated (2) Black 2.85 kgfcm Remove the two side screws bracket .
Lenovo IdeaPad S110 Hardware Maintenance Manual USB board For access, remove these FRUs in order: • “Battery pack” on page 31 • “Keyboard” on page 32 • “Base cover” on page 34 Figure 10: Removal steps of USB port 1 3 Step Screw (quantity) Color Torque M2.0 × 3.0 mm, flat round-head, nylon-coated (1) Black 1.35 kgfcm Remove one screw . Unlock the USB connector and then detach the connector in the direction shown by arrow . Remove USB port.
Lenovo IdeaPad S110 Hardware Maintenance Manual Thermal module For access, remove these FRUs in order: • “Battery pack” on page 31 • “Keyboard” on page 32 • “Base cover” on page 34 Figure 11: Removal steps of thermal module 1 1 2 Step 1 1 3 Screw (quantity) Color Torque M2.0 × 3.0 mm, flat round-head, nylon-coated (4) Black 1.35 kgfcm Remove the four screws . Detach the connector in the direction shown by arrow . Lift and remove the thermal module in the direction shown by arrow .
Lenovo IdeaPad S110 Hardware Maintenance Manual PCI Express Mini Card for wireless LAN For access, remove these FRUs in order: • “Battery pack” on page 31 • “Keyboard” on page 32 • “Base cover” on page 34 Figure 12: Removal steps of PCI Express Mini Card for wireless LAN 2 1 3 Step Screw (quantity) Color Torque M2.0 × 6.0 mm, flat round-head, nylon-coated (1) Black 1.85 kgfcm Remove one screw . Unplug the two cables . Then remove the PCI Express Mini Card in the direction shown by the arrow .
Lenovo IdeaPad S110 Hardware Maintenance Manual RJ-45 connector For access, remove these FRUs in order: • “Battery pack” on page 31 • “Keyboard” on page 32 • “Base cover” on page 34 Figure 13: Removal steps of RJ-45 connector 2 1 Detach the connector in the direction shown by arrow connector as shown by arrow . . Lift the RJ-45 When installing: Make sure that the connector is attached firmly.
Lenovo IdeaPad S110 Hardware Maintenance Manual Power connector For access, remove these FRUs in order: • “Battery pack” on page 31 • “Keyboard” on page 32 • “Base cover” on page 34 Figure 14: Removal steps of power connector 1 2 Detach the connector in the direction shown by arrow connector in the direction shown by arrow . . Lift the power When installing: Make sure that the connector is attached firmly.
Lenovo IdeaPad S110 Hardware Maintenance Manual System board Important notices for handling the system board When handling the system board, bear the following in mind: • Be careful not to drop the system board on a bench top that has a hard surface, such as metal, wood, or composite. • Avoid rough handling of any kind. • Take care not to drop or stack the system board during the whole of the procedure.
Lenovo IdeaPad S110 Hardware Maintenance Manual Figure 16: Removal steps of system board (continued) 2 2 2 3 2 Detach the six connectors in the directions shown by arrows system board in the direction shown by arrow . . Remove the When installing: Make sure that all connectors are attached firmly.
Lenovo IdeaPad S110 Hardware Maintenance Manual Speakers For access, remove these FRUs in order: • “Battery pack” on page 31 • “Keyboard” on page 32 • “Base cover” on page 34 • “Hard disk drive” on page 39 • “PCI Express Mini Card for wireless LAN” on page 43 • “System board” on page 46 Figure 17: Removal steps of speakers 1 1 2 1 1 2 Step Screw (quantity) Color Torque M2.0 × 3.0 mm, flat round-head, nylon-coated (4) Black 1.35 kgfcm Remove the two side screws for each speaker.
Lenovo IdeaPad S110 Hardware Maintenance Manual Touch pad bracket For access, remove these FRUs in order: • “Battery pack” on page 31 • “Keyboard” on page 32 • “Base cover” on page 34 • “Hard disk drive” on page 39 • “PCI Express Mini Card for wireless LAN” on page 43 • “System board” on page 46 Figure 18: Removal steps of Touch pad bracket 1 2 1 Step Screw (quantity) Color Torque M2.0 × 3.0 mm, flat round-head, nylon-coated (2) Black 1.35 kgfcm Remove the two screws arrow . .
Lenovo IdeaPad S110 Hardware Maintenance Manual Figure 19: Removal steps of Touch pad bracket (continued) 3 4 Use a screwdriver to push and unlock the tabs bracket in the direction shown by arrow . 50 .
Lenovo IdeaPad S110 Hardware Maintenance Manual LCD unit For access, remove these FRUs in order: • “Battery pack” on page 31 • “Keyboard” on page 32 • “Base cover” on page 34 Figure 20: Procedure to remove the LCD unit 1 2 1 2 Step Screws (quantity) Color Torque M2.0 × 5.0 mm, flat round-head, nylon-coated (4) Black 1.
Lenovo IdeaPad S110 Hardware Maintenance Manual Figure 21: Procedure to remove the LCD unit (continued) Remove the six back screws . Detach the three connectors in the direction shown by arrow . Remove the LCD unit. When installing: Make sure that all connectors are attached firmly.
Lenovo IdeaPad S110 Hardware Maintenance Manual LCD front bezel For access, remove these FRUs in order: • “Battery pack” on page 31 • “Keyboard” on page 32 • “Base cover” on page 34 • “LCD unit” on page 51 Figure 22: Removal steps of LCD front bezel 1 2 1 2 Step 2 Screw (quantity) Color Torque M2.0 × 3.0 mm, flat round-head, nylon-coated (2) Black 1.35 kgfcm Remove the two screws . Remove the LCD front bezel in the direction shown by arrows .
Lenovo IdeaPad S110 Hardware Maintenance Manual LCD panel For access, remove these FRUs in order: • “Battery pack” on page 31 • “Keyboard” on page 32 • “Base cover” on page 34 • “LCD unit” on page 51 • “LCD front bezel” on page 53 Figure 23: Removal steps of LCD panel 1 1 3 1 1 2 Step Screw (quantity) Color Torque M2.0 × 3.0 mm, flat round-head, nylon-coated (4) Black 1.35 kgfcm Remove the four screws .
Lenovo IdeaPad S110 Hardware Maintenance Manual Integrated camera For access, remove these FRUs in order: • “Battery pack” on page 31 • “Keyboard” on page 32 • “Base cover” on page 34 • “LCD unit” on page 51 • “LCD front bezel” on page 53 • “LCD panel” on page 54 Figure 24: Removal steps of integrated camera 2 1 The integrated camera is attached to the top center of the LCD cover. Lift the integrated camera in the direction shown by arrow . Detach the connector in the direction shown by arrow .
Lenovo IdeaPad S110 Hardware Maintenance Manual Hinges For access, remove these FRUs in order: • “Battery pack” on page 31 • “Keyboard” on page 32 • “Base cover” on page 34 • “LCD unit” on page 51 • “LCD front bezel” on page 53 • “LCD panel” on page 54 Figure 25: Removal steps of hinges 1 1 1 2 1 1 1 2 Step Screw (quantity) Color Torque M2.0 × 3.0 mm, flat round-head, nylon-coated (6) Black 1.35 kgfcm Remove the six screws arrows .
Lenovo IdeaPad S110 Hardware Maintenance Manual Power button board For access, remove these FRUs in order: • “Battery pack” on page 31 • “Keyboard” on page 32 • “Base cover” on page 34 • “LCD unit” on page 51 • “LCD front bezel” on page 53 • “LCD panel” on page 54 • “Hinges” on page 56 Figure 26: Removal steps of power button board 1 2 The power button board is attached to the left side of the LCD cover. Detach the connector in the direction shown by arrow .
Lenovo IdeaPad S110 Hardware Maintenance Manual Antenna kit For access, remove these FRUs in order: • “Battery pack” on page 31 • “Keyboard” on page 32 • “Base cover” on page 34 • “LCD unit” on page 51 • “LCD front bezel” on page 53 • “LCD panel” on page 54 • “Hinges” on page 56 • “Power button board” on page 57 Figure 27: Removal steps of antenna kit 1 1 The antenna modules are attached to the left and right sides of the LCD cover. Remove the antenna modules in the direction shown by arrows .
Lenovo IdeaPad S110 Hardware Maintenance Manual Locations Top view Attention: • Do NOT open the display panel beyond 130 degrees. When closing the display panel, be careful NOT to leave pens or any other objects in between the display panel and the keyboard. Otherwise, the display panel may be damaged. Integrated camera Use the camera for video communication.
Lenovo IdeaPad S110 Hardware Maintenance Manual Power button Press this button to turn on the computer. System status indicators - Touchpad The touchpad functions as a conventional mouse. Wireless module antennas The built-in antennas ensure optimal reception of wireless radio. Left-side view AC power adapter jack Connect the AC adapter here. VGA port Connects to external display devices. Fan louvers Dissipate internal heat. USB port Connects to USB devices.
Lenovo IdeaPad S110 Hardware Maintenance Manual Right-side view USB port Connects to USB devices. RJ-45 port This port connects the computer to an Ethernet network. Lanyard hole Used for attaching a lanyard (not supplied). Front view Memory card slot Insert memory cards (not supplied) here.
Lenovo IdeaPad S110 Hardware Maintenance Manual Bottom view 62 Battery latch manual The manual battery latch is used to keep the battery pack secured in place. Battery pack - Battery latch spring loaded The spring-loaded battery latch keeps the battery pack secured in place. Speakers The stereo speakers provide rich and powerful sound.
Lenovo IdeaPad S110 Hardware Maintenance Manual Parts list This section presents the following service parts: • “Overall” on page 64 • “LCD FRUs” on page 68 • “Keyboard” on page 70 • “Miscellaneous parts” on page 77 • “AC adapters” on page 78 • “Power cords” on page 78 Note: • Each FRU is available for all types or models, unless specific types or models are specified.
Lenovo IdeaPad S110 Hardware Maintenance Manual Overall 64
Lenovo IdeaPad S110 Hardware Maintenance Manual Table 4.Parts list—Overall FRU No. or Lenovo P/N No. FRU a-e See “Miscellaneous parts” on page 77 1 LCD unit (see “LCD FRUs” on page 68) 2 S100 UPPER CASE BLACK 31050149 2 S100 UPPER CASE RED 31050636 2 S100 UPPER CASE BLUE 31050635 2 S100 UPPER CASE WHITE 31050777 3 S110 USB BOARD 90200145 4 Wlan, 802.11b/g/n, Wistron, DHXA-95(AR9285) NA 4 Wlan, 802.11b/g/n, Bitland, BM8A36(RTL8188) NA 4 Wlan, 802.
Lenovo IdeaPad S110 Hardware Maintenance Manual Table 4.Parts list—Overall (Continued) 66 No. FRU FRU No.
Lenovo IdeaPad S110 Hardware Maintenance Manual Table 4.Parts list—Overall (Continued) No. FRU FRU No.
Lenovo IdeaPad S110 Hardware Maintenance Manual LCD FRUs 68
Lenovo IdeaPad S110 Hardware Maintenance Manual Table 5.Parts list—LCD FRUs No. FRU FRU No. or Lenovo P/N 1 S110 LCD BEZEL W/carema hole black 90200126 1 S110 LCD BEZEL W/carema hole blue 90200127 1 S110 LCD BEZEL W/carema hole red 90200128 1 S110 LCD BEZEL W/carema hole white 90200129 2 Panel, 10.1" Flat type 1024x600, CMI N101LGEL41 SD G F LED1 18200140 2 Panel, 10.1" Flat type 1024x600, AUO B101AW06 V1 HW0A SD G F LED1 18200139 2 Panel, 10.
Lenovo IdeaPad S110 Hardware Maintenance Manual Keyboard Table 6.
Lenovo IdeaPad S110 Hardware Maintenance Manual Table 6.
Lenovo IdeaPad S110 Hardware Maintenance Manual Table 6.
Lenovo IdeaPad S110 Hardware Maintenance Manual Table 6.
Lenovo IdeaPad S110 Hardware Maintenance Manual Table 6.
Lenovo IdeaPad S110 Hardware Maintenance Manual Table 6.
Lenovo IdeaPad S110 Hardware Maintenance Manual Table 6.
Lenovo IdeaPad S110 Hardware Maintenance Manual Miscellaneous parts Table 7.Parts list—Miscellaneous parts FRU FRU No.
Lenovo IdeaPad S110 Hardware Maintenance Manual AC adapters Table 8.Parts list—AC adapters FRU FRU No. or Lenovo P/N AC Adaptor, 30 W 20V,1.5A, Delta ADP-30SH BA 20V1.5A 36001806 AC Adaptor, 30 W 20V,1.5A, Litons PA-1300-12LC black 36001809 AC Adaptor, 30 W 20V,1.5A, Chicony CPA09-A030 20V1.5A 36001804 Power cords Table 9.
Lenovo IdeaPad S110 Hardware Maintenance Manual Table 9.
Lenovo IdeaPad S110 Hardware Maintenance Manual Table 9.
Lenovo IdeaPad S110 Hardware Maintenance Manual Notices Lenovo may not offer the products, services, or features discussed in this document in all countries. Consult your local Lenovo representative for information on the products and services currently available in your area. Any reference to a Lenovo product, program, or service is not intended to state or imply that only that Lenovo product, program, or service may be used.
Lenovo IdeaPad S110 Hardware Maintenance Manual Trademarks The following terms are trademarks or registered trademarks of Lenovo in the United States, other countries, or both. Lenovo IdeaPad OneKey Microsoft and Windows are trademarks of Microsoft Corporation in the United States, other countries, or both. Other company, products, or service names may be trademarks or service marks of others.