
Personal Computer Hardware Maintenance Manual


Table Of Contents
- Contents
- Chapter 1. About this manual
- Chapter 2. Safety information
- Chapter 3. General information
- Chapter 4. General checkout
- Chapter 5. Diagnostics
- Chapter 6. Using the Setup Utility
- Chapter 7. Symptom-to-FRU index
- Chapter 8. Replacing FRUs
- Locations
- Opening the computer cover
- Replacing the battery
- Replacing a memory module
- Replacing the adapter card
- Replacing the front audio and USB assembly
- Replacing the heat sink
- Replacing the microprocessor
- Replacing the system board
- Replacing the system fan
- Replacing the hard disk drive
- Replacing the optical drive
- Replacing the internal speaker
- Completing the FRU replacement
- Chapter 9. FRU lists
- Chapter 10. Additional service information
- Appendix. Notices
Replacing the hard disk drive
Attention
Do not open your computer or attempt any repair before reading and understanding the
“Important safety information” in the ThinkCentre Safety and Warranty Guide that came with
your computer. To obtain a copy of the ThinkCentre Safety and Warranty Guide, go to:
http://www.lenovo.com/support
This section provides instructions on how to replace the hard disk drive if your
computer has one. For computer models that do not have an internal hard disk
drive installed and use a remote hard disk drive accessed through the SMC -
Storage Array, contact your network or storage administrator.
Important
When you receive a new hard disk drive, you also receive a set of Product
Recovery discs. The set of Product Recovery discs will enable you to restore the
contents of the hard disk to the same state as when your computer was
originally shipped from the factory. For more information on recovering
factory-installed software, refer to “Recovering software” in your ThinkCentre
User Guide.
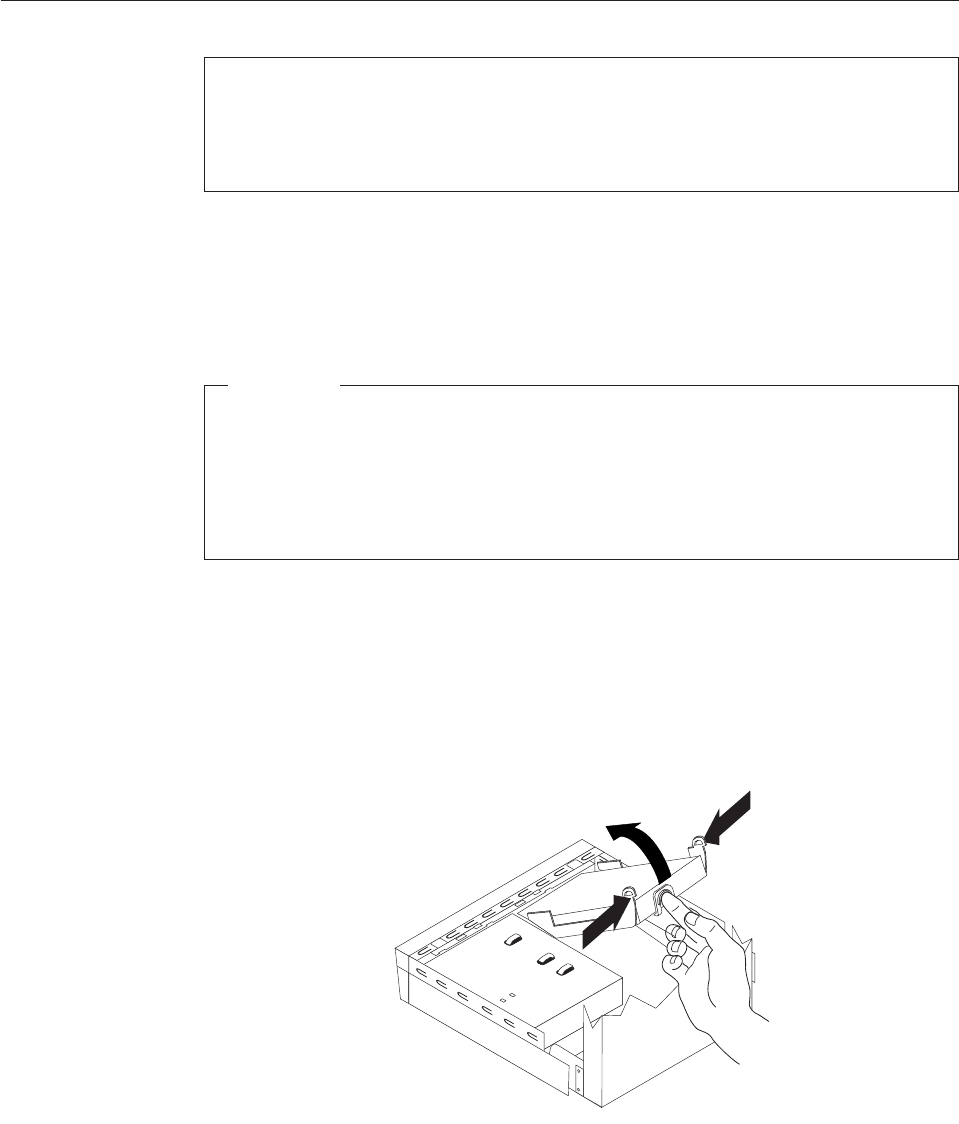
To replace the hard disk drive:
1. Open the computer cover. See “Opening the computer cover” on page 84.
2. Disconnect the power cable from the optical drive.
3. Place your finger on the tab located on the front of the hard disk drive and
push upward. Then press inward on the side tabs and pivot the hard disk
drive upward to remove.
4. Remove the failing hard disk drive from the chassis.
5. Disconnect the signal and power cables from the hard disk drive.
6. Remove the hard disk drive from the plastic bracket by flexing the sides of the
bracket enough to slide it free of the hard disk drive.
Figure 23. Removing the hard disk drive
Chapter 8. Replacing FRUs 101