
Personal Computer Hardware Maintenance Manual


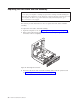
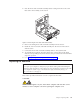


Table Of Contents
- Contents
- Chapter 1. About this manual
- Chapter 2. Safety information
- Chapter 3. General information
- Chapter 4. General checkout
- Chapter 5. Diagnostics
- Chapter 6. Using the Setup Utility
- Chapter 7. Symptom-to-FRU index
- Chapter 8. Replacing FRUs
- Locations
- Opening the computer cover
- Replacing the battery
- Replacing a memory module
- Replacing the adapter card
- Replacing the front audio and USB assembly
- Replacing the heat sink
- Replacing the microprocessor
- Replacing the system board
- Replacing the system fan
- Replacing the hard disk drive
- Replacing the optical drive
- Replacing the internal speaker
- Completing the FRU replacement
- Chapter 9. FRU lists
- Chapter 10. Additional service information
- Appendix. Notices
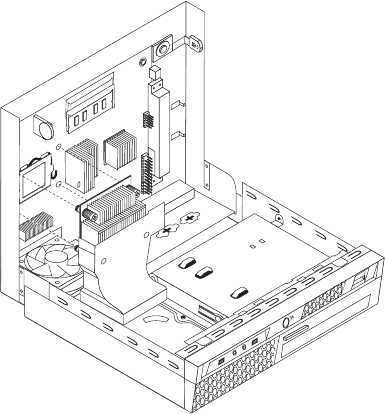
To replace the heat sink:
1. Open the computer cover. See “Opening the computer cover” on page 84.
2. Locate the heat sink. See “Locating components” on page 82.
3. Remove the four screws that secure the heat sink to the system board.
Note: Carefully remove the four screws from the system board to avoid any
possible damage. The four screws cannot be removed from the heat sink.
4. Lift the failing heat sink off the system board.
Notes:
a. You might have to gently twist the heat sink to free it from the
microprocessor.
b. Do not touch the thermal grease while handling the heat sink.
5.
Position the new heat sink on the system board so that the four screws are
aligned with the holes on the system board.
6. Alternate tightening each screw a small and equal amount until the heat sink is
secured to the system board. Do not over-tighten the screws.
7. Go to “Completing the FRU replacement” on page 106.
Figure 14. Removing the heat sink
92 Hardware Maintenance Manual