A285 User Guide
Note: Before using this information and the product it supports, ensure that you read and understand the following: • Safety and Warranty Guide • Setup Guide • “Important safety information” on page v Lenovo makes constant improvement on the documentation of your computer, including this User Guide. To get all the latest documents, go to: https://support.lenovo.com Second Edition (August 2018) © Copyright Lenovo 2018.
Contents Important safety information . . . . . . v Read this first. . . . . . . . . . . . . . . Important information about using your computer Conditions that require immediate action . . . . Service and upgrades . . . . . . . . . . . Power adapters . . . . . . . . . . . . . . Extension cords and related devices. . . . . . Plugs and outlets . . . . . . . . . . . . . Power supply statement . . . . . . . . . . External devices . . . . . . . . . . . . . General battery notice . . . . . . . . . . .
Setting, changing, or removing a password Hard disk security . . . . . . . . . . . . Setting the security chip . . . . . . . . . Using the fingerprint reader . . . . . . . . Deleting data from your storage drive . . . . Using firewalls . . . . . . . . . . . . . Protecting data against viruses . . . . . . . . . . . . . . . . . . . . . 50 51 51 52 54 55 55 Chapter 6. Advanced configuration . . . . . . . . . . . . . . 57 Installing the Windows 10 operating system . Installing device drivers . . . . . . . .
Japan notice for ac power cord . . . . . Lenovo product service information for Taiwan Eurasian compliance mark . . . . . . . . Brazil audio notice . . . . . . . . . . . . . . . . . . . . 117 117 117 117 Appendix C. WEEE and recycling statements of countries and regions . . . . . . . . . . . . . . . . . 119 General recycling information . . . . . . . Important WEEE information . . . . . . . . Japan recycling statements . . . . . . . . Recycling information for Brazil. . . . . . .
iv A285 User Guide
Important safety information Note: Read the important safety information first. Read this first This information can help you safely use your notebook computer. Follow and retain all information included with your computer. The information in this document does not alter the terms of your purchase agreement or the Lenovo Limited Warranty. For more information, see "Warranty Information" in the Safety and Warranty Guide that comes with your computer. Customer safety is important.
Protect yourself from the heat generated by the ac power adapter. When the ac power adapter is connected to an electrical outlet and your computer, it generates heat. Extended contact with your body, even through clothing, may cause a skin burn. • Do not place the ac power adapter in contact with any part of your body while it is in use. • Never use it to warm your body. Prevent your computer from getting wet. To avoid spills and the danger of electrical shock, keep liquids away from your computer.
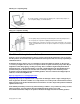
Handle your computer gently. Do not drop, bump, scratch, twist, hit, vibrate, push, or place heavy objects on your computer, display, or external devices. Carry your computer carefully. • Use a quality carrying case that provides adequate cushioning and protection. • Do not pack your computer in a tightly packed suitcase or bag. • Before putting your computer in a carrying case, make sure that it is off, in sleep mode, or in hibernation mode.
• Plugs, power adapters, extension cords, surge protectors, or power supplies that are cracked, broken, or damaged. • Signs of overheating, smoke, sparks, or fire. • Damage to a battery (such as cracks, dents, or creases), discharge from a battery, or a buildup of foreign substances on the battery. • A cracking, hissing or popping sound, or strong odor that comes from the product. • Signs that liquid has been spilled or an object has fallen onto the computer product or the power adapter.
Power adapters DANGER Use only the power adapters supplied by the product manufacturer. Never wrap a power adapter cable around a power adapter or other object. Doing so can stress the cord in ways that can cause the power adapter cable to fray, crack, or crimp. This can present a safety hazard. Always route the power adapter cable so that they will not be walked on, tripped over, or pinched by objects. Protect power adapters from liquids.
Plugs and outlets DANGER If a receptacle (power outlet) that you intend to use with your computer equipment appears to be damaged or corroded, do not use the outlet until it is replaced by a qualified electrician. Do not bend or modify the plug. If the plug is damaged, contact the manufacturer to obtain a replacement.
External devices CAUTION: Do not connect or disconnect any external device cables other than Universal Serial Bus (USB) and 1394 cables while the computer power is on; otherwise, you might damage your computer. To avoid possible damage to attached devices, wait at least five seconds after the computer is shut down to disconnect external devices.
Notice for non-rechargeable coin-cell battery DANGER If the coin-cell battery is incorrectly replaced, there is danger of an explosion. The battery contains a small amount of harmful substance. Do not heat to more than 100°C (212°F). The following statement applies to users in the state of California, U.S.A. California Perchlorate Information: Products containing manganese dioxide lithium coin-cell batteries may contain perchlorate. Perchlorate Material - special handling may apply, See https://www.dtsc.ca.
Heat and product ventilation DANGER Computers, ac power adapters, and many accessories can generate heat when turned on and when batteries are charging. Notebook computers can generate a significant amount of heat due to their compact size. Always follow these basic precautions: • When your computer is turned on or the battery is charging, the base, the palm rest, and some other parts may become hot.
Electrical current safety information DANGER Electric current from power, telephone, and communication cables is hazardous. To avoid a shock hazard: • Do not use your computer during a lightning storm. • Do not connect or disconnect any cables or perform installation, maintenance, or reconfiguration of this product during an electrical storm. • Connect power adapter to a properly wired and grounded electrical outlet. • Connect to properly wired outlets any equipment that will be attached to this product.
Note: For products with mercury-containing fluorescent lamps (for example, non-LED), the fluorescent lamp in the liquid crystal display (LCD) contains mercury; dispose of according to local, state, or federal laws. Using headphones or earphones CAUTION: Excessive sound pressure from earphones and headphones can cause hearing loss. Adjustment of the equalizer to maximum increases the earphone and headphone output voltage and the sound pressure level.
xvi A285 User Guide
Chapter 1. Product overview This chapter provides basic information to help you get familiar with your computer. Computer controls, connectors, and indicators This section introduces hardware features of the computer.
1 5 Power button 6 Fingerprint reader (available on some models) 7 TrackPoint® buttons 8 Trackpad 9 TrackPoint pointing stick 10 Multi-touch screen (available on some models) Infrared camera (available on some models) The infrared camera provides a personal and secure way for you to sign in to your computer with face authentication. After setting the infrared camera for face authentication, you can unlock your computer by scanning your face instead of using a password.
10 Multi-touch screen (available on some models) The multi-touch screen enables you to use your computer with simple touch gestures. For more information, see “Using the multi-touch screen” on page 16. Left-side view 1 1 USB-C™ connectors / power connectors 2 Ethernet extension connector Gen 2 3 Docking-station connector 4 USB 3.1 connector Gen 2 5 HDMI™ connector 6 Audio connector USB-C connectors / power connectors The USB-C connectors on your computer support the USB Type-C™ standard.
5 High-Definition Multimedia Interface (HDMI) connector The HDMI connector is a digital audio and video interface. It enables you to connect your computer to a compatible digital audio device or video monitor, such as an HDTV. Note: The HDMI connector on your computer supports the HDMI 2.0 standard by default. If you connect an external display to your computer through the HDMI connector with an HDMI 1.4 cable which is longer than 10 meters, the external display might not work.
3. Locate the Always On USB section and follow the instructions on the screen to make your preferred setting. Note: The Always On USB 3.1 connector Gen 1 does not work if you click Charge from Sleep and your computer is off without connecting to ac power. 4 Mini security-lock slot To protect your computer from theft, lock your computer to a desk, table, or other fixtures through a security cable lock designed to fit the mini security-lock slot on your computer.
1 1 Fan louvers 2 Docking-station hook holes 3 Emergency-reset hole 4 Speakers Fan louvers The fan louvers and internal fan enable air to circulate in the computer to ensure proper cooling, especially the cooling of the microprocessor. 2 Docking-station hook holes You can use the docking-station hook holes to secure a supported docking station to extend the computer capabilities.
1 Caps Lock indicator When this indicator is on, you can type uppercase letters by directly pressing the letter keys. 2 Fn Lock indicator This indicator shows the status of Fn Lock function. For more information, see “Using the special keys” on page 18. 3 Speaker-mute indicator When this indicator is on, the speakers are muted. 4 Microphone-mute indicator When this indicator is on, the microphones are muted. 5 Camera status indicator When this indicator is on, the camera is in use.
Important product information This section provides information to help you locate the following: • Machine type and model information • FCC ID and IC Certification information • Windows operating systems information Machine type and model information When you contact Lenovo for help, the machine type and model information helps the technicians to identify your computer and provide faster service. The following illustration shows where to find the machine type and model information of your computer.
• For a user-installable wireless WAN module, the actual FCC ID and IC certification number is affixed to the wireless WAN module 1 installed in the computer. To view the FCC ID and IC certification number, you must remove the computer base cover assembly. For instructions, see “Replacing the base cover assembly” on page 96. Note: For the user-installable wireless module, ensure that you use only a Lenovo-authorized wireless module specifically tested for this computer model.
• Version of Windows 10 that is preinstalled Go to https://www.microsoft.com/en-us/howtotell/Hardware.aspx for illustrations of the various types of Genuine Microsoft labels. • In the People’s Republic of China, the Genuine Microsoft label is required on all computer models preinstalled with any version of Windows 10. • In other countries and regions, the Genuine Microsoft label is required only on computer models licensed for Windows 10 Pro.
Connectors and slots • Audio connector • Ethernet extension connector Gen 2 • HDMI connector • Nano-SIM-card and microSD-card slot • One USB 3.1 connector Gen 2 • One Always On USB 3.
• Input rating of the ac power adapter: 100 V to 240 V ac, 50 Hz to 60 Hz Operating environment Maximum altitude (without pressurization) • 3048 m (10 000 ft) Temperature • At altitudes up to 2438 m (8000 ft) – Operating: 5°C to 35°C (41°F to 95°F) – Storage: 5°C to 43°C (41°F to 109°F) • At altitudes above 2438 m (8000 ft) – Maximum temperature when operating under the unpressurized condition: 31.3°C (88°F) Note: When you charge the battery, its temperature must be at least 10°C (50°F).
Hotkey Features Integration This software enables F1–F12 special keys and buttons on your computer. For example, when the microphone mute key or button is pressed, the microphone state switches between mute and unmute. The mute state indicator is displayed on the screen whenever the mute state is changed. Lenovo Vantage Your computer’s best features and capabilities should be easy to access and understand. With Lenovo Vantage, they are.
14 A285 User Guide
Chapter 2. Using your computer This chapter provides information to help you use the various features provided by your computer. Registering your computer When you register your computer, information is entered into a database, which enables Lenovo to contact you if there is a recall or other severe problem. In addition, some locations offer extended privileges and services to registered users.
How do I securely dispose of data stored on the internal storage drive? • Study Chapter 5 “Security” on page 49 to find out how you can protect your computer from theft and unauthorized use. • Before you dispose of the data on the internal storage drive, ensure that you read “Deleting data from your storage drive” on page 54. How do I attach an external display? • Refer to “Using an external display” on page 32.
Touch gesture (touch models only) Description Touch: Tap. Mouse action: Click. Function: Open an app or perform an action on an open app, such as Copy, Save, and Delete, depending on the app. Touch: Tap and hold. Mouse action: Right-click. Function: Open a menu with multiple options. Touch: Slide. Mouse action: Scroll the mouse wheel, move the scroll bar, or click the scroll arrow. Function: Scroll through items, such as lists, pages, and photos. Touch: Drag an item to the location you want.
Touch gesture (touch models only) Description Touch: Swipe in from the left edge. Mouse action: Click the task-view icon on the taskbar. Function: View all your open windows in task view. • Short swipe for full-screened app or when your computer is in the tablet mode Touch: Swipe downwards shortly from the top edge. Mouse action: Move your pointer to the top edge of the screen. Function: Show a hidden title bar.
1 Windows logo key Press the Windows logo key to open the Start menu. For information about using the Windows logo key with other keys, see the help information system of the Windows operating system. 2 3 Fn key and function keys You can configure the Fn key and function keys by doing the following: 1. Go to Control Panel, and then change the view of Control Panel from Category to Large icons or Small icons. 2. Click Lenovo - Keyboard Manager and the Keyboard Manager window is displayed. 3.
• Fn+Spacebar: If your computer supports keyboard backlight, press Fn+Spacebar to switch between the different keyboard backlight status (off, low, or high). • Fn+B: This key combination has the same function as the Break key on a conventional external keyboard. • Fn+K: This key combination has the same function as the ScrLK or Scroll Lock key on a conventional external keyboard. • Fn+P: This key combination has the same function as the Pause key on a conventional external keyboard.
By default, both the TrackPoint pointing device and the trackpad are active with the touch gestures enabled. To change the settings, see “Customizing the ThinkPad pointing device” on page 23. Using the TrackPoint pointing device The TrackPoint pointing device enables you to perform all the functions of a traditional mouse, such as pointing, clicking, and scrolling.
Using the trackpad The entire trackpad surface is sensitive to finger touch and movement. You can use the trackpad to perform all the pointing, clicking, and scrolling functions of a traditional mouse. The trackpad can be divided into two zones: 1 Left-click zone (primary-click zone) 2 Right-click zone (secondary-click zone) To use the trackpad, see the following instructions: • Point Slide one finger across the surface of the trackpad to move the pointer accordingly.
Using the trackpad touch gestures The entire trackpad surface is sensitive to finger touch and movement. You can use the trackpad to perform the same point and click actions as you would use a traditional mouse. You also can use the trackpad to perform various touch gestures. The following section introduces some frequently used touch gestures such as tapping, dragging, and scrolling. For more gestures, see the help information system of the ThinkPad pointing device.
Replacing the cap on the pointing stick The cap 1 on the end of the pointing stick is removable. After you use the cap for a period of time, you might consider replacing the cap with a new one. Notes: • Ensure that you use a cap with grooves a as shown in the following illustration. • Depending on the model, your keyboard might look different from the illustration in this topic.
Using the battery When you use your computer away from electrical outlets, you depend on battery power to keep your computer running. Different computer components consume power at different rates. The more you use the power-intensive components, the faster you consume battery power. Spend more time unplugged with ThinkPad batteries. Mobility has revolutionized business by enabling you to take your work wherever you go.
Maximizing the battery life To maximize the life of the battery, do the following: • Use the battery until the charge is depleted. • Recharge the battery completely before using it. You can see whether the battery is fully charged from the battery-status icon in the Windows notification area. • Always use power management features such as power-saving modes. Managing the battery power To achieve the best balance between performance and power saving, adjust your power plan settings.
When you are not using the wireless features, such as Bluetooth or wireless LAN, turn them off to help conserve power. Cabled Ethernet connections With an Ethernet cable, you can connect your computer to a local network through the Ethernet extension connector Gen 2 on your computer. To attach an Ethernet cable to your computer, you need a ThinkPad Ethernet Extension Adapter Gen 2 (hereafter referred as the Ethernet adapter).
Checking the wireless-LAN connection status You can check the wireless-LAN connection status through the wireless-network-connection-status icon in the Windows notification area. The more bars encompassed, the better the signal is. Using the wireless-WAN connection Wireless wide area network (WAN), which uses cellular networks for data transmission, enables you to establish wireless connections over remote public or private networks.
3. Select Send to ➙ Bluetooth device. 4. Select a Bluetooth device, and then follow the instructions on the screen. For more information, see the Windows help information system and the help information system of the Bluetooth device. Using the Airplane mode If the Airplane mode is enabled, all wireless features are disabled. To enable or disable the Airplane mode, do the following: 1. Open the Start menu. 2. Click Settings ➙ Network & Internet ➙ Airplane mode. 3.
Using the cameras Depending on models, your computer might be equipped with a conventional camera with ThinkShutter or an infrared camera. Using the conventional camera with ThinkShutter To use the conventional camera with ThinkShutter to take pictures and record videos, slide the ThinkShutter to the left to unveil the camera lens first. Then open the Start menu and click Camera from the program list.
5. Enter the PIN you have set earlier. The camera preview starts. 6. Follow the instructions on the screen to complete the setup. 7. Click Improve Recognition to improve the image so that Windows Hello can recognize you in different light conditions or when your appearance changes. To use the infrared camera to unlock your computer, do the following: 1. On the Windows lock screen, select the smiling face icon from the sign-in options. 2.
Attention: Smart cards with slits are not supported. Do not insert such a smart card into the smart card reader of your computer. Otherwise the reader might get damaged. Installing or removing a smart card Attention: Before installing or removing a smart card, ensure that you observe the following precautions: • Before you start, read “Important safety information” on page v.
Connecting an external display You can use either a wired display or a wireless display. The wired display can be connected to a video connector such as the HDMI connector and USB-C connector by a cable. The wireless display can be added through the Miracast® function. • Connecting a wired display Note: When you connect an external monitor, a video interface cable with a ferrite core is required. 1.
1. Right-click on the desktop and select Display settings. 2. Select the display that you want to configure. 3. Change display settings as you want. Note: If you set a higher resolution for the computer display than the external display, only part of the screen can be shown on the external display.
To enable the Airplane mode, do the following: 1. Open the Start menu, and then click Settings ➙ Network & Internet ➙ Airplane mode. 2. Slide the Airplane mode control to turn it on. Travel accessories If you are traveling to another country or region, you might want to consider an appropriate ac power adapter for the country or region to which you are traveling. To purchase travel accessories, go to: https://www.lenovo.com/accessories Chapter 2.
36 A285 User Guide
Chapter 3. Enhancing your computer This chapter provides instructions on how to use hardware devices to expand your computer capabilities. Finding ThinkPad options If you want to expand the capabilities of your computer, Lenovo has a number of hardware accessories and upgrades to meet your needs. Options include memory modules, storage devices, network cards, port replicators or docking stations, batteries, power adapters, keyboards, mice, and more. To shop at Lenovo, go to: https://www.lenovo.
1 System lock: Use the system lock in the following ways: • When the system lock is in the locked position your computer. , the latch is locked, and you cannot attach or detach • When the system lock is in the unlocked position your computer. , the latch is unlocked, and you can attach or detach • When the system lock is in the unlocked position lock slot. , you can remove the system lock from the system- Note: The ThinkPad Basic Docking Station does not ship with a system lock installed.
1 Audio connector: Connect headphones or a headset with a 3.5-mm (0.14-inch), 4-pole plug. 2 ac power connector: Connect the ac power adapter. DisplayPort® connector: Connect a high-performance monitor, a direct-drive monitor, or other devices that use a DisplayPort connector. 3 4 VGA connector: Connect the computer to a VGA-compatible video device, such as a VGA monitor. 5 USB 2.0 connector, 7 USB 3.
3. Ensure that you turn the system lock key to the unlocked position ( ). 4. Align the top-left corner of the computer with the guide post of the docking station. Attach your computer to the docking station as shown 1 until you hear a click. Slide the latch in the direction as shown 2 . 5. Check the docking status indicator. The docking status indicator turns on when the computer is successfully docked. Note: If the indicator is off, your computer is not attached to the docking station successfully.
6. Turn the system lock key to the locked position ( ). Attention: When the computer is attached to a docking station, do not pick up the assembly by taking hold of the computer only. Always hold the whole assembly. Otherwise the docking station might drop down. Detaching your computer from a docking station To detach your computer from a docking station, do the following: Note: The ThinkPad Basic Docking Station does not ship with a system lock installed.
2. Slide the latch in the direction as shown 1 to release the computer, and then grasp both sides of the computer to remove it 2 . Guidelines on connecting multiple external displays You can connect multiple external displays to a supported ThinkPad docking station. To ensure that the multiple displays work correctly, observe the following guidelines and connect the external displays to the appropriate connectors.
Chapter 4. Accessibility, ergonomic, and maintenance information This chapter provides information about accessibility, ergonomic, and cleaning and maintenance. Accessibility information Lenovo is committed to providing users who have hearing, vision, and mobility limitations with greater access to information and technology. This section provides information about the ways these users can get the most out of their computer experience.
If you prefer to type or enter data into your computer using a mouse, joystick, or other pointing device instead of a physical keyboard, you can use On-Screen Keyboard. On-Screen Keyboard displays a visual keyboard with all the standard keys. You can select keys using the mouse or another pointing device, or you can tap to select the keys if your computer supports multi-touch screen. • High Contrast High Contrast is a feature that heightens the color contrast of some text and images on your screen.
Customizable item size You can make the items on your screen easier to read by changing the item size. • To change the item size temporarily, use the Magnifier tool in Ease of Access Center. • To change the item size permanently, do the following: – Change the size of all the items on your screen. 1. Right-click an empty area of the desktop and then click Display settings ➙ Display. 2. Change the item size by following the instructions on the screen.
General posture: Make minor modifications in your working posture to deter the onset of discomfort caused by long periods of working in the same position. Frequent short breaks from your work also help to prevent minor discomfort associated with your working posture. Display: Position the display to maintain a comfortable viewing distance of 510 mm to 760 mm (20 inches to 30 inches). Avoid glare or reflections on the display from overhead lighting or outside sources of light.
• Do not turn your computer over when the ac power adapter is plugged in, otherwise, it could break the adapter plug. • Before moving your computer, be sure to remove any media, turn off attached devices, and disconnect cords and cables. • When picking up your open computer, hold it by the bottom. Do not pick up or hold your computer by the display. • Only an authorized ThinkPad repair technician should disassemble and repair your computer.
48 A285 User Guide
Chapter 5. Security This chapter provides information about how to protect your computer from unauthorized use. Using passwords This topic provides information about how to use the power-on password, supervisor password, and hard disk password. Passwords introduction You can help prevent your computer from unauthorized use by using passwords. After you set a password, a prompt is displayed on the screen each time you turn on the computer. Enter your password at the prompt.
If a user hard disk password has been set, but no master hard disk password has been, the user must enter the user hard disk password to access files and applications on the storage drive. • Master hard disk password The master hard disk password also requires a user hard disk password. The master hard disk password is set and used by a system administrator. It enables the administrator to access any storage drive in a system like a master key.
Hard disk security To protect the computer from unauthorized security attacks, refer to the following tips to enhance security: • Set a power-on password as well as a hard disk password. For security, a longer password is recommended. • The hard disk drive built into your computer can be protected by UEFI BIOS. To provide reliable security, use the security chip and a security program with the Trusted Platform Module (TPM) management feature. See “Setting the security chip” on page 51.
1. Restart the computer. When the logo screen is displayed, press F1 to start the ThinkPad Setup program. 2. Select Security ➙ Security Chip by using the directional keys. 3. Press Enter. The Security Chip submenu opens. 4. Move to an item you want to set by using the directional keys. When the item is highlighted, press Enter. 5. Set other items that you want to set. 6. Press F10. A Setup Confirmation window is displayed. Select Yes to save the configuration changes and exit.
Fingerprint reader indicator 1 Off: The fingerprint reader is not ready for tapping. 2 Solid white: The fingerprint reader is ready for tapping. 3 Amber, blinking: The fingerprint cannot be authenticated. Associating your fingerprints with your power-on password and hard disk password To associate your fingerprints with your power-on password and hard disk password, manually create a connection by doing the following: 1. Turn off and then turn on the computer. 2.
• The reader often fails to enroll or authenticate your fingerprint. If your finger has any of the following conditions, you might not be able to register or authenticate it: • Your finger is wrinkled. • Your finger is rough, dry, or injured. • Your finger is stained with dirt, mud, or oil. • The surface of your finger is different from the one when you enrolled your fingerprint. • Your finger is wet. • Your finger that you are currently using has not been enrolled before.
Using firewalls If your system is preinstalled with a firewall program, it protects against computer Internet security threats, unauthorized access, intrusions, and Internet attacks. It also protects your privacy. For more information about how to use the firewall program, see the help system that comes with the program. Protecting data against viruses Lenovo provides a full version of antivirus software on your computer with a free 30-day subscription.
56 A285 User Guide
Chapter 6. Advanced configuration This chapter provides information to help you further configure the computer: Installing the Windows 10 operating system In some situations, you might need to install a new operating system. This topic provides instructions on how to install a Windows 10 operating system. Before you start, print these instructions. Attention: • It is recommended that you update your operating system through official channels. Any unofficial update might cause security risks.
Country or region Code Country or region Code Italy IT United States US Japan JP Installing device drivers Device drivers are programs that contain instructions for the operating system about how to operate or “drive” a certain piece of hardware. Each hardware component on your computer has its own specific driver. If you add a component, the operating system must be instructed on how to operate that piece of hardware.
Using the ThinkPad Setup program The ThinkPad Setup program enables you to select the preferred settings for your computer through configuring the BIOS. Configuring ThinkPad Setup The ThinkPad Setup program menu lists various items about system configuration. Attention: The default configurations are already optimized for you. Improper change of the configurations might cause unexpected results. To configure ThinkPad Setup, do the following: 1. Restart the computer.
2. Turn on the computer. When the logo screen is displayed, press the F12 key. 3. Select the device that you want the computer to start from. Then press Enter. Note: The Boot menu will be displayed if the computer cannot start from any devices or the operating system cannot be found. Updating the UEFI BIOS The UEFI BIOS is the first program that the computer runs when the computer is turned on. The UEFI BIOS initializes the hardware components, and loads the operating system and other programs.
• CPU Type • CPU Speed • Installed Memory • UUID • MAC Address (DASH LAN) • Preinstalled operating system license • UEFI Secure Boot • OA2 Config menu Note: The BIOS menu items might change without notice. Depending on the model, the default value might vary. Network • Wake On LAN Values: Disabled, AC only, AC and Battery Description: The network administrator can turn on a computer from a management console by using the Wake on LAN feature.
Description: Select network stack priority for UEFI PXE boot. This menu is displayed only in UEFI Only boot mode or Both boot mode with UEFI first, when IPv6 and IPv4 stacks are both enabled. • MAC Address Pass Through Values: Disabled, Enabled Description: Enable or disable the MAC Address Pass Through function when a dock is attached. If you select Enabled, the dock Ethernet will use the same MAC address as the internal Ethernet LAN. If you select Disabled, the dock Ethernet uses its own MAC address.
Description: If you select Enabled, pressing the function keys directly inputs F1–F12. If you select Disabled, pressing the function keys directly initiates the special function printed as an icon on each key. To temporarily switch the above two functions, press Fn+Esc. Display • Boot Display Device Values: ThinkPad LCD, HDMI, USB Type-C A, USB Type-C B Description: Select the display device that you want to activate at boot time.
• Power On with AC Attach Values: Disabled, Enabled Description: Enable or disable a feature that turns on the computer when the ac power adapter is attached. • Disable Built-in Battery Values: Yes, No Description: Temporary disable the built-in battery for servicing the system. After selecting this item, the system will be automatically powered off, then ready to be serviced. Note: The built-in battery will be automatically enabled when the ac power adapter is reconnected.
Descriptions: Enable this option to prevent unauthorized users from changing any settings in ThinkPad Setup. To use this function, a supervisor password is required. • Password at Unattended Boot Values: Disabled, Enabled Descriptions: When this option is enabled, a password prompt is displayed when the computer is turned on or resumed from hibernation mode by an unattended event such as a Wake on LAN attempt. To prevent unauthorized access, set the user authentication on the operating system.
Descriptions: If the fingerprint is not authenticated, you can enter a password instead. If you have selected Normal, enter either the power-on password or the supervisor password; if you have selected High, supervisor password must be entered. • Reset Fingerprint Data Value: Enter Descriptions: Use this option to erase all fingerprint data stored in the fingerprint reader and reset the settings to the factory default state.
Memory Protection • Execution Prevention Values: Disabled, Enabled Descriptions: Some computer viruses and worms cause memory buffers to overflow. By enabling this option, you can protect your computer against attacks from such viruses and worms. If the option is enabled but you find that a program does not run properly, disable this option first and then reset the settings.
Descriptions: Enable the UEFI BIOS interface to activate the computrace module. Computrace is an optional monitoring service from Absolute Software. If you select Permanently Disabled, you cannot enable this setting again. Secure Boot • Secure Boot Values: Disabled, Enabled Descriptions: Enable this option to prevent unauthorized operating systems from loading when you turn on the computer. To enable this option, set the startup setting as UEFI Only and set CSM Support as No first.
Descriptions: Configure DASH (Desktop and Mobile Architecture for System Hardware) setting. DASH is a sub services-base standard that can support both in-band and out-of-band management. Startup menu Note: The BIOS menu items might change without notice. Depending on the model, the default value might vary. • Boot Descriptions: Define the startup sequence. • Network Boot Descriptions: Select the boot device when the system wakes from LAN.
• Exit Discarding Changes Descriptions: Discard the changes and restart the computer. The following changes will not be discarded and must be reset within ThinkPad Setup: – date and time – supervisor password – power-on password – hard disk password • Load Setup Defaults Descriptions: Restore to the factory default settings.
Preboot eXecution Environment The Preboot eXecution Environment (PXE) technology makes the computer more manageable by enabling the computer to start from a server. Your computer supports the personal computer functions that PXE requires. For example, with the appropriate LAN card, your computer can be started from the PXE server. Note: The Remote Initial Program Load (RIPL or RPL) function cannot be used with your computer.
4. Press F10 to save the settings and exit. You can press F9 to restore to the factory default settings.
Chapter 7. Troubleshooting computer problems This chapter provides information about what to do if you experience a problem with your computer. General tips for preventing problems This topic provides the following tips to help you prevent computing problems: • Empty your recycle bin on a regular basis. • Use a disk defragment tool regularly on your storage drive to improve data seek and read times. • To free up disk space, uninstall unused programs.
The troubleshooting information or the diagnostic programs might tell you that you need additional or updated device drivers or other software. You can get the latest technical information and download device drivers and updates from the Lenovo Support Web site at: https://support.lenovo.com For additional information, see the help system of the program. Troubleshooting If your computer has an error, it typically displays a message or an error code, or makes a beep when you turn it on.
Solution: Because most liquids conduct electricity, liquid spilled on the keyboard could create numerous short circuits and damage your computer. To solve the problem, do the following: 1. Ensure that no liquid creates a short circuit between you and the ac power adapter (if in use). 2. Carefully unplug the ac power adapter immediately. 3. Turn off the computer immediately. If the computer does not turn off, remove the removable battery.
• Message: 2100: Detection error on HDD0 (Main HDD) Solution: The hard disk drive is not working. Have the hard disk drive serviced. • Message: 2101: Detection error on SSD1 (M.2) Solution: The M.2 solid-state drive is not working. Have the M.2 solid-state drive serviced. • Message: 2102: Detection error on SSD2 (M.2) Solution: The M.2 solid-state drive is not working. Have the M.2 solid-state drive serviced. • Message: 2110: Read error on HDD0 (Main HDD) Solution: The hard disk drive is not working.
2. Download the proper diagnostic app and install it on your smartphone. 3. Run the diagnostic app and place the smartphone near the computer. 4. Press the Fn key on your computer to emit the beep again. The diagnostic app decodes the beep error and shows possible solutions on the smartphone. The following section describes some beep errors and the corresponding solutions. Note: Do not attempt to service a product yourself unless instructed to do so by the Customer Support Center or product documentation.
Error codes Solutions 0287: Discrete graphics error 1. Reinstall or replace the discrete graphics card (service provider only). 2. Replace the system board (service provider only). 0288: Computer display error 1. Reconnect the display cable on both the system board side and the computer display side (service provider only). 2. Replace the system board (service provider only). Memory module problems Print these instructions now and keep them with your computer for reference later.
If you configured the adapter for full duplex, ensure that the switch port also is configured for full duplex. Setting a wrong duplex mode can degrade performance, cause data loss, or result in lost connections. – You have installed all networking software that is necessary for your network environment. Check with your LAN administrator for the necessary networking software. • Problem: The adapter stops working for no apparent reason. Solution: The network driver files might be corrupt or missing.
Solution: Do the following: 1. Exit the program that uses the sound device (for example, Windows Media Player). 2. Go to Control Panel, and ensure that you view Control Panel by Category. 3. Click Hardware and Sound ➙ Sound ➙ Playback. 4. If you are using a Headset profile, select Bluetooth Hands-free Audio and click Set Default. If you are using an AV profile, select Stereo Audio and click Set Default. 5. Click OK to close the Sound window.
Note: If the Fn and function keys tab is not displayed, connect your computer to the Internet. Then download and install the ThinkPad Hotkey Features program from the Lenovo Support Web site. For more information, see “Installing device drivers” on page 58. 3. In the How to use Fn key combinations section, select your preferred option. 4. If you select Fn sticky method, press Fn to reset the Fn sticky status. 5.
Solution: Do the following: 1. Press the display-mode switching key to bring up the image. 2. If you are using the ac power adapter, or using the battery and the battery gauge shows that the battery is not depleted, press the brightness-up key to make the screen brighter. 3. If your computer is in sleep mode, press Fn to resume the computer from sleep mode. 4. If the problem persists, follow the solution for the following problem. • Problem: The screen is unreadable or distorted.
External monitor problems • Problem: The external monitor is blank. Solution: To bring up the image, press the display-mode switching key want. If the problem persists, do the following: and select the monitor you 1. Connect the external monitor to another computer to ensure that it works. 2. Reconnect the external monitor to your computer. 3. See the manual shipped with the external monitor to check the resolutions and refresh rates that are supported.
• Problem: The screen position on the external monitor is incorrect when that monitor is set for a high resolution. Solution: Sometimes, when you use a high resolution such as 1600 x 1200 pixels, the image is shifted to the left or right on the screen. To correct this, first ensure that your external monitor supports the display mode (the resolution and the refresh rate) that you have set. If it does not, set a display mode that the monitor supports.
Solution: You still can hear some sound even though you have set the Master volume control at minimum. To turn off the sound completely, go to the Master volume control and select Mute Speaker/HP. • Problem: When I connect headphones to my computer while playing sound, a speaker does not produce sound. Solution: When the headphones are attached, the streaming is automatically redirected to it. If you want to listen to sound from the speakers again, ensure that you set those speakers as the default device.
• Problem: The operating time for a fully charged battery is short. Solution: Discharge and recharge the battery. If your battery operating time is still short, use a new battery. • Problem: The computer does not operate with a fully charged battery. Solution: The surge protector in the battery might be active. Turn off the computer for one minute to reset the protector; then turn on the computer again. • Problem: The battery cannot get charged. Solution: You cannot charge the battery when it is too hot.
Power button problem Problem: The system does not respond, and I cannot turn off the computer. Solution: Turn off the computer by pressing and holding the power button for four seconds or more. If the system still does not respond, remove the ac power adapter and reset the system by inserting one end of a needle or a straightened paper clip into the emergency-reset hole. To locate the emergency-reset hole, see “Bottom view” on page 5.
– If the system status indicator is off, your computer has no power or is in hibernation mode. Connect the ac power adapter to the computer; then press the power button to resume operation. If the system still does not resume from sleep mode, your system might stop responding and you might not be able to turn off the computer. In this case, you must reset the computer. If you have not saved your data, it might be lost. To reset the computer, press and hold the power button for four seconds or more.
ensure that you view Control Panel by Category, and click Hardware and Sound ➙ Device Manager. If you are prompted for an administrator password or confirmation, type the password or provide confirmation. Refer to “Diagnosing problems” on page 73 and run a diagnostic test of the USB connector. Docking station problem Problem: The computer does not start when you try to turn it on, and does not respond when you try to resume operation.
90 A285 User Guide
Chapter 8. Recovery information This chapter provides information about the Windows recovery solutions on the Windows 10 operating system. Resetting your computer If your computer does not perform well, you might consider resetting your computer. In the resetting process, you can choose to keep your files or remove them, and then reinstall the Windows operating system. To reset your computer, do the following: Note: The items in the graphical user interface (GUI) might change without notice. 1.
Creating and using a recovery USB drive You can create a recovery USB drive as a backup for the Windows recovery programs. With the recovery USB drive, you can troubleshoot and fix the problems even if the preinstalled Windows recovery programs are damaged. It is recommended that you create a recovery USB drive as early as possible. If you did not create a recovery USB drive as a precautionary measure, you can contact Lenovo Customer Support Center and purchase one from Lenovo.
Chapter 9. Replacing devices This chapter provides instructions on how to install or replace hardware for your computer. Customer Replaceable Units Customer Replaceable Units (CRUs) are parts that can be upgraded or replaced by the customer. ThinkPad computers contain the following types of CRUs: • Self-service CRUs: Refer to parts that can be installed or replaced easily by customer themselves or by trained service technicians at an additional cost.
• Limit your movement. Movement can cause static electricity to build up around you. • Always handle components carefully. Handle adapters, memory modules, and other circuit boards by the edges. Never touch exposed circuitry. • Prevent others from touching the components.
1. Insert a straightened paper clip into the hole in the tray 1 . The tray ejects. Then, slide the tray out of the computer. If a nano-SIM card is installed, gently take the nano-SIM card out of the tray 2 . 2. Install a new nano-SIM card into the tray with the metal contacts facing downward 1 . Insert the tray into the nano-SIM-card and microSD card slot until you hear a click 2 . Ensure that the new nano-SIM card is installed in correct orientation.
1. Insert a straightened paper clip into the hole in the tray 1 . The tray ejects. Then, slide the tray out of the tablet. If a microSD card is installed, gently take the microSD card out of the tray 2 . 2. Install a new microSD card into the tray with the metal contacts facing downward 3 . Insert the tray into the nano-SIM-card and microSD card slot until you hear a click 4 . Ensure that the new microSD card is installed in correct orientation.
4. Loosen the screws 1 , and then remove the base cover assembly 2 . 5. Install a new base cover assembly in place 1 . Press the left and right sides of the base cover assembly as shown 2 , and then tighten the screws in ascending alphabetical order (a to e) as illustrated 3 . 6. Turn the computer over. Connect the ac power adapter and all cables to the computer. Chapter 9.
Replacing the M.2 solid-state drive Before you start, read “Important safety information” on page v and print the following instructions. Attention: The M.2 solid-state drive is sensitive. Inappropriate handling might cause damage and permanent loss of data. When handling the M.2 solid-state drive, observe the following guidelines: • Replace the M.2 solid-state drive only for upgrade or repair. The M.2 solid-state drive is not designed for frequent changes or replacement. • Before replacing the M.
6. Install a new M.2 solid-state drive by doing the following: a. Align the contact edge of the new M.2 solid-state drive with the key in the slot. Then carefully insert the drive into the slot at an angle of about 20 degrees 1 . b. Pivot the M.2 solid-state drive downward 2 . c. Install the screw to secure the M.2 solid-state drive 3 . 7. Reinstall the base cover assembly. 8. Turn the computer over. Connect the ac power adapter and all cables to the computer.
5. Remove the wireless-WAN card by doing the following: a. Hold the cable connector with your fingers and gently disconnect each cable from the wireless-WAN card 1 . Then remove the screw that secures the wireless-WAN card 2 . The card is released from the secured position and pivots upward. b. Carefully remove the wireless-WAN card out of the slot 3 .
6. Install a new wireless-WAN card by doing the following: a. Align the contact edge of the new wireless-WAN card with the key in the slot. Then carefully insert the card into the slot at an angle of about 20 degrees 1 . Pivot the card downward 2 . b. Install the screw to secure the wireless-WAN card in place 3 . Connect the antenna cables to the card 4 . Ensure that you connect the orange cable to the main connector on the card, and the blue cable to the auxiliary connector on the card. 7.
3. Take the tool out of the new keyboard package. Insert the tabs a and b into the slot between the TrackPoint buttons and the trackpad 1 . Slightly pivot the tool downward 2 to release the left and right TrackPoint buttons. Then remove the two TrackPoint buttons 3 . 4. Loosen the screws that secure the keyboard.
5. Insert the tabs c and d into the two dents near the two screw heads as shown. 6. Pivot the tool in the direction as shown to release the keyboard 1 . Push the keyboard in the direction as shown by arrow 2 to release the latches from the keyboard bezel. 7. Pivot the keyboard slightly upward as shown by arrow 1 . Then turn the keyboard over as shown by arrow 2 . Chapter 9.
8. Put the keyboard on the palm rest as shown and detach the connectors. Then remove the keyboard. Installing the keyboard 1. Attach the connectors as shown.
2. Insert the keyboard into the keyboard bezel as shown. Ensure that the top edge of the keyboard (the edge that is close to the computer display) is under the frame of the keyboard bezel. 3. Slide the keyboard in the direction as shown by the arrows. Ensure that the latches are secured under the keyboard frame. Chapter 9.
4. Tighten the screws to secure the keyboard. 5. Take the new TrackPoint buttons out of the new keyboard package. Install the new TrackPoint buttons as shown. 6. Connect the ac power adapter and all cables to the computer.
Chapter 10. Getting support This chapter provides information about getting help and support from Lenovo. Before you contact Lenovo Often, you can solve your computer problems by referring to the information in the explanations of error codes, running diagnostic programs, or by consulting the Lenovo Support Web site. Registering your computer Register your computer with Lenovo. For more information, see “Registering your computer” on page 15.
Microsoft Service Packs are the latest software source for Windows product updates. They are available through Web download (connection charges might apply) or through discs. For more specific information and links, go to https://www.microsoft.com. Lenovo offers technical assistance with installation of, or questions related to, Service Packs for your Lenovo-preinstalled Microsoft Windows product. For more information, contact the Customer Support Center.
Telephone numbers For a list of the Lenovo Support phone numbers for your country or region, go to https:// pcsupport.lenovo.com/supportphonelist or refer to the Safety and Warranty Guide that comes with your computer. Note: Phone numbers are subject to change without notice. The latest phone numbers are available at https://pcsupport.lenovo.com/supportphonelist. If the number for your country or region is not provided, contact your Lenovo reseller or Lenovo marketing representative.
110 A285 User Guide
Appendix A. Supplemental information about the Ubuntu operating system In limited countries or regions, Lenovo offers customers an option to order computers with the preinstalled Ubuntu® operating system. If the Ubuntu operating system is available on your computer, read the following information before you use the computer. Ignore any information related to Windows-based programs, utilities, and Lenovo preinstalled applications in this documentation.
112 A285 User Guide
Appendix B. Regulatory information This chapter provides regulatory and compliance information about Lenovo products. Certification-related information Product name: ThinkPad A285 Compliance ID: TP00093B Machine types: 20MW and 20MX The latest compliance information is available at: https://www.lenovo.com/compliance Wireless-related information This topic provides wireless-related information about Lenovo products.
If you are uncertain of the policy that applies to the use of wireless devices in a specific area (such as an airport or hospital), you are encouraged to ask for authorization to use a wireless device prior to turning on the computer. Locating the UltraConnect wireless antennas ThinkPad notebook computers feature an integrated UltraConnect™ wireless antenna system built into the display for optimal reception, enabling wireless communication wherever you are.
If your computer is shipped without the Regulatory Notice, you can find it on the Web site at: https://support.lenovo.com TCO certification To obtain the TCO certification information for your computer, go to: https://www.lenovo.com/tco-cert Export classification notice This product is subject to the United States Export Administration Regulations (EAR) and has an Export Classification Control Number (ECCN) of 5A992.c.
Industry Canada Class B emission compliance statement CAN ICES-3(B)/NMB-3(B) European Union conformity EU Contact: Lenovo, Einsteinova 21, 851 01 Bratislava, Slovakia EMC Directive Statement: This product is in conformity with the protection requirements of EU Council EMC Directive 2014/30/EU on the approximation of the laws of the Member States relating to electromagnetic compatibility.
Dieses Gerät ist berechtigt, in Übereinstimmung mit dem Deutschen EMVG das EG-Konformitätszeichen CE - zu führen. Verantwortlich für die Konformitätserklärung nach Paragraf 5 des EMVG ist die Lenovo (Deutschland) GmbH, Meitnerstr. 9, D-70563 Stuttgart. Japan compliance statement for products which connect to the power mains with rated current less than or equal to 20 A per phase Japan notice for ac power cord The ac power cord shipped with your product can be used only for this specific product.
118 A285 User Guide
Appendix C. WEEE and recycling statements of countries and regions This chapter provides environmental information about Lenovo products. General recycling information Lenovo encourages owners of information technology (IT) equipment to responsibly recycle their equipment when it is no longer needed. Lenovo offers a variety of programs and services to assist equipment owners in recycling their IT products. For information about recycling Lenovo products, go to: https://www.lenovo.
WEEE information for Hungary Lenovo, as a producer, bears the cost incurred in connection with the fulfillment of Lenovo’s obligations under Hungary Law No. 197/2014 (VIII.1.) subsections (1)-(5) of section 12.
Recycling information for Brazil Declarações de Reciclagem no Brasil Descarte de um Produto Lenovo Fora de Uso Equipamentos elétricos e eletrônicos não devem ser descartados em lixo comum, mas enviados à pontos de coleta, autorizados pelo fabricante do produto para que sejam encaminhados e processados por empresas especializadas no manuseio de resíduos industriais, devidamente certificadas pelos orgãos ambientais, de acordo com a legislação local.
contact Lenovo for service. If you need to dispose of a lithium battery, insulate it with vinyl tape, contact your place of purchase or a waste-disposal operator, and follow their instructions. Disposing of battery packs from Lenovo products Your Lenovo device might contain a lithium-ion battery pack or a nickel metal hydride battery pack. You can find details on the battery pack in the product documentation.
Appendix D. Restriction of Hazardous Substances (RoHS) Directive of countries and regions The latest environmental information about Lenovo products is available at: https://www.lenovo.com/ecodeclaration European Union RoHS This Lenovo product, with included parts (cables, cords, and so on) meets the requirements of Directive 2011/65/EU on the restriction of the use of certain hazardous substances in electrical and electronic equipment ("RoHS recast" or "RoHS 2").
124 A285 User Guide
Taiwan RoHS Appendix D.
126 A285 User Guide
Appendix E. ENERGY STAR model information ENERGY STAR® is a joint program of the U.S. Environmental Protection Agency and the U.S. Department of Energy aimed at saving money and protecting the environment through energy efficient products and practices. Lenovo is proud to offer our customers products with the ENERGY STAR qualified designation. You might find an ENERGY STAR mark affixed on the computer or displayed on the power settings interface.
3. Right-click your network adapter device, and click Properties. 4. Click the Power Management tab. 5. Clear the Allow this device to wake the computer check box. 6. Click OK.
Appendix F. Notices Lenovo may not offer the products, services, or features discussed in this document in all countries. Consult your local Lenovo representative for information on the products and services currently available in your area. Any reference to a Lenovo product, program, or service is not intended to state or imply that only that Lenovo product, program, or service may be used.
This document is copyrighted by Lenovo and is not covered by any open source license, including any Linux agreement(s) which may accompany software included with this product. Lenovo may update this document at any time without notice. To obtain the most up-to-date documentation for your computer, go to: https://support.lenovo.
Appendix G. Trademarks LENOVO, LENOVO logo, THINKPAD, THINKPAD logo, TRACKPOINT, and ULTRACONNECT are trademarks of Lenovo. AMD, AMD-V, AMD Virtualization, and AMD PowerNow! are trademarks or registered trademarks of Advanced Micro Devices, Inc. Microsoft, Windows, Direct3D, BitLocker, and Cortana are trademarks of the Microsoft group of companies. Ubuntu is a registered trademark of Canonical Ltd.
132 A285 User Guide