
User Guide

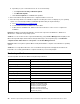
Table Of Contents
- Chapter 1. About the user guide
- Chapter 2. ThinkPad Compact USB Keyboard with TrackPoint
- Chapter 3. ThinkPad Compact Bluetooth Keyboard with TrackPoint
- Appendix A. Compliance information
- Appendix B. Accessibility information
- Appendix C. Trademarks

3. From the desktop, move the pointer to bottom-left corner of the screen, and then search Control Panel
in the search box.
4. Click the Add a device option under the Hardware and Sound menu when viewing the Control Panel
by category.
5. Select the Keyboard (ThinkPad Compact Bluetooth Keyboard with TrackPoint) icon from the list and
click Next.
6. Type the passcode shown on the computer screen into the Bluetooth keyboard, and then press Enter.
The pairing process begins. After the status indicator turns off, the Bluetooth keyboard has been
successfully paired with the computer and a connection is established between the Bluetooth keyboard
and the computer.
7. Click Close when a window is displayed to confirm that the Bluetooth keyboard is connected with the
operating system.
Note: If a window is displayed indicating that the connection fails, right-click the ThinkPad Compact
Bluetooth Keyboard with TrackPoint icon and select Disable to disable the Bluetooth keyboard. Then, pair
the Bluetooth keyboard with the computer again.
After the operating system identifies the Bluetooth keyboard, the Bluetooth keyboard will be ready for use.
For additional information on this product, go to:
http://www.lenovo.com/support/keyboards
Installing the device driver on Windows operating systems
It is recommended that you install the ThinkPad Keyboard Suite to customize advanced settings before you
use the Bluetooth keyboard.
If you are using the Windows 7, Windows 8, Windows 8.1, or Windows 10 operating system, and your
computer is connected to the Internet, when you connect the keyboard to your computer for the first time, a
message will be displayed asking if you want to install the ThinkPad Keyboard Suite. Click Download Now
and the ThinkPad Keyboard Suite will be automatically installed. If the message is not displayed, manually
install the ThinkPad Keyboard Suite by doing the following:
1. Go to
http://support.lenovo.com/tpkeyboard.
2. Locate and download the installation file of the ThinkPad Keyboard Suite.
3. Double-click the installation file, and then follow the instructions on the screen to complete the
installation.
4. Restart the computer, and the ThinkPad Keyboard Suite is installed on your computer.
Uninstalling the device driver from Windows operating systems
To uninstall the ThinkPad Keyboard Suite from the Windows XP, Windows Vista, Windows 7, Windows 8,
Windows 8.1, or Windows 10 operating system, do the following:
For the Windows XP operating system:
1. Click Start ➙ Control Panel or Start ➙ Settings ➙ Control Panel.
2. Depending on your Control Panel mode, click or double-click Add or Remove Programs .
3. Click ThinkPad Compact Keyboard with TrackPoint driver, and then click Remove.
4. Follow the instructions on the screen.
For the Windows Vista or Windows 7 operating system:
1. Click Start ➙ Control Panel or Start ➙ Settings ➙ Control Panel.
Chapter 3. ThinkPad Compact Bluetooth Keyboard with TrackPoint 17