ThinkPad® T61 Service and Troubleshooting Guide
ThinkPad® T61 Service and Troubleshooting Guide
Note Before using this information and the product it supports, be sure to read the following: v Safety and Warranty Guide included in the package with this publication. v Wireless related information in online Access Help and Appendix D, “Notices,” on page 63. v Regulatory Notice included in the package with this publication. Second Edition (April 2007) © Copyright Lenovo 2007. All rights reserved. U.S. GOVERNMENT USERS – RESTRICTED RIGHTS: Our products and/or services are provided with RESTRICTED RIGHTS.
Contents Read this first . . . . . . . . . . . v Chapter 1. Finding information . . . . . 1 This guide and other publications . . . . . 1 Finding information with the ThinkVantage button . . . . . . . . . . . . . . 2 Chapter 2. Taking care of your ThinkPad computer . . . . . . . . . . . . Important tips. . . . . . . . . . . Be careful about where and how you work Be gentle with your computer . . . . Carry your computer properly . . . .
iv ThinkPad® T61 Service and Troubleshooting Guide
Read this first When your computer is turned on or the battery is charging, the base, the palm rest, and some other parts may become hot. Avoid keeping your hands, your lap, or any other part of your body in contact with a hot section of the computer for any extended length of time. When you use the keyboard, avoid keeping your palms on the palm rest for a prolonged period of time. Your computer generates some heat during normal operation.
Read this first Route the cables of an ac adapter, a mouse, a keyboard, a printer, or any other electronic device, or communication lines, so that they cannot be walked on, tripped over, pinched by your computer or other objects, or in any way subjected to treatment that could disturb the operation of your computer. Applying strong force to the cables may damage or break them.
Read this first Use a quality carrying case that provides adequate cushion and protection. Do not pack your computer in a tightly packed suitcase or bag. Place liquids away from your computer to avoid spills, and keep your computer away from water to avoid the danger of electrical shock.
Read this first viii ThinkPad® T61 Service and Troubleshooting Guide
Chapter 1. Finding information This guide and other publications Setup Instructions helps you to unpack your ThinkPad computer and get started. It includes a few tips for first-time users, and introduces software preinstalled by Lenovo. This Service and Troubleshooting Guide provides information about caring for your ThinkPad computer, basic troubleshooting information, some recovery procedures, help and service information, and warranty information for your computer.
Finding information Finding information with the ThinkVantage button The blue ThinkVantage button can help you in many situations when your computer is working normally, and even when it is not. Press the ThinkVantage button to open the Productivity Center and get access to informative illustrations and easy-to-follow instructions for getting started and staying productive.
Chapter 2. Taking care of your ThinkPad computer Though your computer is designed to function reliably in normal work environments, you need to use common sense in handling it. By following these important tips, you will get the most use and enjoyment out of your computer. Important tips Be careful about where and how you work v When your computer is turned on or the battery is charging, the base, the palm rest, and some other parts may become hot.
Taking care of your ThinkPad computer v Some appliances, such as certain portable desktop fans or air purifiers, can produce negative ions. If a computer is close to such an appliance, and is exposed for an extended time to air containing negative ions, it may become electrostatically charged. Such a charge may be discharged through your hands when you touch the keyboard or other parts of the computer, or through connectors on I/O devices connected to it.
Taking care of your ThinkPad computer Handle storage media and drives properly v If your computer comes with a diskette drive, avoid inserting diskettes at an angle and attaching multiple or loose diskette labels, as these can lodge in the drive. v If your computer comes with an optical drive, do not touch the surface of a disc or the lens on the tray. v Wait until you hear the CD or DVD click into the center pivot of an optical drive before closing the tray.
Taking care of your ThinkPad computer v Store your external and removable hard disk, diskette or optical drives in the appropriate containers or packaging when they are not being used. v Before you install any of the following devices, touch a metal table or a grounded metal object. This action reduces any static electricity from your body. The static electricity could damage the device.
Taking care of your ThinkPad computer Note: Avoid spraying cleaner directly on the display or the keyboard. Cleaning your computer display 1. Gently wipe the display with a dry, soft lint-free cloth. If you see a scratch-like mark on your display, it might be a stain transferred from the keyboard or the TrackPoint® pointing stick when the cover was pressed from the outside. 2. Wipe or dust the stain gently with a soft, dry cloth. 3.
Taking care of your ThinkPad computer 8 ThinkPad® T61 Service and Troubleshooting Guide
Chapter 3. Solving computer problems Frequently asked questions . Diagnosing problems . . . HDD diagnostic program Diagnosing problems using from the service partition Troubleshooting . . . . . Error messages . . . . Errors without messages . Password problems . . Keyboard problems . . . . . . . . . . . . . . PC-Doctor . . . . . . . . . . . . . . . . . . . . . . . . . . . . 10 . 11 . 11 . . . . . . . . . . . . 12 13 13 18 19 19 Pointing device problems . . . . .
Solving computer problems Frequently asked questions This section lists frequently asked questions and tells where you can find detailed answers. For details about each publication included in the package with the ThinkPad computer, see “This guide and other publications” on page 1. What safety precautions should I follow when using my ThinkPad computer? See the separate Safety and Warranty Guide for detailed information about safety.
Solving computer problems How can I contact the Customer Support Center? See Chapter 6, “Getting help and service,” on page 45 of this Guide. For the phone numbers of the Customer Support Center nearest to you, see “Worldwide telephone list” on page 47. Where can I find warranty information? See the separate Safety and Warranty Guide for detailed warranty information.
Solving computer problems 3. While the message, “To interrupt normal startup, press the blue ThinkVantage button,” is displayed at the lower left of the screen, press F1 to enter BIOS Setup Utility. 4. Using cursor keys, select HDD diagnostic program and press Enter. The menu for the HDD diagnostic program opens. 5. Using cursor keys, select Main hard disk drive or Ultrabay hard disk drive. Press Enter to start the diagnostic program.
Solving computer problems 3. While the message, “To interrupt normal startup, press the blue ThinkVantage button,” is displayed at the lower left of the screen, press the blue ThinkVantage button to enter the Rescue and Recovery workspace. 4. Select Diagnose hardware. The computer restarts and PC-Doctor starts up. For more information about PC-Doctor, press F1 to go to the Help or online manual for the program. Troubleshooting If you do not find your problem here, see Access Help.
Solving computer problems Message Solution 01C8: More than one Remove one of the Modem Daughter Cards. Otherwise, press modem devices are Esc to ignore the warning message. If this does not solve the found. Remove one problem, have the computer serviced. of them. Press to continue. 01C9: More than one Ethernet devices are found. Remove one of them. Press to continue.
Solving computer problems Message Solution 0250: System battery The backup battery, which is used to preserve the configuration error information, such as the date and time, while the computer is turned off, is depleted. Replace the battery and run BIOS Setup Utility to verify the configuration. If you still have a problem, have the computer serviced. 0251: System CMOS checksum bad The system CMOS might have been corrupted by an application program. The computer uses the default settings.
Solving computer problems Message Solution 2102: Initialization error on HDD1 (Ultrabay hard disk drive) The hard disk is not working. Have the hard disk serviced. 2110: Read error on HDD0 (Main hard disk drive) The hard disk is not working. Have the hard disk serviced. 2112: Read error on HDD1 (Ultrabay hard disk drive) The hard disk is not working. Have the hard disk serviced. The power-on password prompt A power-on password or a supervisor password is set.
Solving computer problems Message Solution CardBus Configuration Error - Device Disabled Go to the BIOS Setup Utility. Press F9 and then Enter to load the default setting. Cannot boot from any device. Check the status of the device which you want to boot from. Press F10 and then Enter to restart the system. Device not found Check the device you want to boot from. Device error Check the device you want to boot from.
Solving computer problems Errors without messages Problem: When I turn on the machine, nothing appears on the screen and the machine does not beep while starting up. Note: If you are not sure whether you heard any beeps, turn off the computer by pressing and holding the power button for more than 4 seconds; then turn it on and listen again. If you are using an external monitor, see “Computer screen problems” on page 21.
Solving computer problems Password problems Problem: I forgot my password. Solution: If you have registered your computer for Password Reset Service, and you forgot your power-on or hard disk password, you can reset it by pressing the ThinkVantage button at the password prompt. v If you cannot reset your power-on password, you must take your computer to a Lenovo authorized servicer or a marketing representative to have the password canceled.
Solving computer problems Problem: A number appears when you type a letter. Solution: The numeric lock function is on. To disable it, press and hold Shift or Fn and then press NmLk (ScrLk). Problem: All or some of the keys on the external numeric keypad do not work. Solution: Make sure that the external numeric keypad is correctly connected to the computer. Pointing device problems Problem: The scrolling or magnifying glass function does not work.
Solving computer problems Problem: The computer does not return from sleep (standby) mode, or the sleep (standby) indicator stays on and the computer does not work. Solution: If the system does not return from sleep (standby) mode, it may have entered sleep (standby) or hibernation mode automatically because the battery is depleted. Check the sleep (standby) indicator. v If the sleep (standby) indicator is on, your computer is in sleep (standby) mode.
Solving computer problems Problem: Missing, discolored, or bright dots appear on the screen every time you turn on your computer. Solution: This is an intrinsic characteristic of the TFT technology. Your computer’s display contains multiple thin-film transistors (TFTs). A small number of missing, discolored, or bright dots on the screen might exist all the time. Problem: The screen is blank. Solution: v Press Fn+F7 to bring up the image.
Solving computer problems Problem: The screen is unreadable or distorted. Solution: Make sure that: v The display device driver is installed correctly. v The screen resolution and color quality are correctly set. v The monitor type is correct. To check these settings, do as follows: For Windows Vista™: 1. Right-click on the desktop, click Personalize, then click Display Settings. 2. Check whether the screen resolution and color quality are correctly set. 3. Click Advanced Settings. 4.
Solving computer problems Solution (continued): For Windows XP and Windows 2000: 1. Right-click on the desktop, click Properties to open the Display Properties window, then click the Settings tab. 2. Check whether the screen resolution and color quality are correctly set. 3. Click Advanced. 4. Click the Adapter tab. 5. Make sure the correct device driver name is shown in the adapter information window. Note: The device driver name depends on the video chip that has been installed on your computer. 6.
Solving computer problems Problem: Your computer shuts down before the battery status indicator shows empty, -orYour computer operates after the battery status indicator shows empty. Solution: Discharge and recharge the battery. Problem: The operating time for a fully charged battery is short. Solution: For details, see the Battery and power category in Troubleshooting under the Problem solving section in Access Help. Problem: The computer does not operate with a fully charged battery.
Solving computer problems Problem: I cannot hot-swap the hard disk drive in the Ultrabay. Solution: You can hot-swap a hard disk drive in the Ultrabay only if no hard disk password has been set. Make sure that the password for the hard disk drive in the Ultrabay is disabled. Problem: I cannot change or remove a hard disk password in the BIOS Setup Utility.
Solving computer problems Other problems Problem: Your computer does not respond. Solution: v To turn off your computer, press and hold the power switch for 4 seconds or more. If the computer still does not respond, remove the ac adapter and the battery. v Your computer might lock when it enters sleep (standby) mode during a communication operation. Disable the sleep (standby) timer when you are working on the network. Problem: The computer does not start from a device you want.
Starting BIOS Setup Utility 4. Click Access BIOS. The System Restart Required window is displayed. 5. Click Yes. The computer restarts, and the BIOS Setup Utility menu appears. If you have set a supervisor password, the BIOS Setup Utility menu appears after you enter the password. You can start the utility by pressing Enter instead of entering the supervisor password; however, you cannot change the parameters that are protected by the supervisor password. For more information, see the on-board help. 6.
Chapter 4. Recovery options Introducing Rescue and Recovery If Windows is not running properly, use the Rescue and Recovery workspace to help solve or identify your problem. Do the following: 1. Turn off your PC, then turn it on again. 2. Watch the screen carefully while your PC starts. When “To interrupt normal startup, press the blue ThinkVantage button” message is displayed at the lower left of the screen, press the blue ThinkVantage button. The Rescue and Recovery workspace opens. 3.
Recovery options Notes: 1. If you are using Windows XP or Windows 2000, and the optical drive is not attached to your ThinkPad computer during recovery, DVD software and CD-recording software will not be installed. To ensure that they will be installed correctly, install the optical drive in the Ultrabay before performing a recovery operation. 2. The recovery process might take up to 2 hours.
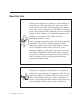
Chapter 5. Upgrading and replacing devices Replacing the battery Important Read Safety and Warranty Guide before replacing the battery. 1. Turn off the computer, or enter hibernation mode. Then disconnect the ac adapter and all cables from the computer. Note: If you are using a PC Card, the computer might not be able to enter hibernation mode. If this happens, turn off the computer. 2. Close the computer display, and turn the computer over. 3. Unlock the battery latch by sliding it to the left 1 .
Replacing the battery Note: If your computer is a ThinkPad T61 14.1-inch widescreen model, install a fully charged batter as follows: a. Align the battery as shown in the drawing 1 , and gently press it downward. 1 b. Slide the battery into the computer 2 .
Replacing the battery 5. Slide the battery latch to the locked position. 6. Turn the computer over again. Connect the ac adapter and the cables to the computer. Note: Your battery may appear slightly different from those shown in figures above depending on the model. Upgrading the hard disk drive Important Read Safety and Warranty Guide before replacing the hard disk drive. You can increase the storage capacity of your computer by replacing the hard disk drive with one of greater capacity.
Upgrading the hard disk drive Attention Handling a hard disk drive v Do not drop the drive or subject it to physical shocks. Put the drive on a material, such as soft cloth, that absorbs the physical shock. v Do not apply pressure to the cover of the drive. v Do not touch the connector. The drive is very sensitive. Incorrect handling can cause damage and permanent loss of data on the hard disk.
Upgrading the hard disk drive 5. Remove the cover . For 14.1-inch widescreen models: For 14.1-inch screen and 15.4-inch widescreen models: 6. Remove the hard disk by pulling out the tab. 7. Detach the side rubber rails from the hard disk drive. Chapter 5.
Upgrading the hard disk drive 8. Attach the side rubber rails to a new hard disk drive. 9. Insert the hard disk drive into the hard disk drive bay; then press it firmly in to place. 10. Reinstall the cover of the hard disk drive slot. For 14.1-inch widescreen models: 36 ThinkPad® T61 Service and Troubleshooting Guide For 14.1-inch screen and 15.
Upgrading the hard disk drive 11. Reinstall the screw. For 14.1-inch widescreen models: For 14.1-inch screen and 15.4-inch widescreen models: 12. Reinstall the battery. 13. Turn the computer over again. Connect the ac adapter and the cables to the computer. Replacing memory Important Read Safety and Warranty Guide before replacing memory. Increasing memory capacity is an effective way to make programs run faster.
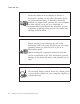
Replacing memory 3. Close the computer display, and turn the computer over. 4. Remove the battery. 5. Remove the palm rest. a. Remove the four screws that secure the palm rest. b. Turn the computer over and open the display. Open up the palm rest in the direction shown by arrow 1 by picking up the projection tabs on the sides, and then release the palm rest from the computer 2 .
Replacing memory c. Detach the connector of the palm rest cable by pulling the tab with your fingers. Now the palm rest has been removed. 6. If two SO-DIMMs are already installed in the memory slot, remove one of them to make room for the new one by pressing out on the latches on both edges of the socket at the same time. Be sure to save the old SO-DIMM for future use. Chapter 5.
Replacing memory 7. With the notched end of the SO-DIMM toward the contact edge side of the socket, firmly insert the SO-DIMM into the socket at an angle of about 20 degrees 1 ; then pivot it downward until it snaps into place 2 . 2 1 2 1 8. Reinstall the palm rest. a. Attach the connector of the palm rest cable.
Replacing memory b. Press the left and right top edges of the palm rest to fit it into place. For 14.1-inch screen and 14.1-inch widescreen models: For 15.4-inch widescreen models: Chapter 5.
Replacing memory c. Push the front side of the palm rest until it clicks into place. d. Close the computer display, and turn the computer over. Reinstall the four screws for the palm rest. 9. Reinstall the battery. 10. Turn the computer over, and reconnect the ac adapter and the cables to the computer. To make sure that the SO-DIMM is installed correctly, do as follows: 1. Turn the computer on. 2.
Replacing memory 4. Click Yes. The computer restarts, and the BIOS Setup Utility screen opens. The “Installed memory” item shows the total amount of memory installed in your computer. Chapter 5.
Replacing memory 44 ThinkPad® T61 Service and Troubleshooting Guide
Chapter 6. Getting help and service Getting help and service If you need help, service, technical assistance, or just want more information about ThinkPad computers, you will find a wide variety of sources available from Lenovo to assist you. This section contains information about where to go for additional information about ThinkPad computers, what to do if you experience a problem with your computer, and whom to call for service should it be necessary.
Getting help and service v Lenovo hardware repair - If the problem is determined to be caused by Lenovo hardware under warranty, trained service personnel are available to provide the applicable level of service. v Engineering change management - Occasionally, there might be changes that are required after a product has been sold. Lenovo or your reseller, if authorized by Lenovo, will make selected Engineering Changes (ECs) available that apply to your hardware.
Getting help and service operation, visit the Support Web site at http://www.lenovo.com/ support/phone. If the number for your country or region is not listed, contact your Lenovo reseller or Lenovo marketing representative.
Getting help and service Country or Region Telephone Number Brazil Sao Paulo region: (11) 3889-8986 Outside Sao Paulo region: 0800-701-4815 (Brazilian Portuguese) Canada 1-800-565-3344 (English, French) In Toronto only call 416-383-3344 Chile 800-361-213 188-800-442-488 (Toll free) (Spanish) China Technical Support Line 800-990-8888 86-10-58851110 (Mandarin) China ThinkPad (Technical enquiry hotline): (Hong Kong S.A.R.
Getting help and service Country or Region Telephone Number France Hardware 0810-631-213 (Warranty service and support) Software 0810-631-020 (Warranty service and support) 0238-557-450 (30 day up and running support) (French) Germany 07032-15-49201 (30 day up and running support) 01805-25-35-58 (Warranty service and support) (German) Greece +30-210-680-1700 Guatemala 1800-624-0051 (Spanish) Honduras Tegucigalpa: 232-4222 San Pedro Sula: 552-2234 (Spanish) Hungary +36-1-382-5720 India 1800-42
Getting help and service 50 Country or Region Telephone Number Malta +35621445566 Mexico 001-866-434-2080 (Spanish) Middle East +44 (0)1475-555-055 Netherlands +31-20-514-5770 (Dutch) New Zealand 0800-733-222 (English) Nicaragua 001-800-220-1830 (Spanish) Norway 6681-1100 (30 day up and running support) 8152-1550 (Warranty service and support) (Norwegian) Panama 206-6047 001-866-434-2080 (Lenovo Customer Support Center- toll Free) (Spanish) Peru 0-800-50-866 (Spanish) Philippines 1800
Getting help and service Country or Region Telephone Number Taiwan 886-2-8723-9799 or 0800-000-700 (Mandarin) Thailand 1-800-299-229 (Thai) Turkey 00800-4463-2041 (Turkish) United Kingdom 01475-555-055 (30 day up and running support) 08705-500-900 (Standard warranty support) (English) United States 1-800-426-7378 (English) Uruguay 000-411-005-6649 (Spanish) Venezuela 0-800-100-2011 (Spanish) Vietnam For northern area and Hanoi: 84-4-843-6675 For southern area and Ho Chi Minh City: 84-8-829-
52 ThinkPad® T61 Service and Troubleshooting Guide
Appendix A. Warranty information This Appendix provides information regarding the warranty period and type of warranty service applicable to your Lenovo hardware product in your country or region. For the terms and conditions of the Lenovo Limited Warranty that applies to your Lenovo hardware product, see Chapter 3, Warranty Information in the Safety and Warranty Guide included with your Lenovo hardware product.
Machine Type Country or Region of Purchase Warranty period 7658, 7662 US, Canada Parts and Labor - 1years Battery pack - 1 year 3 1 7659, 7663 US, Canada, Mexico, Brazil and Australia Parts and Labor - 3 years Battery pack - 1 year 3 1 Japan Parts and Labor - 1 years Battery pack - 1 year 3 1 Other Parts and Labor - 3 years Battery pack - 1 year 4 1 7660, 7664 US, Canada Parts and Labor - 3 years Battery pack - 1 year 3 1 7661, 7665 All Parts and Labor - 3 years Battery pack - 1 year 2 1
Under CRU Service, your Service Provider will ship CRUs to you for you to install. Most CRUs are easy to install whereas others may require some technical skill and tools. CRU information and replacement instructions are shipped with your product and are available from Lenovo at any time upon request. You may request that a Service Provider install some CRUs under one of the other types of warranty service designated for your product.
56 ThinkPad® T61 Service and Troubleshooting Guide
Appendix B. Customer Replaceable Units (CRUs) Customer Replaceable Units (CRUs) are computer parts that can be upgraded or replaced by the customer. There are two types of CRUs: internal and external. External CRUs are easy to install, whereas internal CRUs require some technical skills and in some cases might require tools such as a screwdriver. However, both internal and external CRUs are safe for removal by the customer. Customers are responsible for replacing all external CRUs.
v The Online Hardware Maintenance Manual and Online Videos available from the Support Web site http://www.lenovo.com/support/site.wss/document.do?sitestyle=lenovo &lndocid=part-video. v The Customer Support Center. For the telephone number of the Support Center for your country or region, see “Worldwide telephone list” on page 47. Note: Only use computer parts provided by Lenovo.
Appendix C. Features and Specifications Features Processor v See the system properties of your computer. You can do this as follows: Click Start, right-click Computer (in Windows XP and Windows 2000, My Computer); then from the pull down menu select Properties. Memory v Double data rate (DDR) 2 synchronous dynamic random access memory Storage device v 2.5-inch hard disk drive Display The color display uses TFT technology: v Size: 14.
Features v v v v v v v v Microphone jack 3 Universal Serial Bus (USB) connectors IEEE 1394 connector (on some models) RJ11 telephone connector RJ45 Ethernet connector Ultrabay Enhanced Ultrabay Slim Docking connector Combination card slot for PC Card, ExpressCard, Smart Card or Flash Media Card (depending on models) v PC Card and ExpressCard v PC Card and Smart Card v PC Card and 4-in-1 digital media card reader Optical drive v CD-ROM, DVD-ROM, Combo or Multi-Burner drive depending on the model Wireless f
Specifications v Height: 29.8 to 34.5 mm Environment v Maximum altitude without pressurization: 3048 m (10,000 ft) v Temperature – At altitudes up to 2438 m (8000 ft) - Operating: 5°C to 35°C (41°F to 95°F) - Non-operating: 5°C to 43°C (41°F to 109°F) – At altitudes above 2438 m (8000 ft) - Maximum temperature when operating under the unpressurized condition: 31.3°C (88° F) Note: When you charge the battery pack, its temperature must be at least 10°C (50°F).
Specifications 62 ThinkPad® T61 Service and Troubleshooting Guide
Appendix D. Notices Notices Lenovo may not offer the products, services, or features discussed in this document in all countries. Consult your local Lenovo representative for information on the products and services currently available in your area. Any reference to a Lenovo product, program, or service is not intended to state or imply that only that Lenovo product, program, or service may be used.
information contained in this document was obtained in specific environments and is presented as an illustration. The result obtained in other operating environments may vary. Lenovo may use or distribute any of the information you supply in any way it believes appropriate without incurring any obligation to you. Any references in this publication to non-Lenovo Web sites are provided for convenience only and do not in any manner serve as an endorsement of those Web sites.
Properly shielded and grounded cables and connectors must be used in order to meet FCC emission limits. Proper cables and connectors are available from Lenovo authorized dealers. Lenovo is not responsible for any radio or television interference caused by using other than recommended cables or connectors or by unauthorized changes or modifications to this equipment. Unauthorized changes or modifications could void the user’s authority to operate the equipment.
communications and to other electrical or electronic equipment. Such cables and connectors are available from Lenovo authorized dealers. Lenovo cannot accept responsibility for any interference caused by using other than recommended cables and connectors. Japanese VCCI Class B statement EU WEEE Statements The Waste Electrical and Electronic Equipment (WEEE) mark applies only to countries within the European Union (EU) and Norway.
IBM Lotus Software Offer About the offer for purchasers of ThinkPad computers with Windows XP: As a qualifying purchaser of a ThinkPad computer with the Windows XP operating system, you are receiving a single, limited license for the Lotus Notes® “standalone” client and a single license for the Lotus® SmartSuite® software.
International Program License Agreement: The software licensed to you under this offer does not include software upgrades or technical support, and is subject to the terms and conditions of the IBM International Program License Agreement (IPLA) that accompanies the software. Your use of the Lotus SmartSuite and Lotus Notes programs described in this offer constitutes acceptance of the terms of this Offer and the IPLA. For further information regarding the IBM IPLA, visit http://www.ibm.
–In Asia Pacific Countries: Via the Internet: http://smartsuite.modusmedia.com Mail address: IBM - Lotus Notes and SmartSuite Program Modus Media International eFulfillment Solution Center 750 Chai Chee Road #03-10/14, Technopark at Chai Chee, Singapore 469000 Fax: +65 6448 5830 To inquire about an order, contact: Smartsuiteapac@modusmedia.
Other company, product, or service names may be trademarks or service marks of others.
Index fingerprint reader (continued) care 7 problems 26 frequently asked questions 10 A Access Help 1 B battery problems 24 replacing 31 Be careful about using your computer 3 Be gentle with your computer BIOS Setup Utility 27 H 4 C carrying the computer 4 cleaning computer cover 6 computer display 7 keyboard 6 computer cover cleaning 6 computer display cleaning 7 computer screen problems 21 configuration setup 27 Customer Replaceable Unit (CRU) parts list 57 Customer Support Center 11, 45, 47 diagno
upgrading (continued) hard disk drive 33 W warranty information Web help 45 72 11, 53 ThinkPad® T61 Service and Troubleshooting Guide
Part Number: 42X3595 Printed in China (1P) P/N: 42X3595