Table of Contents ■ Introduction Overview Features Configurations 1 1 2 Installation Cables Device Connection Initial Power-up 5 6 7 ■ Operation Pushuttons LEDs OSD (On-Screen Display) Operation Hotkey Commands 9 9 10 16 ■ Cascade Configuration Connection Change Configuration while Running ■ Sun/Mac Keyboard Mapping ■ Appendices Specifications Troubleshooting Please read this manual thoroughly and follow the Installation procedures to prevent any damage to the KVM switch or any connecting device.
LevelOne ------------------------ Introduction Overview The slim LevelOne KVM Switches offer the most reliable and efficient way of managing multiple computers in server rooms where space is at a premium. On Screen Display (OSD) features computer naming, computer selection, status indication, auto scan and much more. Up to 136 servers can be easily managed by cascading multiple KVM switches to expand the capacity. Revolutionized video enhancement technology ensures superb quality up to 1920 x 1440.
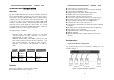
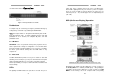
LevelOne LevelOne Cascaded KVM Switch (Master/Slave) Configuration A second level of Slave KVM Switches may connect to the Master unit to expand system capacity allowing you to manage computers. There is only one Master that connects to the PS/2 keyboard, mouse and monitor directly operated by a user. Once connected, LevelOne KVM Switches automatically configure themselves to either Master or Slave. Slaves of different LevelOne KVM Switch models can be mixed in cascade configuration as shown in figure 2.
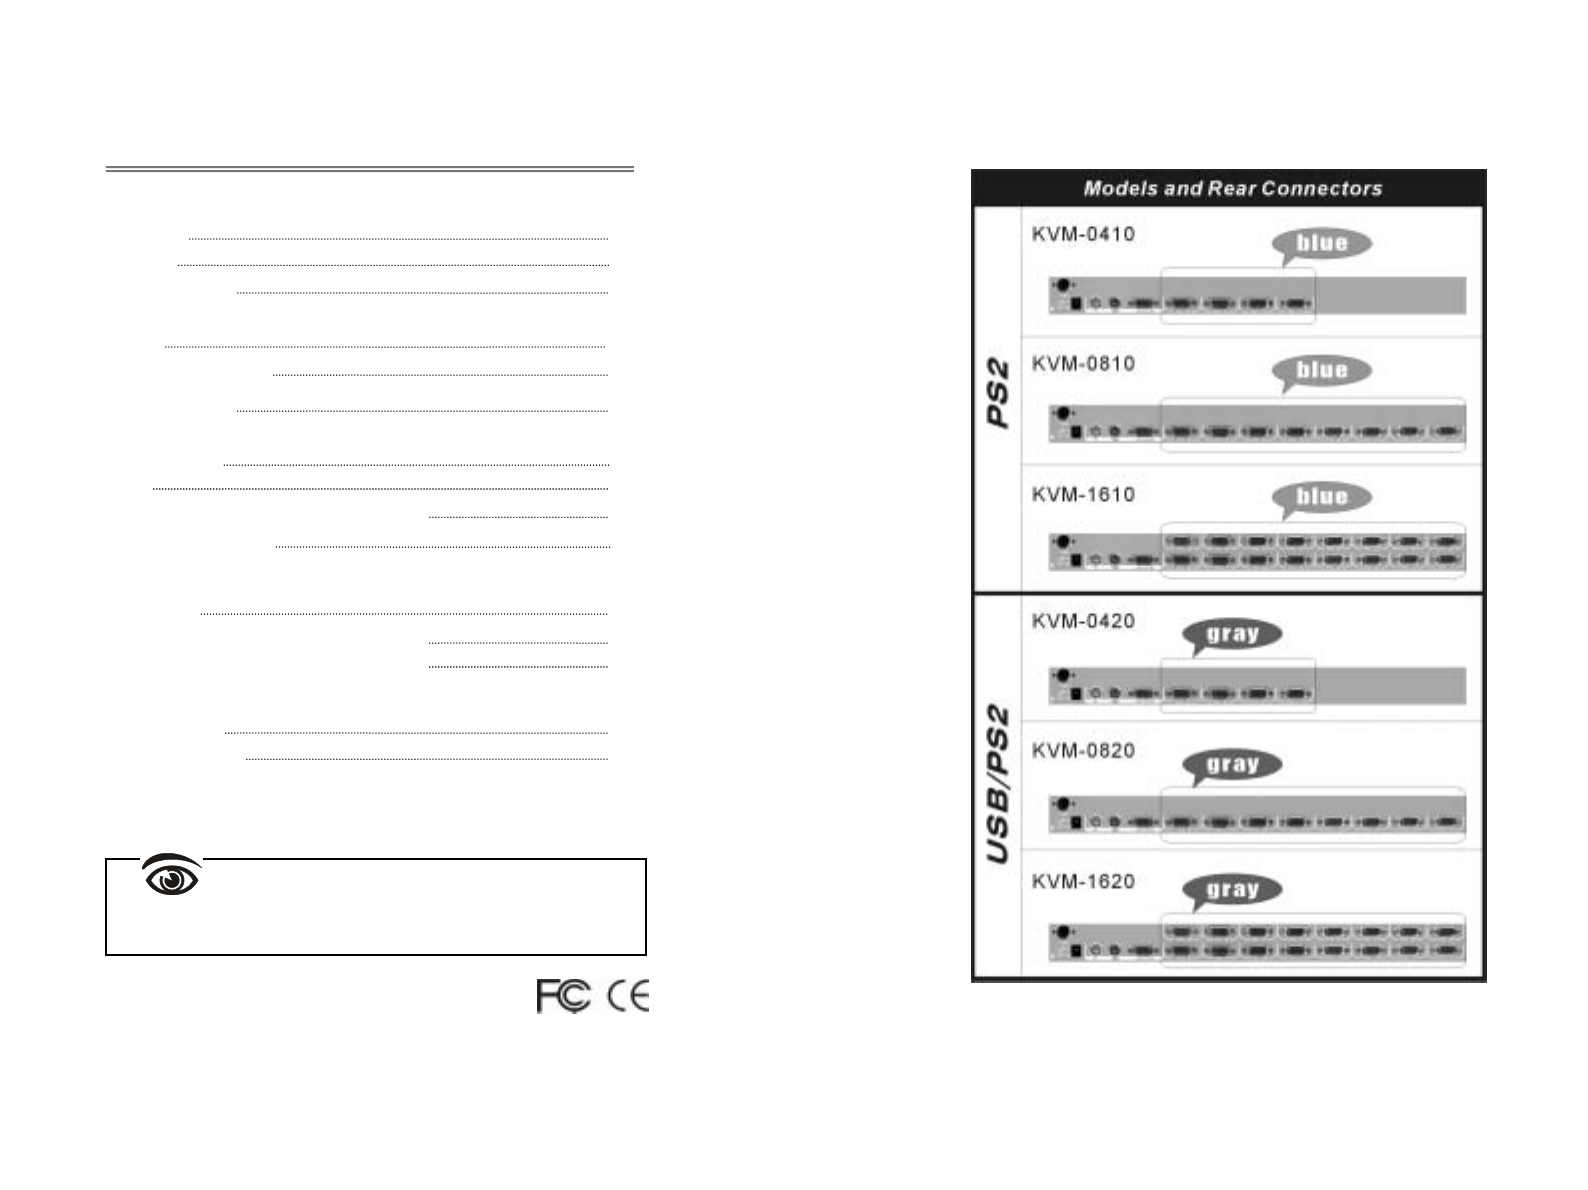
LevelOne LevelOne ------------------------ Installation Device Connection Make sure all computers and LevelOne KVM Switches are powered down during installation. PS/2-only Model (KVM-0410, KVM-0810, KVM-1610) Cables Use a 1-to-3 cable to connect from one of the PC ports to the PS/2 keyboard, mouse and monitor ports of computer, as shown in figure 5. Use only the following cables for connection to computers with PS/2 interface, as shown in figure 3. Model Name Length ACC-2001 1.
LevelOne LevelOne Figure 6: Computer USB Port Connection Initial Power-Up You must power up the Master KVM switch that has a PS/2 keyboard, mouse and monitor connected to it before turning on any other devices. ! For single KVM Switch: 1) 2) ! Apply a power adapter (O/P = 9V DC) to the Master. Turn on computers. For cascaded KVM Switches: 1) Apply a power adapter (O/P = 9V DC) to the Master. 2) Apply power adapters to all Slaves. 3) Turn on computers.
LevelOne ------------------------ Operation LevelOne either Auto Scan or Manual Scan mode if the red LED flashes. Green LED is lighting when the port connects a power-on computer. There are 2 rows of LEDs for 16-port switches, the lower row is for numerical ports (“1” ~ “8”) and the upper row is for alphabetical ports (“A” ~ “B”).
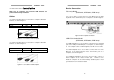
LevelOne LevelOne port numbers, names and status, see figure 8. #Function key : To switch the eye mark (") of a computer The port number of the currently selected computer is displayed in red, same as the front indicator, at the upper-right corner of the OSD menu. on or off. First, use the and arrow keys to highlight it, then press to switch its eye mark on or off.
LevelOne . Available options will be shown in the middle of the screen. Again, using the and arrow keys to view options then press to select it. You can press to exit at any time. ! ! ! Auto Scan In this mode, the KVM switch automatically switches from one power-on computer to the next sequentially in a fixed interval. During Auto Scan mode, the OSD displays the name of the selected computer.
LevelOne ! LevelOne non-volatile memory stores the CH Display setting. Hotkey commands Position The position of the selected computer and/or OSD status displays on screen during operation. The actual display position shifts due to different VGA resolution, the higher the resolution the higher the displayed position. The non-volatile memory stores the Position setting. Upper Left, Upper Right, Lower Left, Lower Right. Middle.
LevelOne LevelOne next computer in sequence. The length of the Auto Scan interval (Scan Rate) is adjustable. To abort the Auto Scan mode, press the left Ctrl key twice. Note: Scan Type determines whether an eye-marked computer is to be displayed during Auto Scan. % Manual Scan enables you to manually switch back and forth between power-on computers. Left Ctrl + left Ctrl + F2 Press ↑ or ↓ to select the previous or the next computer in sequence. And, press any other key to abort the Manual Scan.
LevelOne LevelOne -------------------- Cascade Configuration Connection Before connecting a device (a computer or a Slave KVM Switch) to a KVM Switch under power, you must turn off the device. Note: The Master must have equal or more 'PC x' ports than that of the Slave, i.e., if an 8-port switch is the master, a 4-port or an 8-port switch can be a Slave, but not a 16-port one. PS/2-only models can be cascaded with USB-PS/2 combo models.
LevelOne plus 8 more computers directly connect to the Master (to "PC A"~”PC H”), see figure 13. LevelOne will update this change the next time it is activated. Note: Any new device must be turned off before it is connected to the Master. Figure 13: All 16-port KVM Switches in cascade For OSD menu: After connection completes, you should re-activate the OSD menu to check if the Master recognizes the Slaves.
LevelOne LevelOne --------------- Sun/Mac Keyboard Mapping For USB-PS/2 Combo models The USB-PS/2 Combo models emulate a Sun’s keyboard and mouse when a computer is marked with a Sun in OSD menu by Function key . A Sun keyboard has more keys than a standard PS/2 one. These extra keys simulate by tapping the lower-right Ctrl followed by one of the function keys on the PS/2 keyboard (i.e. combo key).
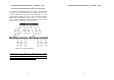
LevelOne LevelOne ------------------------ Appendices USB-PS/2 Combo models Specifications: Specifications PS/2-only models Specifications PS/2 only models KVM-0410 KVM-0810 KVM-1610 Computer port number 4 8 16 Cascade control PC number Up to16* Up to 64* Up to 136* Cable Model Name KVM-0420 KVM-0820 Computer port number 4 8 16 Cascade control PC number Up to 16* Up to 64* Up to 136* Cable Model Name 3M cable Yes Pushbutton control 4 ACC-2003 1.
LevelOne Troubleshooting: LevelOne Master/slave does not work Ensure that all cables are well seated. Check that keyboard/mouse cables are not swapped. Label and bundle the cables for each computer to avoid confusion when connected to the KVM switch. Symptom Possible causes Make sure slave’s CONSOLE is connected to Master’s PC 1~ PC 8 port.
From Map to PS/2 keyboard Sun keyboard right - Ctrl 1 right - Ctrl 2 right - Ctrl 3 right - Ctrl 4 right - Ctrl F1 right - Ctrl F2 Again right - Ctrl F3 Props right - Ctrl F4 Undo right - Ctrl F5 Front right - Ctrl F6 Copy right - Ctrl F7 Open right - Ctrl F8 Paste right - Ctrl F9 Find right - Ctrl F10 Cut right - Ctrl H Help right - Window Stop right - ♦ left - ♦ left - Window $ Context key Compose right - Alt Alt Graph left - Alt Alt From Map to PS/
Limited Warranty IN NO EVENT SHALL THE DIRECT VENDOR'S LIABILITY FOR DIRECT OR INDIRECT, SPECIAL, INCIDENTIAL OR CONSEQUENTIAL DAMAGES, LOSS OF PROFIT, LOSS OF BUSINESS, OR FINANCIAL LOSS WHICH MAY BE CAUSED BY THE USE OF THE PRODUCT EXCEEDS THE PRICE PAID FOR THE PDOCUDT.