
User Guide


Viewing
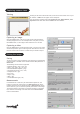
You can edit the resulting image with Exposure & Gain, White Balance, Color
Adjustment and other tools on the Camera tab of the toolbox.
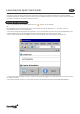
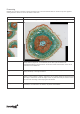
Clicking on the camera name will allow you to see the live camera view on your
PC monitor. A Video tab will appear in the workspace.
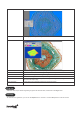
Capturing an image
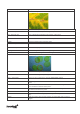
Click the Frame button. The current view will be captured and the
resulting image shown in a new workspace tab. Every time you click
the Frame button, a new image is taken and shown in a new tab.
Capturing a video
Click the Video button. Choose the file format, a name for your video
and the output folder. Upon confirming these selections the live feed
from the camera will be saved as a video until you choose to stop it.
Capturing camera views
Editing the image
Saving
You can save one or several images on your hard drive by choosing the
required option in the File menu. Choose between Save, Save as… or
Batch Save.
The following file formats are supported:
• Windows Bitmap (*.bmp,*.dib,*.rle)
• JPEG (*.jpg,*.jpeg,*.jpe,*.jif,*.jfif)
• Portable Network Graphics (*.png)
• Tag Image File Format (*.tif, *.tiff)
• Compuserve GIF (*.gif)
• PCX (*.pcx)
• Targa (*.tga)
• JBIG (*.jbg)
• LevenhukLite File Type (*.tft)
Measurements
LevenhukLite has a wide array of measurement options for your
images. By using one of the tools in the Measurements tab of the
toolbox (which are also accessible through a Measurements section
of the menu bar) you can measure specific parameters of the image.
The shapes placed on the image are actually located on a separate
layer and the saved image is not affected. All the Measurements
tools are listed below.