Echo Backup Software Quick Start Guide
TABLE OF CONTENTS
INTRODUCTION Whether you’re a business professional on the road, a student doing homework at a friend’s house, or someone simply using a laptop in a café, it’s important to ensure the files on your netbook or notebook are protected. Lexar® Echo portable backup drives provide a convenient way to automatically back up your files on the go.
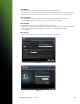
CREATE A BACKUP PLAN 1 Select your language and accept the license agreement Figure 1 1. Select your language. Lexar Echo backup software is available in 18 languages (English, French, German, Italian, Spanish, Portuguese, Swedish, Danish, Norwegian, Dutch, Russian, Czech, Polish, Turkish, Korean, Japanese, Traditional, and Simplified Chinese). 2. Read the End User License Agreement (EULA) and accept by clicking on the “Yes, I have read and I accept the EULA” checkbox (see Figure 1).
1. Select encrypted or non-encrypted for your backup plan. An encrypted plan provides automatic 128-bit AES encryption of data as it is being backed up. 2. Enter a profile name. For an encrypted plan, enter and confirm the password. Enter a hint to help with remembering the password. 3. Click the checkbox to install Backup Manager to enable automatic and continuous backups whenever the Echo drive is connected to the computer. 4. Click the “Next” button to continue.
Main Options - Start backup automatically—Backup starts when the software runs - Live backup—Detect and automatically back up file changes without any user intervention - Number of versions to keep—Select the number of versions of the same file to back up Backup Manager - Default profile—Assign a default profile. This is the backup that will be launched automatically each time the Echo drive is connected to the computer. Filter By Date Echo backup software offers two different types of date filters.
NOTE: Lexar Echo backup software includes an option to back up data online. The Echo backup drive comes with a free, 2GB account offered by Dmailer online. To learn more about the online backup, click “Learn More” (see Figure 5). 4 Start first backup Click “Next” to start the first backup.
1 Main toolbar These commands are available through the main toolbar. • Files o Switch to another backup profile o Exit the application • Settings o Access local backup settings o Access online backup settings • Help o Access online support, FAQ and demos o Search for software update • Backup button - Manually start the backup • Restore button - Restore the backed up files to the designated location 2 Event log Figure 8 The Event Log is found in the Summary tab (see Figure 8).
Figure 10 NOTE: To access a previous version of a file it must first be restored from the application. 4 Restore files To restore a file or folder, follow these steps: 1. Click the “View Files” tab. 2. Select the file or folder you want to restore. The selected file or folder will be highlighted. 3. Click the Restore button. 4. Select the location to where the file or folder is to be restored (see Figure 11). Figure 11 5. Click OK.
CONTACT INFORMATION If you have questions, we are here to help Please send us your questions at support@lexar.com Getting more information Product information: www.lexar.com/echo Customer support and warranty information: www.lexar.com/support Lexar Media, Inc. 47300 Bayside Parkway Fremont, CA 94538 Tel: (510) 413-1275 Email: support@lexar.com URL: www.lexar.com 7 a.m. to 5 p.m.
Echo Backup-Software Kurzanleitung Lexar Echo Backup-Software Kurzanleitung 9
EINLEITUNG Gleichgültig ob Sie auf Geschäftsreise sind, Student sind und bei einem Freund Ihre Hausaufgaben machen oder einfach Ihren Laptop in einem Café verwenden - der Schutz der Dateien auf Ihrem Netbook oder Notebook ist wichtig. Mit unseren tragbaren Lexar® Echo Backup-Laufwerken können Sie unterwegs bequem Sicherheitskopien Ihrer Dateien erstellen.
EINEN BACKUP-PLAN ERSTELLEN 1 Wählen Sie Ihre Sprache und akzeptieren Sie die Lizenzvereinbarung. Abbildung 1 1. Wählen Sie Ihre Sprache. Lexar Echo Backup-Software ist in 18 Sprachen erhältlich (Englisch, Französisch, Deutsch, Italienisch, Spanisch, Portugiesisch, Schwedisch, Dänisch, Norwegisch, Niederländisch, Russisch, Tschechisch, Polnisch, Türkisch, Koreanisch, Japanisch, Traditionelles und Vereinfachtes Chinesisch). 2.
1. Wählen Sie aus, ob Ihr Backup-Plan verschlüsselt oder unverschlüsselt sein soll. Ein verschlüsselter Plan führt bei der Sicherung Ihrer Daten automatisch eine 128-Bit AES-Verschlüsselung durch. 2. Geben Sie einen Profilnamen ein. Falls Sie den verschlüsselten Plan gewählt haben, geben Sie ein Passwort ein und bestätigen Sie dieses. Geben Sie als Erinnerung an Ihr Passwort einen Hinweis ein. 3.
Benutzerintervention. - Anzahl der zu speichernden Versionen—wählen Sie die Anzahl der Versionen einer Datei aus, die gesichert werden sollen. Backup-Manager - Standardprofil—weisen Sie ein Standardprofil zu. Dies ist das Backup, das jedes Mal automatisch startet, wenn das Echo Laufwerk an den Computer angeschlossen wird. Nach Datum filtern Echo Backup-Software bietet zwei verschiedene Arten von Datumsfiltern.
4 Starten Sie das erste Backup. Klicken Sie auf “Next (Weiter)”, um das erste Backup zu starten. Die folgende Bildschirmanzeige zeigt den Fortschritt des Backups (siehe Abbildung 6): Abbildung 6 DIE DATENSICHERUNG VERWALTEN Die Hauptbenutzeroberfläche der Lexar Echo Backup-Software (siehe Abbildung 7) bietet Optionen zur Anzeige, Öffnung, Bearbeitung und Wiederherstellung gesicherter Dateien an.
1 Standard-Symbolleiste Die folgenden Befehle sind über die Standard-Symbolleiste verfügbar.
Abbildung 10 HINWEIS: Um auf eine frühere Version einer Datei zuzugreifen, muss diese zunächst von der Anwendung wiederhergestellt werden. 4 Dateiwiederherstellung Führen Sie folgende Schritte aus, um eine Datei oder einen Ordner wiederherzustellen: 1. Klicken Sie auf die Registerkarte “View Files (Dateien anzeigen)”. 2. Wählen Sie die Datei oder den Ordner aus, die/den Sie wiederherstellen möchten. Die/der ausgewählte Datei/Ordner wird markiert. 3. Klicken Sie auf die Schaltfläche Wiederherstellen. 4.
KONTAKTINFORMATIONEN Falls Sie Fragen haben, helfen wir Ihnen gern. Bitte senden Sie uns Ihre Fragen an support@lexar.com Weitere Informationen Produktinformationen: www.lexar.com/echo Kundendienst und Garantieinformationen: www.lexar.com/support Lexar Media, Inc. 47300 Bayside Parkway Fremont, CA 94538, USA Tel.: +1 (510) 413-1275 E-Mail: support@lexar.com URL: www.lexar.com 7.00 Uhr bis 17.
Logiciel de sauvegarde Echo Guide de démarrage rapide Logiciel de sauvegarde Lexar Echo Guide de démarrage rapide 18
INTRODUCTION Que vous soyez un professionnel en déplacement, un étudiant faisant ses devoirs chez un ami ou simplement quelqu’un utilisant un ordinateur portable dans un café, il est important de vous assurer que les fichiers de votre portable ou miniportable sont protégés. Les lecteurs de sauvegarde portatifs Echo de Lexar® sont un moyen pratique de sauvegarder automatiquement vos fichiers en déplacement.
CRÉER UN PLAN DE SAUVEGARDE 1 Sélectionnez votre langue et acceptez le contrat de licence Illustration 1 1. Sélectionnez votre langue. Le logiciel de sauvegarde Echo de Lexar est disponible en 18 langues (anglais, français, allemand, italien, espagnol, portugais, suédois, danois, norvégien, néerlandais, russe, tchèque, polonais, turc, coréen, japonais, chinois traditionnel et simplifié). 2.
1. Sélectionnez « Encrypted » (Crypté) ou « Non-Encrypted » (Non-crypté) pour votre plan de sauvegarde. Un plan crypté fournit automatiquement un cryptage AES 128 bits des données lors de la sauvegarde. 2. Entrez un nom de profil. Pour un plan crypté, entrez et confirmez le mot de passe. Entrez un indice pour vous souvenir du mot de passe. 3.
Live backup (Sauvegarde en direct) : détecte et sauvegarde automatiquement les modifications des fichiers de sauvegarde sans intervention de l’utilisateur Number of versions to keep (Nombre de versions à conserver) : sélectionnez le nombre de versions du même fichier à sauvegarder Backup Manager (Gestionnaire de sauvegarde) - Default profile (Profil par défaut) : assigne un profil par défaut.
4 Lancer la première sauvegarde Cliquez sur « Next » (Suivant) pour lancer la première sauvegarde. La fenêtre suivante s’affiche, indiquant la progression de la sauvegarde (voir l’illustration 6) : Illustration 6 GÉRER LES SAUVEGARDES L’interface principale du logiciel de sauvegarde Echo de Lexar (voir l’illustration 7) propose des options pour afficher, ouvrir, modifier et restaurer des fichiers ayant été sauvegardés.
1 Barre d’outils principale Ces commandes sont disponibles dans la barre d’outils principale.
Illustration 10 REMARQUE : Pour accéder à une version précédente d’un fichier, elle doit être d’abord restaurée depuis l’application. 4 Restaurer des fichiers Pour restaurer un fichier ou un dossier, suivez ces étapes : 1. Cliquez sur l’onglet « View Files » (Afficher les fichiers). 2. Sélectionnez le fichier ou le dossier que vous voulez restaurer. Le fichier ou le dossier sélectionné sera mis en surbrillance. 3. Cliquez sur le bouton « Restore » (Restaurer). 4.
COORDONNÉES Si vous avez des questions, nous sommes à votre disposition Veuillez nous envoyer vos questions à support@lexar.com Informations supplémentaires Informations produit : www.lexar.com/echo Assistance clientèle et informations sur la garantie : www.lexar.com/support Lexar Media, Inc. 47300 Bayside Parkway Fremont, CA 94538 - USA Tél : (510) 413-1275 E-mail : support@lexar.com URL : www.lexar.
Software di backup Echo Guida rapida Software di backup Lexar Echo Guida rapida 27
INTRODUZIONE È importante fare in modo che i file sul netbook o notebook siano sempre protetti, sia per un professionista in viaggio come per uno studente che fa i compiti a casa di un amico o un semplice utente di un laptop in un caffè. Le unità di backup portatili Lexar® Echo offrono una maniera comoda di realizzare automaticamente il backup dei file mentre si è in viaggio.
CRÉER UN PLAN DE SAUVEGARDE 1 Selezionare la propria lingua ed accettare l’accordo di licenza Figura 1 1. Selezionare la propria lingua. Il software di backup Lexar Echo è disponibile in 18 lingue (inglese, francese, tedesco, italiano, spagnolo, portoghese, svedese, danese, norvegese, olandese, russo, ceco, polacco, turco, coreano, giapponese, cinese sia tradizionale che semplificato). 2.
1. Scegliere se utilizzare o meno l’opzione di crittografia per il piano di backup. Un piano con crittografia prevede l’utilizzo automatico della crittografia a 128 bit AES per i dati mentre ne viene eseguito il backup. 2. Inserire un nome per il profilo. Per un piano con crittografia, inserire e confermare la password. Digitare un suggerimento per aiutare a ricordare la password. 3.
Main Options (opzioni principali) - Start backup automatically (avvia backup automaticamente) —Il backup parte quando il software è in esecuzione - Live backup (backup in diretta) —Rileva e esegue automaticamente il backup delle modifiche apportate ai file, senza alcun intervento da parte dell’utente - Number of versions to keep (numero di versioni da conservare) —Selezionare il numero di versioni dello stesso file per le quali eseguire il backup Backup Manager - Default profile (profilo predefinit
NOTA: Il software di backup Lexar Echo include un’opzione che prevede il backup dei dati on-line. L’unità di backup Echo include un account on-line da 2 GB da utilizzare come prova per 30 giorni, offerto da Dmailer. Per saperne di più sul backup on-line, fare clic su “Learn more” (vedere la Figura 5). 4 Avvio del primo backup Fare clic su “Next” (successivo) per avviare il primo backup. Viene visualizzata la seguente schermata, che mostra l’avanzamento del backup (vedere la Figura 6).
1 Barra degli strumenti principale I seguenti comandi sono disponibili tramite la barra degli strumenti principale. • Files (file) o Passare a un altro profilo di backup o Uscire dall’applicazione. • Settings (impostazioni) o Accesso alle impostazioni di backup locale o Accesso alle impostazioni di backup on-line • Help (guida) o Accesso al supporto on-line, alle FAQ e alle demo.
Illustration 10 NOTA: Per accedere a una versione precedente di un file, essa deve prima essere ripristinata dall’applicazione. 4 Ripristino dei file Per ripristinare un file o una cartella, attenersi ai seguenti passi: 1. Fare clic sulla scheda “View Files” (visualizza file). 2. Selezionare il file o la cartella che si desidera ripristinare. Il file o la cartella selezionata risulterà evidenziata. 3. Fare clic sul pulsante Restore (ripristino). 4.
INFORMAZIONI DI CONTATTO Se avete domande da porre, siamo qui per aiutarvi. Inviate le vostre domande all’indirizzo support@lexar.com Come ottenere maggiori informazioni Informazioni sul prodotto: www.lexar.com/echo Assistenza clienti e informazioni sulla garanzia: www.lexar.com/support Lexar Media, Inc. 47300 Bayside Parkway Fremont, CA 94538 Tel: (510) 413-1275 Posta elettronica: support@lexar.com URL: www.lexar.com dalle 07.
Software de copia de seguridad Echo Guía de inicio rápido Software de copia de seguridad Lexar Echo Guía de inicio rápido 36
INTRODUCCIÓN Independientemente de si es un profesional en viaje de negocios, un estudiante haciendo las tareas escolares en la casa de un amigo o cualquiera usando un portátil en una cafetería, es importante garantizar que los archivos de su netbook o portátil estén protegidos. Las unidades de copia de seguridad portátiles Echo de Lexar® son una forma cómoda de hacer una copia de seguridad automática de sus archivos en cualquier lugar.
CREE UN PLAN DE COPIA DE SEGURIDAD 1 Seleccione su idioma y acepte el contrato de licencia Figura 1 1. Seleccione su idioma. El software de copia de seguridad Echo de Lexar está disponible en 18 idiomas (inglés, francés, alemán, italiano, español, portugués, sueco, danés, noruego, holandés, ruso, checo, polaco, turco, coreano, japonés y chino tradicional y simplificado). 2.
1. Seleccione encriptado o no encriptado para su plan de copia de seguridad. Un plan encriptado ofrece una encriptación automática AES de 128 bit para los datos al miso tiempo que hace la copia. 2. Introduzca un nombre de perfil. Para los planes encriptados, introduzca y confirme la contraseña. Introduzca una pista que le ayude a recordar la contraseña. 3.
- Número de versiones a conservar: seleccione el número de versiones del mismo archivo de las que realizará una copia de seguridad Administrador de copia de seguridad - Perfil por defecto:asigne un perfil por defecto. Ésta será la copia de seguridad que se realizará automáticamente cada vez que se conecte la unidad Echo al ordenador.. Filtro por fecha El software de copia de seguridad Echo ofrece dos tipos distintos de filtros de fecha.
4 Inicie la primera copia de seguridad Haga clic en “Next” (Siguiente) para iniciar la primera copia de seguridad. Aparece la siguiente pantalla mostrando el progreso de la copia de seguridad (vea la Figura 6): Figura 6 ADMINISTRE LA COPIA DE SEGURIDAD La interfaz principal del software de copia de seguridad Echo de Lexar (vea la Figura 7) ofrece opciones para ver, abrir, editar y restaurar archivos de los que tiene una copia de seguridad.
1 Barra de herramientas principal Estos comandos están disponibles en la barra de herramientas. • Archivos o Cambie a otro perfil de copia de seguridad. o Salga de la aplicación • Configuraciones o Acceda a las configuraciones de copia de seguridad local o Acceda a las configuraciones de copia de seguridad en Internet • Ayuda o Acceda a asistencia en Internet, Preguntas frecuentes y demostraciones.
Figura 10 NOTA: Para acceder a una versión anterior de un archivo, debe restaurarse desde la aplicación. 4 Restaurar archivos Para restaurar un archivo o carpeta, siga estos pasos: 1. Haga clic en la ficha “View files” (Ver archivos). 2. Seleccione el archivo o la carpeta que quiere restaurar. Se resaltará el archivo o carpeta seleccionado. 3. Haga clic en el botón Restaurar. 4. Seleccione la ubicación a donde se debe restaurar el archivo o la carpeta (vea la Figura 11). Figura 11 5. Haga clic en OK.
INFORMACIÓN DE CONTACTO Si tiene preguntas, estamos aquí para ayudarle Envíenos sus preguntas a support@lexar.com Obtener más información Información del producto: www.lexar.com/echo Asistencia al cliente e información de garantía: www.lexar.com/support Lexar Media, Inc. 47300 Bayside Parkway Fremont, CA 94538 EE. UU. Tel.: +1 (510) 413-1275 Correo electrónico: support@lexar.com URL: www.lexar.com 7 a. m. a 5 p. m.
Software de cópia de segurança Echo Manual de iniciação rápida Software de cópia de segurança Lexar Echo Manual de iniciação rápida 45
INTRODUCÇÃO Quer seja um profissional de negócios em viagem, ou um estudante a fazer os trabalhos de casa em casa de um amigo, ou simplesmente alguém a utilizar um computador portátil num café, é importante assegurar a protecção dos ficheiros no seu computador portátil ou netbook. As unidades portáteis de cópia de segurança Echo da Lexar® oferecem uma forma prática de fazer cópias de segurança automaticamente enquanto viaja.
CRÉER UN PLAN DE SAUVEGARDE 1 Seleccione o idioma e aceite o contrato de licença Figura 1 1. Seleccione o idioma. O software de cópia de segurança Echo da Lexar está disponível em 18 idiomas (inglês, francês, alemão, iItaliano, espanhol, português, sueco, dinamarquês, norueguês, holandês, russo, checo, polaco, turco, coreano, japonês, chinês tradicional e simplificado). 2.
1. Seleccione encriptado ou não encriptado, para o seu plano de cópia de segurança. Um plano encriptado oferece uma encriptação, AES de 128 bits, dos dados, à medida que a cópia de segurança vai sendo efectuada. 2. Introduza um nome de perfil. Para um plano encriptado, introduza e confirme a palavra-passe. Introduza algo que o ajude a lembrar-se da palavra-passe. 3.
Cópia de segurança automática (Live backup)—Detecta e efectua automaticamente uma cópia de segurança das alterações feitas nos ficheiros, sem intervenção do utilizador Número de versões a guardar—Seleccione o número de versões do mesmo ficheiro que pretende efectuar uma cópia de segurança. Gestor de cópias de segurança (Backup Manager) - Perfil predefinido—Atribua um perfil predefinido.
4 Iniciar a primeira cópia de segurança Clique em “Next” (Seguinte) para dar início à primeira cópia de segurança. Aparece o seguinte ecrã, que lhe mostra o progresso da cópia de segurança (consulte a figura 6): Figura 6 GERIR A CÓPIA DE SEGURANÇA A interface principal do software de cópia de segurança Echo da Lexar (consulte a figura 7) oferece opções para ver, abrir, editar e restaurar ficheiros aos quais foi efectuada uma cópia de segurança.
1 Barra de ferramentas principal Os seguintes comandos encontram-se disponíveis na barra de ferramentas principal. • Files (Ficheiros) o Alternar para outro perfil de cópia de segurança o Sair da aplicação • Settings (Definições) o Acesso às definições da cópia de segurança local o Acesso ás definições da cópia de segurança online • Help (Ajuda) o Acesso ao serviço de apoio online, FAQ e demos.
Figura 10 NOTA: Para aceder a uma versão anterior de um ficheiro, este tem primeiro de ser restaurado pela aplicação. 4 Restaurar ficheiros Para restaurar um ficheiro ou uma pasta, siga os seguintes passos: 1. clique no separador “View Files” (Ver ficheiros). 2. Seleccione o ficheiro ou a pasta que pretende restaurar. O ficheiro ou a pasta será seleccionado(a). 3. Clique no botão Restore (Restaurar). 4.
CONTACTOS Se tiver questões, estamos aqui para o ajudar Envie-nos as suas questões para support@lexar.com Para obter mais informações Informações sobre o produto: www.lexar.com/echo Serviço de apoio ao cliente e informações sobre a garantia: www.lexar.com/support Lexar Media, Inc. 47300 Bayside Parkway Fremont, CA 94538 Tel: (510) 413-1275 E-mail: support@lexar.com URL: www.lexar.
Программное обеспечение для резервного копирования Echo Краткое руководство пользователя Программное обеспечение для резервного копирования Lexar Echo Краткое руководство пользователя 54
ВВЕДЕНИЕ Если Вы бизнесмен в дороге, студент, который выполняет домашнее задание в гостях у друга или просто используете ноутбук кафе, важно обеспечить защиту файлов на вашем ноутбуке и самого ноутбука. Портативные драйверы резервного копирования Lexar® Echo предоставляют удобный способ автоматически копировать Ваши файлы на ходу.
СОЗДАНИЕ ПЛАНА РЕЗЕРВНОГО КОПИРОВАНИЯ 1 Выберите свой язык и примите условия лицензионного соглашения Рисунок №1 1. Выберите свой язык Программное обеспечение для резервного копирования Lexar Echo доступно на 18 языках (английский, французский, немецкий, итальянский, испанский, португальский, шведский, датский, норвежский, голландский, русский, чешский, польский, турецкий, японский, корейский, традиционный и упрощенный китайский). 2.
1. Для Вашего плана резервного копирования выберите “с кодированием” или “без кодирования”. План с кодированием предоставляет автоматическое 128-битовое AES кодирование данных во время резервного копирования. 2. Введите название профиля. В случае плана с кодированием введите и подтвердите пароль. Введите подсказку, которая поможет Вам запомнить пароль. 3.
Резервное копирование в режиме реального времени - Автоматическое обнаружение изменений в файлах и копирование их без вмешательства пользователя. Количество сохраняемых версий - Выберите количество версий одного файла для резервного копирования. Менеджер резервного копирования - Профиль по умолчанию —Присвоить профиль по умолчанию. Данное резервное копирование будет начинаться автоматически каждый раз, когда привод Echo подключен к компьютеру.
4 Начало первого резервного копирования Чтобы начать первое резервное копирование, нажмите кнопку “Next (Далее)”. На экране появится следующее окошко, показывающее процесс резервного копирования (см. Рисунок №6). Рисунок №6 УПРАВЛЕНИЕ РЕЗЕРВНЫМ КОПИРОВАНИЕМ Основной интерфейс программного обеспечения для резервного копирования Echo Lexar (см. Рисунок №7) предоставляет возможность просматривать, открывать, редактировать и восстанавливать скопированные файлы.
1 Основная панель инструментов Эти команды доступны через основную панель инструментов. Файлы o Переключиться на другой профиль резервного копирования o Выход из приложения. • Настройки o Доступ к локальным настройкам резервного копирования o Доступ к он-лайн настройкам резервного копирования • Помощь o Доступ к он-лайн поддержке, часто задаваемым вопросам и демо-версиям.
Рисунок №10 ПРИМЕЧАНИЕ: Чтобы была доступна предыдущая версия файла, необходимо восстановить его из приложения. 4 Восстановление файлов Чтобы восстановить файл или папку, следуйте следующим инструкциям: 1. Выберите закладку “View Files (Просмотр файлов)”. 2. Выберите файл или папку, которую Вы хотите восстановить. Выбранный файл или папка будет выделен. 3. Нажмите кнопку Восстановление. 4. Выберите место, куда будет восстановлен файл или папка (см. Рисунок №11). Рисунок №11 5. Нажмите ОК.
КОНТАКТНАЯ ИНФОРМАЦИЯ Если у Вас есть вопросы, мы Вам поможем! Пожалуйста, присылайте Ваши вопросы на support@lexar.com Получение дополнительной информации Информация о продукте: www.lexar.com/echo Клиентская поддержка и информация о гарантии: www.lexar.com/support Lexar Media, Inc. 47300 Bayside Parkway Fremont, CA 94538 Тел: (510) 413-1275 Email: support@lexar.com URL: www.lexar.
図9
図 11