
User Manual
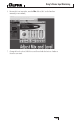

section iii - adJusting the buFFer settings
Audio latency is the minimum time required for a computer to store recorded audio
from an audio interface into the recording application memory and playback that
same recorded audio back out audio interface output.
After the audio has been converted to the digital domain, it is passed to a buffer before
it is processed by the driver and then passed to the audio application. An audio buf-
fer is a reserved segment of memory used to hold this advance portion of audio data
to compensate for momentary delays in processing. The size of an audio buffer is
themaximumnumberofsamplesthebuffercanhold.Forsoundcomingfromthe
computer, there is an output buffer before the digital to analog conversion. "Buffering"
introduces latency, since a buffer needs to fill up by a certain amount before the data
can continue along the chain.
The buffers in Cubase
®
LE 4 were automatically set at a safe setting for your computer
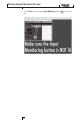
when you installed the software. If you are using Input Monitoring, you may wish to
adjust the amount of buffering to reduce this latency, or perceived delay in the input
vs. output of audio. Lowering the buffers will lower the amount of latency when using
Input Monitoring. Setting the buffers too low will result in unwanted digital artifacts,
such as popping or crackling and possibly audio dropout. The faster the computer
(Hard Disk and CPU), the lower you will be able to adjust the buffer setting without
negativelyimpactingtheaudio.Formoreinformation,consulttheCubaseonline
documentation.
a. adJusting the buFFers in windows
®
vista and xp
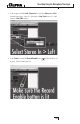
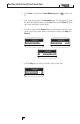
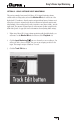
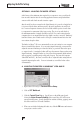
1. Open Cubase LE 4 and go to Devices>Device Setup.
2. Click on VST Multitrack.
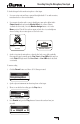
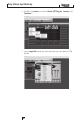
3. Click the Control Panel button. You will now see the ASIO control panel.
Moving the Alpha Stream Reliability slider toward More CPU will decrease
any monitoring latency. If audio playback has artifacts (clicking, popping), move
this slider toward Less CPU until it stabilizes.
4. When you are finished adjusting the buffer size, click the OK button and return to
your project to test the results.
Adjusting the Buffer Settings
30