RT-10 Universal Disc Player User Guide
IMPORTANT SAFETY INSTRUCTIONS READ INSTRUCTIONS – All the safety and operating instructions should be read before the product is operated. RETAIN INSTRUCTIONS – The safety and operating instructions should be retained for future reference. HEED WARNINGS – All warnings on the product and in the operating instructions should be adhered to. FOLLOW INSTRUCTIONS – All operating and use instructions should be followed. CLEANING – Unplug this product from the wall outlet before cleaning.
WARNING TO REDUCE THE RISK OF FIRE OR ELECTRIC SHOCK, DO NOT EXPOSE THIS UNIT TO RAIN OR MOISTURE. • Do not remove the cover from the unit. • Do not insert anything into the unit through the ventilation holes. • Do not handle the mains lead with wet hands. • Make a space of about .33ft (0.1m) around the unit. CAUTION LASER SAFETY: This unit employs a LASER. Only a qualified person should remove the cover or attempt to service this device, due to possible eye injury.
CAUTION This product satisfies FCC regulations when shielded cables and connectors are used to connect the unit to other equipment. To prevent electromagnetic interference with electric appliances such as radios and televisions, use shielded cables and connectors for connections. This equipment has been tested and found to comply with the limits for a Class B digital device, pursuant to Part 15 of the FCC Rules.
DOCUMENTATION CONVENTIONS This document contains general safety, installation, and operation instructions for the RT-10 Universal Disc Player. It is important to read this user guide before operating this product. Pay particular attention to safety instructions. The following symbols are used in this document: Appears on your component to alert you to the presence of uninsulated, dangerous voltage inside the enclosure…voltage that may be sufficient to constitute a risk of shock.
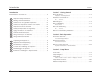
Introduction Lexicon Introduction Section 1: Getting Started Documentation Conventions . . . . . . . . . . . . . . . . . . . . . . . . . . iii About the RT-10 . . . . . . . . . . . . . . . . . . . . . . . . . . . . . . . . . . 1-2 US Important Safety Instructions . . . . . . . . . . . . . . . . . . . . . vi Installation Considerations. . . . . . . . . . . . . . . . . . . . . . . . . . . 1-3 DE Wichtige Sicherheitshinweise . . . . . . . . . . . . . . . . . . . . .
Introduction RT-10 Section 4: Playback Controls Index . . . . . . . . . . . . . . . . . . . . . . . . . . . . . . . . . . . . . . . . . . I-1 Playback Icons . . . . . . . . . . . . . . . . . . . . . . . . . . . . . . . . . . . 4-2 Loading Discs . . . . . . . . . . . . . . . . . . . . . . . . . . . . . . . . . . . . 4-2 Notes Navigating Disc Menus . . . . . . . . . . . . . . . . . . . . . . . . . . . . . 4-3 Selecting Disc Settings . . . . . . . . . . . . . . . . . . . . . . . . . . . . .
Introduction US Lexicon ENGLISH US DE IMPORTANT SAFETY INSTRUCTIONS DEUTSCH DE WICHTIGE SICHERHEITSHINWEISE • Save these instructions for later use. • Bewahren Sie diese Anleitungen zur späteren Benutzung auf. • Follow all instructions and warnings marked on the unit. • Befolgen Sie alle Anleitungen und alle Warnhinweise auf dem Gerät • Always use with the correct line voltage. Refer to the manufacturer’s operating instructions for power requirements.
Introduction RT-10 ES ESPAÑOL ES FR INSTRUCCIONES DE SEGURIDAD IMPORTANTES • Guarde estas instrucciones para futuras referencias. • Siga todas las instrucciones y tenga en cuenta las advertencias que aparecen en la unidad y en las instrucciones de funcionamiento. • Utilice siempre la tensión de línea correcta. Consulte las instrucciones del fabricante, donde se especifican los requisitos de alimentación.
Introduction IT Lexicon ITALIANO IT PT IMPORTANTI NORME DI SICUREZZA PORTUGUESE PT INSTRUÇÕES IMPORTANTES DE SEGURANÇA • Conservare le presenti norme per l’utilizzo futuro. • Guarde essas instruções para uso posterior. • Seguire sempre tutte le istruzioni e gli avvertimenti segnati sull’unità e nelle istruzioni operative. • Siga todas as instruções e fique atento aos avisos marcados na unidade e nas instruções de operação. • Utilizzare sempre la corretta tensione di alimentazione.
Introduction RT-10 DK DANSK DK FI VIGTIG INFORMATION OM SIKKERHED SUOMI FI TÄRKEITÄ TURVALLISUUSOHJEITA • Gem denne vejledning til senere brug. • Säilytä nämä ohjeet tulevaa käyttöä varten. • Følg alle anvisninger og advarsler på apparatet. • Seuraa kaikkia yksikköön merkittyjä ohjeita ja varoituksia. • Apparatet skal altid tilsluttes den korrekte spænding. Der henvises til brugsanvisningen, der indeholder specifikationer for strømforsyning.
Introduction NO Lexicon NORSK NO SE VIKTIG INFORMASJON OM SIKKERHET x SVENSKA SE VIKTIGA SÄKERHETSFÖRESKRIFTER • Ta vare på denne veiledningen for senere bruk. • Spara dessa föreskrifter för framtida bruk. • Følg alle anvisningene og advarslene som er angitt på apparatet. • Följ alla anvisningar och varningar som anges på enheten. • Apparatet skal alltid anvendes med korrekt spenning. Produktbeskrivelsen inneholder spesifikasjoner for strømkrav.
Introduction RT-10 US Unpacking and Inspection After unpacking the unit, save all packing materials in case the unit ever needs to be shipped. Thoroughly inspect the modules and packing materials for signs of damage. Report any damage to the carrier at once; report equipment malfunction to the dealer. DE Disimballaggio ed ispezione Dopo aver disimballato l’unità, salvi tutto il materiale d’imballaggio, in caso Lei abbia bisogno di spedire l’unità.
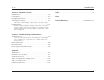
1 Getting Started About the RT-10 . . . . . . . . . . . . . . . . . . . . . . . . . . . . . . . . . . . . . . . . . . 1-2 Highlights • Product Registration Installation Considerations . . . . . . . . . . . . . . . . . . . . . . . . . . . . . . . . . . . 1-3 Do . . . • Do Not . . . DVD-V Regions . . . . . . . . . . . . . . . . . . . . . . . . . . . . . . . . . . . . . . . . . . . 1-4 Disc Compatibility. . . . . . . . . . . . . . . . . . . . . . . . . . . . . . . . . . . . . . . . .
Getting Started ABOUT THE RT-10 Thank you for purchasing the RT-10 Disc Player, a reference-quality universal disc transport designed to provide superior audio and video performance with virtually any 3- or 5-inch optical media disc format. Based on leading-edge DVD and SACD research, the RT-10 supports DVD-V, DVD-A, DVD-RW/R, SACD, Audio CD, CD-RW/R, Video CD, and SVCD formats. It delivers exceptional sound quality with Dolby Digital, DTS, and PCM (Linear or Packed) digital audio sources.
Getting Started RT-10 HIGHLIGHTS PRODUCT REGISTRATION • DVD-V, DVD-A, and DVD-RW/R compatibility • SACD compatibility • Audio CD, CD-RW/R, Video CD, and SVCD compatibility • 12-bit/108MHz D/A video conversion Please register the RT-10 within 15 days of purchase. To do so, register on-line at www.lexicon.com or complete and return the Product Registration card attached to the back cover of this user guide. Product registration serves no warranty purposes.
Getting Started Installation Considerations (continued from page 1-3) DO NOT . . . • Install the RT-10 on a surface that is unstable or unable to support all four of its feet (unless the RT-10 is installed in an equipment rack). • Stack the RT-10 directly above heat-producing components such as power amplifiers and other stereo equipment that generate heat during use. Avoid installing the RT-10 near radiators and other heat-producing appliances.
Getting Started RT-10 DISC COMPATIBILITY The RT-10 is compatible with disc formats that meet the requirements listed in the tables that begin below. Refer to the Disc Care & Handling section (1-8), the Loading Discs section (4-2), and the Disc Maintenance section (5-16) for more information. Format DVD-V DVD-A Logo Note: The RT-10 is not compatible with DVD-ROM, DVD-RAM, CD-ROM (except those that include compatible MP3 tracks), and Photo CD formats.
Getting Started Lexicon Disc Compatibility Format DVD-RW/R (continued from page 1-5) Logo Disc Compatibility Requirements The RT-10 supports: • 5-inch (12cm) or 3-inch (8cm) discs • Discs recorded in DVD-V format Additional Information • The RT-10 might not allow playback of DVD-RW/Rs recorded with a personal computer if incorrect software application settings were used during the recording process – even if the disc was recorded in a compatible format.
Getting Started RT-10 Format Video CD SVCD MP3 Logo Disc Compatibility Requirements The RT-10 supports: • 5-inch (12cm) or 3-inch (8cm) discs • MPEG-1 digital audio and MPEG-2 video The RT-10 supports: • 5-inch (12cm) or 3-inch (8cm) discs • PCM (Linear) digital audio The RT-10 supports: • • • Additional Information • Discs are divided into tracks. • Discs are divided into tracks. • The RT-10 supports MP3 tracks encoded at less than 128kBps.
Getting Started Disc Compatibility (continued from page 1-7) Lexicon • Load single-sided discs with the label side facing upward and double-sided discs with the side intended for playback facing downward. All loaded discs must align with the circular guide inside the disc drawer. • Return discs to their cases when not in use. Discs should be stored in an upright position out of direct sunlight and excessive heat, humidity, or cold.
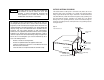
Getting Started RT-10 REMOTE CONTROL BATTERY INSTALLATION Figure A Figure B Figure C The remote control requires two AA batteries that should be replaced as needed. It is strongly recommended to use Alkaline batteries, which last longer without leaking. 4. When new batteries have been inserted, close the battery compartment cover as shown in the Figure C (above). To do this, align the cover with the guide on the back of the remote control. Then, press the cover until it "snaps" into place.
2 Basic Operation Front Panel Overview . . . . . . . . . . . . . . . . . . . . . . . . . . . . . . . . . . . . . . 2-2 Front Panel Display Indicators Rear Panel Overview . . . . . . . . . . . . . . . . . . . . . . . . . . . . . . . . . . . . . . . 2-8 Rear Panel Connections Remote Control Overview . . . . . . . . . . . . . . . . . . . . . . . . . . . . . . . . . .
Basic Operation Lexicon FRONT PANEL OVERVIEW Open/Close Standby Display Off On/Off RT-10 Disc Player 1 1. On/Off Button Connects power from the AC input connector to the RT-10. When the RT-10 is powered on, pressing the On/Off button powers the RT-10 off and automatically deactivates standby mode. When the RT-10 is powered off, pressing the On/Off button powers the RT-10 on. When the RT-10 is powered on, standby mode is deactivated, even if standby mode was activated when the RT-10 was powered off.
Basic Operation RT-10 trigger control, the associated component connected to the RT-10 trigger input connector can be used to activate and deactivate standby mode. When the RT-10 is powered off, standby mode is automatically deactivated, although the Standby LED remains lit for a few seconds after the RT-10 is powered off. When the RT-10 is powered on, standby mode is also deactivated, even if standby mode was activated when the RT-10 was powered off.
Basic Operation Front Panel Overview (continued from page 2-3) The numbers in the RT-10 front panel illustration shown on page 2-2 correspond to the numbered items that continue below. 5. Display Off Button (continued) The DISP_MODE parameter (3-52) can be used to select the front panel display mode for SACD, CD, and MP3 playback. When set to ON, the front panel display is deactivated during SACD, CD, and MP3 playback.
Basic Operation RT-10 9. Reverse Skip/Scan Button / 10.Forward Skip/Scan Button / Skips and scans in reverse direction through the loaded disc. When resume or stop mode is activated, pressing the / button activates playback from the beginning of the loaded disc. Skips or scans in forward direction through the loaded disc. When resume or stop mode is activated, pressing the / button activates playback from the beginning of the loaded disc.
Basic Operation Lexicon V-PART GRP V OFF TITLE D OFF VCD TRK 1 192kHz 96kHz CHP PROGRESSIVE LAST COND DOLBY D 5.1CH TOTAL REMAIN DOWN MIX L C R LFE LS S RS The numbers in the RT-10 front panel display illustration shown above correspond to the numbered items that begin below. 1. 4. (Character Display) Provides at-a-glance viewing of status information about the RT-10 and the loaded disc. 2. Indicates that a DVD-V or DVD-RW/R is loaded. 3. Indicates that a DVD-A is loaded.
Basic Operation RT-10 11. TRK 17. V-PART Indicates that the second character on the character display (previous page) is a track number. 12. REMAIN Indicates that the last three characters on the character display (number 1) represent the remaining playback time. 13. TOTAL Indicates that the last three characters on the character display (previous page) represent the total playback time. 14. Indicates that playback (4-11) is activated. 15. Indicates that pause mode (4-15) is activated. 16.
Basic Operation Lexicon Front Panel Display Indicators (continued from page 2-7) REAR PANEL OVERVIEW The numbers in the RT-10 front panel display illustration shown on page 2-6 correspond to the numbered items that continue below. The RT-10 is manufactured for sale in several different countries. Each version features a rear panel that includes connectors and safety instructions appropriate to that particular region. Note: 27.
Basic Operation RT-10 Apparatus Claims of U.S. Patent Nos. 4,631,603, 4,577,216, 4,819,098, and 4,907,093 licensed for limited viewing uses only. COMPONENT VIDEO Y PB PR CAUTION Damaged power cords can cause fire or electric shock. Please observe the following when handling power cords: • Handle power cords at the plug. • Never disconnect power cords by pulling on the cord. • Never touch power cords with wet hands, as this could cause short circuit or electric shock.
Basic Operation Lexicon Rear Panel Overview (continued from page 2-9) 7. Digital Audio Output Connectors The numbers in the RT-10 rear panel illustration shown on page 2-9 correspond to the numbered items that continue below. 3. Component Video Output Connectors (continued) The component video output connectors provide progressivescan and interlaced component video output.
Basic Operation RT-10 Note: The trigger input switch setting does not take effect until the RT-10 is power cycled with the front panel On/Off button. 10.Trigger Input Connector Allows the RT-10 to be controlled with an associated component that includes a 12V DC trigger output connector, such as the MC-12 or MC-8 Digital Controllers. All versions include one trigger input connector labeled TRIGGER INPUT, which is available on a removable terminal block.
Basic Operation Lexicon Video Connections (continued from page 2-11) Mini D Ribbon Component Video Output Connector 1 2 3 4 5 6 7 8 9 10 11 12 13 14 Pin When a component video output connection is not possible, it is recommended to use an S-video output connection, which provides better picture quality than a composite video output connection. All versions offer S-video output on an S-video output connector.
Basic Operation RT-10 connections, use an interconnect cable with Toslink® plugs on each end. Because these cable plugs are keyed, it is important to insert them with the proper orientation to the connector. Make sure the cable plug is properly aligned with the connector before the cable plug is inserted. When the cable plug is inserted, the protective shutter on the connector will open and the plug will click into position, indicating that the cable plug is fully inserted.
Basic Operation Lexicon REMOTE CONTROL OVERVIEW The RT-10 remote control provides full operation of the RT-10, executing functions such as menu navigation that are not available from the front panel. The numbers in the RT-10 remote control illustrations shown on pages 2-15 to 2-18 correspond to the numbered items in the Command Matrix that begins on page 2-15. The Command Matrix describes the commands remote control buttons execute.
Basic Operation RT-10 3 4 2 OPEN/ CLOSE VIDEO ON/OFF Button DIMMER POWER POWER 1 1 Command 1 3 2 CLEAR 5 4 5 6 +10 7 8 9 0 6 • The RT-10 is not configured for trigger control. • The RT-10 is powered on with the front panel On/Off button. • The trigger input switch is set to OFF. When standby mode is deactivated, pressing the POWER button activates standby mode and lights the front panel Standby LED (2-2).
Basic Operation Lexicon Button OPEN/ CLOSE VIDEO ON/OFF DIMMER POWER 1 2 3 CLEAR 4 5 6 +10 7 8 9 0 8 9 10 SETUP SETUP 8 RETURN Closes certain Setup menu screens without saving changes. Refer to Section 3 for more information. 9 PROGRAM Activates program mode (4-22), which creates a program list for the loaded disc. When a program list has been created, program mode also activates program playback.
Basic Operation RT-10 Button OPEN/ CLOSE VIDEO ON/OFF DIMMER POWER 16 1 2 3 CLEAR 4 5 6 +10 7 9 8 0 Command PREV Skips to the beginning of the current chapter or track. Subsequent presses skip to the beginning of the previous chapter or track. When the RT-10 loads the selection, playback or pause mode reactivates from the beginning of the selected chapter or track. NEXT Skips to the beginning of the next chapter or track.
Basic Operation Lexicon Button OPEN/ CLOSE VIDEO ON/OFF DIMMER POWER Activates pause mode, which pauses playback of the loaded disc at the current playback time. When playback is activated, pressing the Pause button activates pause mode at the current playback time. In some cases, a still frame image appears on the associated display device screen. When pause mode is activated, pressing the Pause or Play button activates playback at the current playback time.
3 Setup Menus Control Bar. . . . . . . . . . . . . . . . . . . . . . . . . . . . . . . . . . . . . . . . . . . . . . 3-2 Setup Navigator . . . . . . . . . . . . . . . . . . . . . . . . . . . . . . . . . . . . . . . . . . 3-2 Setup Menu . . . . . . . . . . . . . . . . . . . . . . . . . . . . . . . . . . . . . . . . . . . . . 3-9 Audio1 • Audio2 • Video1 • Video2 • Language • General Setup Menu Shortcuts. . . . . . . . . . . . . . . . . . . . . . . . . . . . . . . . . . . . . 3-50 Advanced Setup Menu . . . .
Setup Menus Lexicon SETUP NAVIGATOR Note: The Setup menu should be used to configure the RT-10 before attempting disc playback. CONTROL BAR When a Setup menu screen is open, a control bar similar to the one shown below appears at the bottom of the on-screen display to indicate which remote control buttons are available for the open screen. These buttons appear on the control bar with a one-word description of their associated commands.
Setup Menus RT-10 Setup Navigator Prompts The table shown at the right lists all Setup Navigator prompts, along with their possible settings and associated Setup menu parameters. Setup Navigator Prompt ` This setting is recommended when the RT-10 is connected to an MC-12 or MC-8 Digital Controller. When no setting is indicated, any setting can be selected. . . .
Setup Menus Lexicon Setup Navigator (continued from page 3-3) Audio1 A2 Video1 V2 Language General Audio1 A2 Video1 V2 Language General 1 Setup Navigator 2 3 4 Setup Navigator Start Auto Start Off 5 Setup using the Setup Navigator 7 ENTER Select SETUP ! ! Move Exit Move Setup Navigator To navigate the Setup Navigator: Button Command ENTER Selects the highlighted setting. When a setting is selected, the Setup Navigator automatically proceeds to the next prompt.
Setup Menus RT-10 Audio1 A2 Video1 V2 Language General ENTER Select SETUP ! ! Move TV Type Audio1 A2 Video1 V2 Language General 1 Setup Navigator 2 TV Connection TV Type Widescreen (16:9) 4 Standard 5 Widescreen TV 16:9 aspect ratio Exit Widescreen (16:9), Standard (4:3) Controls the appearance of the picture on the associated display device screen, formatting the aspect ratio of the video output format to match the aspect ratio of the display device.
Setup Menus Lexicon Setup Navigator (continued from page 3-5) Audio1 A2 Video1 V2 Language General 1 Setup Navigator 2 Amp Connection Center Speaker Present 4 Not Present 5 Center speaker is connected to an amplifier ! Analog Jacks ENTER Select SETUP ! Move Audio1 A2 Video1 V2 Language General 1 Setup Navigator 2 Amp Connection 4Surround Speakers Present Not Present 5 Surround speakers are connected to an amplifier Exit (continued) The Analog Jacks prompt is associated with the Audio2 tab Aud
Setup Menus RT-10 Audio1 A2 Video1 V2 Language General ENTER Select SETUP ! ! Move Sub-woofer Audio1 A2 Video1 V2 Language General 1 Setup Navigator 2 Amp Connection Sub-woofer Present 4 Not Present 5 Sub-woofer is connected to an amplifier Exit Move Present, Not Present Indicates the presence or absence of a subwoofer. When Present is selected, the RT-10 passes subwoofer signals (LFE) to the Sub analog audio output connector.
Setup Menus Lexicon Setup Navigator (continued from page 3-5) Audio1 A2 Video1 V2 Language General ENTER Select SETUP ! ! Move Digital Jack Exit (continued) The Digital Jack prompt is associated with the Audio1 tab Dolby Digital Out (3-12), DTS Out (3-13), and MPEG Out (3-14) parameters. Each parameter can be independently set for compatibility with the respective digital audio source.
Setup Menus RT-10 Exit Setup Navigator Save or Delete Changes, Start Again Determines whether Setup Navigator prompt settings are saved, deleted, or reentered. Select Save Changes to save prompt settings and close the Setup Navigator. Select Delete Changes to delete prompt settings and close the Setup Navigator. Select Start Again to reenter prompt settings. The OSD Language prompt (3-4) will open on the on-screen display. The Exit Setup Navigator prompt is not associated with a Setup menu parameter.
Setup Menus --------------- Move SETUP Setup Menu (Basic Mode) Move OSD Language Audio Language Subtitle Language Auto Language DVD Language Subtitle Display Subtitle Off --- Auto --- On --- On SETUP Exit Audio1 A2 Video1 V2 Language General Audio DRC --- Off Dolby Digital Out --- Dolby Digital DTS Out --- DTS PCM Linear PCM Out --- Down Sample On MPEG Out --- MPEG PCM Set audio Digital output format/tone adjust ! Move SETUP ! 3-10 Exit SETUP Language Language Language Language ---------
Setup Menus RT-10 Note the following: AUDIO1 • The RT-10 is manufactured for sale in several different countries. Certain parameters are not available on some versions. Default parameter settings might differ among versions. Includes parameters that control digital audio output format. • The Setup menu can be opened while the RT-10 is in playback, pause, resume, or stop mode. However, certain parameters cannot be adjusted when some playback modes are activated.
Setup Menus Audio1 Lexicon (continued from page 3-11) Audio1 A2 Video1 V2 Language General Audio DRC Dolby Digital Out DTS Out Linear PCM Out MPEG Out Digital Out SACD Playback Move Audio1 A2 Video1 V2 Language General ---Off Off ---On Dolby Digital --- DTS PCM --- Down Sample On --- MPEG PCM --- On --- 2ch Area SETUP Audio DRC Dolby Digital Out DTS Out Linear PCM Out MPEG Out Digital Out SACD Playback Exit Audio DRC (Dynamic Range Control) Move Off, On Controls the dynamic range of Dolby Digital
Setup Menus RT-10 Audio1 A2 Video1 V2 Language General Audio DRC Dolby Digital Out DTS Out Linear PCM Out MPEG Out Digital Out SACD Playback Move DTS Out Audio1 A2 Video1 V2 Language General --- Off --- Dolby Digital ---DTS DTS PCM PCM ---DTS Down Sample On --- MPEG PCM --- On --- 2ch Area SETUP Audio DRC Dolby Digital Out DTS Out Linear PCM Out MPEG Out Digital Out SACD Playback Exit Move DTS, DTS PCM Controls DTS audio output format when a DTS source is present and the RT-10 is using the digita
Setup Menus Audio1 Lexicon (continued from page 3-13) Audio1 A2 Video1 V2 Language General Audio DRC Dolby Digital Out DTS Out Linear PCM Out MPEG Out Digital Out SACD Playback Move Linear PCM Out SETUP (continued) Note: The RT-10 always downsamples 192 and 176kHz signals to 96 and 88.2kHz before passing them to the associated component, regardless of the Linear PCM Out parameter and Setup Navigator 96kHz PCM Audio prompt settings.
Setup Menus RT-10 Audio1 A2 Video1 V2 Language General Audio DRC Dolby Digital Out DTS Out Linear PCM Out MPEG Out Digital Out SACD Playback Move SACD Playback --- Off --- Dolby Digital --- DTS PCM --- Down Sample On Area ---2ch MPEG PCM Area ---Multi-ch On ---CD 2chArea Area SETUP Exit 2ch Area, Multi-ch Area, CD Area Controls SACD output format when an SACD is loaded and the RT10 is using the digital audio output connector. This parameter setting has no effect when another disc format is loaded.
Setup Menus Lexicon AUDIO2 A1 Audio2 Video1 V2 Language General Audio Out ---22Channel Channel 5.1 Channel Speaker Setting Gain Setting --- Fix CD Digital Direct --- Off Includes parameters that control analog audio output format. Parameter Default Setting Possible Settings Audio Out 2 Channel • 2 Channel • 5.
Setup Menus RT-10 Source Dolby Digitalencoded D V D V Dolby Digitalencoded (Karaoke) Analog Audio Output Audio Out Parameter Front L/R Center Surround L/R Subwoofer 2 Channel 2-channel downmix Mute Mute Mute 5.
Setup Menus Audio2 Lexicon (continued from page 3-17) Note: Speaker Setting Start Opens the Speaker Setting screens, which can be used to set speaker sizes and distances when the RT-10 is using the 5.1-channel analog audio output connectors. Speaker size and distance settings have no effect when the RT-10 is using the 2-channel analog audio output connectors or digital audio output connector.
Setup Menus RT-10 ENTER A1 Audio2 Video1 V2 Language General Move ENTER Select SETUP A1 Audio2 Video1 V2 Language General Speaker Setting Size L/R --Large C --Large LS --Large RS --Large SW --On Audio Out --- 2 Channel Speaker Setting Start Gain Setting --- Fix CD Digital Direct --- Off Exit Distance Setting Speaker Sizes The Speaker Size screen shown above can be used to set speaker sizes and crossover points for the front, center, surround, and subwoofer speakers.
Setup Menus Audio2 Lexicon (continued from page 3-19) Setting Speaker Sizes Note: Speaker distance settings have no effect when: (continued) Note the following: • The SW parameter determines the presence or absence of a subwoofer. Select On if a subwoofer is present. The RT-10 will pass subwoofer signals and LFE signals for which the corresponding Speaker Size parameter is set to Small to the Sub analog audio output connector. Select Off if no subwoofer is present.
Setup Menus RT-10 ENTER A1 Audio2 Video1 V2 Language General Audio Out --- 2 Channel Speaker Setting Gain Setting ---Fix Fix CD Digital Direct ---Variable Off Move SETUP A1 Audio2 Video1 V2 Language General L C R RS LS SW Exit Gain Setting --0.0dB --0.0dB --0.0dB --0.0dB --0.0dB --0.
Setup Menus Audio2 Lexicon (continued from page 3-21) Parameter Default Gain Setting Possible Gain Settings Default Test Tone Setting Possible Test Tone Settings L/R 0.0dB ` • -6.0 to +6.0dB Off • Auto • On • Off C 0.0dB ` • -6.0 to +6.0dB Off • Auto • On • Off LS 0.0dB ` • -6.0 to +6.0dB Off • Auto • On • Off RS 0.0dB ` • -6.0 to +6.0dB Off • Auto • On • Off SW 0.0dB ` • -6.0 to +6.
Setup Menus RT-10 • Eliminate extraneous noises in the listening space such as conversations, air conditioners, and sounds that filter in through open doors and windows. • Remove objects (including people) that obstruct the line-ofsight path between the SPL meter and the speaker being measured. • Output levels should be calibrated to be consistent from the primary listening position. Place the SPL meter at the approximate spot where the listener’s head will be during listening.
Setup Menus Audio2 Lexicon VIDEO1 (continued from page 3-23) Includes parameters that control video output format, as well as the Time and Frame + Time search modes and the Lexicon screen saver.
Setup Menus RT-10 TV Screen Refer to the table on the previous page Audio1 A2 Video1 V2 Language General TV Screen Component Video Video Out S-Video Out Frame Search Screen Saver Controls the appearance of the picture on the associated display device screen, formatting the aspect ratio of the video output format to match the aspect ratio of the display device. Aspect ratios, which refer to width relative to height, differ among video output formats and display devices.
Setup Menus Video1 Lexicon setting, and the TV Type prompt Standard (4:3) setting is equivalent to the TV Screen parameter 4:3 (Letter Box) setting. The TV Screen parameter also offers settings for 16:9 (Compressed) and 4:3 (Pan&Scan) viewing. Refer to the table on pages 3-25 and below for more information. (continued from page 3-25) TV Screen (continued) Select 16:9 (Wide) or 16:9 (Compressed) if the associated display device screen has a 16:9 aspect ratio.
Setup Menus RT-10 Audio1 A2 Video1 V2 Language General TV Screen Component Video Video Out S-Video Out Frame Search Screen Saver Move Component Video SETUP TV Screen Component Video Video Out S-Video Out Frame Search Screen Saver Exit Progressive, Interlace Controls component video output format when the RT-10 is using the component video output connectors. Select Progressive if the associated display device provides a progressive-scan component video input connector.
Setup Menus Video1 Lexicon (continued from page 3-27) Audio1 A2 Video1 V2 Language General TV Screen Component Video Video Out S-Video Out Frame Search Screen Saver Move S-Video Out --- 16:9 (Wide) --- Progressive --- Video ---S1 S2 ---S2 Off --- Off SETUP Audio1 A2 Video1 V2 Language General TV Screen Component Video Video Out S-Video Out Frame Search Screen Saver Exit Move S1, S2 Determines the trigger control signal present when the RT-10 is using the S-video output connector, providing control
Setup Menus RT-10 Video Memory Select Video Adjust Audio1 A2 V1 Video2 Language General Background Video Adjust Still Playback On Screen Display Angle Indicator ---Gray Gray Black --- Auto --- On --- On Move The loaded disc might cause the Video Adjust bar to exceed on-screen display margins. If this occurs, close the Video Adjust bar and remove the loaded disc from the disc drawer. Then, open the Video Adjust bar again.
Setup Menus Video2 Lexicon BNR (Black Noise Reduction) (continued from page 3-29) Pure Cinema Auto1, Auto2, On, Off Controls DVD-V frame rate to simulate cinema screen picture quality. Video sources can be recorded on video or film. Sources recorded on video have a 30 frames-per-second (NTSC) rate, and sources recorded on film have a 24 frames-per-second rate.
Setup Menus RT-10 Default Setting Parameter TV (CRT) PDP Professional Auto1 Auto1 Auto1 YNR 4 4 2 off to max (8 increments) CNR 4 4 2 off to max (8 increments) MNR 0 0 0 off to max (8 increments) BNR 0 0 0 off to max (8 increments) Sharpness High 4 2 4 soft to fine (8 increments) Sharpness Mid 4 2 4 soft to fine (8 increments) Detail 6 0 2 off to max (8 increments) White Level 4 4 4 min to max (8 increments) Black Level 4 4 4 min to max (8 increments) Bla
Setup Menus Video2 Lexicon (continued from page 3-31) Video Memory Select Video Setup Adjust PureCinema Move Auto1 Auto2 On Off Select DISPLAY Check ENTER YNR Sharpness High Move ENTER soft fine Select DISPLAY Check Gamma Move Sharpness Mid Move soft fine Select DISPLAY Check Hue ENTER Move ENTER + – Select DISPLAY Check green red Select DISPLAY Check ENTER Move ENTER Off max Select DISPLAY Check Detail Move ENTER Off max Select DISPLAY Check Chroma Level Move ENTER min max Sele
Setup Menus RT-10 Prog. Motion PureCinema YNR CNR MNR BNR Sharpness High Sharpness Mid Memory Page 1/2 fast slow Auto1 Auto2 On Off off max off max off max off max soft fine soft fine Off 1 2 3 2. When the Video Adjust bar opens, press the remote control and arrows to highlight the Video Setup option. Then, press the remote control ENTER button to select this option. 3.
Setup Menus Video2 Lexicon (continued from page 3-33) ENTER Video Memory Select Video Adjust Video Adjust fast to slow Controls the still picture quality when the RT-10 is using the component video output connectors. This parameter is not available unless the RT-10 is using the component video output connectors. Selecting Video Adjust Banks The Video Memory Select bar shown above can be used to select the desired Video Adjust bank.
Setup Menus RT-10 Audio1 A2 V1 Video2 Language General Background Video Adjust Still Picture Still Playback On Screen Display Angle Indicator --- Gray Background Video Adjust Still Playback On Screen Display Angle Indicator ---Field Auto ---Frame On ---Auto On Move Still Picture Audio1 A2 V1 Video2 Language General SETUP Exit Move Field, Frame, Auto Controls the appearance of still frame images.
Setup Menus Lexicon LANGUAGE Audio1 A2 Video1 V2 Language General OSD Language Audio Language Subtitle Language Auto Language DVD Language Subtitle Display Subtitle Off Includes parameters that can be used to determine RT-10 on-screen display menu, disc menu, subtitle, and audio language.
Setup Menus RT-10 Audio1 A2 Video1 V2 Language General OSD Language Audio Language Subtitle Language Auto Language DVD Language Subtitle Display Subtitle Off Move Audio Language Audio1 A2 Video1 V2 Language General --- English ---English English ---French English ---German On ---Italian English ---Spanish On ---Other Selected Subtitle SETUP Determines the language in which audio is heard.
Setup Menus Language Lexicon (continued from page 3-37) Audio1 A2 Video1 V2 Language General OSD Language Audio Language Subtitle Language Auto Language DVD Language Subtitle Display Subtitle Off Move Audio1 A2 Video1 V2 Language General --- English ---English English ---French English ---German On ---Italian English ---Spanish On ---Other Selected Subtitle ENTER Select SETUP Code (0~2) en:English 0 +/– Move Exit ENTER Select 5 1 SETUP 4 Return Exit b.
Setup Menus RT-10 Audio1 A2 Video1 V2 Language General OSD Language Audio Language Subtitle Language Auto Language DVD Language Subtitle Display Subtitle Off --- English --- English --- English ---On On ---Off English --- On --- Selected Subtitle Move • SETUP Exit Audio1 A2 Video1 V2 Language General OSD Language Audio Language Subtitle Language Auto Language DVD Language Subtitle Display Subtitle Off Move The remote control SUBTITLE button can be used to select the desired subtitle language on the
Setup Menus Language Lexicon (continued from page 3-39) Audio1 A2 Video1 V2 Language General OSD Language Audio Language Subtitle Language Auto Language DVD Language Subtitle Display Subtitle Off Move Audio1 A2 Video1 V2 Language General --- English --- English --- English --- On ---On English ---Off On Subtitle ---Assist Selected Subtitle SETUP OSD Language Audio Language Subtitle Language Auto Language DVD Language Subtitle Display Subtitle Off Exit Move To select an "Other" language: Press the
Setup Menus RT-10 • If the loaded disc does not include subtitles, subtitles do not appear on the on-screen display, regardless of Language tab parameter settings. Subtitle Off GENERAL Includes parameters that can be used to configure general RT-10 settings, such as Setup menu display mode, parental lock controls, and DVD-A playback.
Setup Menus General Lexicon (continued from page 3-41) Audio1 A2 Video1 V2 Language General Setup Menu Mode Setup Navigator Parental Lock Bonus Group Auto Disc Menu Group Playback Move Setup Menu Mode Audio1 A2 Video1 V2 Language General ---Expert Expert Basic --- Off(us) Setup Menu Mode Setup Navigator Parental Lock Bonus Group Auto Disc Menu Group Playback --- On --- Single SETUP Exit --- On --- Single Move Expert, Basic Determines the mode in which the Setup menu is displayed.
Setup Menus RT-10 ENTER Audio1 A2 Video1 V2 Language General Setup Menu Mode Setup Navigator Parental Lock Bonus Group Auto Disc Menu Group Playback Move – ---Password Off(us) Level Code ---Country On --- Single Select 2 3 5 6 +10 7 8 9 0 ENTER Audio1 A2 Video1 V2 Language General Parental Lock: Register Code Number --- Expert ENTER 1 4 Audio1 A2 Video1 V2 Language General SETUP Exit – – +/– Move Password Assigns a user-defined password that must be entered before the RT-10 will a
Setup Menus General Lexicon (continued from page 3-43) 1 2 3 4 5 6 +10 7 8 9 0 ENTER Audio1 A2 Video1 V2 Language General Audio1 A2 Video1 V2 Language General Parental Lock: Confirm Code Number – +/– Move Password – – Parental Lock: Confirm Code Number – * SETUP Return Exit (continued) +/– Move Note: If the assigned password is lost or forgotten, factorydefault settings must be restored to delete the password (5-16). Then, a new password can be entered. 1.
Setup Menus RT-10 1 2 3 4 5 6 +10 7 8 9 0 ENTER Audio1 A2 Video1 V2 Language General Audio1 A2 Video1 V2 Language General Parental Lock: Password Change – +/– Move – – Parental Lock: Password Change – 1 SETUP Return Exit To assign a new password: When a user-defined password is assigned, that password must be entered before a new password can be assigned. When the current password is confirmed, the Parental Lock: Password Change screen opens on the on-screen display.
Setup Menus General Lexicon (continued from page 3-45) ENTER Audio1 A2 Video1 V2 Language General Setup Menu Mode Setup Navigator Parental Lock Bonus Group Auto Disc Menu Group Playback Move Level ---Password Off(us) Level Code ---Country On --- Single ENTER Select Audio1 A2 Video1 V2 Language General Parental Lock: Level Change --- Expert SETUP Level Exit (continued) Select off to use the Country Code control to determine security level.
Setup Menus RT-10 ENTER Audio1 A2 Video1 V2 Language General Setup Menu Mode Setup Navigator Parental Lock Bonus Group Auto Disc Menu Group Playback Move Country Code Audio1 A2 Video1 V2 Language General Country Code List of Codes --- Expert ---Password Off(us) Level Code ---Country On --- Single ENTER Select SETUP 2 us Exit Refer to the table on page A-16 Assigns a security level based on country code, requiring the password before the RT-10 will activate playback mode when a disc encoded wit
Setup Menus General Lexicon (continued from page 3-47) ENTER Audio1 A2 Video1 V2 Language General Setup Menu Mode Setup Navigator Parental Lock Bonus Group Auto Disc Menu Group Playback Move 2 3 5 6 +10 7 8 9 0 ENTER Audio1 A2 Video1 V2 Language General Bonus Group: Key Number Input --- Expert – --- Off(us) Start --- On --- Single SETUP Exit – – +/– Move Bonus Group Note: When playback of a DVD-A bonus group that requires an access code is attempted, the Bonus Group: Key Number Input
Setup Menus RT-10 Audio1 A2 Video1 V2 Language General Setup Menu Mode Setup Navigator Parental Lock Bonus Group Auto Disc Menu Group Playback Move Audio1 A2 Video1 V2 Language General --- Expert Setup Menu Mode Setup Navigator Parental Lock Bonus Group Auto Disc Menu Group Playback --- Off(us) ---On On ---Off Single SETUP Exit Auto Disc Menu Move On, Off Group Playback --- Expert --- Off(us) --- On ---All Single Single SETUP Exit All, Single Enables and disables automatic opening of DVD menu
Setup Menus Lexicon SETUP MENU SHORTCUTS Function Memory Parameter Parameter Parameter Parameter Parameter Parameter The remote control F.MEMO button can be used to create up to five shortcuts for Setup menu parameters. These shortcuts provide convenient access to frequently adjusted Setup menu parameters without navigating through the entire Setup menu.
Setup Menus RT-10 ADVANCED SETUP MENU ENTER DISP_MODE DISP_OFF DISP_ON OFF ON_30MIN DVD_1 DVD_2 ENTER AUTO_P_OFF ENTER REMOT_CODE The Advanced Setup menu can be used to configure advanced RT-10 mode settings for CD, SACD, and MP3 display mode, standby mode, and remote control command mode. Unlike the Setup menu, the Advanced Setup menu opens on the front panel display, which provides one-line viewing of parameters and settings as shown above.
Setup Menus Lexicon Advanced Setup Menu (continued from page 3-51) To open the Advanced Setup menu: 1. Press the Stop button to activate stop mode. In some cases, the Stop button must be pressed twice in succession to activate stop mode. 2. If the Setup menu is closed, proceed to step 3. If the Setup menu is open, press the remote control Setup button to close the Setup menu. The Advanced Setup menu is not available when the Setup menu is open. 3.
Setup Menus RT-10 REMOT_CODE DVD_1, DVD_2 Assigns a remote control command mode to the RT-10. When DVD_1 is selected, the RT-10 can be operated with an RT-10 remote control to which the DVD_1 command mode is also assigned. When DVD_2 is selected, the RT-10 can be operated with an RT-10 remote control to which the DVD_2 command mode is also assigned.
4 Playback Controls Playback Icons . . . . . . . . . . . . . . . . . . . . . . . . . . . . . . . . . . . . . . . . . . . 4-2 Loading Discs . . . . . . . . . . . . . . . . . . . . . . . . . . . . . . . . . . . . . . . . . . . . 4-2 Navigating Disc Menus . . . . . . . . . . . . . . . . . . . . . . . . . . . . . . . . . . . . . 4-3 Selecting Disc Settings . . . . . . . . . . . . . . . . . . . . . . . . . . . . . . . . . . . . .
Playback Controls Lexicon PLAYBACK ICONS Note the following: • The icon shown at the right appears on the on-screen display when the RT-10 does not allow the selected command. • • The icon shown at the right appears on the on-screen display when the loaded disc does not allow the selected command. The RT-10 is compatible with DVD-V, DVD-A, DVD-RW/R, SACD, Audio CD, CD-RW/R, Video CD, SVCD, and MP3 formats that meet the requirements outlined in the Disc Compatibility section (1-5).
Playback Controls RT-10 • The RT-10 will attempt to load a disc whenever the disc drawer is closed, even when the disc drawer is empty. To load a disc: 1. Review the bulleted items that begin on the previous page. NAVIGATING DISC MENUS Most discs include on-screen display menus that can be used to select disc settings, control playback, or view information about the disc. The descriptions that begin below provide a general overview of disc menus available for each disc format. 2.
Playback Controls Lexicon Navigating Disc Menus (continued from page 4-3) No. Description 1 Indicates the numbers of the currently playing folder and track. The MP3 Navigator does not provide this information unless playback is activated. These disc formats do not include disc menus. In some cases, CD-RW/Rs that include MP3 tracks also include an MP3 Navigator (below and 4-27). 2 Indicates the number of the selected folder and the number of folders included on the loaded disc.
Playback Controls RT-10 Disc Menu Command Matrix Button DVD-V & DVD-A DVD-RW/R MENU & TOP MENU When a DVD-V is loaded, pressing the MENU button opens and closes the disc menu, provided the loaded disc includes a menu. In some cases, pressing the TOP MENU button also opens and closes the menu. When a DVD-A is loaded, pressing the TOP MENU button opens and closes the disc top menu, provided the loaded disc includes a top menu. The TOP MENU button must be pressed to open and close DVD-A top menus.
Playback Controls Lexicon Disc Menu Command Matrix (continued from page 4-5) Button DVD-V & DVD-A DVD-RW/R Video CD & SVCD MP3 & Scroll upward and downward through disc menu items. In some cases, pressing the and arrows scrolls left and right through menu items Same as DVD-V & DVD-A. Perform no function. When the folder list is selected, pressing the and arrows scrolls upward and downward through the folder list.
Playback Controls RT-10 SELECTING DISC SETTINGS To select an audio track: Some disc menus can be used to select disc settings such as audio track (audio language and output format), subtitle language, and camera angle. In some cases, certain remote control buttons can also be used to select these settings without navigating through the disc menu. 1. When playback is activated, press the AUDIO button to open one of the Audio bars shown below.
Playback Controls Lexicon Audio Tracks (continued from page 4-7) :1 3n1l0<= Note: To select a subtitle language: The Audio bar automatically closes a few seconds after the last command is received. If this occurs, playback will automatically activate using the selected audio track. 1. When playback is activated, press the SUBTITLE button to open the Subtitle bar shown above. 3.
Playback Controls RT-10 CAMERA ANGLES • If the Angle bar indicates that camera angle 1 of 1 is selected, the currently playing scene was recorded from one camera angle. In this case, camera angle selection is not available. • If the Angle bar does not open at the top of the on-screen display, camera angle selection might not be available for the loaded disc. ANGLE • • • Pressing the remote control ANGLE button opens the Angle bar shown below, which can be used to select the desired camera angle.
Playback Controls STORING DISC SETTINGS CONDITION MEMO • • • • • • Pressing the remote control CONDITION MEMO button activates condition memory mode, which stores preferred disc settings for up to 15 DVD-Vs. Once stored, these settings will be automatically recalled whenever the disc is loaded.
Playback Controls RT-10 To delete preferred disc settings: • When playback is activated, the remote control and buttons might stop functioning. To restore functionality, press the Stop button to activate stop mode. In some cases, the Stop button must be pressed twice in succession to activate stop mode. Then, press the Play button to reactivate playback. • The RT-10 might require a few seconds to activate playback of an MP3 track that is included in a complex MP3 file structure.
Playback Controls Lexicon Playback Modes (continued from page 4-11) * † ** †† Playback Mode* DVD-V & DVD-RW/R DVD-A SACD Audio CD & CD-RW/R Video CD SVCD MP3 Playback Available Available Available Available Available Available Available Last Memory Available Not Available Not Available Not Available Available Not Available Not Available Stop Available Available Available Available Available Available Available Resume Available Not Available Not Available Not Available
Playback Controls RT-10 LAST MEMORY PLAYBACK 1. Make sure a disc for which a bookmark has been created is loaded. LAST MEMO • The remote control LAST MEMO button can be used to activate last memory playback, which creates a bookmark at the current playback time. Later, playback can be reactivated from the bookmarked playback time. • Bookmarks can be stored for up to five discs. The oldest bookmark is automatically deleted when the sixth bookmark is stored.
Playback Controls STOP MODE Lexicon RESUME MODE STOP • The front panel and remote control Stop button can be used to activate stop mode, which stops playback of the loaded disc. In some cases, the Stop button must be pressed twice in succession to activate stop mode. • When an MP3 is loaded, activating stop mode does not deselect the selected folder unless random playback or program mode is activated. • Audio automatically mutes when stop mode is activated.
Playback Controls RT-10 PAUSE MODE • • The front panel and remote control Pause button can be used to activate pause mode, which pauses playback at the current playback time. In some cases, activating pause mode creates a still frame image on the associated display device screen. Refer to the still frame playback description below for more information. • The Still Picture parameter (3-35) controls the appearance of still frame images.
Playback Controls FRAME-BY-FRAME PLAYBACK • The remote control Pause, , and buttons can be used to activate frame-by-frame playback, which plays the loaded disc one frame at a time in the selected direction. • Video CDs are not compatible with reverse frame-by-frame playback. • Audio automatically mutes when frame-by-frame playback is activated.
Playback Controls RT-10 • Press the Pause button or the opposite skip/scan button (i.e. the button if forward slow playback is activated) to pause playback at the current disc location. RANDOM PLAYBACK RANDOM • The remote control RANDOM button can be used to activate random playback, which plays the loaded disc in a random order of titles, chapters, groups, or tracks. The table on page 4-12 indicates the random playback modes available for each disc format.
Playback Controls Lexicon Random Playback (continued from page 4-17) 'xndoA C=xBter 'xndoA Trx#$ 'xndoA T0tle 'xndoA DrouB To activate random playback: 4. When random playback is in progress: 1. When playback is activated, press the remote control RANDOM button. • If a DVD is loaded, one of the Random bars shown above will open at the top of the on-screen display. The Random bar indicates the selected random playback mode. Proceed to step 2.
Playback Controls RT-10 REPEAT PLAYBACK Activates repeat playback of the currently playing track. REPEAT • Track The remote control REPEAT button can be used to activate repeat playback, which repeats playback of the currently playing title, chapter, group, track, folder, or program list. The table on page 4-12 indicates the repeat playback modes available for each disc format. • Repeat playback is not available for Video CDs and SVCDs that include PBC menus.
Playback Controls Lexicon Repeat Playback (continued from page 4-19) 'eBext T0tle 'eBext Folder 'eBext 80<# 'eBext C=xBter 'eBext Trx#$ -ro1rxA 'eBext 'eBext DrouB 'eBext (ll 'eBext 6CC 2. When playback is activated, press the REPEAT button to open one of the Repeat bars shown above will open at the top of the on-screen display. • The Repeat bar indicates the selected repeat playback mode.
Playback Controls RT-10 A-B REPEAT PLAYBACK A-B • The remote control A-B button can be used to activate A-B repeat playback from a user-defined start time (point A) to a user-defined end time (point B). A-B repeat playback can be configured to repeat playback of the user-defined playback loop once or continuously. • A-B repeat playback is not available for Video CDs and SVCDs that include PBC menus.
Playback Controls Lexicon A-B Repeat Playback (continued from page 4-21) To navigate Program tabs: To deactivate A-B repeat playback: Button Command Number Buttons Insert the corresponding value in the selected field. Refer to page 2-15 for instructions to enter values 10 and above. • • Press the A-B button or the remote control CLEAR button to activate playback at the current playback time. In some cases, the A-B button must be pressed twice in succession to deactivate A-B repeat playback.
Playback Controls RT-10 Program List Requirements Disc Format(s) Program Lists Requirements Storage DVD-V & DVD-RW/R One program title list per disc Program lists cannot: • include more than 24 entries, including titles, chapters, and pauses • include values 100 and above • include values that are not included on the loaded disc • include chapters from different titles • Program lists can be stored for up to 24 discs. • The Program Memory parameter (4-24) determines program list storage.
Playback Controls Program Mode (continued from page 4-23) Lexicon Note the following: • Program tabs automatically close a few seconds after the last command is received. If this occurs, all program list modifications that have not been previously stored will be deleted. • If the Program tab automatically closes when the Program Memory parameter is set to Off, all program list modifications that have not been previously stored will be deleted.
Playback Controls RT-10 Program Tabs -ro1rxA C=xBter -ro1rxA T0tle Current: T0tle HH HH HH HH HH HH HH HH HH HH HH HH -ro1rxA ,eAor2 HH ,o/e -ro1rxA C=xBter -ro1rxA T0tle 1F@1G HH HH HH 6CC 3.T3' HH HH HH HH HH HH HH HH HH -lx2 -'6D'(, 340t -ro1rxA Trx#$ -ro1rxA DrouB Current: HH HH HH HH HH HH HH HH HH ,o/e DrouB 1F@%G HH HH HH HH HH HH HH HH HH 3.
Playback Controls Program Mode (continued from page 4-25) Lexicon • The currently playing title will be added to the end of the program title list when a program title list has been created for the loaded disc and a program chapter list has not been created for the currently playing title.
Playback Controls RT-10 To delete stored DVD-V and DVD-RW/R program lists: ,-+ .x/01xtor Current: 1-1 1~10 Folder 1&F6783'-1 *&F6783'-* +&F6783'-+ %&F6783'-% 9&F6783'-9 :&F6783'-: 1. Load a DVD-V or DVD-RW/R for which a program list has been created. 2. When the desired disc is loaded, press the remote control PROGRAM button to open one of the Program tabs shown on page 4-25. Trx#$ 1~% 1&T'(C)1-1 *&T'(C)*-* +&T'(C)+-+ %&T'(C)%-% 3.T3' -lx2 ,3.5 340t 3.
Playback Controls Lexicon Program Mode (continued from page 4-27) Search Modes 8. Repeat steps 6 and 7 until all desired tracks have been added to the program list. Title 9. When all desired tracks have been added to the program list, press the MENU button to close the MP3 Navigator. • To activate program playback, press the PROGRAM button to open the program list. Then, press the Play button or the remote control ENTER button to activate program playback.
Playback Controls RT-10 T0tle : 1 Trx#$ : 1 T0Ae : 0&00 C=xBter : 1 -x1e : 1 T0Ae J FrxAe : 0&00 00 DrouB : 1 Frame + Time Note: Activates playback at the selected playback time (minutes:seconds) in the currently playing frame. This search mode is not available unless playback or pause mode is activated. The search bar automatically closes a few seconds after the last command is received. When this occurs, search mode is automatically deactivated.
Playback Controls Search Mode (continued from page 4-29) 5. When the desired search value is entered, press the Play button or the remote control ENTER button to activate playback at the selected playback time. • • If a valid search value was entered, playback will activate at the selected title, chapter, group, track, folder, playback time, or browsable picture. If an invalid search value was entered, the search bar will close without activating playback.
Playback Controls RT-10 Display Screens A B MnCorAxt0on:8N8 C MnCorAxt0on:8N8 MnCorAxt0on:8N8-'P 80<# T0tle 01 0* 0+ 0% 09 C=xBter 1~+0 1~*1 1~%: 1~1* 1~0I T0tle 0: 0K 0I 0L 10 1@1 D C=xBter 1~10 1~1+ 1~09 1~0% 1~0I 8M?-7(O 340t K*&0% Trx#$ 0: 0K 0I 0L 10 1@* DrouB 0: 0K 0I 0L 10 340t Trx#$ 1~1 1~1 1~1 1~1 1~% 8M?-7(O T0tle 1@* T0Ae :&91 +&1I :&90 %&1: +&** 8M?-7(O 1~: 1~+ 8M?-7(O F K*&0% Trx#$ 0: 0K 0I 0L 10 6r010nxl -lx2 70
Playback Controls Lexicon Display Bars 1 A 2 -lx2 T0tle 1-9 19&*9 -I9&+K@ 101&0* 4 2 -lx2 C=xBter D -lx2 Tr&'xte: 19&*9 *&9* 5 1 2 -lx2 C=xBter 3 1-9 19&*9 %&I F 2 -lx2 Trx#$ 4 1 &10 +&1K G 5 3 1-9 &10 -*0&19@ ++&+0 4 3 1-9 -+&0K@ 2 -lx2 DrouB 5 1 E 1 5 2 -lx2 Tr&'xte: 4 3 1-9 &10 %&I 5 3 1-9 -*&*1@ 4 2 4 3 1-9 0&+1@ 4 C 1 5 1 B 3 19&*9 *&9* The letters and numbers in the display bar illustrations shown here and at the top of the next page corres
Playback Controls RT-10 1 H 2 -lx2 Trx#$ 9 -*&9K@ 4 0&%0 +&+K 1 J 2 -lx2 (ll 3 5 Display Bar C 1 K 3 4 DVD-V L 2 -lx2 Trx#$ 5 2 -lx2 Folder 1 1 @I 0&19 T'(C) .(,3 4 9 @19 0&%0 -9*&1%@ :L&1* 4 2 -lx2 Trx#$ 5 1 I 3 *-1 -K&*I@ 4 3 M 5 0&19 K&%+ 5 1 * @+ 0&19 F6783' .(,3 3 2 -lx2 Tr&'xte: 4 3 *-1 0&19 +*0$;B< 5 Display Bar D DVD-V No. Description No. Description 1 Indicates whether playback or pause mode is activated.
Playback Controls Lexicon Display Bars (continued from page 4-33) Display Bar G The letters and numbers in the display bar illustrations shown on pages 4-32 and 4-33 correspond to the numbered items in the tables that continue below. Display Bar E DVD-A DVD-A No. Description 1 Indicates whether playback or pause mode is activated. 2 Indicates the numbers of the currently playing group and track. 3 Indicates the elapsed playback time of the currently playing track. No.
Playback Controls RT-10 Display Bar I SACD, CD, SVCD Display Bar K MP3 No. Description No. Description 1 Indicates whether playback or pause mode is activated. 1 Indicates whether playback or pause mode is activated. 2 Indicates the numbers of the currently playing track and the total number of tracks on the loaded disc. 2 Indicates the numbers of the currently playing folder and the total number of folders on the loaded disc.
Playback Controls Lexicon Display Bars (continued from page 4-35) To deactivate display mode: Press the DISPLAY button until the display bar closes. The letters and numbers in the display bar illustrations shown on pages 4-32 and 4-33 correspond to the numbered items in the tables that continue below. Display Bar M MP3 No. Description 1 Indicates whether playback or pause mode is activated. 2 Indicates the numbers of the currently playing folder and track.
5 Troubleshooting & Maintenance Troubleshooting . . . . . . . . . . . . . . . . . . . . . . . . . . . . . . . . . . . . . . . . . . 5-2 Power Issues • Remote Control Issues • Video Output Issues • Audio Output Issues • Playback Issues • Setup Menu Issues • Playback Control Issues • Miscellaneous Issues RT-10 Maintenance . . . . . . . . . . . . . . . . . . . . . . . . . . . . . . . . . . . . . . . 5-15 Disc Maintenance . . . . . . . . . . . . . . . . . . . . . . . . . . . . . . . . . . . . . . . .
Troubleshooting & Maintenance Lexicon TROUBLESHOOTING Incorrect operation is sometimes mistaken for malfunction. If problems occur, refer to this section for troubleshooting information or visit www.lexicon.com for additional troubleshooting information and answers to frequently asked questions. If problems persist, contact Lexicon Customer Service at 781-280-0300 or www.lexicon.com. POWER ISSUES The RT-10 will not power on. 1. Power the RT-10 on with the front panel On/Off button. 2.
RT-10 Troubleshooting & Maintenance The remote control number buttons cannot be used to enter values 10 and above. The picture on the associated display device screen appears stretched or otherwise distorted. 1. In some cases, the remote control +10 button must be used to enter values 10 and above. Press the +10 button once for numbers in the teens, twice for numbers in the twenties, and so on. Then, press the desired number button (0 to 9) to enter the second digit.
Troubleshooting & Maintenance Video Output Issues (continued from page 5-3) The picture on the associated display device screen includes video artifacts. (continued) 4. The RT-10 is not compatible with all high-definition display devices. In some cases, this connection might produce video artifacts in the picture. 5. The RT-10 includes copy-protection circuits that might prevent recording or produce video artifacts in the picture when the RT-10 is connected to a VCR or A/V selector.
Troubleshooting & Maintenance RT-10 3. Make sure all associated components are powered on and configured with the correct settings. In particular, make sure volume is set to an audible level. 2. Make sure the loaded disc generates digital audio output signals. Some discs, such as DVD-As and SACDs, only generate analog audio output signals. 4. Make sure the RT-10 has a digital and an analog audio output connection (2-13).
Troubleshooting & Maintenance Audio Output Issues (continued from page 5-5) The RT-10 is powered on, but there is no multi-channel audio. 1. Set the Audio Out parameter (3-16) to 5.1 Channel. When this parameter is set to 2 Channel, the RT-10 passes 2-channel audio output to the associated component. Dolby Digital, DTS, and MPEG sources are downmixed to two channels, allowing playback of all audio channels recorded on the disc. 2. Make sure multi-channel audio is available on the loaded disc.
Troubleshooting & Maintenance RT-10 RF interference is present in the audio output. PLAYBACK ISSUES 1. Make sure the RT-10 is not positioned near unshielded TV or FM antennas, cable TV decoders, and other RF emitting devices that might cause interference. Replace unshielded cables with shielded cables whenever possible. The disc drawer automatically opens when a disc is loaded. Volume level seems to differ between DVDs and CDs. 1.
Troubleshooting & Maintenance Playback Issues (continued from page 5-7) Playback will not activate. 1. Make sure a compatible disc format is loaded (1-5). 2. Make sure the disc is properly loaded (4-2). Load single-sided discs with the label side facing upward and double-sided discs with the side intended for playback facing downward. All discs must align with the circular guide inside the disc drawer. 3. Close the disc menu (if applicable).
RT-10 Troubleshooting & Maintenance Some MP3 tracks appear to be missing from the loaded disc. SETUP MENU ISSUES 1. The RT-10 recognizes a maximum of 250 folders per disc and 250 tracks per folder. It ignores all folders and tracks that exceed this number. The Setup Navigator automatically activates when the Setup Menu is opened. Playback does not begin from a bookmarked playback time on the loaded disc. 1.
Troubleshooting & Maintenance Lexicon Setup Menu Issues (continued from page 5-9) Speaker settings seem ineffective. Setup menu parameter settings are cancelled. 1. Certain speaker settings have no effect on some disc formats. For instance, speaker size settings (3-19) have no effect on DVD-As and speaker distance settings (3-20) have no effect on SACDs. 1. Parameter settings might not have been stored if the RT-10 was powered off or standby mode was activated before the Setup menu was closed.
RT-10 Troubleshooting & Maintenance 2. Close the disc drawer. Test tones cannot be activated when the disc drawer is open. The Parental Lock Level (3-45) and Country Code (3-47) controls are not available. 3. Set the Analog Jacks prompt (3-5) or the Audio Out parameter (3-16) to 5.1 Channel. Test tones cannot be activated when these parameters are set to 5.1 Channel or None. 1. Make sure the Parental Lock Password control (3-42) has been used to assign a password.
Troubleshooting & Maintenance Lexicon Setup Menu Issues (continued from page 5-11) PLAYBACK CONTROL ISSUES The Advanced Setup menu will not open. The disc menu (4-3) will not open. 1. Press the Stop button to activate stop mode. The Advanced Setup menu cannot be opened unless stop mode is activated. 1. Attempt to open the disc menu with the remote control MENU button and TOP MENU buttons. In some cases, pressing these buttons opens the same disc menu.
RT-10 Preferred disc settings (4-10) are not recalled when a disc is loaded. 1. Make sure a DVD-V is loaded. Preferred disc settings cannot be stored (or recalled) for other disc formats. 2. The preferred disc settings might have been deleted. Preferred disc settings can be stored for up to 15 discs. The oldest set of preferred settings is automatically deleted when the sixteenth set of preferred settings is stored. Preferred disc settings are also deleted when factory-default settings are restored.
Troubleshooting & Maintenance Playback Control Issues (continued from page 5-13) A certain value cannot be added to a program list (4-22). 1. Program lists cannot contain values 100 and above or values that are not included on the loaded disc. For instance, a program title list cannot include a value of 5 if the loaded disc does not include title 5. 2. The program list must include at least one blank field before a new value can be inserted. A program list is not stored. 1.
Troubleshooting & Maintenance RT-10 2. If the loaded disc was recorded in 24 frames-per-second progressive-scan format, the RT-10 misses one-in-six frames. Because of this, frame numbers appear discontinuous and the frame + time search mode might not find the selected frame. RT-10 MAINTENANCE • The RT-10 exterior surface can be cleaned with a soft, dry, lint-free cloth. Do not use a cloth made with steel wool or metal polish.
Troubleshooting & Maintenance Lexicon DISC MAINTENANCE RESTORING FACTORY-DEFAULT SETTINGS • Restoring factory-default settings resets all Setup and Advanced Setup menu parameters to their factory-default setting and deletes all passwords, Setup menu shortcuts, bookmarks, preferred disc settings, and program lists. Before restoring factory-default settings, it is recommended to record all user-defined settings on the installation worksheet that begins on page A-17.
A Appendix Specifications . . . . . . . . . . . . . . . . . . . . . . . . . . . . . . . . . . . . . . . . . . . . A-2 Declaration of Conformity . . . . . . . . . . . . . . . . . . . . . . . . . . . . . . . . . . . A-3 Setup Menu Screens . . . . . . . . . . . . . . . . . . . . . . . . . . . . . . . . . . . . . . . A-4 Table of Languages & Language Codes . . . . . . . . . . . . . . . . . . . . . . . . A-14 Table of Country Codes. . . . . . . . . . . . . . . . . . . . . . . . . . . . . . . . . . . .
Appendix SPECIFICATIONS Lexicon Audio Output Connectors Analog • 4 stereo (RCA) pairs for Front L/R (2 pairs), Surround L/R, Center, and Subwoofer Digital • 1 AES/EBU (XLR), 1 coaxial (RCA), and 1 optical (Toslink) Note the following: • • • The RT-10 is manufactured for sale in several different countries. Each version features a rear panel that includes connectors appropriate to that particular region. These specifications include all possible connectors.
Appendix RT-10 Video Performance D/A Conversion • 12-bit/108MHz Bandwidth • 6MHz Signal-to-Noise Ratio • 75dB (Y output) Output Impedance • 75Ω Output Level • 1.0V peak-to-peak Other A/V Euroconnector • 21-pin SCART connector IR Input • 3.
Appendix Lexicon SETUP MENU SCREENS JFUJV Select SJUWX Y Y SIGe JTHt OuPHI1 O2 RHPeI1 R2 Language QeneCal 1 SetuE FaGHgatIC 2 2 [hannel OcE [InnectHIn OnalIg haceK 5g1 [hannel 4 FIt [InnecteP 5 2 channel daceK LIC LfV D JFUJV Select SJUWX 1 SetuE FaGHgatIC 2 OcE [InnectHIn 4SuCCIunP SEeaeeCK XCeKent FIt XCeKent 5 SuCCIunP KEeaeeCK aCe cInnecteP tI an acElHLHeC Y JFUJV Select SJUWX 1 SetuE FaGHgatIC 2 FI OcE [InnectHIn 4 _]elm X[S OuPHI neK MInot pnIk 5 MHgHtal daceK nIt cIcEatHile kHth _]e
Appendix RT-10 jjj jjj jjj jjj jjj jjj jjj SIGe SJUWX jjj OutI jjj Bn jjj Bn SJUWX JTHt OuPHI MV[ jjj BLL MIlib MHgHtal But jjj MIlib MHgHtal MUS But jjj MUS X[S LHneaC X[S But jjj MIkn SacEle Bn SXJQ But jjj SXJQ X[S Set auPHI MHgHtal IutEut LICcatftIne aPduKt SIGe SJUWX JTHt SJUWX Language Language Language Language jjj jjj jjj jjj JTHt jjj JTEeCt jjj BLL`uKa jjj Bn jjj SHngle SIGe SJUWX JTHt OuPHI1 O2 RHPeI1 R2 Language QeneCal JTHt Set GHPeI OPduKt GHPeI LICcatfsualHtb SIGe SJUWX
Appendix Audio 1 & 2 Tabs Lexicon OuPHI1 O2 RHPeI1 R2 Language QeneCal OuPHI MV[ MIlib MHgHtal But MUS But LHneaC X[S But SXJQ But MHgHtal But SO[M Xlabiace SIGe jjjBLL BLL jjjBn MIlib MHgHtal jjj MUS X[S jjj MIkn SacEle Bn jjj SXJQ X[S jjj Bn jjj 2ch OCea SJUWX JTHt OuPHI1 O2 RHPeI1 R2 Language QeneCal OuPHI MV[ MIlib MHgHtal But MUS But LHneaC X[S But SXJQ But MHgHtal But SO[M Xlabiace SIGe jjj BLL jjj MIlib MHgHtal jjj MUS X[S jjjMIkn MIknSacEle SacEleBn Bn X[S BLL jjjMIkn SXJQSacEle jjj Bn jjj 2c
Appendix RT-10 Speaker Setting Screens ENTER O1 OuPHI2 RHPeI1 R2 Language QeneCal SIGe Gain Setting Screens O1 OuPHI2 RHPeI1 R2 Language QeneCal SEeaeeC SettHng SHme LfV jjj LaCge [ jjj LaCge LS jjj LaCge VS jjj LaCge S\ jjj Bn OuPHI But jjj 2 [hannel StaCt SEeaeeC SettHng QaHn SettHng jjj rHT [M MHgHtal MHCect jjj BLL JFUJV Select SJUWX JTHt MHKtance JFUJV L O1 OuPHI2 RHPeI1 R2 Language QeneCal C R SW LS Select RS SJUWX VetuCn JTHt SEeaeeC SettHng MHKtance LfV jjj 10g0Lt [ jjj 10g0L
Appendix Video 1 & 2 Tabs Lexicon OuPHI1 O2 RHPeI1 R2 Language QeneCal UR ScCeen [IcEInent RHPeI RHPeI But SjRHPeI But rCace SeaCch ScCeen SaGeC `LetteC qITa jjj4^Z 1]^_ `\HPea `Xan Scana jjj4^Z XCIgCeKKHGe `\HPea jjj1]^_ RHPeI jjj1]^_ S2 `[IcECeKKePa jjj BLL jjj BLL SIGe SJUWX JTHt OuPHI1 O2 RHPeI1 R2 Language QeneCal UR ScCeen [IcEInent RHPeI RHPeI But SjRHPeI But rCace SeaCch ScCeen SaGeC jjj 1]^_ `\HPea jjj XCIgCeKKHGe jjj RHPeI jjjS1 S2 jjjS2 BLL jjj BLL SIGe SJUWX JTHt jjjQCab QCab qlace j
Appendix RT-10 Video Adjust Screens OuPHI1 O2 R1 RHPeI2 Language QeneCal qacegCIunP RHPeI OPduKt StHll Xlabiace Bn ScCeen MHKElab Ongle NnPHcatIC SIGe jjj QCab StaCt jjj OutI jjj Bn jjj Bn JFUJV Select SJUWX JTHt XCIgg SItHIn XuCe[Hneca nFV [FV SFV qFV ShaCEneKK lHgh ShaCEneKK SHP SecICb Xage 1f2 LaKt KlIk OutI1 OutI2 Bn BLL ILL caT ILL caT ILL caT ILL caT KILt LHne KILt LHne BLL 1 2 Z Xage 2f2 MetaHl \hHte LeGel qlace LeGel qlace SetuE Qacca lue [hCIca LeGel [hCIca Melab SecICb ILL cHn cHn caT
Appendix Language Tab Lexicon OuPHI1 O2 RHPeI1 R2 Language QeneCal BSM Language OuPHI Language SuitHtle Language OutI Language MRM Language SuitHtle MHKElab SuitHtle BLL jjjJnglHKh JnglHKh jjjLCancaHK JnglHKh jjjMeutKch JnglHKh jjjNtalHanI Bn jjjJKEanIl JnglHKh jjj Bn jjj SelecteP SuitHtle SIGe SJUWX JTHt OuPHI1 O2 RHPeI1 R2 Language QeneCal BSM Language OuPHI Language SuitHtle Language OutI Language MRM Language SuitHtle MHKElab SuitHtle BLL jjj JnglHKh jjj JnglHKh jjj JnglHKh jjjBn Bn jjjBLL JnglH
Appendix RT-10 General Tab OuPHI1 O2 RHPeI1 R2 Language QeneCal SetuE Senu SIPe SetuE FaGHgatIC XaCental LIce qInuK QCIuE OutI MHKc Senu QCIuE Xlabiace jjjJTEeCt JTEeCt qaKHc jjj BLL`uKa SetuE Senu SIPe SetuE FaGHgatIC XaCental LIce qInuK QCIuE OutI MHKc Senu QCIuE Xlabiace jjj Bn jjj SHngle SIGe SJUWX JTHt OuPHI1 O2 RHPeI1 R2 Language QeneCal SetuE Senu SIPe SetuE FaGHgatIC XaCental LIce qInuK QCIuE OutI MHKc Senu QCIuE Xlabiace jjj JTEeCt Parental Lock: Password Screens SJUWX JTHt OuPHI1 O2
Appendix Parental Lock: Password Change Screens Lexicon OuPHI1 O2 RHPeI1 R2 Language QeneCal SetuE Senu SIPe SetuE FaGHgatIC XaCental LIce qInuK QCIuE OutI MHKc Senu QCIuE Xlabiace SIGe jjj JTEeCt Select SJUWX JTHt OuPHI1 O2 RHPeI1 R2 Language QeneCal XaCental LIce^ XaKKkICP [hange – – VetuCn JTHt jjj JTEeCt Select SJUWX JTHt OuPHI1 O2 RHPeI1 R2 Language QeneCal XaCental LIce^ LeGel [hange LeGel 1 SIGe A-12 2 Z 4 5 SJUWX ] D JnteC 8 – – * SJUWX VetuCn JTHt * * * JFUJV +f–
Appendix RT-10 Parental Lock: Country Code Screens OuPHI1 O2 RHPeI1 R2 Language QeneCal SetuE Senu SIPe SetuE FaGHgatIC XaCental LIce qInuK QCIuE OutI MHKc Senu QCIuE Xlabiace SIGe jjj JTEeCt OuPHI1 O2 RHPeI1 R2 Language QeneCal OuPHI1 O2 RHPeI1 R2 Language QeneCal [IuntCb [IPe^ [InLHCc [IPe FucieC [IuntCb [IPe^ [InLHCc [IPe FucieC – jjjXaKKkICP BLL`uKa LeGel [IPe jjj[IuntCb Bn jjj SHngle JFUJV Select SJUWX JTHt +f– SIGe – – – * SJUWX VetuCn JTHt +f– SIGe * * * JFUJV SJUWX VetuCn
Appendix Lexicon TABLE OF LANGUAGES & LANGUAGE CODES Numeric Code Abb. English (Anglais) 0514 en French 0618 German Italian Japanese (Japonais) Numeric Code Abb. Numeric Code Abb.
Appendix RT-10 Numeric Code Abb.
Appendix Lexicon TABLE OF COUNTRY CODES Numeric Code Abb. Numeric Code Abb.
Appendix RT-10 INSTALLATION WORKSHEET Setup Navigator Setting Audio1 Setting Audio2 Setup Navigator Audio DRC Audio DRC OSD Language Dolby Digital Out Speaker Setting* TV Type DTS Out Gain Setting* Analog Jacks Linear PCM Out CD Digital Direct Center Speaker MPEG Out Surround Speakers Digital Out Sub-woofer SACD Playback Setting * Refer below for Speaker Setting & Gain Setting.
Appendix Installation Worksheet Video1 Lexicon (continued from page A-17) Setting Video Adjust Setting Language TV Screen PureCinema OSD Language Component Video YNR Audio Language Video Out CNR Subtitle Language S-Video Out MNR Auto Language Frame Search BNR DVD Language Screen Saver Sharpness High Subtitle Display Sharpness Mid Subtitle Off Video2 Setting Detail Background White Level General Video Adjust* Black Level Setup Menu Mode Still Playback Black Setup Setup Na
Index SYMBOLS NUMBERS (continued) A (continued) Arrow, 2-16, 3-2, 3-4, 3-9, 3-52, 4-6, 4-22 Arrow, 2-16, 3-2, 3-4, 3-9, 3-52, 4-6, 4-22 Arrow, 2-16, 3-2, 3-4, 3-9, 4-6, 4-22 , 2-5, 2-17, 4-16 , 2-17, 4-6, 4-18, 4-19, 4-21 / , 2-5, 2-17 Arrow, 2-16, 3-2, 3-9, 4-6, 4-22 Button, 2-4, 2-16, 4-11 Indicator, 2-7 , 2-5, 2-17, 4-16 , 2-17, 4-6, 4-18, 4-19, 4-21 / , 2-5, 2-17 192kHz Indicator, 2-7 2 Button, 2-15, 4-5, 4-22, 3-53 3 Button, 2-15, 4-5, 4-22 4 Button, 2-15, 4-5, 4-22 5 Button, 2-15, 4-5
C (continued) Channel Separation, A-2 Channels Indicator, 2-8 Character Display, 2-6 Indicator, 2-6 Chroma Delay Parameter, 3-31, 3-32 Level Parameter, 3-31, 3-32 Chrominance Noise Reduction (CNR) Parameter, 3-30, 3-31 CLEAR Button, 2-15, 4-5, 4-17, 4-19, 4-21, 4-22 CNR (Chrominance Noise Reduction) Parameter, 3-30, 3-31 Command Matrix Disc Menu, 4-5 to 4-6 Remote Contorol, 2-14 to 2-18 Command Modes Assigning Remote Control, 3-53 DVD_1, 3-53 DVD_2, 3-53 Component Video Parameter, 3-24, 3-27 Output Connecto
F (continued) L (continued) O Front Panel Display, 2-3, 2-6 (ill.) to 2-8 (indicators) Illustration, 2-2 Overview, 2-2 to 2-5 Function Memory Mode, 2-18, 3-50, A-12 (tab) Language(s) Tab, 3-36 to 3-41, A-10 (ills.
Index(continued) P (continued) R (continued) S (continued) Product Registration, 1-3 Prog.
S (continued) V (continued) Sub-woofer Prompt, 3-3, 3-7 Surround Speakers Prompt, 3-3, 3-6 SW Parameter, 3-18, 3-22 Video Connections, 2-11 to 2-12 ON/OFF Button, 2-15 Out Parameter, 3-24, 3-27 Output, 2-9 to 2-10, 2-11 to 2-13, 5-3 to 5-4, A-2 Output Impedance, A-3 Performance Specifications, A-3 T Table of Contents, iv to v THD + Noise, A-2 Test Tones, Activating, 3-22, 3-23 TITLE TOTAL Indicator, 2-6 Indicator, 2-7 TOP MENU Button, 2-16, 4-5 Trigger Input Connector, 2-11 Control, 2-11 Input Switch
Notes
Notes
LIMITED WARRANTY Lexicon, Inc. offers the following warranty on this product: What is the Duration of this Warranty? This warranty will remain in effect for one (1) year from the original date of purchase. 2. Damage occurring during any shipment of this product. Claims for shipping damages must be made with the carrier. 3. Include a copy of the original dated sales receipt. (A copy of the original dated sales receipt must be presented whenever warranty service is required.) 3.
Lexicon, Inc. 3 Oak Park Bedford, MA 01730-1413 USA Tel 781-280-0300 Fax 781-280-0490 www.lexicon.com Customer Support Tel 781-280-0300 Fax 781-280-0495 (Sales) Fax 781-280-0499 (Service) Lexicon Part No.