
User's Manual

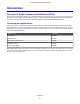
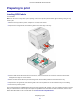
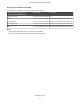
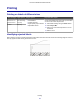

Table Of Contents
- Contents
- Introduction
- Preparing to print
- Printing
- Understanding the RFID menu
- Understanding RFID printer messages
- Notices
- Index

Printing
Printing on labels of different sizes
Label size/type Input options Output options Rejected label output
Less than 7 in. 250-sheet tray
• 5-bin Mailbox
• Output expander
• High-capacity output stacker
• Adjustable stacker
Set the default Reject Bin so that all rejected labels
are sent to the same output device.
1 Select RFID Settings using the Menu button.
2 Select Reject Bin.
3 Select one of the listed output bins to use as
the default.
4 Exit the menu.
Less than 9 in. Any tray
9–14 in. Any tray
Identifying rejected labels
When a label is rejected, a printed grid appears at the bottom of the label sheet as shown in the following diagram. However,
this only applies to label sheets greater than 9 inches.
Lexmark Confidential until announced
Printing
8