
Printer User's Guide
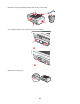
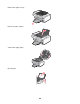
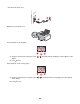
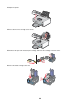
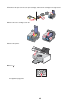
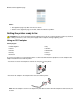
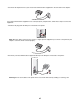
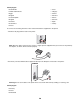
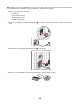
Table Of Contents
- Contents
- Introduction
- Setting up the printer
- Checking the box contents
- Understanding the parts of the printer
- Standalone printer setup
- Getting the printer ready to fax
- Using an RJ11 adapter
- Choosing a fax connection
- Connecting to an answering machine
- Connecting directly to a telephone wall jack
- Connecting directly to a telephone wall jack in Germany
- Connecting to a computer with a modem
- Connecting to a telephone
- Setting up to fax while behind a PBX
- Using a digital phone service
- Understanding the control panel
- Installing the printer software
- Understanding the printer software
- Turning printing voice notification on or off
- Installing an internal wireless print server
- What do the Wi-Fi indicator lights mean?
- Security Information
- Networking
- Loading paper and original documents
- Loading paper
- Using the automatic paper type sensor
- Loading envelopes
- Loading labels
- Loading greeting cards, index cards, photo cards, and postcards
- Loading transparencies
- Loading iron-on transfers
- Loading custom-size paper
- Loading banner paper
- Loading original documents on the scanner glass
- Loading original documents into the Automatic Document Feeder
- Using the Paper Handling submenu
- Printing
- Printing basic documents
- Printing a document
- Printing a Web page
- Printing photos or images from a Web page
- Printing multiple copies of a document
- Collating copies
- Printing the last page first (reverse page order)
- Printing multiple pages on one sheet (N-Up)
- Understanding the Print Files menu
- Printing documents from a removable storage device
- Pausing print jobs
- Canceling print jobs
- Printing specialty documents
- Choosing compatible specialty paper types
- Printing envelopes
- Printing greeting cards, index cards, photo cards, and postcards
- Printing a document as a poster
- Printing an image as a poster
- Printing a booklet
- Assembling a booklet
- Printing on custom-size paper
- Printing iron-on transfers
- Printing transparencies
- Printing a banner
- Printing on both sides of the paper (duplexing)
- Changing printer settings
- Printing basic documents
- Working with photos
- Retrieving and managing photos
- Inserting a memory card
- Inserting a flash drive
- Printing photos from a PictBridge-enabled digital camera
- Understanding Photo and the Photo Card Mode menu
- Understanding the PictBridge Default Print Settings menu
- Using the Change PictBridge Default Settings submenu
- Using the Change Photo Default Settings submenu
- Transferring photos from a memory device to the computer using the control panel
- Transferring all photos from a memory card using the computer
- Transferring selected photos from a memory card using the computer
- Transferring selected photos from a CD or flash drive using the computer
- Transferring photos from a memory card to a flash drive
- Changing the Productivity Studio temporary files preferences
- Changing the Productivity Studio searched folders preferences
- Changing the Productivity Studio library preferences
- Changing the Productivity Studio transfer settings
- Editing photos
- Editing photos using the control panel
- Cropping a photo
- Rotating a photo
- Changing the Resolution / Size of a photo
- Applying One-Click Auto Fixes to a photo
- Reducing the red-eye effect in a photo
- Blurring/Sharpening a photo
- Enhancing a photo
- Changing the Hue / Saturation of a photo
- Changing the Gamma Value of a photo or image
- Despeckling a photo
- Changing the Brightness / Contrast settings of a photo
- Applying a color effect to a photo
- Changing the Exposure setting of a photo
- Removing wavy patterns from scanned photos, magazines, or newspapers
- Printing photos
- Printing photos from a CD or removable storage device using the computer
- Viewing / Printing photos from the Productivity Studio
- Printing Photo Packages
- Creating Photo Greeting Cards
- Printing a photo or selected photos
- Printing all photos from a memory device
- Printing photos stored on a memory device using the proof sheet
- Using a PictBridge-enabled digital camera to control printing photos
- Printing photos from a digital camera using DPOF
- Creating a slideshow
- Retrieving and managing photos
- Copying
- Making a copy
- Making a color or black-and-white copy
- Copying on both sides of the paper (duplexing)
- Copying photos
- Copying a photo using the computer
- Adjusting copy quality
- Adjusting the brightness of a copy
- Collating copies using the control panel
- Repeating an image on one page
- Copying multiple pages on one sheet (N-Up)
- Enlarging or reducing an image
- Understanding Copy and the Copy Mode menu
- Using the Change Copy Default Settings submenu
- Changing the default copy settings
- Scanning
- Scanning a document
- Scanning a document using the computer
- Scanning text for editing
- Scanning images for editing
- Scanning a photo to Work with Documents and Photos
- Scanning multiple photos at one time using the computer
- Creating a PDF from a scanned item
- Canceling a scan job
- Customizing scan settings using the computer
- Understanding Scan and the Scan Mode menu
- Using the Change Scan Default Settings submenu
- Changing the default scan settings
- Scanning to a computer over a network using the control panel
- Saving a scanned image on the computer
- Changing the Productivity Studio scan settings
- Adding a file to an e-mail message
- Adding a new scanned image to an e-mail message
- Scanning documents or images for e-mailing
- Changing the Productivity Studio e-mail screen preferences
- Faxing
- Sending a fax
- Receiving a fax
- Forwarding faxes
- Using the Phone Book
- Customizing fax settings
- Customizing settings using the Fax Setup Utility
- Understanding Fax and the Fax Mode menu
- Using the Change Fax Default Settings submenu
- Printing the Fax Settings List
- Setting up a fax footer
- Creating a fax cover page using the control panel
- Blocking junk faxes
- Blocking unwanted changes to fax settings
- Using the Fax Solutions Software
- Setting up a dialing prefix
- Setting the distinctive ring
- Setting the number of rings before receiving a fax automatically
- Setting up Speed Dial
- Printing fax activity reports
- Maintaining the printer
- Understanding the Maintenance menu
- Installing print cartridges
- Removing a used print cartridge
- Refilling print cartridges
- Using genuine Lexmark print cartridges
- Aligning print cartridges
- Cleaning the print cartridge nozzles
- Wiping the print cartridge nozzles and contacts
- Preserving the print cartridges
- Cleaning the scanner glass
- Cleaning the exterior of the printer
- Ordering supplies
- Troubleshooting
- Setup Troubleshooting
- Wireless troubleshooting
- How do I find out what type of security my network is using?
- Check your security keys
- Wireless network printer does not print
- Wi-Fi indicator is not lit
- Wi-Fi indicator light is blinking orange during installation
- Wi-Fi indicator light is orange
- Wireless printer is no longer working
- Changing wireless settings after installation
- Resetting an internal wireless print server to factory default settings
- Network printer does not show up in the printer selection list during installation
- Printer cannot connect to the wireless network
- Wireless Setup Utility cannot communicate with the printer during installation (Windows users only)
- Checking your network name (Windows users only)
- Ping the access point
- Ping the printer
- Run the Wireless Setup Utility (Windows users only)
- Changing wireless settings after installation (Windows users only)
- Check printer ports (Windows users only)
- Print troubleshooting
- Partial 4 x 6 in. (10 x 15 cm) photo prints when using a PictBridge-enabled digital camera
- Improving print quality
- Poor text and graphic quality
- Poor quality at the edges of the page
- Print speed is slow
- Partial document or photo prints
- Photo smudges or scratches
- Checking the print cartridges
- Ink levels seem incorrect
- Ink levels seem to go down too quickly
- A blank or incorrect page prints
- Characters on printout are missing or unexpected
- Colors on printout are faded or differ from colors on the screen
- Glossy photo paper or transparencies stick together
- Page prints with different fonts
- Print is too dark or smudged
- Printed characters are improperly formed or are not aligned correctly
- Printouts have alternating bands of light and dark print
- Transparencies or photos contain white lines
- Vertical straight lines are not smooth
- White lines appear in graphics or solid black areas
- Checking the printer status
- Settings are not saved
- Checking printer readiness
- Checking the Spool Settings for banner printing
- Resolving font problems
- Printer is busy printing another job
- Ready or Busy Printing is listed as the status
- Printing a test page
- Test page does not print
- Checking the port setting
- External print server is not working
- Removing an external print server
- Cable is not connected, is loose, or is damaged
- Printer is plugged in but does not print
- Printer is trying to print to File
- Printer cannot communicate with computers over peer-to-peer network
- Printer is not able to communicate with the computer
- Problems when copying, scanning, or faxing
- Wrong printer is attached
- Updating the printer software
- Bidirectional communication is not established
- Experiencing poor quality or incorrect output
- Cannot print from digital camera using PictBridge
- Jams and misfeeds troubleshooting
- How to clear and avoid paper jams
- Duplex unit does not operate correctly
- Two-sided paper type error
- Two-sided printing is not supported on the current paper size
- Two-sided printing is not supported on the current paper type
- Paper jam in the printer
- Paper jam in the paper support
- Paper or specialty media misfeeds
- Printer does not feed paper, envelopes, or specialty media
- Banner paper jams
- Paper continues to jam
- Paper jam in the Automatic Document Feeder (ADF)
- Paper jam in the duplex unit
- Memory card troubleshooting
- Copy troubleshooting
- Scan troubleshooting
- Fax troubleshooting
- Cannot send or receive a fax
- Can send but not receive faxes
- Can receive but not send faxes
- Printer receives a blank fax
- Received fax has poor print quality
- Caller ID information is not displayed
- Fax Error
- Remote Fax Error
- Phone Line Busy
- Phone Line Error
- Failed to Connect
- Unsupported Paper Size
- Unsupported Fax Mode
- No Answer
- Error messages on the printer display
- Alignment Error
- Cartridge Error (1102, 1203, 1204, or 120F)
- Black Ink Low / Color Ink Low / Photo Ink Low
- Clear Carrier Jam
- Cover Open
- Error 1104
- Left Cartridge Error / Right Cartridge Error
- Left Cartridge Incorrect / Right Cartridge Incorrect
- Left Cartridge Missing / Right Cartridge Missing
- Memory Failure
- No images have been selected
- No photo/paper size selection has been made
- Could not detect a proof sheet
- No proof sheet information
- No valid photo image files detected
- Only one photo enhancement may be chosen at a time
- Only one photo/size selection can be chosen at a time
- Paper or Photo Size error
- PictBridge communications error
- Please remove the camera card.
- Some photos removed from card by host.
- Problems reading the memory card
- Error messages on the computer screen
- Notices
- Product information
- Edition notice
- UNITED STATES GOVERNMENT RIGHTS
- Trademarks
- Conventions
- Federal Communications Commission (FCC) compliance information statement
- Exposure to radio frequency radiation
- Industry Canada notice
- European Community (EC) directives conformity
- European EC directives conformity statement for radio products
- Noise emission levels
- Waste from Electrical and Electronic Equipment (WEEE) directive
- Product disposal
- Temperature information
- Federal Communications Commission (FCC) compliance information statement
- Notice to users of the Canadian telephone network
- Notice to users of the New Zealand telephone network
- South Africa telecommunications notice
- ENERGY STAR
- Power consumption
- Statement of Limited Warranty
- LEXMARK LICENSE AGREEMENTS
- Networking glossary
- Index
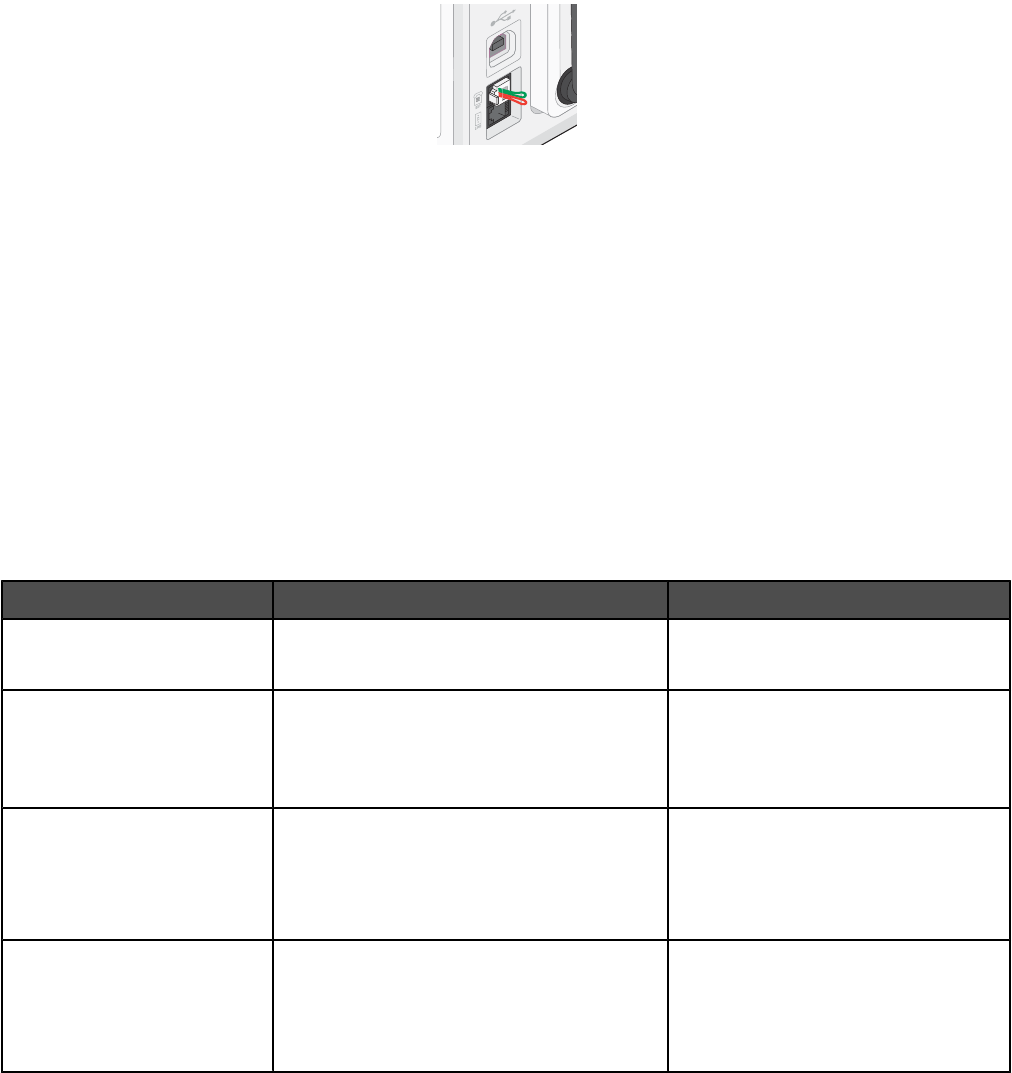
There is a plug installed in the EXT port of the printer. This plug is necessary for the proper functioning of the printer.
Note: Do not remove the plug. If you remove it, other telecommunications devices in your home (such as telephones
or answering machines) may not work.
Choosing a fax connection
You can connect the printer with equipment such as a telephone, an answering machine, or a computer modem. If
problems occur, see “Setup Troubleshooting” on page 143.
Note: The printer is an analog device that works best when directly connected to the wall jack. Other devices (such
as a telephone or answering machine) can be successfully attached to pass through the printer, as described in the
setup steps. If you want a digital connection such as ISDN, DSL, or ADSL, a third-party device (such as a DSL filter)
is required.
You do not need to attach the printer to a computer, but you do need to connect it to a telephone line to send and
receive faxes.
You can connect the printer to other equipment. See the following table to determine the best way to set up the
printer.
Equipment Benefits See this section
• The printer
• A telephone cord
Send and receive faxes without using a
computer.
“Connecting directly to a telephone
wall jack” on page 31
• The printer
• A telephone
• Two telephone cords
• Use the fax line as a normal telephone
line.
• Send and receive faxes without using a
computer.
“Connecting to a telephone” on
page 33
• The printer
• A telephone
• An answering machine
• Three telephone cords
Receive both incoming voice messages and
faxes.
“Connecting to an answering
machine” on page 29
• The printer
• A telephone
• A computer modem
• Three telephone cords
Send faxes using the computer or the
printer.
“Connecting to a computer with a
modem” on page 32
Connecting to an answering machine
Connect an answering machine to the printer to receive both incoming voice messages and faxes.
29