C520, C522, and C524 User’s Guide Lexmark and Lexmark with diamond design are trademarks of Lexmark International, Inc., registered in the United States and/or other countries. © 2005 Lexmark International, Inc. All rights reserved. 740 West New Circle Road Lexington, Kentucky 40550 June 2005 www.lexmark.
Edition: June 2005 The following paragraph does not apply to any country where such provisions are inconsistent with local law: LEXMARK INTERNATIONAL, INC., PROVIDES THIS PUBLICATION “AS IS” WITHOUT WARRANTY OF ANY KIND, EITHER EXPRESS OR IMPLIED, INCLUDING, BUT NOT LIMITED TO, THE IMPLIED WARRANTIES OF MERCHANTABILITY OR FITNESS FOR A PARTICULAR PURPOSE. Some states do not allow disclaimer of express or implied warranties in certain transactions; therefore, this statement may not apply to you.
Contents Chapter 1: Overview ........................................................................................................... 8 Basic models ................................................................................................................................................... 8 Configured model ............................................................................................................................................ 9 Illustrations in this publication ................
Contents Canceling a job from a computer running Windows ............................................................................... 27 Canceling a job from a Macintosh computer running Mac OS 9.x .......................................................... 27 Canceling a job from a Macintosh computer running Mac OS X ............................................................ 27 Printing the menu settings page .............................................................................................
Contents Clearing jams from the multipurpose feeder .................................................................................................. 77 Clearing jams from the manual feed slot ....................................................................................................... 77 Chapter 8: Maintaining the printer .................................................................................. 78 Determining the status of supplies .....................................................
Contents Disabling Power Saver ................................................................................................................................ 107 Encrypting the disk ...................................................................................................................................... 107 Configuring printer alerts .............................................................................................................................
Contents Industry Canada compliance statement ............................................................................................... 136 Avis de conformité aux normes de l’industrie du Canada ..................................................................... 136 European Community (EC) directives conformity ................................................................................. 136 The United Kingdom Telecommunications Act 1984 .........................................................
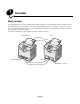
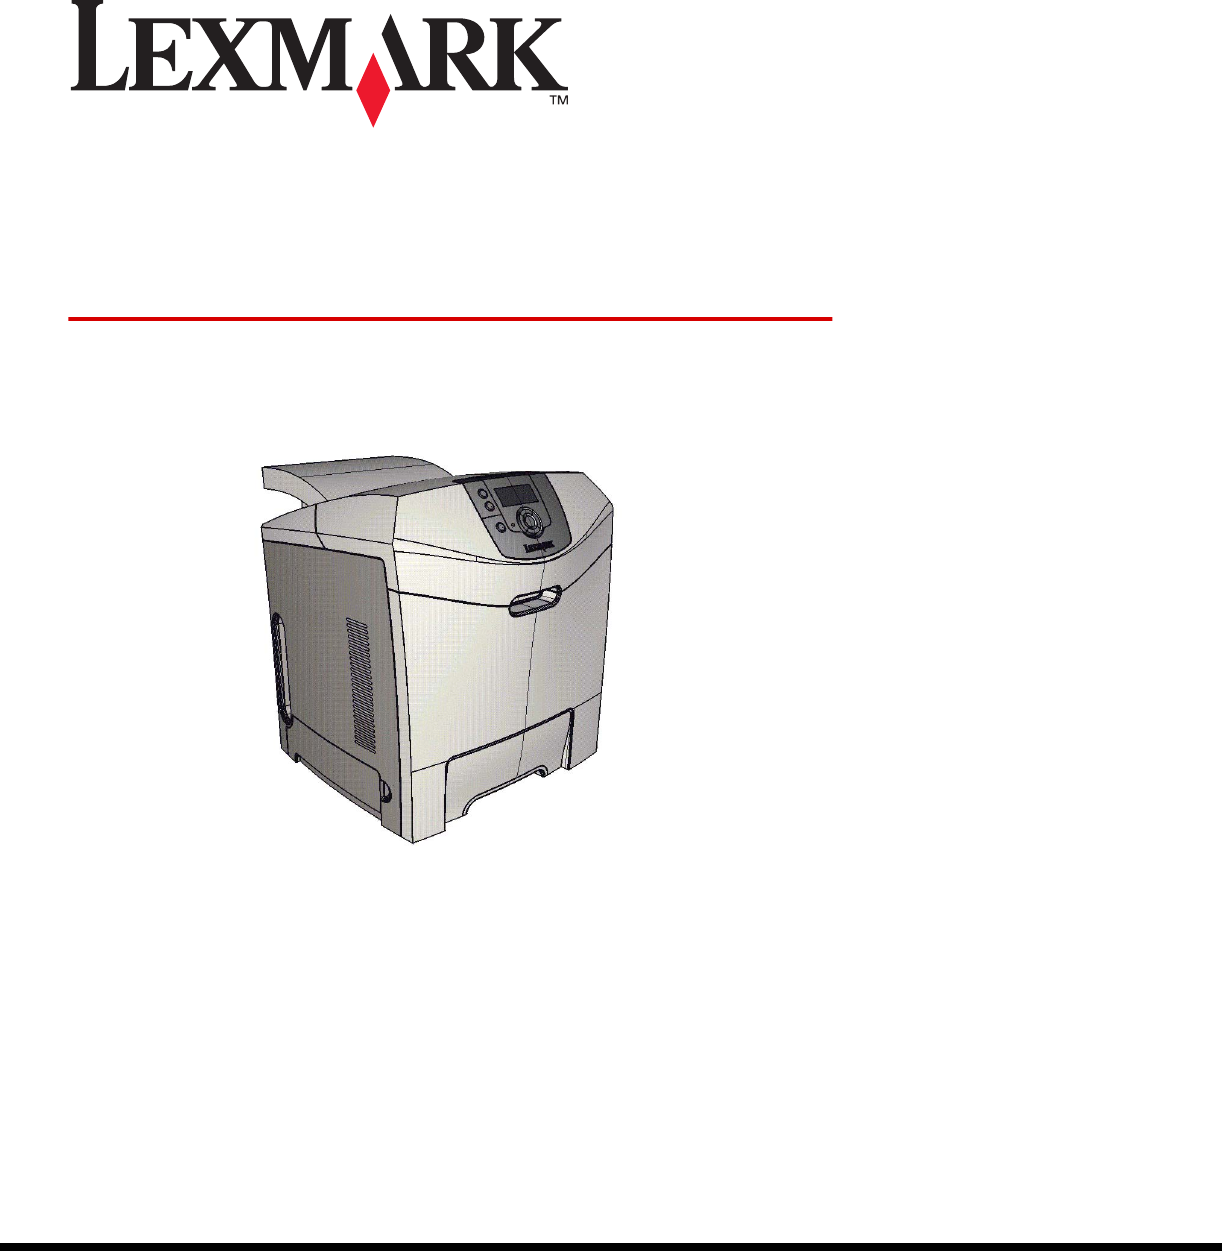
1 Overview Basic models The following illustration shows the Lexmark™ C520, C522, and C524 of the Lexmark family of printers and their features. C520 and C522 have a manual feed slot on the front of the standard tray. C524 has a multipurpose feeder located on the front of the standard tray which can be seen once it is lowered using the latch. The standard tray for all models is available when it is pulled out using the handhold. The C522 and C524 have an optional 500-sheet drawer available for purchase.
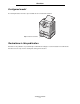
Overview Configured model The following illustration shows the option available for the Lexmark C522 and C524. Optional 500-sheet drawer Illustrations in this publication Illustrations in this publication are predominantly for C524 with the multipurpose feeder. Illustrations for C522 with the manual feed slot are only shown for loading and clearing jams instructions.
2 Installing drivers for local printing A local printer is a printer attached to the computer using a USB or parallel cable. The local printer is intended to be used by the computer to which it is attached. If attaching a local printer, install the printer driver on the computer before setting up the printer. The printer driver is software that lets the computer communicate with the printer. The procedure to install drivers depends on the operating system used.
Installing drivers for local printing 2 Click Install Printer and Software. Note: Some Windows operating systems require that the user has administrative access to install printer drivers on the computer. 3 Click Agree to accept the license agreement. 4 Select Suggested, and click Next. The Suggested option is the default installation for local and network-attached setup. To install utilities, change settings, or customize device drivers, select Custom, and follow the instructions on the screen.
Installing drivers for local printing Before printing, establishing communication between the printer and computer is required. To do this: 1 Set serial parameters in the printer. 2 Install a printer driver on the attached computer. 3 Match the serial settings in the COM port. Setting parameters in the printer 1 Press 2 Press on the operator panel. until Reports appears, and then press .
Installing drivers for local printing Installing a printer driver A printer driver must be installed on the computer that is connected to the printer. Note: Windows 95 and Windows 98 (first edition) users should follow the installation directions in Using Windows 95 and Windows 98 (first edition). 1 Insert the drivers CD. It should launch automatically. If the CD does not launch automatically, click Start à Run, and type the following in the Run dialog: D:/Setup.
Installing drivers for local printing Creating a queue in Print Center / Printer Setup Utility (Mac OS X) 1 Install a PostScript Printer Description (PPD) file on the computer. a Insert the drivers CD. b Double-click the installer package for the printer. Note: A PPD file provides detailed information about the capabilities of a printer to the Macintosh computer. c Click Continue on the Welcome screen and again after viewing the Readme file.
Installing drivers for local printing 4 Select Printer (USB), and click OK. 5 In the USB Printer Selection section, click Change. If the printer does not appear in the USB Printer Selection list, make sure the USB cable is properly connected, and the printer is turned on. 6 Select the name of the printer, and click OK. The printer appears in the original Printer (USB) window. 7 In the PostScript Printer Description (PPD) File section, click Auto Setup.
3 Installing drivers for network printing Printing a network setup page If the printer is attached to a network, print a network setup page on the printer to verify the network connection. This page also provides important information that helps in configuring for network printing. 1 Make sure the printer is on. 2 Press 3 Press until Reports appears, and then press 4 Press until Network Setup Page appears, and then press on the operator panel. . .
Installing drivers for network printing 9 Using the navigation arrow buttons, enter the IP gateway. Once it is entered, press . Submitting Selection appears briefly. 10 Press until the printer returns to Ready. Verifying the IP settings 1 Print another network setup page. Look under the “TCP/IP” heading, and make sure the IP address, netmask, and gateway are correct. See Printing a network setup page on page 16 if help is needed. 2 Ping the printer, and verify that it responds.
Installing drivers for network printing Follow the steps for the printing configuration and operating system in use to configure the network printer: Printing configuration Operating system Go to page Direct • Printer is connected directly to the network using a network cable, such as Ethernet. • Printer drivers are typically installed on each network computer. Windows 98 SE, Windows NT 4.
Installing drivers for network printing Shared printing using Windows NT 4.0, Windows 2000, Windows XP, or Windows Server 2003 Note: Install the printer software before connnecting the USB cable. After connecting the printer to a Windows NT 4.0, Windows 2000, Windows XP, or Windows Server 2003 computer (which will act as a server), follow these steps to configure the network printer for shared printing: Server Printer Clients 1 Install a custom printer driver. a Launch the drivers CD.
Installing drivers for network printing g Check the following to make sure the printer was successfully shared. • • The printer object in the Printers folder now has a shared indicator. For example, in Windows NT 4.0, a hand appears under the printer object. Browse Network Neighborhood. Find the host name of the server, and look for the shared name assigned to the printer.
Installing drivers for network printing Configuring Drag‘N’Print Note: Drag’N’Print™ support is not available for all printers. For detailed configuration instructions, launch the drivers CD, click View Documentation, and click Software and utilities. Macintosh Note: A PostScript Printer Description (PPD) file provides detailed information about the capabilities of a printer to UNIX or Macintosh computers.
Installing drivers for network printing 7 Verify printer installation: a Open Finder, click Applications, and click TextEdit. b Choose Print from the “File” menu. c Choose Summary from the “Copies & Pages” pop-up menu. Note: Look on the Network Setup page under the “AppleTalk” heading to find the default name of the printer to know which printer to select. • • If the PPD file displayed in the Summary window is correct for the printer, then printer setup is complete.
Installing drivers for network printing f Click Close when installation is complete. Note: A PPD for the printer is also available in a downloadable software package on the Lexmark Web site at www.lexmark.com. Step 2: Create a desktop printer 1 In the Chooser, select the LaserWriter 8 driver. 2 For a routed network, select the default zone from the list. For the zone to select, look on the Network Setup page under AppleTalk for Zone. 3 Select the new printer from the list.
4 Printing This chapter covers tips for printing, how to print certain lists of information from the printer, how to cancel a job, and how to print black-only text and graphics. Tips for successful printing Tips on storing media Store the media properly. For more information, see Storing media. Avoiding jams By selecting appropriate paper or specialty media (transparencies, labels, and card stock) and loading it properly, most jams are avoidable.
Printing Sending a job from a typical Macintosh application 1 Open the file needed for printing. 2 From a word processor, spreadsheet, browser, or other application, select File à Print. 3 In the Copies & Pages or General pop-up menu, select Job Routing. 4 a When using Mac OS 9, if Job Routing is not a choice on the pop-up menu, select Plug-in Preferences à Print Time Filters. b Turn down the disclosure triangle to the left of Print Time Filters, and select Job Routing.
Printing Entering a personal identification number (PIN) When Confidential jobs is selected, the following prompt appears: Enter PIN _0 _ _ _ 1 Use the navigation arrow buttons on the operator panel to specify the numbers of the four-digit PIN associated with the confidential job. a In the first of the four fields, press or to scroll to the first number of the PIN which is displayed, and then press . The number changes to an asterisk. The next field to the right becomes the current field.
Printing Canceling from the printer operator panel If the job is formatting or already printing, and Cancel a Job appears on the first line of the display: 1 Press . A list of jobs appears. 2 Press until appears next to the job requiring cancelation, and then press . The message Canceling appears. Note: Once a print job is sent, to easily cancel the job, press until Cancel a job appears, and then press . . The Stopped screen appears.
Printing 3 In the printer window, select the print job requiring cancelation. 4 Press Delete. Printing the menu settings page The menu settings page shows current settings (user default settings) for the menus, a list of installed options, and available printer memory. Use this page to verify that all printer options are properly installed and the printer settings are correct. See Understanding the operator panel to identify the display and operator panel buttons if help is needed.
Printing 6 When the needed item is selected, press . The message Printing PCL Fonts. or Printing PS Fonts. appears while the pages print based on the one selected. The printer returns to the Ready message after the font sample pages print. If any other message appears when this page prints, see the Menus and Messages Guide located on the publications CD for more information. Printing the Print Quality Test Pages To help isolate print quality problems, print the Print Quality Test Pages.
Printing 6 Press until Exit Config Menu appears, and then press . Resetting the Printer appears briefly, followed by the clock. Remove all color supplies then appears, so complete Removing the color supplies as follows. Removing the color supplies Warning: Do not touch the shiny photoconductor drum on the photoconductor unit. 1 Grasp the handhold.
Printing 2 Open the upper door fully. Grasp the handle on the inner door and pull to open both the inner and lower doors. Gently lower the lower door. Now the photoconductor units can be seen. 3 Grasp the knob on the right side of the photoconductor unit, lift up on the knob to release the photoconductor unit, and then lift the photoconductor unit by the handle.
Printing 5 Place the photoconductor units in the box that comes with replacement units. If the box is not available, use an empty paper supplies box. 6 Close the box to protect the photoconductor units from light exposure. 7 Grasp the small handles on the yellow toner cartridge as the illustration blowup shows in detail. Lift it up slightly, and then pull it straight out. As the main part of the illustration shows, remove the magenta and cyan toner cartridges in the same way.
Printing 9 10 Close the lower door. This closes the inner door. Close the upper door. Configuring the printer for color printing and replacing the supplies To return to color printing, complete the following steps. 1 Turn the printer off. 2 Press and hold and while turning the printer on.
Printing 3 Release the buttons when the clock appears. CONFIG MENU appears on the first line of the display. The following messages appear individually as prompts for the replacement of photoconductor units and color toner cartridges.
5 Media specifications Media is paper, card stock, transparencies, labels, and envelopes. The last four are sometimes referred to as specialty media. The printer provides high quality printing on a variety of media. A number of things must be considered concerning media before printing. This chapter provides information to help make media selections and how to care for media. Media guidelines Selecting the appropriate media for the printer helps avoid printing problems.
Media specifications Smoothness needs to be between 100 and 300 Sheffield points; however, smoothness between 150 and 250 Sheffield points produces the best print quality. Moisture content The amount of moisture in the paper affects both print quality and the ability of the printer to feed the paper properly. Leave the paper in its original wrapper until it is time to use it. This limits the exposure of the paper to moisture changes that can degrade its performance.
Media specifications • • • Make sure the Paper Type, Paper Texture, and Paper Weight settings are correct. (See Paper Menu in the Menus and Messages Guide located on the publications CD for detailed information about these settings.) Make sure the paper is properly loaded in the source. Flex paper back and forth. Do not fold or crease the paper. Straighten the edges on a level surface.
Media specifications When printing on transparencies: • • • • Be sure to set the Paper Type to Transparency from the printer operator panel, printer driver, or from MarkVision™ Professional. Use transparencies designed specifically for laser printers. Transparencies must be able to withstand temperatures of 180°C (356°F) without melting, discoloring, offsetting or releasing hazardous emissions. To prevent print quality problems, avoid getting fingerprints on the transparencies.
Media specifications Labels The printer can print on paper labels designed for use with laser printers. Only letter size, A4 size, and legal size label sheets should be used. Label adhesives, face sheet (printable stock), and topcoats must be able to withstand temperatures of 180°C (356°F) and pressure of 30 pounds per square inch (psi). Do not use vinyl labels. Try a sample of any labels considered for use with the printer before purchasing a large quantity.
Media specifications • • Do not use preprinted card stock manufactured with chemicals that may contaminate the printer. Preprinting introduces semi-liquid and volatile components into the printer. The use of grain long card stock is recommended. Storing media Use the following guidelines for proper media storage.
Media specifications Media sizes and support (continued) Legend ✓ — supported ✘— unsupported Media size Dimensions Standard 250-sheet tray (Tray 1) Optional 500-sheet tray (Tray 2) Multipurpose feeder or manual feed slot Executive 184.2 x 266.7 mm (7.25 x 10.5 in.) ✓ ✓ ✓ Folio 216 x 330 mm (8.5 x 13 in.) ✓ ✓ ✓ Statement 139.7 x 215.9 mm (5.5 x 8.5 in.) ✘ ✘ ✓ Universal* 148 x 210 mm to 215.9 x 355.6 mm (5.83 x 8.27 in. to 8.5 x 14 in.)** ✓ ✓ ✓ 7 3/4 Envelope (Monarch) 98.4 x 190.
Media specifications Media source support and duplex (two-sided printing) support for Universal media size Legend ✓ — supported ✘— unsupported Standard 250- Optional 500sheet tray sheet tray (Tray 1) (Tray 2) Multipurpose feeder Manual feed slot Duplex 98.4 x 123.8 mm to 215.9 x 355.6 mm (3.875 x 4.875 in. to 8.5 x 14 in.) ✘ ✘ ✓ ✘ ✘ 98.4 x 152.4 mm to 215.9 x 355.6 mm (3.875 x 6 in. to 8.5 x 14 in.) ✘ ✘ ✓ ✓ ✘ 139.7 x 210 mm to 215.9 x 355.6 mm (5.5 x 8.27 in. to 8.5 x 14 in.
Media specifications Media types and weights Media weight Standard 250-sheet tray (Tray 1) Media Type Paper Xerographic 60 to 74.9 g/m2 grain long or business (16 to 19.9 lb bond)2 paper (Used for simplex printing only)1 Glossy papers Optional 500-sheet drawer (Tray 2) Multipurpose feeder or manual feed slot 60 to 74.9 g/m2 grain long (16 to 19.9 lb bond)2 60 to 74.9 g/m2 grain long (16 to 19.
Media specifications Media types and weights (continued) Media weight Optional 500-sheet drawer (Tray 2) Multipurpose feeder or manual feed slot Media Type Standard 250-sheet tray (Tray 1) Card stock—maximum (grain long)3 Index Bristol 163 g/m2 (90 lb) Not recommended 163 g/m2 (90 lb) Tag 163 g/m2 (100 lb) Not recommended 163 g/m2 (100 lb) Cover 176 g/m2 (65 lb) Not recommended 176 g/m2 (65 lb) Index Bristol 199 g/m2 (110 lb) Not recommended 199 g/m2 (110 lb) Tag 203 g/m2 (125 lb) I
Media specifications Tray linking Tray linking enables the automatic linking feature for trays when the same size and type of media is loaded in multiple sources. The printer automatically links the trays; when one tray is empty, media feeds from the next linked tray. For example, if the same size and type of media is loaded in tray 1 and tray 2, the printer selects media from tray 1 until it becomes empty, and then the printer automatically feeds media from the next linked tray — tray 2.
Media specifications The two values for the Duplex Bind are: Long Edge* The asterisk (*) indicates this is the factory default setting. Assumes binding along the long end of the page (left edge for portrait orientation and top edge for landscape orientation).
6 Loading media This chapter shows how to load the standard tray (250-sheet letter size tray), the multipurpose feeder, and the optional 500sheet tray which is part of the optional 500-sheet drawer. It also includes information about the standard bin. Loading the standard tray The printer has two trays to select from: the standard tray (tray 1), also known as the 250-sheet tray and the optional 500sheet tray (tray 2), which is part of the optional 500-sheet drawer and fits into the support unit.
Loading media 2 Squeeze the width guide tabs together as shown, and move the width guide to the side of the tray. 3 Squeeze the length guide tabs together as shown, and slide the length guide to the correct position for the size of paper being loaded. For setup, load Letter or A4 based on the standard size for your country or region. Notice the size indicators on the bottom of the tray on both sides of the guide. Use these indicators to help position the guide at the correct size.
Loading media 5 Load the paper stack with the recommended print side face-up. Load the stack toward the back of the tray as shown. CB A When loading letterhead paper, place the header toward the front of the tray. 6 Squeeze the width guide tabs, and slide the length guide to lightly touch the side of the stack. 7 Align the tray, and insert it.
Loading media 8 If a different type of media was loaded than the type previously loaded in the tray, change the Paper Type setting for the tray from the operator panel. See Setting the Paper Type and Paper Size. Loading the optional 500-sheet tray The optional 500-sheet drawer consists of a 500-sheet tray and the support unit. The tray is loaded in the same way as the 250-sheet standard tray is loaded.
Loading media Follow these guidelines when using the multipurpose feeder: • Load only one size and type of media at a time. • To achieve the best possible print quality, use only high-quality media that is designed for use in laser printers. See Media guidelines for information on selecting types of media. • To prevent jams, do not add media to the multipurpose feeder when it already contains media. • Do not close the multipurpose feeder while a job is printing. Doing so may cause a jam.
Loading media 3 Grasp the extension, and pull it straight out until fully extended. 4 Grasp the handle of the guide. • For paper, push the guide to the media size that is being loaded. Notice the size names molded into the surface.
Loading media • 5 If not loading paper, push the guide all the way to the left. Prepare media for loading. Note: Do not load different sizes or types of media in the multipurpose feeder at the same time. Doing so may cause a jam. • Flex sheets of paper back and forth to loosen them, and then fan them. Do not fold or crease the media. Straighten the edges on a level surface. • Hold transparencies by the edges and fan them to prevent feeding failures.
Loading media 6 Flex a stack of envelopes back and forth to loosen them, and then straighten the edges on a level surface. • Fan the envelopes. This prevents the edges of the envelopes from sticking together and helps them feed properly. Do not fold or crease the envelopes. 7 Move the guide close to the size indicator for the size of envelopes being loaded first. 8 Locate the stack height limiter and tab. Do not exceed the maximum stack height by forcing media under the stack height limiter.
Loading media 9 Load the media. • Load paper and card stock with the recommended print side face down and the top edge entering first. • Load letterhead with the logo face down and the top edge entering first. • Load transparencies with the recommended print side face down and the top edge entering first.
Loading media • Load envelopes with the flap side up. Warning: Never use envelopes with stamps, clasps, snaps, windows, coated linings, or self-stick adhesives. These envelopes may severely damage the printer. Do not feed stamped envelopes into the multipurpose feeder. The stamp is shown in the illustration only for placement. 10 Adjust the guide to lightly touch the side of the stack of media. Ensure the media is under the stack height limiter and the tab.
Loading media 12 Slide the width guide to the right until it lightly touches the edge of the stack for transparencies, card stock, or envelopes. For paper, the guide was already placed before the paper was loaded; however, check to see if the guide needs a slight adjustment. Release tab Make sure the media fits loosely in the multipurpose feeder and is not bent or wrinkled. 13 Set the Paper Size and Paper Type in the menus from the operator panel.
Loading media Follow these guidelines when using the manual feed slot: • Load only one sheet at a time. • To achieve the best possible print quality, use only high-quality media that is designed for use in laser printers. See Media guidelines for information on selecting types of media. • Load media with the top edge going into the manual feed slot first. (Letterhead goes face-down.) 1 Use the marks above the slot to adjust the guide for standard sizes of media.
Loading media Using the standard bin The standard bin holds up to 250 sheets of 20 lb paper and is located on top of the printer. The standard bin collates print jobs face-down. The standard bin supports all media listed in Media sizes and support. Attaching the standard bin To attach the standard bin to the top of the printer: 1 Align it with the opening and slide it down. 2 Press it down into place.
Loading media Using the media stop The standard bin has a media stop which is used to keep media from sliding off the back of the standard bin. It has two lengths, one for shorter media like Letter and A4 sizes, and one for longer media like Legal size. To extend the media stop for short sizes of media: 1 Grasp the media stop at the first indentation. 2 Lift it up and then back until it stops at a 90 degree angle. To close it, fold it back down.
Loading media To extend the media stop for longer sizes of media, start with the media stop fully closed: 1 Grasp the media stop at the second indentation. 2 Lift it up and back until it is flat at a 180 degree angle.
Loading media 3 Lift up and then back on the extension until it stops at a 90 degree angle. To close the media stop, fold the extension forward and down. Raise the media stop, and then fold it back down into its closed position. Setting the Paper Type and Paper Size After setting the Paper Type and Paper Size to the correct values for the type and size used in the trays, then any trays containing the same size and type are automatically linked by the printer.
7 Clearing jams Avoiding jams hints The following hints can help avoid jams: • Use only recommended paper or specialty media (referred to as media). See Media guidelines for more information. See the Card Stock & Label Guide available on the Lexmark Web site at www.lexmark.com/publications for more information about which media will provide optimum results for the printing environment. • For detailed information prior to purchasing large quantities of customized media, see the Card Stock & Label Guide.
Clearing jams • Make sure the media size in the sources matches the size setting selected from the operator panel menus. • Make sure all cables that connect to the printer are correctly attached. See the Setup sheet for more information. Identifying the media path The following illustration shows the path that media travels through the printer. The path varies depending on the input source (tray 1 or tray 2) and if a duplex (two-sided) print job is being sent.
Clearing jams Accessing jam areas Open doors and covers, and remove trays to access jam areas. The illustration shows the location of sources and possible jam areas.
Clearing jams Use the following table to locate instructions for a particular jam. Note: To resolve any message, all media must be cleared from the entire media path. Operator panel message 200.xx Paper Jam Area description Clearing a jam... Go to page Jam at the input sensor Just beyond Tray 1 67 Between Tray 1 and Tray 2 69 Behind the inner door 69 Under the four photoconductor units 70 In Tray 1 76 200.xx Paper Jam Jam in the manual feed slot In the manual feed slot 77 201.
Clearing jams Clearing a jam in the standard tray (Tray 1) If the media did not feed correctly from the standard tray, the jam is in the tray. The operator panel indicates a 241.xx Paper Jam. 1 Open the standard tray. 2 Pull the jammed media out. 3 Insert the tray. If the media fed from the tray and jammed just beyond tray 1, the operator panel indicates a 200.xx Paper Jam. 1 Open the standard tray. 2 Pull the jammed media out. Insert the tray.
Clearing jams Clearing a jam in the optional 500-sheet tray (Tray 2) If the media did not feed correctly from the optional 500-sheet tray (Tray 2), the jam is in the tray. The operator panel indicates a 242.xx Paper Jam. 1 Open the optional 500-sheet tray. 2 Pull the jammed media out. 3 Insert the tray into the support unit. If the media fed from Tray 2, but is caught between Tray 1 and Tray 2 in the media path, the operator panel indicates a 242.xx Paper Jam, also.
Clearing jams If the media fed from Tray 2, but is caught between Tray 1 and Tray 2 in the media path, the operator panel may indicate a 200.xx Paper Jam instead. If so, clear the jam as follows. 1 Remove the standard tray. 2 Pull the jammed media up and then out of the tray. 3 Insert the tray. Clearing jams behind the inner door The media is jammed behind the inner door, but not under the photoconductor units. The operator panel indicates a 200.xx Paper Jam.
Clearing jams The media is jammed under the photoconductor units. The operator panel indicates a 200.xx Paper Jam or 201.xx Paper Jam. 1 Open the upper door and the inner door. The lower door comes open with the inner door. 2 Pull the media straight forward only to remove it. Note: Be careful not to dislodge the photoconductor units. 3 If the media does not pull free at all, remove all four photoconductor units. (If help to remove them is needed, see the illustration on page 31.
Clearing jams Clearing jams under the fuser or fuser cover CAUTION: The fuser and the inside of the printer near the fuser may be hot. Wait for the fuser to cool before clearing jams from this area. The jammed media is under the fuser or the fuser cover. The operator panel indicates a 201.xx Paper Jam. Warning: To avoid overexposing the photoconductor units to light, do not leave the inner door open longer than 10 minutes while clearing this jam. 1 Open the upper door and the inner door.
Clearing jams b If the jammed media is not seen, grasp the tabs on the fuser cover and lift it. Grasp the jammed media, and pull it up and out. Close the fuser cover. 1 2 Tab Tab If the jammed media is partially under the fuser and partially exposed from the slot behind the fuser, the operator panel indicates a 202.xx Paper Jam. Warning: If jammed media is seen in the position shown in the following illustration, pull the jammed media gently up and to the rear of the printer. 3 Close the lower door.
Clearing jams Clearing jams between the fuser and the standard bin The jammed media is visible from the standard bin. The operator panel indicates a 202.xx Paper Jam. Grasp the jam, and pull it back away from the bin. Clearing a jam in the standard bin The jammed media is in the standard bin. The operator panel indicates a 203.xx Paper Jam. Grasp the jam, and pull it back away from the bin.
Clearing jams Clearing duplex path jams The jammed media is under the rollers near the fuser. The operator panel indicates a 203.xx Paper Jam. 1 Open the upper door. 2 Grasp the jammed media on each side, and pull it out gently. 3 Close the upper door.
Clearing jams If the jammed media is caught between the lower door and the inner door, the operator panel indicates a 230.xx Paper Jam. 1 Open the upper door. 2 Pull the jammed media straight up. Note: If most of the jammed media is not visible with the upper door open, open the lower door to access the jam. To open the lower door without also opening the inner door, pull on the lower door handle. Do not pull the inner door handle, or both the inner door and the lower door will pull down together.
Clearing jams If the jammed media is caught entering the standard tray (Tray 1), the operator panel indicates a 230.xx Paper Jam. 1 Remove the standard tray. 2 Pull the jammed media down and out. 3 Install the standard tray. The jammed media is caught as shown in the standard tray (Tray 1). The operator panel indicates a 200.xx Paper Jam or a 230.xx Paper Jam. 1 Remove the standard tray. 2 Pull the jammed media straight up.
Clearing jams Clearing jams from the multipurpose feeder The media jams as it enters the multipurpose feeder. The operator panel indicates a 250.xx Paper Jam. Clearing jams from the manual feed slot If the media is not placed far enough into the manual feed slot, the printer operator panel issues a message to insert the media. In this case, push the media farther into the slot.
8 Maintaining the printer The following sections deal with topics for a network administrator in charge of the printer. Periodically, certain tasks need completion to maintain optimum print quality. These tasks are covered in this chapter. If several people are using the printer, designate a key operator to do the setup and maintenance of the printer. Refer printing problems and maintenance tasks to this key operator. In the U.S.
Maintaining the printer Ordering supplies and maintenance items To order supplies in the U.S., contact Lexmark at 1-800-539-6275 for information about Lexmark Authorized Supplies Dealers in your area. In other countries or regions, visit the Lexmark Web site at www.lexmark.com or contact the place where you bought your printer. Replacing maintenance items as needed helps to maintain top printer performance, optimize print quality, and avoid printing problems.
Maintaining the printer Part name Part Number For printer(s) Yellow Toner Cartridge C5202YS C520 Black Toner Cartridge C5202KS C520 Ordering a photoconductor unit Order Lexmark part number C52030X. For a multi-pack of photoconductor units, order Lexmark part number C52034X. Ordering a fuser Order Lexmark part number 40X1400 for a 120V/50–60Hz printer, 40X1402 for a 220–240V/50–60Hz printer, or 40X1403 for a 100V/50–60Hz printer. Ordering a transfer belt Order Lexmark part number 40X1401.
Maintaining the printer Storing the toner cartridges and photoconductor units Store toner cartridges and photoconductor units in their original packaging until the time for their installation. Do not store toner cartridges and photoconductor units in: • Temperatures greater than 40°C (104°F). • An environment with extreme changes in humidity or temperature. • Direct sunlight. • Dusty places. • A car for a long period of time. • An environment where corrosive gases are present.
Maintaining the printer Recycling Lexmark products To return Lexmark products to Lexmark for recycling: 1 Visit our Web site: www.lexmark.com/recycle 2 Follow the instructions on the computer screen. Replacing the photoconductor units When 84 [color] PC Unit life warning appears on the operator panel, replace the photoconductor unit soon. Make sure one is on order. See Ordering a photoconductor unit for more information.
Maintaining the printer To replace the transfer belt, see the Replacing the transfer belt sheet that comes with a replacement transfer belt. Cleaning the printhead lenses Clean the printhead lenses when print quality problems become apparent as mentioned in Solving print quality problems in the Troubleshooting chapter. Warning: To avoid overexposing the photoconductor units to light, do not leave the inner door open longer than 10 minutes. 1 Turn the printer off.
Maintaining the printer Aligning the toner cartridges for color registration When the new transfer belt was installed and all the photoconductor units were moved from the used transfer belt to the new one, the alignment of the toner cartridges and photoconductor units may have changed. For better color quality, complete the following steps for color registration: 1 Turn the printer off. 2 Press and hold 3 Release the buttons when the clock appears. and while turning the printer on.
Maintaining the printer Removing the fuser for long-term storage If the printer will be turned off for a month or longer, remove the fuser and store it in a clean and convenient place. CAUTION: The fuser and the inside of the printer near the fuser may be hot. Wait for the fuser to cool before removing it. 1 Turn the printer off. 2 Grasp the handhold. 3 Open the upper door.
Maintaining the printer 4 Turn the thumbscrews counterclockwise to loosen them. 5 Grasp the fuser by the handles and lift it straight up. 6 The fuser could still be hot. Touch it only by the handles. 7 Store the fuser in a clean and convenient place. 8 Close the upper door.
Maintaining the printer Replacing the fuser after long-term storage 1 Grasp the handhold. 2 Open the upper door.
Maintaining the printer 3 Grasp the fuser by the handles and align it with its opening. Align the tab on the right with the groove. Align the u-shaped part on the left of the fuser with the u-shaped groove. 4 Gently lower the fuser into place. Push it down until it is firmly seated. 5 Turn the thumbscrews clockwise to tighten them. Warning: Make sure the thumbscrews are tightened fully before closing the upper door. 6 Close the upper door. 7 Turn the printer on.
9 Troubleshooting Solving basic printer problems Sometimes printer problems or an unresponsive printer are very easy to solve. When a problem occurs, first make sure that: • The printer power cord is plugged into the printer and a properly grounded electrical outlet. • The printer power switch is on. • The electrical outlet is not turned off by any switch or breaker. • Other electrical equipment plugged into the outlet is working. • The printer driver settings are correct.
Troubleshooting Solving display problems Symptom Cause Action Operator panel shows only diamonds or is blank. The printer self test failed. Turn the printer off, wait about 10 seconds, and turn the printer on. The clock appears on the operator panel. When the test is completed, Ready appears. If the messages do not appear, turn the printer off. For technical support, contact the Lexmark Customer Support Center at http://support.lexmark.com. Menu settings changed from the operator panel have no effect.
Troubleshooting Symptom Cause Solution Job takes longer than expected to print. The job is too complex. Reduce the complexity of the print job by eliminating the number and size of fonts, the number and complexity of images, and the number of pages in the job. Page Protect is set to On. Set Page Protect to Off from the Setup Menu in Settings. 1 Press . 2 Press until Settings appears, and then press . 3 Press until Setup Menu appears, and then press .
Troubleshooting Use the following table to find solutions to print quality problems. Symptom Cause Solution Repeating defects Either the toner cartridges, the photoconductor units, or the fuser are defective. Marks occur repeatedly only in one color and multiple times on a page: Replace the item if the defects occur every: 33.5 mm (1.32 in.) or 35.7 mm (1.41 in.) for the toner cartridges 28.3 mm (1.11 in.) or 72.4 mm (2.85 in.
Troubleshooting Symptom Cause Solution Streaked horizontal lines The toner cartridges may be defective, empty, or worn. Replace the toner cartridges as needed. The fuser may be defective or worn. Replace the fuser. ABCDE ABCDE ABCDE Streaked vertical lines ABCDE ABCDE ABCDE Print irregularities ABCDE ABCDE ABCDE Toner is smeared before fusing to the media. If media is stiff, try feeding from another tray. The toner cartridges are defective.
Troubleshooting Symptom Cause Solution Print too light Color Saver in the Quality Menu in Settings could be set to On. Set Color Saver to Off. The Toner Darkness setting in the Quality Menu in Settings is too light, the RGB Brightness setting is too bright, or the RGB Contrast is too high. Select a different Toner Darkness, RGB Brightness, or RGB Contrast setting from the printer driver before sending the job to print, or return the color settings to the factory defaults.
Troubleshooting Symptom Cause Solution Uneven print density The toner cartridges are defective. Replace the toner cartridges. The photoconductor units are defective. Replace the photoconductor units. Ghost images The photoconductor units are not functioning properly. Make sure the Paper Type setting is correct for the paper or specialty media being used. Replace the photoconductor units. See Repeating defects. Call for customer support.
Troubleshooting Symptom Cause Solution The media curls badly once it prints and exits to the standard bin. The Paper Weight setting is wrong for the type of paper or specialty media being used. Change the Paper Weight setting. The media loaded in the source is damp. Make sure the media loaded in the source is not damp. Load media from a new package.
Troubleshooting Solving option problems Symptom Cause Solution The option does not operate correctly after it is installed, or it stops working. The option is not installed correctly. Remove the option, and then reinstall it. Cables connecting the option to the printer are not attached correctly. Check the cable connections. See the Setup sheet for instructions. The printer driver does not recognize that the option is installed.
Troubleshooting Solving media feed problems Symptom Cause Solution Paper frequently jams. Media that does not meet the printer specifications is being used. Use recommended media. See the Card Stock & Label Guide available on our Lexmark Web site at www.lexmark.com for detailed specifications. See Clearing jams for more information. See Avoiding jams hints for information that can help prevent jams from occurring. Too much paper or too many envelopes are loaded.
Troubleshooting Symptom Cause Solution Media falls out of the standard bin when the standard bin is full. Some printer models do not have a standard bin full sensor. Remove media from the standard bin. The standard bin media stop is not set to the correct position for the media size. Set the media stop in the standard bin to the correct position. See Using the media stop for more information. The page that jammed does not reprint after the jam is cleared.
Troubleshooting Solving network printing problems Problem Action Job did not print or incorrect characters printed. Verify that the MarkNet N8000 Series internal print server or external print server is set up properly and the network cable is connected. For more details, see the drivers CD that shipped with the printer. For Novell users: Make sure the netware.drv file is dated October 24, 1994 or later. Make sure the NT (no tabs) flag is included in the capture statement.
Troubleshooting Frequently asked questions (FAQ) about color printing What is RGB color? Red, green, and blue light can be added together in various amounts to produce a large range of colors observed in nature. For example, red and green light can be combined to create yellow light. Televisions and computer monitors create colors in this manner. RGB color is a method of describing colors by indicating the amount of red, green, and blue light needed to reproduce a particular color.
Troubleshooting My color transparencies seem dark when projected. Is there anything I can do to improve the color? This problem most commonly occurs when projecting transparencies with reflective overhead projectors. To obtain the highest projected color quality, transmissive overhead projectors are recommended. If a reflective projector must be used, then adjusting Toner Darkness settings to 1, 2, or 3 will lighten the transparency. Color Saver must be Off to adjust Toner Darkness.
Troubleshooting Off, the color is based on the print job information; no color conversion is implemented.
Troubleshooting Cyan, Magenta, and Yellow. The increment value defined by the user for Detailed Color Samples applies to Cyan, Magenta, Yellow, and Black. Online technical support Technical support is available on the Lexmark Web site at www.lexmark.com. Calling for service When calling for printer service, be prepared to describe the problem or the error message on the display. Be prepared to give the printer model type and serial number.
10 Administrative support The following sections are for a system support person in charge of the printer. Since many people could be using the printer, an administrator may choose to lock the menus to keep others from changing menu settings from the operator panel. Disabling operator panel menus To disable the operator panel menus so that changes cannot be made to the printer default settings: 1 Turn the printer off.
Administrative support Restoring factory default settings When first entering the printer menus from the operator panel, notice an asterisk (*) next to a value in the menus. This asterisk indicates the factory default setting. These settings are the original printer settings. (Factory defaults may vary for different countries and regions.) When a new setting is selected from the operator panel, the Saved message appears.
Administrative support Disabling Power Saver Disabling Power Saver is a two-step process. First, the menu item is turned on, and then the menu item is selected. 1 Turn the printer off. 2 Press and hold 3 Release the buttons when the clock appears. and while turning the printer on. CONFIG MENU appears on the first line of the display. 4 Press until Energy Conserve appears, and then press 5 Press until Off appears, and then press . . Submitting Selection appears.
Administrative support 3 Press until Disk Encryption appears, and then press 4 Press until Disable appears, and then press . . Contents will be lost. Continue? appears. 5 Press until Yes appears, and then press . The Encrypting Disk progress bar appears. 6 Press when the disk encryption finishes. 7 Press until Exit Config Menu appears, and then press .
Administrative support To change the LCD Contrast setting: 1 Make sure the printer is on and the Ready message appears. 2 Press 3 Press until Settings appears, and then press 4 Press until Utilities Menu appears, and then press 5 Press until LCD Contrast appears, and then press 6 Press to decrease or 7 Press Ready. to complete the adjustment and save the setting as the new user default setting. The printer returns to to enter the menus. . . .
Administrative support If a Confidential job is selected, the personal identification number (PIN) specified in the driver when the job was sent must be entered.
Administrative support Verify Print If a Verify Print job is sent, the printer prints one copy and holds the remaining copies requested from the driver in printer memory. Use Verify Print to examine the first copy to see if it is satisfactory before printing the remaining copies. See Printing and deleting held jobs if help is needed to print the additional copies stored in memory. Note: Once all copies are printed, the Verify Print job is deleted from printer memory.
Administrative support Understanding the operator panel The operator panel consists of these items: • • • 160 x 64 pixel liquid crystal display (LCD) Eight buttons (Back, Menu, Stop, Select, An indicator light , , , and ) Display BACK Back button MENU Menu button STOP X Select button Stop button Indicator light Navigation buttons — , , , For more information on buttons, see Buttons as follows.
Administrative support Buttons Button Function Note: It has a curved arrow icon. Press to return to the previous screen. Note: This button is only active if appears on the top left of the screen. Note: It has a key icon. Press to open the administration menus. These menus are only available when the printer is in the Ready state. Press to stop or suspend all job activity. The functions as a stop button. If printing, pressing causes the Stop screen to appear on the display. Note: It has an X icon.
Administrative support Using the security lock feature The printer is equipped with a security lock feature. When a lock compatible with most laptop computers is attached, the printer is locked. Once locked, the metal plate and the system board cannot be removed. Attach a security lock to the printer in the location shown as follows. Setting security using the Embedded Web Server (EWS) To enhance the security of network communications and device configuration, use the advanced security options.
Administrative support Supporting SNMPv3 (Simple Network Management Protocol version 3) SNMPv3 protocol allows for encrypted and authenticated network communications. It also lets the administrator select a desired level of security. Prior to use, at least one user name and password must be established from the settings page. To configure for SNMPv3 through the Embedded Web Server of the printer: 1 Open the Web browser.
Administrative support To configure the Secure mode for TCP and UDP ports from the Embedded Web Server: 1 Open the Web browser. In the address line, enter the IP address of the printer being configured using the format: http://ip_address/. 2 Click Configuration. 3 Under Other Settings, click Network/Ports. 4 Click TCP/IP Port Access. Note: Disabling ports will disable function on the printer. Using 802.1x Authenticating 802.
Administrative support Printing Lockout Printing Lockout allows locking or unlocking of a printer using an assigned PIN. When locked, every job the printer receives will buffer to the hard disk. A user can print jobs only by entering the correct PIN on the operator panel. A PIN can be assigned through the Web page of the device. Note: This setting is only available when a hard disk is installed. Note: Back channel data will be processed while the printer is locked.
11 Installing and removing options Installing the 500-sheet drawer The printer supports one optional drawer which allows an additional 500 sheets of paper to be loaded. CAUTION: If installing a 500-sheet drawer after setting up the printer, turn the printer off and unplug the power cord before continuing. 1 Unpack the 500-sheet drawer, and remove any packing material. 2 Place the drawer in the location chosen for the printer.
Installing and removing options Removing the 500-sheet drawer If the printer location needs to change, or the printer and media handling options need to be shipped to a new location, all media handling options must be removed from the printer. For shipping, pack the printer and media handling options securely to avoid damage. 1 Turn the printer off, and unplug the printer power cord. 2 Disconnect all cables from the back of the printer. 3 Remove any media from the standard bin.
Installing and removing options To install a memory or flash card, access the system board. 1 Notice the eight screws located on the metal plate. Turn the screws counterclockwise until they are loose. Do not remove the screws. 2 Lift the metal plate up until each screw is in the keyhole. 3 Pull the metal plate forward to remove it.
Installing and removing options 4 Use the illustration to locate the connector for the card being installed. Memory card connector Firmware and flash memory card connectors Optional INA card connector Hard disk connector Warning: System board electrical components are easily damaged by static electricity. Touch something metal on the printer before touching any system board electronic components or connectors.
Installing and removing options Replacing the system board metal plate Note: This procedure requires a #2 Phillips screwdriver. 1 Align and place the eight keyholes on the system board metal plate onto the screws on the system board. 2 Slide the metal plate down.
Installing and removing options 3 Tighten the screws firmly. Installing an optional memory card The system board has one connector for an optional memory card. Warning: System board electrical components are easily damaged by static electricity. Touch something metal on the printer before touching any system board electronic components or connectors. CAUTION: If installing a memory card after setting up the printer, turn the printer off and unplug the power cord before continuing.
Installing and removing options 3 Unpack the memory card. Save the packaging materials. Avoid touching the connection points along the edge of the card. 4 Align the notches on the memory card with the ridges on the connector. Notch Ridge 5 Push the memory card straight into the connector until it snaps into place. Make sure each latch fits over the notch located on either side of the memory card. Latch Notch 6 Replace the metal plate (see Replacing the system board metal plate).
Installing and removing options Removing a memory card Warning: System board electrical components are easily damaged by static electricity. Touch something metal on the printer before touching any system board electronic components or connectors. 1 Locate the card to remove. 2 Push each latch out at each end of the connector. 3 Grasp the option card, and pull it gently out of the connector.
Installing and removing options Installing an optional flash memory or firmware card The system board has two connectors for an optional flash memory or firmware card. Only one of each may be installed, but the connectors are interchangeable. Warning: System board electrical components are easily damaged by static electricity. Touch something metal on the printer before touching any system board electronic components or connectors.
Installing and removing options 5 Replace the metal plate (see Replacing the system board metal plate). Removing an optional flash memory or firmware card 1 Select the optional firmware or flash memory card to remove. Warning: Electronic components are easily damaged by static electricity. Touch something metal on the printer before touching the option card. 2 While pushing on both locking clips, gently pull the card straight out from the system board.
Installing and removing options Installing an optional hard disk Note: A small Phillips screwdriver is needed to attach the hard disk to the mounting plate. Warning: Hard disks are easily damaged by static electricity. Touch something metal on the printer before touching a disk. Note: If an option card has been installed, it may need removing before installing the hard disk. 1 Remove the system board metal plate (see Accessing the system board).
Installing and removing options 7 Press the ribbon cable connector into the connector on the system board. 8 Flip the hard disk over, and then press the three posts on the mounting plate into the holes on the system board. The hard disk snaps into place. 9 Replace the metal plate. See Replacing the system board metal plate. Removing an optional hard disk Warning: Hard disks are easily damaged by static electricity. Touch something metal on the printer before touching a disk.
Installing and removing options Installing an optional INA card Warning: System board electrical components are easily damaged by static electricity. Touch something metal on the printer before touching any system board electronic components or connectors. An optional internal print server allows connection from the printer to the local area network (LAN). Unpack the optional INA card. Save the packing materials. Remove the system board metal plate (see Accessing the system board).
Installing and removing options Removing an optional INA card Warning: System board electrical components are easily damaged by static electricity. Touch something metal on the printer before touching any system board electronic components or connectors. Remove the system board metal plate (see Accessing the system board). 1 Remove the two screws on either side of the connector slot. 2 Pull the optional card straight out of the system board connector.
Installing and removing options Attaching cables Connect the printer to the computer using the appropriate cable for the configuration. Connect the printer to the computer using a USB cable, an Ethernet cable, or a parallel cable. A USB port requires a USB cable. Be sure to match the USB symbol on the cable to the USB symbol on the printer.
Notices • Licensing notice • Conventions • Electronic emission notices • Noise emission levels • ENERGY STAR • Waste from Electrical and Electronic Equipment (WEEE) directive • Laser notice • Statement of Limited Warranty for Lexmark C520, C522, and C524 Notices 133
Notices Licensing notice The printer resident software contains software developed and copyrighted by Lexmark. In addition, the printer resident software may contain: • • • Lexmark modified software licensed under the provisions of the GNU General Public License version 2 and/or the GNU Lesser General Public License version 2.
Notices Static sensitivity notice Warning: This symbol identifies static-sensitive parts. Do not touch in the areas near these symbols without first touching the metal frame of the printer.
Notices Industry Canada compliance statement This Class B digital apparatus meets all requirements of the Canadian Interference-Causing Equipment Regulations. Avis de conformité aux normes de l’industrie du Canada Cet appareil numérique de la classe B respecte toutes les exigences du Règlement sur le matériel brouilleur du Canada.
Notices Noise emission levels The following measurements were made in accordance with ISO 7779 and reported in conformance with ISO 9296.
Notices Power Saver As part of the ENERGY STAR program, this printer is designed with an energy-saving mode called Power Saver. The Power Saver Mode is equivalent to the EPA Sleep Mode. The Power Saver Mode saves energy by lowering power consumption during extended periods of inactivity.
Notices Laser notice The printer is certified in the U.S. to conform to the requirements of DHHS 21 CFR Subchapter J for Class I (1) laser products, and elsewhere is certified as a Class I laser product conforming to the requirements of IEC 60825-1. Class I laser products are not considered to be hazardous. The printer contains internally a Class IIIb (3b) laser that is nominally a 5 milliwatt gallium arsenide laser operating in the wavelength region of 770-795 nanometers.
Notices Remote technical support is provided for this product throughout its warranty period. For products no longer covered by a Lexmark warranty, technical support may not be available or only be available for a fee. Extent of limited warranty Lexmark does not warrant uninterrupted or error-free operation of any product or the durability or longevity of prints produced by any product.
Index Numerics contrast, operator panel 108 current menu settings 28 with menu settings page 28 500-sheet drawer 118, 119 installing 118 removing 119 D A directory list, printing 28 disabling operator panel menus 105 Power Saver 107 duplex (two-sided) printing binding 45 definition 45 from trays 45 printing definition 45 selecting 45 using 45 Duplex Bind 45 adjusting operator panel contrast 108 Power Saver 106 automatic size sensing 45 automatic tray linking 45 avoiding jams 24 hints 63 B binding, du
Index G M guidelines avoiding jams 24 labels 39 media 35 printing letterhead 37 Macintosh 13 sending a print job 25 to print to a network printer 21 USB printing 13 maintaining the printer 78 toner cartridges, storing 81 manual feed slot guidelines 58 location 50 media guidelines 35 letterhead 37 letterhead, printing 37 loading multipurpose feeder 53 letterhead guidelines 37 loading in multipurpose feeder 55 loading instructions based on source 37 loading multipurpose feeder 55 optional 500-sheet tray 5
Index multipurpose feeder (continued) stack height limiter 54 tab 54 using, with various media 50 paper loading multipurpose feeder 55 Paper Size, setting 62 Paper Type, setting 62 parallel 132 personal identification number (PIN) 111 photoconductor units storing 81 photoconductor units, replacing 82 PIN 111 entering at the printer 26 entering from the driver 25 for confidential jobs 25 Power Saver adjusting 106 disabling 107 preprinted forms 37 Print and Hold function 109 print job canceling from printer
Index problems (continued) color quality (continued) tinted printed page 101 why printed color and PC screen color don’t match 101 display 90 blank 90 diamonds 90 LCD too light or too dark 90 menu settings, no effect 90 media feed blank pages in output bin 99 frequent jams 98 jammed page does not reprint 99 media falls out of standard bin 99 Paper Jam message remains after clearing jam 98 network printing incorrect characters printed 100 job did not print 100 options 500-sheet drawer 97 INA card 97 memory
Index storing (continued) supplies 80 toner cartridges 81 supplies conserving 78 ordering 79 fuser 80 photoconductor units 80 toner cartridges 79 transfer belt 80 waste toner box 80 paper 78 recycling 81 specialty media 78 status 78 storing 80 toner 78 supplies, determining status 78 system board accessing 119 covering with metal plate 122 troubleshooting (continued) other problems access to updated printer driver 100 access to updated utilities 100 attaching a serial cable 100 cannot find printer escape