
Operation Manual


Hardware and internal option problems
2100-sheet tray problems
Action Yes No
Step 1
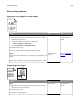
a Pull out the tray, and then do one or more of the following:
• Make sure paper lies
flat
in the tray.
• Check for paper jams or misfeeds.
• Check if the paper size indicators on the paper guides are
aligned with the paper size indicators on the tray.
• Check if the paper guides are aligned against the edges of
the paper.
• Make sure the paper is below the maximum paper fill
indicator.
• Check if you are printing on a recommended paper size and
type.
• Check if the paper or specialty media meets specifications
and is not damaged.
b Insert the tray properly.
Note: Press the paper stack down while inserting the tray.
Does the tray operate properly?
The problem is
solved.
Go to step 2.
Step 2
Turn o the printer, then wait about 10 seconds, and then turn it
back on.
Does the tray operate properly?
The problem is
solved.
Go to step 3.
Step 3
Print a menu settings page, and then check if the tray is listed in
the Installed Features list.
Note: If the tray is listed in the menu settings page, but paper
jams when it enters or exits the tray, then it may not be properly
installed.
Is the tray listed in the menu settings page?
Go to step 4. For more
information, see the
setup sheet that
came with the 2100-
sheet tray.
Step 4
Check if the tray is available in the printer driver.
Note: You may need to manually add the tray in the printer driver
to make it available for print jobs. For more information, see
“Adding available options in the print driver” on page 35.
Is the tray available in the printer driver?
Go to step 5. Manually add the
tray in the printer
driver.
Troubleshooting 312