
Operation Manual


4 Touch the photo or photos you want to print.
Tips:
• If you want to clear a selected photo, then touch the photo again.
• If you want to view more photos, then touch the left or right arrow, and then touch the photo to select it.
5 When you are finished selecting the photos you want to print, touch Layout.
6 If you want to change the print settings, then touch Change Settings.
If necessary, touch Accept each time you make a selection.
7 Press .
Note: For best results, allow the prints to dry at least 24 hours before stacking, displaying, or storing.
Editing photos using the printer control panel
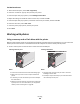
1 Load photo paper.
2 Insert a memory card or flash drive.
The Memory Device screen appears on the display.
3 Touch View Photos.
The Select Photos screen appears.
4 Touch the photo you want to edit.
5 Touch to view the selected photo.
Tips:
• If you want to clear the selected photo, then touch .
• If you want to view the previous or next photo, then touch the left or right arrow, and then touch to select
the photo.
6 Touch . Touch Accept each time you make a selection.
From here You can
Crop Crop a photo.
Brightness Adjust the brightness of a photo.
Red Eye Reduce the red-eye effect caused by light reflection.
Auto Fix Enhance a photo automatically.
Color Effects Select whether to print a photo in black and white, sepia, antique brown, or
antique gray.
7 When you are finished editing the photo, touch Done.
8 If you want to edit another photo, then touch to return to the Select Photos screen.
9 Repeat steps 4 through 8 until all the photos are edited, and then touch Layout.
Printing
46