4600 MFP Option Printer and Scanner Setup Guide for the T640, T642, and T644 series printers April 2006 www.lexmark.
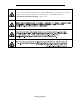
Stability Information CAUTION: Floor-mounted configurations require additional furniture for stability. You must use either a printer stand or caster base if you are using a 2000-sheet drawer. Certain other configurations also must have a printer stand or caster base. More information is available on our Lexmark Web site at www.lexmark.com/multifunctionprinters. VOORZICHTIG: Voor configuraties die op de grond staan, zijn extra onderdelen nodig ter bevordering van de stabiliteit.
VAARA: Lattialle asennettu tulostin edellyttää lisätukea. Tulostinjalustaa tai -tukea on käytettävä, jos monitoimilaitteeseen on asennettu 2000 arkin syöttölaite Myös tietyissä muissa kokoonpanoissa on käytettävä tulostinjalustaa tai -tukea. Lisätietoja on Lexmarkin Web-sivuilla osoitteessa www.lexmark.com/multifunctionprinters. FORSIKTIG: Gulvmonterte konfigurasjoner krever ekstra møbelenheter som støtter og stabiliserer skriveren.
ᇣᖗ˖㨑ഄ䜡㕂㽕∖᳝䰘ࡴ䆒ҹ⹂ֱ〇ᅮᗻDŽབᵰՓ⫼ 2000 义䖯㒌఼ˈᙼᖙ乏Փ⫼ᠧॄᴎᎹৄᠧॄ ᴎᑻDŽᶤѯ݊ᅗ䜡㕂гᖙ乏Փ⫼ᠧॄᴎᎹৄᠧॄᴎᑻDŽৃҢ Lexmark ⱘ Web キ⚍˖ www.lexmark.
Stability Information 4
English
Edition: April 2006 The following paragraph does not apply to any country where such provisions are inconsistent with local law: LEXMARK INTERNATIONAL, INC., PROVIDES THIS PUBLICATION “AS IS” WITHOUT WARRANTY OF ANY KIND, EITHER EXPRESS OR IMPLIED, INCLUDING, BUT NOT LIMITED TO, THE IMPLIED WARRANTIES OF MERCHANTABILITY OR FITNESS FOR A PARTICULAR PURPOSE. Some states do not allow disclaimer of express or implied warranties in certain transactions; therefore, this statement may not apply to you.
Contents Stability Information ......................................................................................................................................... 1 Chapter 1: Getting started .................................................................................................. 9 Conventions ..................................................................................................................................................... 9 Using this book ................................
Contents Chapter 7: Setting up the printer ..................................................................................... 32 Removing the print cartridge packaging ........................................................................................................ 32 Loading paper ................................................................................................................................................ 35 Chapter 8: Installing printer memory or option cards ................
1 Getting started Conventions Note: A note identifies something that could help you. CAUTION: A caution identifies something that could cause you harm. Warning: A warning identifies something that could damage your product hardware or software. Using this book This guide is intended to help you set up your printer and scanner (MFP option). If you do not have an option listed here, you can skip that portion of the guide and continue to the next task.
Getting started Customizing your MFP option You can customize your MFP with various input, output, and memory options. Note: Leave all components and hardware in the boxes until you are ready to install them. Check the boxes you received to make sure you have all the necessary components for the configuration you ordered.
Getting started Drivers and options After attaching the power cables and turning on your computer, you will need to install two sets of drivers. First, install the printer drivers located on the drivers CD that came with the printer, then install the MFP drivers located on the Software and Documentation CD that came with the MFP. After installing the drivers, verify the computer recognizes your installed options by: 1 Opening the Printers folder.
2 MFP Adjustable stand setup This chapter includes information on setting up the MFP option with an MFP adjustable stand. To assemble this option, you should have the following components: • MFP adjustable stand (part number 12B0602) • Printer • Optional drawer • Finisher or mailbox • Optional duplex unit • 4600 MFP option (scanner) If you do not have an option listed here, you can skip that portion of the setup and continue to the next task.
MFP Adjustable stand setup Installing a 250- or 500-sheet drawer The 250- or 500-sheet drawer attaches under the printer and optional duplex unit. The printer automatically recognizes any drawer that is installed. A drawer consists of a tray and a support unit. The 250- and the 500-sheet drawers are installed the same way. 1 Remove the tray from the support unit. Remove all packing material and tape from the support unit and the tray. 2 Place the tray in the support unit.
MFP Adjustable stand setup Installing a duplex unit The duplex unit attaches under the printer, below the standard tray and above any drawers. Note: Two optional duplex units are available. The 250-sheet duplex unit only works with printers that have a 250-sheet standard tray, and the 500-sheet duplex unit only works with printers that have a 500sheet standard tray. Make sure you have the appropriate duplex unit for the tray size installed in the printer.
MFP Adjustable stand setup Positioning the printer 1 Open the printer box, and then remove all items from the box. 2 Make sure you have the following items: • • • • • • • 3 Printer Power cord Setup Sheet Publications CD Operator panel language overlays Wire bail Operator panel protector overlay Place all items except the printer aside for later use.
MFP Adjustable stand setup Installing the finisher or mailbox 1 Remove the top cover from the printer. You will not need the cover when the finisher or mailbox is attached. Store the cover; it will be needed if you remove the finisher or mailbox. 2 Align and insert the finisher or mailbox into the slots on top of the printer. Due to the small amount of space between the printer and top shelf, the finisher or mailbox must be rotated into the slots.
MFP Adjustable stand setup Installing the scanner CAUTION: The scanner requires two people to lift it safely. 1 Extend the scanner shelf. 2 Align the two holes on the bottom of the scanner with the two forward holes in the shelf, and then place the scanner base on the shelf. 3 Insert the two thumbscrews through the bottom of the shelf and into the bottom of the scanner. Tighten both thumbscrews securely.
3 Low profile stand setup This chapter includes information on setting up the MFP option with a low profile stand.
Low profile stand setup Installing a 250- or 500-sheet drawer The 250- or 500-sheet drawer attaches under the printer and optional duplex unit. The printer automatically recognizes any drawer that is installed. A drawer consists of a tray and a support unit. The 250- and the 500-sheet drawers are installed the same way. 1 Remove the tray from the support unit. Remove all packing material and tape from the support unit and the tray. 2 Place the tray in the support unit.
Low profile stand setup Installing a duplex unit The duplex unit attaches under the printer, below the standard tray and above any drawers. Note: Two optional duplex units are available. The 250-sheet duplex unit only works with printers that have a 250-sheet standard tray, and the 500-sheet duplex unit only works with printers that have a 500sheet standard tray. Make sure you have the appropriate duplex unit for the tray size installed in the printer.
Low profile stand setup Positioning the printer 1 Open the printer box, and then remove all items from the box. 2 Make sure you have the following items: • • • • • • • 3 Printer Power cord Setup Sheet Publications CD Operator panel language overlays Wire bail Operator panel protector overlay Place all items except the printer aside for later use.
Low profile stand setup Installing the scanner shelf Note: If you do not have a scanner shelf but have a scanner stand, go to Scanner stand setup on page 28. Otherwise, go to Scanner option setup on page 30. 1 Remove the top cover from the printer. Note: A scanner shelf is not available for the T640 printer. You will not need the cover when the scanner shelf is attached. Store the cover; it will be needed if you remove the scanner shelf. 2 Remove the backing from the tape on the shelf bottom.
Low profile stand setup Installing the scanner CAUTION: The scanner requires two people to lift it safely. 1 Place the scanner base on the scanner shelf. 2 Insert the one thumbscrews attached to the bottom of the scanner shelf into the bottom of the scanner, and tighten it securely. 3 Align the hinges on the scanner top with the slots in the scanner, and then lower the scanner top onto the scanner.
4 Caster base setup CAUTION: Floor-mounted configurations require additional furniture for stability. You must use either a printer stand or caster base if you are using a 2000-sheet drawer. Certain other configurations also must have a printer stand or caster base. More information is available on our Lexmark Web site at www.lexmark.com/multifunctionprinters. This chapter includes information on setting up the MFP option using a caster base.
Caster base setup Installing the caster base The caster base is used when placing your MFP on the scanner stand and the printer on the floor. It provides mobility and a stable platform for your printer. There are different assembly instructions for use with a 2000-sheet drawer, 500-sheet drawer, or a 250-sheet drawer. 1 Follow the assembly instructions provided with the caster base. 2 Go to Installing the scanner shelf on page 25.
Caster base setup 3 Align and insert the scanner shelf mounting brackets into the slots on top of the printer. 4 Make sure the scanner shelf is positioned securely. 5 Place the tips of the wire bail into the ends of the plastic brackets so that the bail curves downward. The wire bail came with the printer and rests in the standard output bin when installed. 6 Attach the plastic bracket to the scanner shelf. Installing the scanner CAUTION: The scanner requires two people to lift it safely.
Caster base setup 3 Align the hinges on the scanner top with the slots in the scanner, and then lower the scanner top onto the scanner. For information on removing the scanner top, see “Removing the scanner top” in the User’s Guide located on the Software and Documentation CD. 4 Connect the two scanner cables. Note: To prevent errors and scanner malfunction, make sure the scanner cable thumbscrews are tightened securely. 5 Go to Removing the print cartridge packaging on page 32.
5 Scanner stand setup CAUTION: Floor-mounted configurations require additional furniture for stability. You must use either a printer stand or caster base if you are using a 2000-sheet drawer. Certain other configurations also must have a caster base. More information is available on our Lexmark Web site at www.lexmark.com/multifunctionprinters. This chapter includes information on setting up the MFP option with a scanner stand.
Scanner stand setup Installing output options If you purchased an output option (finisher, expander, or mailbox), follow these steps: 1 Remove the top cover from the printer. You will not need the cover when the output option is attached. Store the cover; it will be needed if you remove the output option. 2 Remove the option from the box, and follow the setup instructions included with the option. 3 Place the tips of the wire bail into the ends of the plastic bracket so that the bail curves downward.
6 Scanner option setup This chapter includes information on setting up the MFP (scanner). To assemble this option, you should have the following components: • Printer • 4600 MFP option (scanner) • Printer memory or option cards The setup for this portion of the book covers: 1 Positioning the scanner 2 Installing memory options 3 Installing the printer Positioning the scanner CAUTION: The scanner requires two people to lift it safely. 1 Remove the scanner base from the carton.
Scanner option setup 5 Go to Removing the print cartridge packaging on page 32, and follow the printer setup instructions. For information on installing the interface card and memory and firmware cards, go to Installing printer memory or option cards on page 36.
7 Setting up the printer Removing the print cartridge packaging Note: If you are installing a scanner after initial printer setup, the print cartridge packaging was removed during printer setup. 1 Open the lower front door. 2 Open the upper front door. 3 Pull the print cartridge up and out. 4 Remove the tabs and packaging from the cartridge. 5 Discard the cartridge tabs and packaging. 6 Shake the print cartridge. 7 Reinsert the print cartridge into the printer.
Setting up the printer 8 Close both front doors. Ordering print cartridges Note: For optimum copy quality, order one of the following when replacing your print cartridge. You can use your current cartridges until they are exhausted.
Setting up the printer Part number Description Average cartridge yield* X644H01P High Yield Return Program Print Cartridge for Label Applications 21,000 standard pages X644X01P Extra High Yield Return Program Print Cartridge for Label Applications 32,000 standard pages Other available print cartridges X644A21P Print Cartridge 10,000 standard pages X644H21P High Yield Print Cartridge 21,000 standard pages X644X21P Extra High Yield Print Cartridge 32,000 standard pages For Latin America X64
Setting up the printer Loading paper Complete these instructions to load paper into any of the standard or optional trays. All trays are loaded in the same way. 1 Remove the tray. 2 Adjust the length and width guides to the correct position for the size of paper you are loading. 3 Flex the sheets of paper back and forth to loosen them, and then fan them. Do not fold or crease the paper. Straighten the edges of the stack on a level surface.
8 Installing printer memory or option cards CAUTION: If you are installing memory or option cards sometime after setting up the printer, turn the printer off, and unplug the power cord from the wall outlet before continuing. After installing memory or option cards, go to Scanner setup on page 42. The instructions in this section help you install the interface card, memory card, and firmware card. Information about other memory or option cards can be found in the printer User’s Guide.
Installing printer memory or option cards 5 Slide the shield to the right, and then remove it. 6 Set the shield aside. Use the illustration to locate the connector for the card you want to install.
Installing printer memory or option cards Installing a memory card Note: Printer memory cards designed for other Lexmark printers may not work with the printer. 1 Remove the system board access cover. (See Accessing the printer system board.) Warning: Printer memory cards are easily damaged by static electricity. Touch something metal such as the printer frame before you touch a memory card. 2 Push open the latches on both ends of the memory card connector. 3 Unpack the memory card.
Installing printer memory or option cards Installing a firmware card Note: Firmware cards designed for other Lexmark printers may not work with the printer. 1 Remove the system board access cover. (See Accessing the printer system board.) Note: If a firmware card has been installed, you must remove it. Only one firmware card is allowed. 2 Unpack the firmware card. 3 Holding the firmware card by the locking clips, align the plastic pins on the card with the holes on the system board.
Installing printer memory or option cards Installing an interface card and cable Warning: Interface cards are easily damaged by static electricity. Touch something metal such as the printer frame before you touch an interface card. 1 Locate the card connectors on the system board. 2 Remove the screw and the cover plate closest to the system board, and save them. 3 Unpack the scanner interface card and cable. Save the packaging materials. 4 a Connect the USB interconnect cable to the system board.
Installing printer memory or option cards Replacing the shield After you have installed options on the printer system board, follow these steps to reattach the shield and close the doors. 1 Align the keyholes on the shield with the screws on the frame. 2 Slide the shield down onto the screws. 3 Tighten the screws. 4 Close the side door. 5 Close the top front cover. 6 Close the multipurpose feeder.
9 Scanner setup Installing the printer operator panel cover If you purchased your printer and MFP option separately, you will need to install the printer operator panel cover. If you purchased a printer and MFP together, the printer operator panel cover is installed; go to Unlocking the scanner on page 43. 1 Locate the cover bracket packaged with your MFP. 2 Remove the backing from the tape on the rear of the cover bracket.
Scanner setup Unlocking the scanner 1 Locate the lock switch on the side of the scanner, and then slide the switch down. 2 Lift the scanner feed tray up until it locks into position. Attaching cables and power cords 1 Connect the scanner cable to the scanner and printer. 2 Connect the printer to a LAN drop or hub using standard cabling that is compatible with your network. 3 Connect the RJ-11 telephone fax line cable into the left modem port on the back of the scanner.
Scanner setup 5 Connect the power cord to the printer and scanner. Note: Use the power cord from the scanner box. 6 Connect the power cord to the scanner. Note: Use the power cord from the printer box. 7 Plug the power cord into a properly-grounded outlet. If you have a 2000-sheet drawer: a Connect the power cord from the scanner to the back of the 2000-sheet drawer. b Connect the power cord into the 2000-sheet drawer, and then into a properly grounded outlet.
Scanner setup 5 Turn on the printer. Fax setup When you first turn on the MFP or if the MFP has been off for an extended time, Set clock will appear.
Scanner setup 7 Touch Done to save your choice. 8 Touch Station Number. 9 Enter your fax phone number. 10 Touch Done. Note: If your region supports caller ID, you may have to change the default setting. There are two settings available; FSK (pattern 1) and DTMF (pattern 2). Contact your telecommunications company or switch the settings if the MFP does not identify incoming calls.
Scanner setup Verifying the IP settings 1 Print another network setup page. Look under the “TCP/IP” heading, and make sure the IP address, netmask, and gateway are correct. See To print a network setup page. on page 46 if you need help. 2 Ping the printer, and verify that it responds. At a command prompt on a network computer, type ping followed by the new printer IP address (for example, 192.168.0.11).
Scanner setup Verify MFP setup Printing a menu settings page 1 Touch the key icon on the MFP control panel. 2 Touch Reports. 3 Touch Menu Settings Page. 4 Verify the options you installed are correctly listed under “Installed Features” and “Printer Information.” Printing the Help pages We recommend you store this information in a convenient location near the printer. 1 Touch the key icon on the MFP control panel. 2 Touch Help. 3 Touch Print all guides.
Scanner setup Testing a scan to PC profile 1 Type the IP address of the MFP in the URL field of your browser, and then press Enter. If the Java applet screen appears, click Yes. 2 Click Scan Profile. 3 Click Create Scan Profile. 4 Select your scan settings, and then click Next. 5 Select a location for saving the scanned output file somewhere on your computer. 6 Enter a profile name. The profile name is the name that will appear on the SCAN PROFILE list on the MFP control panel. 7 Click Submit.
10 Distributing MFP user information Finding user instructions MFP online documentation includes helpful instructions for making copies, sending faxes, and scanning documents to email, FTP destinations, or back to your computer. It also contains information on various menus and messages and configuration information. To view the available information on the MFP Software and Documentation CD, click View Documentation, and then select your MFP.
11 Solve setup problems Problem Solution Nothing appears on the scanner display. The scanner and the printer are not talking to each other. 1 Turn the printer off and then back on. 2 Turn the printer off, and unplug the scanner. Make sure all cables and cords are connected, and then plug the scanner in before turning on the printer. The control panel is not responding. Make sure the printer is turned on. Note: Remember to plug the scanner in before turning on the printer.