
Operation Manual

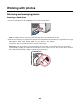
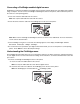
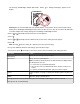

Table Of Contents
- Contents
- Finding more information
- Setting up the printer
- Loading paper and original documents
- Loading paper
- Using the automatic paper type sensor
- Loading envelopes
- Loading labels
- Loading greeting cards, index cards, photo cards, and postcards
- Loading transparencies
- Loading iron-on transfers
- Loading custom-size paper
- Loading banner paper
- Loading original documents into the Automatic Document Feeder (ADF)
- Faxing using the control panel
- Sending a fax using the control panel
- Receiving a fax using the control panel
- Forwarding faxes using the control panel
- Using the control panel Phonebook
- Customizing fax settings using the control panel
- Understanding the Fax menu
- Setting up Quick Dial buttons using the control panel
- Setting up a fax header using the control panel
- Setting up a fax footer using the control panel
- Blocking junk faxes using the control panel
- Blocking unwanted changes to fax settings using the control panel
- Setting up a dialing prefix using the control panel
- Setting the distinctive ring using the control panel
- Setting the number of rings before receiving a fax automatically using the control panel
- Changing Caller ID pattern using the control panel
- Printing fax activity reports using the control panel
- Canceling a fax after a document is loaded using the control panel
- Faxing using the computer
- Sending a fax using the software
- Receiving a fax using the computer
- Forwarding faxes
- Using the computer Phone Book
- Customizing fax settings using the computer
- Customizing settings using the Fax Setup Utility
- Setting Auto Answer to on
- Setting up Quick Dial buttons using the computer
- Creating a fax cover page using the Productivity Studio
- Blocking junk faxes
- Using the Fax Solutions Software
- Setting up a dialing prefix
- Setting the distinctive ring
- Setting the number of rings before receiving a fax automatically
- Setting up Speed Dial
- Setting up to fax while behind a PBX
- Printing fax activity reports
- Printing
- Printing basic documents
- Printing specialty documents
- Choosing compatible specialty paper types
- Printing envelopes
- Printing greeting cards, index cards, photo cards, and postcards
- Printing a document as a poster
- Printing an image as a poster
- Printing a booklet
- Assembling a booklet
- Printing iron-on transfers
- Printing on custom-size paper
- Printing transparencies
- Printing a banner
- Watermark
- Changing printer settings
- Copying
- Scanning
- Scanning using the control panel
- Scanning using only the computer
- Scanning a document using the computer
- Scanning text for editing using the computer
- Scanning images for editing
- Creating a PDF from a scanned item
- Customizing scan settings using the computer
- Saving a scanned image on the computer
- Changing the Productivity Studio scan settings
- Adding a file to an e-mail message
- Adding a new scanned image to an e-mail message
- Scanning documents or images for e-mailing
- Changing the Productivity Studio e-mail screen preferences
- Canceling a scan job
- Working with photos
- Retrieving and managing photos
- Inserting a flash drive
- Connecting a PictBridge-enabled digital camera
- Understanding the PictBridge menu
- Transferring all photos from a CD or flash drive using the computer
- Transferring selected photos from a CD or flash drive using the computer
- Changing the Productivity Studio temporary files preferences
- Changing the Productivity Studio searched folders preferences
- Changing the Productivity Studio library preferences
- Changing the Productivity Studio transfer settings
- Editing photos
- Cropping a photo
- Rotating a photo
- Changing the Resolution / Size of a photo
- Applying One-Click Auto Fixes to a photo
- Reducing the red-eye effect in a photo
- Blurring/Sharpening a photo
- Enhancing a photo
- Changing the Hue / Saturation of a photo
- Changing the Gamma Value of a photo or image
- Despeckling a photo
- Changing the Brightness / Contrast settings of a photo
- Applying a color effect to a photo
- Changing the Exposure setting of a photo
- Removing wavy patterns from scanned photos, magazines, or newspapers
- Printing photos
- Creating and viewing a slideshow
- Retrieving and managing photos
- Connecting the printer to a network
- Maintaining the printer
- Removing a used print cartridge
- Installing print cartridges
- Refilling print cartridges
- Using genuine Lexmark print cartridges
- Aligning print cartridges
- Cleaning the print cartridge nozzles
- Wiping the print cartridge nozzles and contacts
- Preserving the print cartridges
- Cleaning the scan lens and white roller
- Cleaning the exterior of the printer
- Ordering supplies
- Troubleshooting
- Setup Troubleshooting
- Fax troubleshooting
- Jams and misfeeds troubleshooting
- Print troubleshooting
- Partial 4 x 6 in. (10 x 15 cm) photo prints when using a PictBridge-enabled digital camera
- Improving print quality
- Poor text and graphic quality
- Poor quality at the edges of the page
- Print speed is slow
- Partial document or photo prints
- Photo smudges or scratches
- Checking the print cartridges
- Ink levels seem incorrect
- Ink levels seem to go down too quickly
- A blank or incorrect page prints
- Characters on printout are missing or unexpected
- Colors on printout are faded or differ from colors on the screen
- Glossy photo paper or transparencies stick together
- Page prints with different fonts
- Print is too dark or smudged
- Printed characters are improperly formed or are not aligned correctly
- Printouts have alternating bands of light and dark print
- Transparencies or photos contain white lines
- Vertical straight lines are not smooth
- White lines appear in graphics or solid black areas
- Checking the printer status
- Settings are not saved
- Checking printer readiness
- Checking the Spool Settings for banner printing
- Resolving font problems
- Printer is busy printing another job
- Ready or Busy Printing is listed as the status
- Printing a test page
- Printing a test page using the control panel
- Test page does not print
- External print server is not working
- Removing an external print server
- Checking the port setting
- Cable is not connected, is loose, or is damaged
- Printer is plugged in but does not print
- Printer is trying to print to File
- Printer cannot communicate with computers over peer-to-peer network
- Printer is not able to communicate with the computer
- Problems when copying, scanning, or faxing
- Wrong printer is attached
- Updating the printer software
- Bidirectional communication is not established
- Experiencing poor quality or incorrect output
- Ping the access point
- Copy troubleshooting
- Scan troubleshooting
- Error messages on the printer display
- Alignment Error
- Cannot Retrieve Application List
- Cartridge Error (1102, 1203, 1204, or 120F)
- Black Ink Low / Color Ink Low / Photo Ink Low
- Clear Carrier Jam
- Clear Paper Jam
- Computer not connected
- Cover Open
- Document Load Error
- Cartridges are in the wrong positions
- Left Cartridge Error / Right Cartridge Error
- Left Cartridge Incorrect / Right Cartridge Incorrect
- Left Cartridge Missing / Right Cartridge Missing
- Load Document
- Memory Failure
- PictBridge communications error
- Scan Request Failed
- Error messages on the computer screen
- Notices
- Product information
- Edition notice
- UNITED STATES GOVERNMENT RIGHTS
- Trademarks
- Conventions
- Federal Communications Commission (FCC) compliance information statement
- European Community (EC) directives conformity
- Noise emission levels
- Waste from Electrical and Electronic Equipment (WEEE) directive
- Product disposal
- Temperature information
- Federal Communications Commission (FCC) compliance information statement
- Notice to users of the Canadian telephone network
- Notice to users of the New Zealand telephone network
- South Africa telecommunications notice
- Power consumption
- Statement of Limited Warranty
- LEXMARK LICENSE AGREEMENTS
- Index
Transferring all photos from a CD or flash drive using the computer
1 Insert a CD into the computer, or insert a flash drive into the computer or printer.
2 If you are using:
• Windows Vista, an “AutoPlay” screen appears. Click Transfer Photos to your computer.
• Windows XP, a “What do you want Windows to do?” screen appears. Click Copy pictures to a folder on
my computer using Microsoft Scanner and Camera Wizard.
• Windows 2000:
a From the desktop, double-click the Productivity Studio icon.
b Click Transfer Photos.
3 Click Automatically save all photos to “My Pictures”.
4 If you want to delete your photos from the flash drive:
a Select Yes.
b Click Done.
5 Remove the flash drive or CD to view your transferred photos in the Photo Library.
Transferring selected photos from a CD or flash drive using the computer
1 Insert a CD into the computer, or a flash drive into the computer or printer.
2 If you are using
• Windows Vista, an “AutoPlay” screen appears.
Click Transfer Photos to your computer using the Productivity Studio.
• Windows XP, a “What do you want Windows to do?” screen appears.
Click Transfer Photos to your computer using the Productivity Studio.
• Windows 2000:
a From the desktop, double-click the Productivity Studio icon.
b Click Transfer Photos.
3 Click Select photos to save.
4 Click Deselect All.
5 Click to select the photo(s) you want to transfer, and then click Next.
6 If you want to save the photos to the default folder, click Next.
7 If you want to save the photos in a folder other than the default folder:
a Click Browse.
b Select the folder you want.
c Click OK.
8 If you want to assign a prefix to all of the photos you just transferred, select the check box and enter a name.
9 Click Next.
86