
All in One Printer User Manual

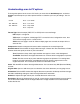
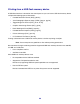
Table Of Contents
- Contents
- Learning about the MFP
- Copying
- Quick copy
- Multiple page copying
- Using the scanner glass (flatbed)
- Understanding the copy screens and options
- Copying from one size to another
- Making transparencies
- Copying to letterhead
- Copying photographs
- Making copies using media from a selected tray
- Copying mixed-sized media
- Setting the duplex option
- Reducing and enlarging copies
- Adjusting copy quality
- Setting collation options
- Placing separator sheets between copies
- Setting paper saving options
- Placing the date and time at the top of each page
- Placing an overlay message on each page
- Canceling a copy job
- Copy tips
- E-mail
- Entering an e-mail address
- Using a shortcut number
- Using the address book
- E-mailing to a profile
- Adding e-mail subject and message information
- Changing the output file type
- E-mailing color documents
- Creating an e-mail shortcut
- Creating an e-mail profile
- Canceling an e-mail
- Understanding e-mail options
- E-mail server setup
- Address book setup
- E-mail tips
- Faxing
- FTP
- Scanning to a PC or USB flash memory device
- Printing
- Sending a job to print
- Printing from a USB flash memory device
- Canceling a print job
- Printing the menu settings page
- Printing a network setup page
- Printing a font sample list
- Printing a directory list
- Printing confidential and held jobs
- Printing on specialty media
- Loading standard trays and optional trays
- Setting the Paper Type and Paper Size
- Loading the multipurpose feeder
- Loading the 2000-sheet drawer
- Loading the envelope feeder
- Linking trays
- Understanding paper and specialty media guidelines
- Installing and removing options
- Understanding the MFP
- Administrative support
- Adjusting control panel brightness
- Restoring factory default settings
- Adjusting screen timeout
- Adjusting Power Saver
- Configuring the MFP
- Setting Password Protect for the menus
- Restricting Function Access
- Preventing access to the menus from the control panel
- Disabling the Driver to Fax menu item
- Setting a password before printing received faxes
- Releasing held faxes for printing
- Setting security using the Embedded Web Server (EWS)
- Using the secure EWS
- Supporting SNMPv3 (Simple Network Management Protocol version 3)
- Supporting IPSec (Internet Protocol Security)
- Disabling ports and protocols
- Using 802.1x Authentication
- Confidential Print Setup
- Using the restricted server list function
- Clearing jams
- Troubleshooting
- Understanding MFP messages
- Online technical support
- Checking an unresponsive MFP
- Printing multiple language PDFs
- Solving printing problems
- Solving copy quality problems
- Solving scan quality problems
- Solving fax problems
- Solving option problems
- Solving paper feed problems
- Print quality troubleshooting
- Solving print quality problems
- Notices
- Index

66
Understanding scan to PC options
To change the options for the scan to PC Profile, you must click the Quick Setup box, and select
Custom. Quick Setup lets you select preset formats or customize your scan job settings. You can
select:
Format Type: Sets the output (PDF, TIFF, or JPEG) for the scanned image.
PDF output is a single file.
TIFF output is a single file. If Multi-page TIFF is turned off in the Configuration menu, then
TIFF saves one page each in a series of files.
JPEG saves one page in each file. When multiple pages are scanned, the output will be a
series of files.
Compression: Sets the compression format used to compress the scanned output file.
Default Content: Tells the MFP the original document type. Choose from Text, Text/Photo, or Photo.
Content affects the quality and size of your scanned file.
Text: Emphasizes sharp, black, high-resolution text against a clean, white background.
Text/Photo: Used when the original documents are a mixture of text and graphics or pictures.
Photo: Tells the scanner to pay extra attention to graphics and pictures. This setting takes
longer to scan but emphasizes a reproduction of the full dynamic range of tones in the
original document. This increases the amount of information saved.
Color: Tells the MFP the color of the original documents. You can select Gray, BW (Black and White),
or Color.
Original Size: Opens a field where you can select the size of the document you are going to scan.
Orientation: Tells the MFP whether the original document is portrait or landscape and then changes
the Sides and Binding settings to match the original document orientation.
Darkness: Adjusts how light or dark your scanned documents will turn out.
Resolution: Adjusts the output quality of your file. Increasing the image resolution increases the file
size and the time needed to scan the original document. Image resolution can be decreased to
reduce the file size.
Custom Photo - Color JPEG
Text - BW PDF Photo - Color TIFF
Text - BW TIFF Photo - Gray JPEG
Photo - Gray TIFF