X644e, X646e User’s Guide January 2006 Lexmark and Lexmark with diamond design are trademarks of Lexmark International, Inc., registered in the United States and/or other countries. © 2006 Lexmark International, Inc. All rights reserved. 740 West New Circle Road Lexington, Kentucky 40550 www.lexmark.
Edition: January 2006 The following paragraph does not apply to any country where such provisions are inconsistent with local law: LEXMARK INTERNATIONAL, INC., PROVIDES THIS PUBLICATION “AS IS” WITHOUT WARRANTY OF ANY KIND, EITHER EXPRESS OR IMPLIED, INCLUDING, BUT NOT LIMITED TO, THE IMPLIED WARRANTIES OF MERCHANTABILITY OR FITNESS FOR A PARTICULAR PURPOSE. Some states do not allow disclaimer of express or implied warranties in certain transactions; therefore, this statement may not apply to you.
• Your product uses a laser. CAUTION: Use of controls or adjustments or performance of procedures other than those specified herein may result in hazardous radiation exposure. • Your product uses a printing process that heats the print media, and the heat may cause the media to release emissions. You must understand the section in your operating instructions that discusses the guidelines for selecting print media to avoid the possibility of harmful emissions.
Contents Chapter 1: Learning about the MFP .................................................................................. 8 Identifying the MFP .......................................................................................................................................... 8 Using the scanner ............................................................................................................................................ 9 Configured models ............................................
Contents Creating an e-mail shortcut ............................................................................................................................ 35 Creating an e-mail profile ............................................................................................................................... 36 Canceling an e-mail .......................................................................................................................................
Contents Loading standard trays and optional trays ..................................................................................................... 62 Setting the Paper Type and Paper Size ........................................................................................................ 64 Loading the multipurpose feeder ................................................................................................................... 64 Loading the 2000-sheet drawer ............................
Contents Hard disk wiping .......................................................................................................................................... 122 Using the restricted server list function ........................................................................................................ 123 Chapter 13: Troubleshooting ......................................................................................... 124 Understanding MFP messages .........................................
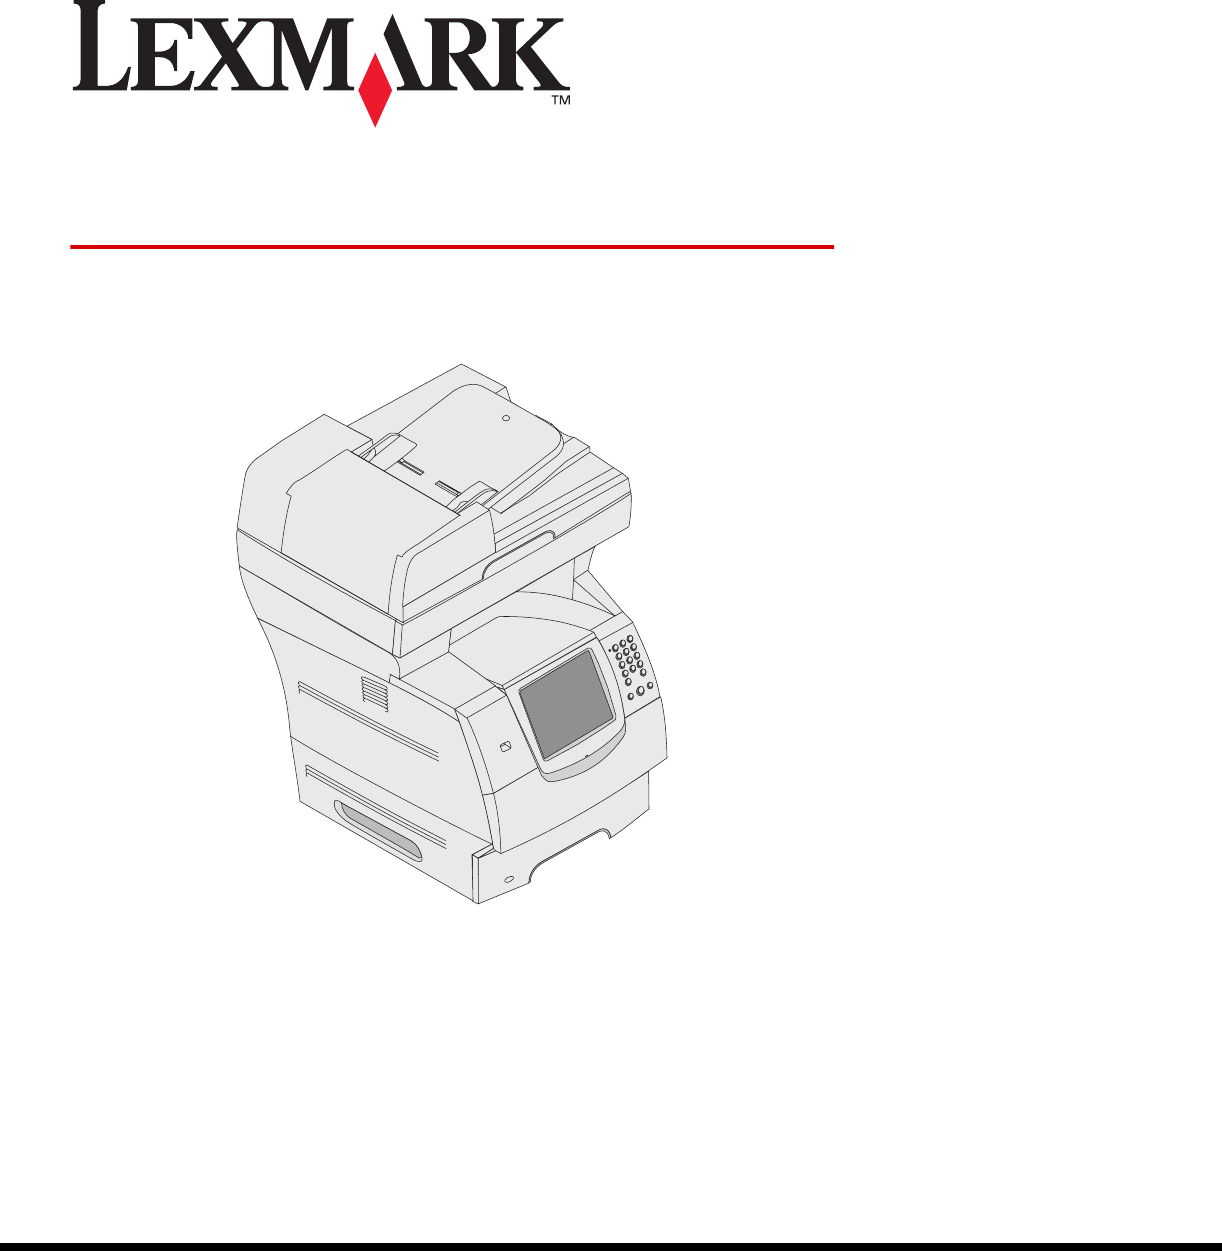
1 Learning about the MFP Identifying the MFP Use the following table to determine the features and options of your Lexmark™ X646e or X646dte MFP (multifunction printer). For more information about installing input options, see Installing and removing options or the instructions that came with the option. CAUTION: The MFP requires three people to lift it safely. Models The MFP is available in two models The following table lists some common features and differences between the models.
Learning about the MFP Using the scanner Basic functions of the scanner The Lexmark X646e and X646dte provide copy, fax, and scan-to-network capability for large workgroups. With either of these MFPs, you can: • Make quick copies, or change the settings on the control panel to perform specific copying jobs. • Send an outgoing fax using the MFP control panel. • Send an outgoing fax to multiple fax destinations at the same time.
Learning about the MFP Configured models The following illustrations show a standard MFP and an MFP with a duplex unit and a 500-sheet drawer. Other print media handling options are also available. Standard With duplex and drawer Scanner Standard output bin Control panel Tray 1 (integrated tray or standard tray) Duplex unit Multipurpose feeder Tray 2 (500 sheets) Tray 1 (integrated tray or standard tray) CAUTION: Floor-mounted configurations require additional furniture for stability.
Learning about the MFP Understanding the MFP control panel MFP and scanner settings can be changed several ways: through the MFP control panel, the software application in use, the print driver, MarkVision™ Professional, or the Web pages. Settings changed from the application or print driver apply only to the job being sent to the MFP. Changes made to print, fax, copy, and e-mail settings from an application override changes made from the control panel.
Learning about the MFP Callout Control panel item Function 3 0—9 Note: Referred to as the numeric keypad. Press these buttons to enter numbers when the LCD screen has a field that accepts the entry of numbers. Also, use these buttons to dial phone numbers for faxes. Note: If a number is pressed while on the home screen without pressing the # button first, the Copy menu opens and changes the Copy Quantity. 4 # (Pound or number character) Press this button: • For a shortcut identifier.
Learning about the MFP Callout Control panel item Function 10 Asterisk (*) * is used as part of a fax number or as an alphanumeric character. 11 USB Direct interface The host Universal Serial Bus (USB) direct interface on the control panel is used to plug in a USB flash memory device and print any Portable Document Format (PDF) [.pdf file], Joint Photographic Experts Group (JPEG) [.jpeg or .jpg file], Tagged Image File Format (TIFF) [.tiff or .tif file], Graphics Interchange Format (GIF) [.
Learning about the MFP Home screen and Home screen buttons After the MFP is turned on and a short warm-up period occurs, the LCD shows the following basic screen which is referred to as the Home screen. Use the Home screen buttons to initiate an action such as copy, fax, or scan, to open the menu screen, or to respond to messages. Copy 1 Fax 8 E-mail 2 FTP 7 6 Menus Ready. Toner low. Status/ Supplies 3 Touch any button to begin.
Learning about the MFP Callout number Button Function 7 FTP Touch to access the File Transfer Protocol (FTP) menus. A document can be scanned directly to an FTP site. 8 Fax Touch to access the Fax menus. Other buttons may appear on the Home screen. They are: Button Button name Function Release Held Faxes (or Held Faxes if in Manual Mode) There are held faxes with a scheduled hold time previously set. To access the list of held faxes, touch this button.
Learning about the MFP Button Cancel Jobs Button name Function Unlock Device This button appears on the screen when the MFP is locked. The control panel buttons and shortcuts cannot be used while it appears and no default copy starts may occur. To unlock the MFP: 1 Touch Unlock Device to open a PIN entry screen. 2 Enter the correct PIN to unlock the numeric keypad (0—9) and the Backspace button on the control panel. Note: If an invalid PIN is entered, Invalid PIN. appears.
Learning about the MFP Using the LCD touch-screen buttons The following section provides information on navigating through several screens. Only a few are chosen to demonstrate the use of the buttons. Sample screen one Copy from Sides (Duplex) Letter (8.5 x 11 in.) Portrait 1-sided to 1-sided Copy to Letter (8.5 x 11 in.
Learning about the MFP Button Scan the ADF Button name Function or description Right scroll increase button Touch the right scroll increase button to scroll to another value in increasing order. Left arrow button Touch the left arrow button to scroll left to: • Reach a decreased value shown by an illustration. • See a full text field on the left. Right arrow button Touch the right arrow button to scroll right to: • Reach an increased value shown by an illustration.
Learning about the MFP Sample screen two Unknown paper size. Copy from: Letter (8.5 x 11 in.) Legal (8.5 x 14 in.) Executive (7.25 x 10.5 in.) Folio (8. 5 x 13 in.) Statement (5.5 x 8.5 in.) A4 (210 x 297 mm) Cancel Job Continue Information on touch-screen buttons Button Button name Function or description Down arrow Touch the down arrow to move down to the next item in a list, such as a list of menu items or values. The down arrow does not appear on a screen with a short listing.
Learning about the MFP Button Button name Function or description Selected radio button This is a selected radio button. Touch a radio button to select it. The radio button changes color to show it is selected. In Sample screen two, the only paper size selected is Letter. Cancel Job See Cancel Jobs on page 16. Continue Touch Continue after a menu item or value on a screen is selected and more changes need to be made for a job from the original screen.
Learning about the MFP Button Button name Function or description Select Touch to select a menu. The next screen appears showing menu items. Touch to select a menu item. The next screen appears showing values. Done Allows specifying that a job is finished. For example, when scanning an original document, one could indicate that the last page is scanned, and then printing the job would begin.
Learning about the MFP Features Feature Feature name Description Menus Æ Settings Æ Copy Settings Æ Number of Copies Menu trail line A line is located at the top of each menu screen. This feature acts as a trail. It gives the exact location within the menus. Touch any of the underlined words to return to that menu or menu item. The Number of Copies is not underlined since this is the current screen.
Learning about the MFP Menus A number of menus are available to make it easy for you to change MFP settings or print reports. To access the menus and settings, press the menu button in the lower right corner of the home screen. When a value or setting is selected and saved, it is stored in MFP memory. Once stored, these settings remain active until new ones are stored or the factory defaults are restored.
2 Copying The following copy topics are available in this and other chapters.
Copying Using the flatbed If you are using the flatbed (scanner glass) to make copies: 1 Open the document cover. 2 Place the document face-down on the scanner flatbed. 3 Close the document cover. 4 Touch Copy on the home screen, or press Go on the numeric pad. For Copy, continue with step 5. For Go, proceed with step 8. 5 Set the number of copies. 6 Change the copy options to meet your requirements. 7 Touch Copy It.
Copying Printed Image: Copies halftone photographs or graphics such as documents printed on a laser printer or pages from a magazine or newspaper that are composed primarily of images. For original documents that are a mixture of text, line drawings, or other graphics, leave Printed Image off. Sides (Duplex): Prints copies on 1 or 2 sides, makes 2-sided copies (duplex) of 2-sided originals, 2-sided copies from 1-sided originals or 1-sided copies (simplex) from 2-sided originals.
Copying Copying from one size to another 1 Place your original document in the automatic document feeder face-up, short-edge first. 2 Adjust the paper guides. 3 Touch Copy on the home screen. 4 Touch Copy from:, and then identify the size of your original document. For example, Legal. 5 Touch Copy to:, and then select the size you want the copy to be. Note: If you select a paper size that is different from the “Copy from” size, the MFP will scale the size automatically. 6 Touch Copy It.
Copying 5 Touch Content. 6 Touch Photograph. 7 Touch Copy It. 8 Touch Scan Next or Done. Making copies using media from a selected tray During the copy process, you can select the input tray that contains the media type of choice. For example, if a special media type is located in the multipurpose feeder, and you want to make copies on that media: 1 Place your original document in the automatic document feeder face-up, short-edge first. 2 Adjust the paper guides.
Copying Setting the duplex option 1 Place your original document in the automatic document feeder face-up, short-edge first. 2 Adjust the paper guides. 3 Touch Copy on the home screen. 4 Touch the button that looks the way you want your copies duplexed. The first number represents sides of the original documents; the second number represents sides of the copy. For example, select 1 --> 2-sided if you have 1-sided original documents and you want 2-sided copies. 5 Touch Copy It.
Copying Setting collation options If you want your copies collated, you don’t need to do anything; this is the default setting. For example, two copies of three pages will print page 1, page 2, page 3, page 1, page 2, page 3. If you don’t want your copies collated, you can change the setting. For example, two copies of three pages will print page 1, page 1, page 2, page 2, page 3, page 3. To turn collation off: 1 Place your original document in the automatic document feeder face-up, short-edge first.
Copying Placing the date and time at the top of each page 1 Place your original document in the automatic document feeder face-up, short-edge first. 2 Adjust the paper guides. 3 Touch Copy on the home screen. 4 Touch Options. 5 Touch Date/Time Stamp. 6 Touch On. 7 Touch Done. 8 Touch Copy It. Placing an overlay message on each page An overlay message can be placed on each page. The message choices are Urgent, Confidential, Copy, or Draft.
Copying 7 Touch Done. 8 Touch Copy It. When the end of a set is reached, the “Scan the next page” screen appears. Touch Scan the next page or touch Done. For more information on the Custom job or the job build setting, see the Menus and Messages Guide on the Software and Documentation CD. Canceling a copy job While the document is in the ADF When the ADF begins processing a document, the scanning screen is displayed. You can cancel the copy job by touching Cancel Job on the touch screen.
3 E-mail The MFP can be used to e-mail scanned documents to one or more recipients. There are four ways to send an e-mail from the MFP. You can type the e-mail address, use a shortcut number, use the address book, or a profile. Permanent e-mail destinations can be created in the Manage Destinations link located under the Configuration tab on the Web page.
E-mail 3 Press #, and then enter the recipient's shortcut number. You can enter additional recipients by pressing next and then entering the recipient's shortcut number or address. 4 Touch E-mail It. Using the address book 1 Place the original document in the automatic document feeder face-up or on the flatbed face-down. Adjust the paper guides when using the ADF. 2 Touch E-mail on the home screen. 3 Touch Search Address Book.
E-mail Changing the output file type 1 Place the original document in the automatic document feeder face-up or on the flatbed face-down. Adjust the paper guides when using the ADF. 2 Touch E-mail on the home screen. 3 Enter an e-mail address. 4 Touch Options. 5 Touch the button that represents the file type you want to send. • • • 6 PDF: This creates a single file with multiple pages, viewable with Adobe Reader. Adobe Reader is provided free by Adobe at http://www.adobe.com.
E-mail 7 Go to the MFP, and place your original document in the automatic document feeder face-up, short-edge first. 8 Press #, and then enter the recipient's shortcut number. 9 Touch E-mail It. From the MFP 1 Load the original document in the ADF face-up, short-edge first, and adjust the paper guides. 2 Touch E-mail on the home screen. 3 Enter the recipient's e-mail address. To create a group of recipients, touch Next number, and enter the next recipient’s e-mail address.
E-mail Orientation: Tells the MFP whether the original document is portrait or landscape and then changes the Sides and Binding settings to match the original document orientation. Binding: Tells the MFP whether the original document is bound on the long-edge or short-edge side. E-mail Subject: Lets you enter a subject line to your e-mail. You can enter up to 255 characters. E-mail Message: Lets you enter a message that will be sent with your scanned attachment.
E-mail E-mail server setup For e-mail to operate, it must be turned on in the MFP configuration and have a valid IP address or gateway address. To set up the e-mail function: 1 Open your Web browser. In the address line, enter the IP address of the MFP you want to configure using the format: http://ip_address/. 2 Click Configuration. 3 Click E-mail/FTP Settings. 4 Click Email Server Setup. 5 Fill in the fields with the appropriate information. 6 Click Submit.
4 Faxing Note: Faxing is not supported on all models. The fax function lets you scan items and fax them to one or more recipients directly from the MFP. When you touch Fax, it opens the fax destination screen. You enter the fax number and touch Fax It to send your fax. You can also change the fax settings to fit your personal needs. During initial MFP setup, you may be required to configure the MFP for faxing. For additional information, see Fax setup.
Faxing Using fax destination shortcuts Fax destination shortcuts are just like the speed dial numbers on a telephone or fax machine. You can assign shortcut numbers when creating permanent fax destinations. Permanent fax destinations or speed dial numbers are created in the Manage Destinations link located under the Configuration tab on the Web page. A shortcut number (1—99999) can contain a single recipient or multiple recipients.
Faxing Creating shortcuts Instead of entering the entire phone number of a fax recipient on the control panel each time you want to send a fax, you can create a permanent fax destination and assign a shortcut number. A single shortcut number or a multiple number shortcut can be created. There are two methods for creating shortcut numbers: from a computer or from the MFP touch screen. From a computer 1 Enter the IP address of the MFP in the URL field (address bar) of your Web browser.
Faxing Understanding fax options Original: Opens a screen where you can choose the size of the documents you are going to fax. • Touching any of the paper size buttons on the follow-on screen will make that your selection and return you to the Fax Options Screen. • When Original Size is set to Mixed Sizes, you can scan different size original documents (letter and legal size pages). They will be scaled automatically to fit the selected output media size.
Faxing Changing the fax resolution 1 Place your original document in the automatic document feeder face-up, short-edge first. 2 Adjust the paper guides. 3 Touch Fax on the home screen. 4 Enter the fax number. 5 Touch Options. 6 Touch the button that represents the resolution you want. 7 Touch Fax It. Adjusting the Darkness setting 1 Place your original document in the automatic document feeder face-up, short-edge first. 2 Adjust the paper guides. 3 Touch Fax on the home screen.
Faxing Cancel an outgoing fax There are two ways to cancel an outgoing fax: While the original documents are still scanning 1 When using the automatic document feeder, touch Cancel while Scanning… is displayed on the touch screen. 2 When using the scanner bed, touch Cancel while Scan the Next Page / Finish the Job is displayed on the touch screen. After the original documents have been scanned to memory 1 Touch Cancel Jobs on the home screen. The Cancel Jobs screen will appear.
Faxing Fax setup When you first turn on the MFP or if the MFP has been off for an extended time, Set clock will appear.
Faxing 4 Click Configuration. If you are changing fax modes, you must click Submit before you can access the configuration page. Note: During MFP power up, if the print server is configured to use Network Time Protocol (NTP) time, the current date and time are provided. However, you must set the time zone to get the correct time.
5 FTP The MFP scanner lets you scan documents directly to a File Transfer Protocol (FTP) server. Note: Only one FTP address may be sent to at a time. Once an FTP destination has been configured by your system administrator, the name of the destination becomes available as a shortcut number or listed as a profile under the Held Jobs icon. An FTP location could also be another PostScript printer: for example, a color document can be scanned and then sent to a color printer.
FTP Creating shortcuts Instead of entering the entire FTP site address on the control panel each time you want to send a document to an FTP, you can create a permanent FTP destination and assign a shortcut number. A single shortcut number or a multiple number shortcut can be created. There are two methods for creating shortcut numbers: from a computer or from the MFP touch screen. From a computer 1 Enter the IP address of the MFP in the URL field (address bar) of your Web browser.
FTP Sides (Duplex): Tells the MFP if your original document is simplex (printed on one side) or duplex (printed on both sides). This lets the scanner know what needs to be scanned for inclusion in the e-mail. Binding: Tells the MFP whether the original document is bound on the long-edge or short-edge side. Base File Name: Lets you enter a file name. The default value is the word image. A timestamp is added to the file name to prevent overwriting files of the same name at the FTP site.
FTP FTP tips The following tips may improve the MFP FTP quality. Question Tip When should I use Text mode? • Text mode should be used when text preservation is the main goal of sending a document to an FTP site, and preserving images copied from the original document is not a concern. • Text is best used for receipts, carbon copy forms, and documents that only contain text or fine line art.
6 Scanning to a PC or USB flash memory device The MFP scanner lets you scan documents directly to your PC or a USB flash memory device. Your computer does not have to be directly connected to the MFP for you to receive Scan to PC images. You can scan the document back to your computer over the network by creating a scan profile on your computer and then downloading the profile to the MFP.
Scanning to a PC or USB flash memory device Understanding scan to PC options To change the options for the scan to PC Profile, you must click the Quick Setup box, and select Custom. Quick Setup lets you select preset formats or customize your scan job settings. You can select: Custom Photo - Color JPEG Text - BW PDF Photo - Color TIFF Text - BW TIFF Photo - Gray JPEG Photo - Gray TIFF Format Type: Sets the output (PDF, TIFF, or JPEG) for the scanned image. PDF output is a single file.
Scanning to a PC or USB flash memory device Scanning to a USB flash memory device 1 Place the original document in the automatic document feeder (ADF) face-up or on the flatbed face-down. Adjust the paper guides when using the ADF. 2 Insert the USB flash memory device into the USB direct interface on the front of the MFP. The Held Jobs screen appears. 3 Touch Scan to USB drive. 4 Enter the name of the file. 5 Select your scan settings. 6 Touch Scan It.
7 Printing This chapter covers information about sending a job to print, printing confidential jobs, canceling a print job, printing a menu settings page, a font list, and a directory list. This chapter also provides information on printing folio and statement size media. For tips on paper jam prevention and print media storage, see Avoiding jams and Storing print media. Sending a job to print An MFP driver is software that lets your computer communicate with the MFP.
Printing We recommend using the following tested and approved USB flash memory devices in the 256 MB, 512 MB, and 1 GB sizes: • Lexar JumpDrive 2.0 Pro • SanDisk Cruzer Mini Other USB flash memory devices must: • Be compatible with the USB 2.0 standard. • Support the Full-Speed standard as well. Devices only supporting USB low speed capabilities are not supported. • Use the FAT file system. Devices formatted with NTFS or any other file system s are not supported.
Printing Canceling a print job There are several methods for canceling a print job.
Printing Canceling a job from a Macintosh computer Canceling a print job from a computer running Mac OS 9 When you send a job to print, the printer icon for your selected MFP appears on the desktop. 1 Double-click the printer icon on your desktop. A list of print jobs appears in the printer window. 2 Select the print job you want to cancel. 3 Click the trash can button.
Printing Printing a directory list A directory listing shows the resources stored in flash memory or on the hard disk. To print a listing: 1 Make sure the MFP is on and the Ready message appears. 2 Touch the menu button on the control panel. 3 Touch Reports. 4 Touch the down arrow until Print Directory appears, then touch Print Directory. Printing confidential and held jobs The term held job refers to any type of print job that can be initiated by the user at the MFP.
Printing 4 Enter a User Name and PIN. 5 Send your job to the MFP. Go to the MFP when you are ready to retrieve your confidential print job, and follow the At the MFP steps. At the MFP 1 Touch Held jobs on the home screen. 2 Touch your user name. Note: A maximum of 500 results can be displayed for held jobs. If your name does not appear, touch the down arrow until your name appears, or touch Search Held Jobs if there are a large number of held jobs in the MFP. 3 Select Confidential Jobs.
Printing Repeat Print If you send a Repeat Print job, the MFP prints all requested copies of the job and stores the job in memory so you can print additional copies later. You can print additional copies as long as the job remains stored in memory. Note: Repeat Print jobs are automatically deleted from MFP memory when the MFP requires extra memory to process additional held jobs. Windows 1 From a word processor, spreadsheet, browser, or other application, select File Æ Print. 2 Click Properties.
Printing Printing on specialty media Media is paper, card stock, transparencies, labels, and envelopes. The last four are sometimes referred to as specialty media. Follow these instructions to print on specialty media. 1 Load the media as specified for the tray being used. See Loading standard trays and optional trays for help. 2 From the MFP control panel, set the Paper Type and Paper Size according to the media you loaded. See Setting the Paper Type and Paper Size for help.
Printing Loading standard trays and optional trays The MFP has a 500-sheet standard tray. You may have also purchased one or more 250-sheet or 500-sheet optional trays or a 2000-sheet drawer. The steps for loading a 250-sheet tray or 500-sheet tray are the same. Note: The steps for loading a 2000-sheet drawer are different than the steps for loading a 250-sheet tray or 500-sheet tray.
Printing 5 Place the print media in the tray: Note: Paper must be loaded differently in the trays, depending on the options you have installed. • • Print side face-down for simplex (single-sided) printing Print side face-up for duplex printing Note: Do not fill paper above the load line. Overfilling the tray may cause jams. 6 Squeeze the side guide tab, and slide the guide toward the inside of the tray until it lightly rests against the edge of the media. 7 Insert the tray into the MFP.
Printing Setting the Paper Type and Paper Size After setting the Paper Type and Paper Size to the correct values for the type and size used in the trays, then any trays containing the same size and type are automatically linked by the MFP. Note: If the size of the media you are loading is the same size of the media previously loaded, do not change the Paper Size setting. To change the Paper Size and Paper Type setting: 1 Make sure the MFP is on. 2 Touch the menu button on the control panel.
Printing To load print media: Note: Do not add or remove print media when the MFP is printing from the multipurpose feeder or when the control panel indicator light is blinking. Doing so may cause a jam. 1 Push the release latch, and lower the multipurpose feeder. 2 Pull the tray extension out. Note: Do not place objects on the multipurpose feeder. Also, avoid pressing down or applying excessive force on it. 3 Slide the width guide to the far right.
Printing 5 Load the media in the tray. Use the stack height label as a guide for stack height when loading print media. Loading paper, transparencies, or envelopes Note: Letterhead or other preprinted paper must be loaded differently depending on the options you have installed. • • Load paper or transparencies with the left edge of the stack against the stack height label and with the recommended print side face-up. Load envelopes flap side down with the stamp area and flap on the left.
Printing 6 Slide the side guide toward the inside of the tray until it lightly rests against the edge of the media. 7 Set the Paper Size and Paper Type for the multipurpose feeder to the correct value for the print media you loaded. See Setting the Paper Type and Paper Size for more information. Closing the multipurpose feeder 1 Remove print media from the multipurpose feeder. 2 Push the extension tray in. 3 Close the multipurpose feeder cover.
Printing To load the 2000-sheet drawer: 1 Open the loading door. If the elevator tray is not already in the lowered position, push the elevator button to lower the tray. 2 Flex the sheets back and forth to loosen them, then fan them. Do not fold or crease the print media. Straighten the edges on a level surface. 1 2 3 4 5 6 7 8 9 0 # Elevator button 3 Slightly bend the stack of print media as shown, and place it on the elevator tray with the preferred print side facing down.
Printing Loading the envelope feeder The optional envelope feeder can accept a variety of envelope sizes. However, the envelope feeder must be adjusted correctly to ensure trouble-free printing. To load the envelope feeder: 1 Adjust the envelope support for the length of envelope you are loading.
Printing 5 Load the stack of envelopes flap side down with the stamp area and the flap on the left. The end of the envelopes with the stamp area enters the envelope feeder first. Let the envelopes at the bottom of the stack slide into the envelope feeder slightly more than the ones at the top of the stack. Warning: Never use envelopes with stamps, clasps, snaps, windows, coated linings, or self-stick adhesives. These envelopes may severely damage the MFP.
Printing Linking trays Tray linking enables the automatic linking feature for trays when you load the same size and type of print media in multiple sources. The MFP automatically links the trays; when one tray is empty, print media feeds from the next linked tray. For example, if you have the same size and type of print media loaded in tray 2 and tray 4, the MFP selects print media from tray 2 until it becomes empty, and then the MFP automatically feeds print media from the next linked tray–tray 4.
8 Understanding paper and specialty media guidelines Print media is paper, card stock, transparencies, labels, and envelopes. The MFP provides high-quality printing on a variety of print media. You must consider a number of things concerning print media before you print. This chapter provides information to help you make print media selections.
Understanding paper and specialty media guidelines Output bin Duplex unit (option) Multipurpose feeder 500-sheet tray 250-sheet tray Legend ✓ – indicates support Envelope feeder (option) 2000-sheet drawer (option) Print media sizes Print media size Dimensions A4 210 x 297 mm (8.27 x 11.7 in.) ✓ ✓ ✓ ✓ ✓ ✓ A5 148 x 210 mm (5.83 x 8.27 in.) ✓ ✓ ✓ ✓ ✓ ✓ JIS B5 182 x 257 mm (7.17 x 10.1 in.) ✓ ✓ ✓ ✓ ✓ ✓ Letter 215.9 x 279.4 mm (8.5 x 11 in.) ✓ ✓ ✓ ✓ ✓ ✓ Legal 215.
Understanding paper and specialty media guidelines ✓ ✓ ✓ Card stock ✓ ✓ ✓ ✓ Transparencies ✓ ✓ ✓ ✓ Vinyl labels* ✓ ✓ ✓ ✓ ✓ ✓ ✓ ✓ Polyester label ✓ ✓ ✓ ✓ Dual-web and integrated labels* ✓ ✓ ✓ ✓ Paper labels * ✓ Output bin Paper * ✓ Duplex unit 2000-sheet drawer Multipurpose feeder Print media 500-sheet drawer 250-sheet drawer Print media types ✓ * Printing label applications on the printer requires a special label fuser cleaner.
Understanding paper and specialty media guidelines Print media weights (continued) Print media weight Print media Type Integrated tray and optional 500-sheet drawer Card stock– maximum (grain short)1 Index Bristol 199 g/m2 (110 lb) Tag 2 203 g/m (125 lb) g/m2 Multipurpose feeder and optional 250-sheet drawer Envelope feeder 163 g/m2 (90 lb) n/a 2 163 g/m (100 lb) 176 g/m2 (65 lb) Cover 216 Transparencies Laser printer 138 to 146 g/m2 (37 to 39 lb bond) 138 to 146 g/m2 (37 to 39 lb bond
Understanding paper and specialty media guidelines Selecting print media Selecting the appropriate print media for the MFP helps you avoid printing problems. The following sections contain guidelines for choosing the correct print media for the MFP. • Paper • Card stock • Envelopes • Transparencies • Labels Paper For the best print quality, use 75 g/m2 (20 lb) xerographic, grain long paper. Try a sample of any paper you are considering using with the MFP before buying large quantities.
Understanding paper and specialty media guidelines Transparencies The MFP can print directly on transparencies designed for use in laser printers. Print quality and durability depend on the transparency used. Always print samples on the transparencies you are considering before buying large quantities. The Paper Type setting should be set to Transparency to help prevent jams.
Understanding paper and specialty media guidelines Labels The MFP can print on many labels designed for use with laser printers. These labels are supplied in letter size, A4 size, and legal size sheets. Label adhesives, face sheet (printable stock), and topcoats must be able to withstand temperatures of 230°C (446°F) and pressure of 25 pounds per square inch (psi). Try a sample of any labels you are considering using with the MFP before purchasing a large quantity.
Understanding paper and specialty media guidelines Card stock Card stock is single ply, and has a large array of properties, such as the moisture content, thickness, and texture, that can significantly affect print quality. See Supported print media for information on the preferred weight and for the grain direction of print media. Try a sample of any card stock you are considering using with the MFP before purchasing a large quantity.
Understanding paper and specialty media guidelines Avoiding jams Use appropriate print media (paper, transparencies, labels, and card stock) to help ensure trouble-free printing. See Supported print media for more information. Note: Try a limited sample of any print media you are considering using with the MFP before purchasing large quantities. By selecting the appropriate print media and loading it properly, you can avoid most jams.
9 Installing and removing options Installing input options Order of installation Floor-mounted configurations require additional furniture. You must use either a printer stand or printer base if you are using a 2000-sheet drawer, a duplex unit and an input option, or more than one input option. If you purchased an MFP that scans, copies, and faxes, you may need additional furniture. More information is available on our Lexmark Web site at www.lexmark.com/multifunctionprinters.
Installing and removing options Installing a 250-sheet or 500-sheet drawer Optional drawers attach under the MFP and optional duplex unit. The MFP automatically recognizes any drawer that is installed. A drawer consists of a tray and a support unit. The 250-sheet drawer and the 500-sheet drawer are installed the same way. 1 Remove the tray from the support unit. Remove all packing material and tape from both the support unit and the tray.
Installing and removing options Installing a duplex unit The duplex unit attaches under the MFP, below the standard tray and above any drawers. Place the duplex unit on top of any installed drawers or the table or MFP cabinet where you plan to use the MFP. The tab, round peg, and square holes on top of any drawer help you position the duplex unit so the edges are aligned properly. Make sure it is securely in place.
Installing and removing options Installing memory or option cards CAUTION: If you are installing memory or option cards sometime after setting up the MFP, turn the MFP off and unplug the power cord from the wall outlet before continuing. You can customize the MFP memory capacity and connectivity by adding optional cards.
Installing and removing options 3 Press both side door latches, and open the side door. 4 Loosen, but do not remove, the six screws on the shield. 5 Slide the shield to the right, and then remove it.
Installing and removing options 6 Set the shield aside. Use the illustration to locate the connector for the card you want to install.
Installing and removing options Installing or removing a memory card Installation Note: MFP or printer memory cards designed for other Lexmark MFPs or printers may not work with this MFP. 1 Remove the system board access cover. (See Accessing the MFP system board.) Warning: MFP memory cards are easily damaged by static electricity. Touch something metal such as the MFP frame before you touch a memory card. 2 Push open the latches on both ends of the memory card connector. 3 Unpack the memory card.
Installing and removing options Removal 1 Remove the system board access cover. (See Accessing the MFP system board.) Warning: MFP memory cards are easily damaged by static electricity. Touch something metal such as the MFP frame before you touch a memory card. 2 Push the latches away from the card on both ends of the memory card connector. The memory card moves out of the connector as the latches open. 3 Pull the memory card out of the connector.
Installing and removing options Installing or removing a flash memory or firmware card Installation Note: Flash memory or firmware cards designed for other Lexmark MFPs may not work with this MFP. 1 Remove the system board access cover. (See Accessing the MFP system board.) Note: If an option card has been installed, you may need to remove the option card before installing the flash memory or firmware card. 2 Unpack the flash memory or firmware card.
Installing and removing options Removal 1 Remove the system board access cover. (See Accessing the MFP system board.) Note: If an option card has been installed, you may need to remove the option card before removing the flash memory or firmware card. 2 Squeeze the flash memory or firmware card locking clips. 3 Pull the card out. Avoid touching the metal pins on the bottom of the card. 4 Place the flash memory or firmware card in its original packaging.
Installing and removing options Installing an option card The MFP has one connector that supports the following option cards: • • • • MarkNet N8000 series internal print server RS-232 Serial Interface Card Parallel 1284-B Interface Card Coax/Twinax Adapter for SCS Warning: Option cards are easily damaged by static electricity. Touch something metal such as the MFP frame before you touch an option card. 1 Locate the card connectors on the system board.
Installing and removing options Replacing the shield After you have installed options on the MFP system board, follow these steps to reattach the shield and close the doors. 1 Align the keyholes on the shield with the screws on the frame. 2 Slide the shield down onto the screws. 3 Tighten the screws. 4 Close the side door. 5 Close the top front cover. 6 Close the multipurpose feeder.
10 Maintaining the MFP Periodically, you need to complete certain tasks to maintain optimum print quality. These tasks are covered in this chapter. If several people are using the MFP, you may want to designate a key operator to do the setup and maintenance of the MFP. Refer printing problems and maintenance tasks to this key operator. In the U.S., contact Lexmark at 1-800-539-6275 for information about Lexmark Authorized Supplies Dealers in your area.
Maintaining the MFP Determining the status of supplies Copy Fax E-mail FTP Status/ Supplies Ready. 88 Toner low. Menus Touch any button to begin. The MFP control panel alerts you once a supply item or maintenance is required. The Print status message bar at the bottom of the touch screen indicates if the MFP is Ready and lets you know if any supplies are low or empty.
Maintaining the MFP Conserving supplies Several settings in your application software or through the touch screen let you conserve toner and paper. For more information on changing these settings, see the Menus and Messages Guide on the Software and Documentation CD. Supply Menu selection item What the setting does Toner Toner Darkness, touch the menu button Æ Printer Settings Æ Quality Menu Lets you adjust the level of toner released on a sheet of print media.
Maintaining the MFP The recommended print cartridges specifically designed for the MFP are: Part number Average cartridge yield1 Description For the USA and Canada2 X644A11A Return Program Print Cartridge 10,000 standard pages X644H11A High Yield Return Program Print Cartridge 21,000 standard pages X644X11A Extra High Yield Return Program Print Cartridge 32,000 standard pages X644H01A High Yield Return Program Print Cartridge for Label Applications 21,000 standard pages X644X01A Extra High
Maintaining the MFP Part number Description Average cartridge yield1 X644X21P Extra High Yield Print Cartridge 32,000 standard pages 5 For Latin America X644A11L Return Program Print Cartridge 10,000 standard pages X644H11L High Yield Return Program Print Cartridge 21,000 standard pages X644X11L Extra High Yield Return Program Print Cartridge 32,000 standard pages X644H01L High Yield Return Program Print Cartridge for Label Applications 21,000 standard pages X644X01L Extra High Yield Re
Maintaining the MFP Ordering charge rolls We recommend ordering new charge rolls when toner fog or background shading appears on printed pages. Order Lexmark part number 40X0127. Ordering a transfer roller Order Lexmark part number 40X0130. Ordering pick rollers Order Lexmark part number 40X0070.Order new pick rolls when the paper fails to properly feed from the tray. When ordering pick rollers, you need one set per input tray excluding the multipurpose feeder.
Maintaining the MFP Cleaning the scanner glass and backing material 1 Open the document cover. 2 Dampen a clean, lint-free cloth or cotton swab with isopropyl alcohol (95%). 3 Wipe the scanner glass and backing material by moving the cloth or swab from side to side. Backing material Scanner glass 4 Open the scan unit access door. 5 Wipe the scanner glass and backing material by moving the cloth or swab from side to side. Scanner glass 6 Close the scan unit access door.
Maintaining the MFP Scanner registration Scanner Registration is a process to align the scan area with the paper location. Two pieces of either letter or A4 dark colored paper are needed for this process. 1 Turn the MFP off. 2 Open the document cover. 3 Clean the scanner glass and backing material. For more information, see Cleaning the scanner glass and backing material. 4 Hold down the number 2 and number 6 keys on the numeric pad. 5 Continue to hold the buttons, and turn the MFP on.
Maintaining the MFP Moving the MFP Follow these guidelines to move the MFP within the office or to prepare the MFP for shipment. CAUTION: Follow these guidelines to avoid injuring yourself or damaging the MFP. • Always use at least three people to lift the MFP. • Always turn off the MFP using the power switch. • Disconnect all cords and cables from the MFP before attempting to move the MFP.
11 Clearing jams By carefully selecting print media and loading it properly, you should be able to avoid most paper jams. For more information on avoiding paper jams, see Avoiding jams. If jams do occur, follow the steps outlined in this section. To resolve the paper jam messages, you must clear the entire paper path, and then touch Continue to clear the message and resume printing.
Clearing jams Access doors and trays The following illustration shows the path that print media travels through the MFP. The path varies depending on the input source (trays, multipurpose feeder, envelope feeder) you are using. The numbers in following illustration indicate the numbers that can appear on the control panel and designate the general area of a paper jam.
Clearing jams Message What to do* 260 Paper Jam Check Env Feeder Lift the envelope weight, remove all envelopes, flex and stack the envelopes, reload the envelope feeder, and adjust the guide. 290, 291, 292, and 294 Scanner Jams Remove all original documents from the ADF. Open the ADF cover, and remove any jammed pages. Open the document cover, and remove any jammed pages. Open the scan unit access door, and remove any jammed pages.
Clearing jams 260 Paper Jam Check Env Feeder The envelope feeder feeds envelopes from the bottom of the stack; the bottom envelope will be the one that is jammed. 1 Lift the envelope weight. 2 Remove all envelopes. If the jammed envelope has entered the MFP and cannot be pulled out, remove the envelope feeder. a Lift the envelope feeder out of the MFP, and then set it aside. b Remove the envelope from the MFP. Note: If you cannot remove the envelope, the print cartridge will have to be removed.
Clearing jams 4 Load the envelope feeder. 5 Adjust the guide. 6 Lower the envelope weight. 7 Touch Continue. 23x and 24x jams Paper jams in these areas can occur on the incline surface of a tray or across more than one tray. To clear these areas: 1 Open the MFP paper tray, and remove any jammed media.
Clearing jams 2 Open the duplex tray. To remove the media, pull up. 3 Open any optional trays beginning at the top, and remove any jammed media. Pull the print media either up or down. If it does not pull easily one way, try the other way. CAUTION: Floor-mounted configurations require additional furniture for stability. You must use either a printer stand or printer base if you are using a 2000-sheet drawer. Certain other configurations also must have a printer stand or printer base.
Clearing jams 4 If you have an optional 2000-sheet feeder, open the front door, press the elevator button to lower the tray, remove the jam, and make sure the stack of print media is neat and aligned. 5 Touch Continue. Elevator button 1 2 3 4 5 6 7 8 9 0 # CAUTION: Floor-mounted configurations require additional furniture for stability. You must use either a printer stand or printer base if you are using a 2000-sheet drawer.
Clearing jams 200 and 201 Paper Jam Remove Cartridge 1 Push the release latch, and lower the multipurpose feeder. 2 Push the release latch, and open the top front cover. CAUTION: The inside of the MFP may be hot. Allow the MFP to cool before touching any internal components. 3 Lift and pull the print cartridge out of the MFP. Warning: Do not touch the photoconductor drum on the underside of the cartridge. Use the cartridge handle whenever you are holding the cartridge.
Clearing jams 5 Pull the print media up and toward you. CAUTION: Do not use any pointed objects to remove the paper. This could cause personal injury or damage to the MFP. Warning:If the print media does not move immediately when you pull, stop pulling. You need to access the print media from the MFP rear door. 6 Align and reinstall the toner cartridge. 7 Close the top front cover. 8 Close the multipurpose feeder. 9 Touch Continue.
Clearing jams 202 Paper Jam Open Rear Door 1 If the paper is exiting the MFP, pull the media straight out, and then touch Continue. Otherwise, continue with step 2. 2 Open the MFP rear door. CAUTION: The inside of the MFP may be hot. Allow the MFP to cool before touching any internal components. CAUTION: Do not use any pointed objects to remove the paper. This could cause personal injury or damage to the MFP. 3 Remove the jammed media. 4 Close the rear door. 5 Touch Continue.
Clearing jams 23x Paper Jam Open Duplex Rear Door 1 Open the duplex rear door. 2 Remove the jammed media. Depending on the media location, pull the media either up or down. 3 Close the duplex rear door. Make sure it snaps into place. 4 Touch Continue.
Clearing jams Clearing ADF Jams 290, 291, 292, and 294 Scanner Jams 1 Remove all original documents from the ADF. 2 Open the ADF cover, and remove any jammed pages. 3 Open the document cover, and remove any jammed pages. 4 Open the scan unit access door, and remove any jammed pages. 5 Close the scan unit access door. 6 Close the ADF cover.
12 Administrative support Adjusting control panel brightness If you are having trouble reading your control panel display, the LCD brightness can be adjusted through the Settings menu. Brightness 1 Make sure the MFP is on. 2 Touch the Menus button on the home screen. 3 Touch Settings. 4 Touch General Settings. 5 Touch the down arrow until Brightness appears. 6 Touch the left arrow to decrease the brightness, or touch the right arrow to increase the brightness.
Administrative support • All settings in the Parallel menu, Serial menu, Network menu, and USB menu. 7 Touch Submit. 8 Touch Home. Adjusting screen timeout To adjust the Screen Timeout setting: 1 Make sure the MFP is on. 2 Touch the Menus button on the home screen. 3 Touch Settings. 4 Touch General Settings. 5 Touch the down arrow until Screen Timeout appears. 6 Touch the left arrow to decrease the time, or touch the right arrow to increase the time.
Administrative support 6 Touch Submit. 7 Touch Settings Æ Security Æ Password Protect to view what configuration settings are protected by the Advanced Password. Note: Settings Æ Security Æ Password Protect and Settings Æ Security Æ Create/Change Passwords Æ Create Change User Password can be used to restrict access with a different password than the Advanced Password. Use Settings Æ Security Æ Password Protect to select the menus that are accessible with both an Advanced Password and a User Password.
Administrative support Setting the Device Lockout personal identification number (PIN) The Device Lockout PIN allows locking and unlocking the functional state of the MFP. A locked MFP automatically buffers each job received to its hard disk. To initiate the printing of jobs on a locked MFP hard disk, enter the correct PIN on the control panel to unlock the MFP. A locked MFP also prevents all use of the control panel except to unlock the MFP.
Administrative support 2 Enter the defined password in the Print Faxes Password field. This releases any received and held fax jobs, so they print. Note: The defined password was created in step 6 of Setting a password before printing received faxes. Setting security using the Embedded Web Server (EWS) To enhance the security of network communications and MFP configuration, use the advanced security features. These features are available through the Web page of the MFP.
Administrative support SNMPv3 authentication and encryption has three levels of support: • • • No authentication and no encryption Authentication with no encryption Authentication and encryption Note: The selected level serves as a minimum level of protection. The MFP negotiates with the SNMPv3 requestor, and a higher level of protection may be agreed upon and used by both. 5 Indicate the setting for each sub-item as required for the network environment. 6 Click Submit.
Administrative support Disabling ports and protocols The TCP and UDP ports can be configured to one of three modes or values: • • • Disabled–Never allows network connections to this port Secure and Unsecure–Allows the port to remain open, even in Secure mode Unsecured Only–Allows the port to only open when the MFP is not in Secure mode Note: A password must be set to enable Secure mode. Once enabled, only the ports set to Secure and Unsecure will be open.
Administrative support 6 Indicate the setting for each sub-item as required for the network environment. 7 Click Submit. Confidential Print Setup Confidential Print Setup allows the designation of a maximum number of PIN entry attempts and allows setting an expiration time for print jobs. When a user exceeds a specific number of PIN entry attempts, all of that user’s print jobs are deleted. When a user has not printed their jobs within a designated time period, the print jobs are deleted.
Administrative support 3 Release the buttons when the touch screen blinks and is blank momentarily. Wait. The Config Menu appears. 4 Touch the down arrow to scroll to Disk Encryption. 5 Touch the right arrow to enter the Disk Encryption menu. 6 Touch the right arrow next to Disable to decrypt the hard disk. Contents will be lost. Continue? appears. 7 Touch Yes to continue the process. The Formatting Disk progress screen appears. Warning: Do not power off the MFP until the process completes.
Administrative support Using the restricted server list function The Restricted Server List lets a system support person restrict which hosts are allowed to communicate with the MFP over the network which prevents other hosts from managing and printing to the MFP. Note: The Restricted Server List only restricts TCP traffic; it does not affect UDP traffic. The Restricted Server List supports up to ten host addresses or ten network addresses.
13 Troubleshooting Understanding MFP messages The MFP displays three types of messages: status messages, attendance messages, and service messages. Status messages provide information about the current state of the MFP. They require no action on your part. Attendance messages alert you to MFP problems that require your intervention. Service messages also alert you to problems that require intervention. However, the MFP will stop printing and the errors are non-recoverable.
Troubleshooting Printing multiple language PDFs Symptom Cause Solution Some documents do not print. The documents contain unavailable fonts. 1 Open the document you want to print in Adobe Reader. 2 Click the printer icon. The Print dialog appears. 3 Check the Print as image box. 4 Click OK. Solving printing problems Symptom Cause Solution The control panel display is blank. The MFP self test failed. Turn the MFP off, wait about 10 seconds, and turn the MFP back on.
Troubleshooting Symptom Cause Solution Held jobs do not print. A formatting error has occurred. • Print the job. (Only part of the job may print.) • Delete the job. • Free up additional MFP memory by scrolling through the list of held jobs and deleting others you have sent to the MFP. The MFP has insufficient memory. The MFP has received invalid data. Delete the job. The job is too complex.
Troubleshooting Solving copy quality problems The following solutions will help solve copy problems. For additional information, see Copy tips. Symptom Solution Unwanted background is visible. Adjust the Background Removal setting under Copy Æ Options Æ Advanced Imaging. Touch the right arrow to remove more background. Unwanted patterns (Moire) appear when a document is copied using Photograph mode. Change the content mode to Printed Image under Copy Æ Options Æ Content.
Troubleshooting Solving fax quality problems The following solutions will help solve copy problems. For additional information, see Fax tips. Symptom Solution The fax document takes a long time to transmit. Touch Options, then under Content, change the setting to Text, and then set the resolution to Standard. The images on the fax I sent are not clear. Touch Options, then under Content, change the setting to Text/Photo or Photo. Increase the output resolution.
Troubleshooting Solving 2000-sheet drawer problems Problem Solution The elevator tray does not raise when the loading door is closed, or the elevator tray does not lower when the door is opened and the elevator button is pushed. Check the following: • The MFP is properly attached to the 2000-sheet drawer. • The MFP is powered on. • The power cord is plugged firmly into the back of the 2000-sheet drawer. • The power cord is plugged into an outlet. • The outlet has power.
Troubleshooting Solving paper feed problems Symptom Cause Solution Paper frequently jams. You are using paper that does not meet the MFP specifications. Use recommended paper and other specialty media. See the Card Stock & Label Guide available on our Lexmark Web site at www.lexmark.com for detailed specifications. See Avoiding jams for information that can help prevent jams from occurring. You have loaded too much paper or too many envelopes.
Troubleshooting Print quality troubleshooting To help isolate print quality problems, print the “Print defects guide,” and check for repeating defects. If repeating defects appear, print the Print Quality Test Pages. Printing the print defects guide 1 Touch the help icon (?). 2 Touch Print Defects Guide. Printing the print quality test pages 1 Turn the MFP off. 2 Hold down the number 2 and number 6 keys on the numeric pad. 3 Continue to hold the buttons, and turn the MFP on.
Troubleshooting Solving print quality problems The information in the following table may help you solve print quality problems. If these suggestions still do not correct the problem, call for service. You may have an MFP part that requires adjustment or replacement. Problem Action Print is too light. • The toner may be low. To utilize the remaining toner, remove the cartridge by gripping the handles with both hands.
Troubleshooting Problem Action Entire page is white. • Make sure the packaging material is removed from the print cartridge. • Check the print cartridge to be sure it is installed correctly. • The toner may be low. To utilize the remaining toner, remove the cartridge by gripping the handles with both hands. With the cartridge arrows pointing downward, firmly shake the print cartridge side-to-side and front-to-back several times to redistribute the toner. Reinstall the cartridge.
Troubleshooting Problem Action Part or all of the page is printed in black. Check the print cartridge to see if it is installed correctly. The job prints, but the top and side margins are incorrect. • Make sure the Paper Size setting in the Paper menu is correct. • Make sure the margins are set correctly in your software application. Ghost images appear. • • • • Some of the print is cut off on the sides, top, or bottom of the media.
Troubleshooting The Quality menu control panel options can be adjusted to help improve print quality. Menu selection Purpose Values† Print Resolution To select printed output resolution 600 dpi* 1200 Image Q 1200 dpi 2400 Image Q Toner Darkness Lightens or darkens printed output and alters toner consumption 1—10 8* is the default setting. Select a lower number to lighten the printed output or save toner.
Notices Conventions Note: A note identifies something that could help you. CAUTION: A caution identifies something that could cause you harm. Warning: A warning identifies something that could damage your product hardware or software.
Notices European Community (EC) directives conformity Declaration of Conformity with Regard to the EU Directive 1999/5/EC (R&TTE Directive) in languages of the European Community. English Hereby, Lexmark International Inc., declares that this Product is in compliance with the essential requirements and other relevant provisions of Directive 1999/5/EC. Suomi Valmistaja Lexmark International Inc.
Notices Latviski Ar šo Lexmark International Inc. deklarē, ka Product atbilst Direktīvas 1999/5/EK būtiskajām prasībām un citiem ar to saistītajiem noteikumiem. Lithuanian Lexmark International Inc. deklaruoja, kad irenginys Product tenkina 1999/5/EB Direktyvos esminius reikalavimus ir kitas sios direktyvos nuostatas Maltese Polski Lexmark International Inc.
Notices Japanese VCCI notice If this statement appears on your product, the following statement is applicable. Korean MIC statement If this symbol appears on your product, the accompanying statement is applicable. This equipment has undergone Type Approval/EMC registration as a business product. It should not be used in a residential area. BSMI EMC notice If this statement appears on your product, the accompanying statement is applicable.
Notices The telephone company may make changes in its facilities, equipment, operations or procedures that could affect the operation of this equipment. If this happens, the telephone company will provide advance notice in order for you to make necessary modifications to maintain uninterrupted service. If you experience trouble with this equipment, for repair or warranty information, contact Lexmark International, Inc. at www.Lexmark.com or your Lexmark representative.
Notices Notice to users of the New Zealand telephone network The following are special conditions for the Facsimile User Instructions. The grant of a telepermit for any item of terminal equipment indicates only that Telecom has accepted that the item complies with minimum conditions for connection to its network. It indicates no endorsement of the product by Telecom, nor does it provide any sort of warranty.
Notices Noise emission levels German GS mark notice Model: X644e, X646e Machine types: 7002-101, 7002-102, 7002-111, 7002-112, 7002-001, 7002-011, 7002-012, and 7002-002 Mailing address Lexmark Deutschland GmbH Postfach 1560 63115 Dietzenbach Physical address Lexmark Deutschland GmbH Max-Planck-Straße 12 63128 Dietzenbach Phone: 0180 - 564 56 44 (Product Information) Phone: 01805 - 00 01 15 (Technical Support) E-mail: internet@lexmark.
Notices ENERGY STAR Waste from Electrical and Electronic Equipment (WEEE) directive The WEEE logo signifies specific recycling programs and procedures for electronic products in countries of the European Union. We encourage the recycling of our products. If you have further questions about recycling options, visit the Lexmark Web site at www.lexmark.com for your local sales office phone number. Laser advisory label A laser notice label may be affixed to this MFP.
Index Numerics left scroll decrease 17 Lock Device 15 Menus 14 numeric keypad 12 Pound 12 Release Held Faxes 15 right arrow 18 right scroll increase 18 Search Held Jobs 15 Select 21 select 17 selected radio 20 Start 12 Status/Supplies 14 Stop 12 Unlock Device 16 unselected radio 19 42.
Index LCD 11 numeric keypad 12 pound 12 Start 12 Stop 12 control panel menus preventing access 116 converting existing files to standard template 1-column appendix 136 copies flatbed 25 quick 24 copy from 25 one size to another 27 to 25 copy quality adjusting 29 copy screens 25 copy tray selection 28 copying 24 duplexing 29 enlarging 29 letterhead 27 multipurpose feeder 28 reducing 29 transparencies 27 create booklet 26 custom job 31 addresses 33 canceling 36 color documents 35 file reduction 37, 49 file
Index indicator light 11 integrated forms 75 Internet Protocol Security 119 locking 117 unlocking 117 mixed sizes copying 28 models 8 multipurpose feeder closing 67 guidelines 64 icons 64 print media loading 66 transparencies 65 multipurpose feeder copying 28 J jams avoiding 80 clearing 102 job 31 job build 31 L label fuser cleaner 98 labels guidelines 78 LCD brightness 114 LCD contrast 114 LCD touch-screen features Attendance message alert 22 Menu trail line 22 left arrow button 18 left scroll decrease
Index S ordering 95 print media guidelines 76 paper 76 transparencies guidelines 77 Print media guidelines 76 print media jams avoiding 80 print media specifications characteristics 76 sizes 73 types 74 weight 74 Printing 54 problems incorrect characters print 126 job didn’t print 125 job prints 126 from wrong tray 126 on wrong paper or specialty media 126 large jobs do not collate 126 operator panel 125 blank 125 displays black diamonds 125 paper feed blank pages in output bin 130 frequent jams 130 jamme
Index transfer roller 98 transparencies loading input tray 62 transparencies, copying 27 tray linking 71 tray selection 28 troubleshooting settings software application overrides 11 U USB Direct interface 54 USB flash memory device 54 V verify print 59 W weight, paper 76 width guide 62 148