ENGLISH User Guide LG-D855P This model is not intended for sale in the USA. MFL00000000 (1.0) www.lg.
ENGLISH User Guide Do you know* introduces you to the new key features of G2. This is available on the phone: 1 From the Home screen, swipe left until you see Do you know screen. 2 Tap the Do you know screen and tap each feature to get to know. * Requires data connection. ** To hide the Do you know screen, tap > > Home screen setting > uncheck Do you know?. Screen displays and illustrations may differ from those you see on actual phone.
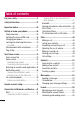
Table of contents For your safety ..........................................5 Safety instructions .................................12 Important notice .....................................20 Getting to know your phone ...................26 Phone overview .....................................26 Installing the micro-USIM card ...............28 Charging your phone .............................29 Locking and unlocking the screen..........30 KnockON .............................................
Camera ....................................................57 Getting to know the viewfinder ..............57 Using the advanced settings ..................58 Taking a quick photo .............................59 Using Shot & Clear mode .......................59 Using Dual camera mode .......................60 Using Time catch shot mode ..................60 Once you've taken a photo.....................61 From your Gallery ..................................62 Video camera .....................................
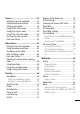
Table of contents Utilities ....................................................87 Slide Aside (Quick task-switching with THREE fingers) ......................................87 Guest Mode .........................................87 Setting your alarm .................................87 Using your calculator .............................88 Adding an event to your calendar ...........88 Voice Recorder ......................................89 Recording a sound or voice ..................
Guidelines for safe and efficient use Please read these simple guidelines. Not following these guidelines may be dangerous or illegal. Should a fault occur, a software tool is built into your device that will gather a fault log. This tool gathers only data specific to the fault, such as signal strength, cell ID position in sudden call drop and applications loaded. The log is used only to help determine the cause of the fault.
Guidelines for safe and effi cient use This device meets RF exposure guidelines when used either in the normal use position Bodily Contact During Operation against earwas or when at least 1.5back cmofaway from kept the body. When a carry This the device testedpositioned for typical use with the the phone 0.39 inches cm) clip from or theholder body. To comply FCC RF operation, exposure requirements, minimummetal and case,(1 belt is used forwith bodyworn it should nota contain separation distance of 0.
* FCC Part 15.19 statement This device complies with part 15 of the FCC Rules. Operation is subject to the following two conditions: (1) This device may not cause harmful interference, and (2) this device must accept any interference received, including interference that may cause undesired operation. Caution! Change or Modifications that are not specifically approved by the manufacturer could void the user’s authority to operate the equipment.
Guidelines for safe and effi cient use Do not handle the phone with wet hands while it is being charged. It may cause an electric shock and can seriously damage your phone. t Do not charge a handset near flammable material as the handset can become hot and create a fire hazard. t Use a dry cloth to clean the exterior of the unit (do not use solvents such as benzene, thinner or alcohol). t Do not charge the phone when it is on soft furnishings. t The phone should be charged in a well ventilated area.
Efficient phone operation Electronics devices All mobile phones may receive interference, which could affect performance. t Do not use your mobile phone near medical equipment without requesting permission. Avoid placing the phone over pacemakers, for example, in your breast pocket. t Some hearing aids might be disturbed by mobile phones. t Minor interference may affect TVs, radios, PCs etc. t Use your phone in temperatures between 0ºC and 40ºC, if possible.
Guidelines for safe and efficient use Road safety Check the laws and regulations on the use of mobile phones in the area when you drive. t Do not use a hand-held phone while driving. t Give full attention to driving. t Pull off the road and park before making or answering a call if driving conditions so require. t RF energy may affect some electronic systems in your vehicle such as car stereos and safety equipment.
NOTE: Excessive sound pressure from earphones and headphones can cause hearing loss Glass Parts Some parts of your mobile device are made of glass. This glass could break if your mobile device is dropped on a hard surface or receives a substantial impact. If the glass breaks, do not touch or attempt to remove it. Stop using your mobile device until the glass is replaced by an authorised service provider. Blasting area Do not use the phone where blasting is in progress.
Guidelines for safe and efficient use Children Keep the phone in a safe place out of the reach of small children. It includes small parts which may cause a choking hazard if detached. Emergency calls Emergency calls may not be available on all mobile networks. Therefore you should never depend solely on your phone for emergency calls. Check with your local service provider. Battery information and care You do not need to completely discharge the battery before recharging.
If you need to replace the battery, take it to the nearest authorised LG Electronics service point or dealer for assistance. t Always unplug the charger from the wall socket after the phone is fully charged to save unnecessary power consumption of the charger. t Actual battery life will depend on network configuration, product settings, usage patterns, battery and environmental conditions. t Make sure that no sharp-edged items such as animal’s teeth or nails, come into contact with the battery.
Important notice Please read this before you start using your phone! Please check to see whether any problems you encountered with your phone are described in this section before taking the phone in for service or calling a service representative. 1. Phone memory When there is less than 10% of space available in your phone memory, your phone cannot receive new messages. You need to check your phone memory and delete some data, such as applications or messages, to make more memory available.
NOTE: If you accidently press the Power/Lock Key while the device is in your pocket, the screen will turn off automatically in order to save battery power. To check the battery power level: t Tap > > Apps tab > Settings > General tab > About phone > Battery. The battery status (charging or discharging) and battery level (percentage charged) is displayed at the top of the screen.
Important notice 4. Using an unlock pattern Set an unlock pattern to secure your phone. Tap > > Apps tab > Settings > Display tab > Lock screen > Select screen lock > Pattern. This opens a screen that will guide you through how to draw a screen unlock pattern. You have to create a Backup PIN as a safety measure in case you forget your unlock pattern. Caution: Create a Google account before setting an unlock pattern and remember the Backup PIN you created when creating your pattern lock.
NOTE: If you have not logged into your Google Account and have forgotten your Unlock Pattern, you will need to enter your Backup PIN. 5. Using the Hard Reset (Factory Reset) If your phone does not restore to its original condition, use a Hard Reset (Factory Reset) to initialize it. 1 Turn the power off. 2 Press and hold the Power/Lock key + Volume Down key on the back of the phone. 3 Release the Power/Lock Key only when the LG logo is displayed, then immediately press and hold the Power/Lock Key again.
Important notice 1 Touch and hold the Home Key . A list of recently used applications will be displayed. 2 Tap the application you want to access. This does not stop the previous app running in the background on the phone. Make sure to tap Back Key to exit an app after using it. t To stop applications, tap Task Manager from the recent apps list, then tap Stop or Stop all. t To remove an app from the recent apps list, swipe the app preview to the left or right. To clear all apps, tap Clear all. 7.
9. When the screen freezes If the screen freezes or the phone does not respond when you try to operate it: Press and hold the Power/Lock key for 10 seconds to turn your phone off. If it still does not work, please contact the service center. 10. Do not connect your phone when you power on/off your PC Make sure to disconnect your phone from the PC when powering your PC on or off as it might result in PC errors. 11.
Getting to know your phone Phone overview Front Camera Lens Proximity Sensor Earpiece Touch Screen Back Key t Return to the previous screen. Exit an app after using it. Home Key t Return to the Home screen from any screen. Menu Key t Check what options are available. NOTE: Proximity sensor When receiving and making calls, the proximity sensor automatically turns the backlight off and locks the touch screen by sensing when the phone is near your ear.
Eject Button Aperture SIM Card Tray Infrared LED Microphone Camera Lens Flash Power/Lock Key t Switch your phone on/ off by pressing and holding this key t Short press to lock/ unlock the screen NFC Touch Point Volume Keys t On the home screen: Controls ringer volume. t During a call: Control your earpiece volume. t When playing a track: Controls volume continuously. Microphone Speaker Charger/USB port Headset Jack WARNING t This part encloses the battery compartment.
Getting to know your phone Installing the SIM card and battery Before you can start exploring your new phone, you'll need to set it up. 1 To remove the back cover, hold the phone fi rmly in one hand. With your other hand, lift off the back cover with your thumbnail as shown in fi gure below. 2 Slide the SIM card into the lower slot for the SIM card as shown in the fi gure. Make sure the gold contact area on the card is facing downwards.
3 Insert the battery into place by aligning the gold contacts on the phone and the battery (1) and pressing it down until it clicks into place (2). 4 Align the back cover over the battery compartment (1) and press it down until it clicks into place (2).
Getting to know your phone Charging your phone Charge the battery before using it for the first time. Use the charger to charge the battery. A computer can be also used to charge the device by connecting them via the USB cable. WARNING Use only LG-approved chargers, batteries and cables.
Using the memory card Your phone supports the use of microSDTM or microSDHCTM memory cards of up to 64GB capacity. These memory cards are specifically designed for mobile phones and other ultra-small devices and are ideal for storing media-rich files such as music, programs, videos, and photographs for use with your phone. To insert a memory card: Insert the memory card into the upper slot for the memory card. Make sure the gold contact area of Memory card is facing downwards.
Getting to know your phone To format the memory card: Your memory card may already be formatted. If it isn't, you must format it before you can use it. NOTE: All files on your memory card are deleted when it is formatted. 1 2 3 4 5 Touch to open the application list. Scroll and touch Settings > General tab > Storage. Touch Unmount SD card. Touch Erase SD card > Erase SD card > Erase everything. If you have set a pattern lock, input the pattern lock then select Erase everything.
2 Place a checkmark on Screen on/off. Double-tap the center screen quickly to unlock the screen. To lock the screen, doubletap the status bar in any screen (except on the camera viewfinder) or empty area on the Home screen. NOTE: When turning the screen on, make sure you do not cover the proximity sensor. Doing so will turn the screen off immediately after turning it on in order to prevent abnormal turning on in your pocket or bag.
Getting to know your phone 2 The applications panel displays and you can select an app to run. NOTE: You can edit the applications to display on the panel and set not to show the applications panel. Please see < Accessory >. 3 If a call is coming when the headset is connected to the phone, press the take the call. 4 To end the call, press the again. to Plug & Pop Plug & Pop allows you to quickly choose apps to use when plugging in an earphone or On-the-Go device, such as a mouse or keyboard.
Your Home screen Touch screen tips Here are some tips on how to navigate on your phone. Tap or touch – A single finger tap selects items, links, shortcuts and letters on the on-screen keyboard. Touch and hold – Touch and hold an item on the screen by tapping it and not lifting your finger until an action occurs. For example, to open a contact's available options, touch and hold the contact in the Contacts list until the context menu opens.
Your Home screen Home screen The Home screen is the starting point for many applications and functions, and it allows you to add items like application shortcuts, or Google widgets to give you instant access to information and applications. This is the default canvas and accessible from any menu by tapping . Status Bar Shows phone's status information including the time, signal strength, battery status, and notification icons.
Customizing the Home screen You can customize your Home screen by adding apps, widgets or changing wallpapers. To add items on your Home screen 1 Touch and hold the empty part of the Home screen. 2 In the Add Mode menu, select the item you wish to add. You will then see this added item on the Home screen. 3 Drag it to the desired location and lift your finger. TIP! To add an application icon to the Home screen from the Apps menu, touch and hold the application you want to add.
Your Home screen Returning to recently-used applications 1 Touch and hold . The screen displays a pop-up containing the icons of applications you used recently. 2 Tap an icon to open the application. Or tap to return to your previous screen. Notifications panel Notifications alert you the arrival of new messages, calendar events, and alarms, as well as to ongoing events, such as when you are on a call. When a notification arrives, its icon appears at the top of the screen.
Opening the notifications panel Swipe down from the status bar to open the notifications panel. Quick Toggle Area Tap each quick toggle key to turn it on/off. Touch and hold the key to access the settings menu of the function. To see more toggle keys, swipe left or right. Tap to remove, add, or rearrange toggle keys. QSlide Apps Tap a QSlide app to open as a small window on your screen. Tap to remove, add, or rearrange QSlide apps. Tap to clear all the notifications.
Your Home screen The icons displayed at the top of the screen provide information about the status of the device. The icons listed in the table below are some of the most common ones.
A song is currently playing DLNA music playing Mobile hotspot is active NOTE: The icons location in the status bar may differ according to the function or service. On-screen keyboard You can enter text using the on-screen keyboard. The on-screen keyboard appears automatically on the screen when you need to enter text. To manually display the keyboard, simply tap a text field where you want to enter text. Using the keypad & entering text Tap once to capitalize the next letter you type.
Google account setup When you first turn on your phone, you have the opportunity to activate the network, to sign into your Google Account and select how you want to use certain Google services. To set up your Google account: Sign into a Google Account from the prompted set-up screen. OR t Tap > > Apps tab > select a Google application, such as Gmail > select New to create a new account. If you have a Google account, tap Existing, enter your email address and password, then tap .
Connecting to Networks and Devices Wi-Fi With Wi-Fi, you can use high-speed Internet access within the coverage of the wireless access point (AP). Enjoy wireless Internet using Wi-Fi, without extra charges. Connecting to Wi-Fi networks To use Wi-Fi on your phone, you need to access a wireless access point or ‘hotspot’. Some access points are open and you can simply connect to them. Others are hidden or use security features; you must configure your phone to be able to connect to them.
Connecting to Networks and Devices Bluetooth You can use Bluetooth to send data by running a corresponding application, but not from the Bluetooth menu as on most other mobile phones. NOTE: t LG is not responsible for the loss, interception or misuse of data sent or received via the Bluetooth wireless feature. t Always ensure that you share and receive data with devices that are trusted and properly secured. If there are obstacles between the devices, the operating distance may be reduced.
Send data using the Bluetooth wireless feature 1 Select a file or item, such as a contact, calendar event or media file, from an appropriate application or from Downloads. 2 Select the option for sending data via Bluetooth. NOTE: The method for selecting an option may vary by data type. 3 Search for and pair with a Bluetooth-enabled device. Receive data using the Bluetooth wireless feature 1 Tap > > Apps tab > Settings > Networks tab > set Bluetooth to ON.
Connecting to Networks and Devices To share your phone's data connection as a portable Wi-Fi hotspot 1 Tap > > Apps tab > Settings > Networks tab > Tethering & networks > Wi-Fi hotspot switch to activate. 2 Enter a password and tap Save. TIP! If your computer is running Windows 7 or a recent distribution of some flavours of Linux (such as Ubuntu), you will not usually need to prepare your computer for tethering.
ATTENTION! If you set the security option as Open, you cannot prevent unauthorised usage of online services by other people and additional charges may be incurred. To avoid unauthorized usage, you are advised to keep the security option active. Wi-Fi Direct Wi-Fi Direct supports a direct connection between Wi-Fi enabled devices without an access point. Due to the high battery usage of Wi-Fi direct, it is recommended that you plug your phone into a power outlet while using the Wi-Fi Direct feature.
Connecting to Networks and Devices If the device is not on the list, make sure on the device that Wi-Fi, Wi-Fi Direct, or Bluetooth connection is turned on. And tap Rescan. 4 Tap Send. To enjoy content from nearby devices such as a computer or mobile device on your phone 1 To connect the nearby devices to your phone, tap Nearby devices on Gallery, Music, or Videos application as below. t Ensure that your phone and nearby devices are connected to the same Wi-Fi network.
PC connections with a USB cable Learn to connect your device to a PC with a USB cable in USB connection modes. Transferring music, photos and videos using the USB mass storage mode 1 Connect your phone to a PC using a USB cable. 2 If you haven't installed the LG Android Platform Driver on your PC, you will need to manually change the settings. Choose System settings > General tab > PC connection > Select USB connection method, then select Media sync (MTP).
Calls Making a call 1 2 3 4 Tap to open the keypad. Enter the number using the keypad. To delete a digit, tap the Tap to make a call. To end a call, tap the End icon . TIP! To enter "+" to make international calls, touch and hold . . Calling your contacts 1 Tap to open your contacts. 2 Scroll through the contact list or enter the first few letters of the contact you want to call by tapping Search contacts. 3 In the list, tap you want to call.
Adjusting the in-call volume To adjust the in-call volume during a call, use the Volume up and down keys on the back side of the phone. Making a second call 1 During your first call, tap Menu key > Add call and dial the number. You can also go to the recently dialled numbers list by tapping or can search contacts and selecting the contact you want to call. by tapping 2 Tap to make the call. 3 Both calls are displayed on the call screen. Your initial call is locked and put on hold.
Calls Call settings You can configure phone call settings such as call forwarding, as well as other special features offered by your carrier. 1 On the Home screen, tap . 2 Tap . 3 Tap Call settings and choose the options that you wish to adjust.
Contacts Add contacts to your phone and synchronize them with the contacts in your Google account or other accounts that support contact syncing. Searching for a contact On the Home screen 1 Tap to open your contacts. 2 Tap Search contacts and enter the contact name using the keyboard. Adding a new contact 1 Tap , enter the new contact's number, then tap the Menu key . Tap Add to Contacts > New contact. 2 If you want to add a picture to the new contact, tap the image area.
Contacts Removing a contact from your favourites list 1 Tap to open your contacts. 2 Tap the tab, and choose a contact to view its details. 3 Tap the yellow color star to the right corner of the contact's name. The star turns grey color and the contact is removed from your favourites. Creating a group 1 Tap to open your contacts. 2 Tap Groups and tap the Menu key . Select New group. 3 Enter a name for the new group. You can also set a ringtone for the newly created group. 4 Tap Save to save the group.
Messaging Your phone combines SMS and MMS into one intuitive, easy-to-use menu. Sending a message 1 Tap on the Home screen and tap to open a blank message. 2 Enter a contact name or contact number in the To field. As you enter the contact name, matching contacts will appear. You can tap a suggested recipient. You can add more than one contact. NOTE: You will be charged for a text message for every person to whom you send the message. 3 Tap the Enter message field and begin composing your message.
Messaging Threaded box Messages (SMS, MMS) exchanged with another party can be displayed in chronological order so that you can conveniently see an overview of your conversation. Changing your message settings Your phone message settings are pre-defined, so you can send messages immediately. You can change the settings according to your preferences. t Tap the Messaging icon on the Home screen, tap and then tap Settings.
E-mail You can use the E-mail application to read emails from services like Gmail. The E-mail application supports the following account types: POP3, IMAP and Exchange. Your service provider or system administrator can provide you with the account settings you need. Managing an email account The first time you open the E-mail application, a set-up wizard opens to help you to set up an email account. After the initial set-up, E-mail displays the contents of your inbox.
E-mail Composing and sending email To compose and send a message 1 While in the E-mail application, tap the . 2 Enter an address for the message's intended recipient. As you enter text, matching addresses will be proposed from your Contacts. Separate multiple addresses using semicolons. 3 Tap the to add a Cc/Bcc and tap to attach files, if required. 4 Enter the text of the message. 5 Tap . TIP! When a new email arrives in your Inbox, you will be notified by a sound or vibration.
Camera With the OIS (Optical Image Stabilizer) camera on the phone, you can take a clearer picture by removing physical shaking. The Multi Point AF (Autofocus) feature enables you to get a clearer and natural picture even if the objects are not in the center. To open the Camera application, tap Camera on the Home screen. Getting to know the viewfinder Flash – Choose from Off , On , Auto . Swap camera – Switch between the rear–facing camera lens and the front–facing camera lens.
Camera Using the advanced settings In the viewfinder, tap to open the advanced options. You can change the camera . settings by scrolling through the list. After selecting the option, tap To take a photo, say one of the following words: Cheese, Smile, Whisky, Kimchi or LG. Defines and controls the amount of sunlight entering the photo. Tap to select the focus mode. Selects photo resolution.
Restores all camera default settings. TIP! t When you exit the camera, some settings return to their defaults, such as white balance, color effect, timer and shot mode. Check these before you take your next photo. t The setting menu is superimposed over the viewfinder, so when you change photo color or quality elements, you will see a preview of the changed image behind the Settings menu. Taking a quick photo 1 Open the Camera application and point the lens toward the subject your want to photograph.
Camera 4 Tap any of the outlined objects to remove them from the photo, then tap * When taking a picture, moving objects are shown as dashed lines. . NOTES t Take a picture after fixing the camera in one place. t If the color of a subject is similar to the background, only a part may be detected or it may be difficult to erase. t If a moving subject is too small or too large, it may be difficult to erase. t If the subject is moving insignificantly, it may not be detected.
4 To view the moments just before the picture was taken, tap the image thumbnail at the bottom of the Camera screen. 5 Select the pictures that you want to keep, then tap at the top of the screen. Once you've taken a photo Tap the image thumbnail at the bottom of the Camera screen to view the last photo you took. Tap to share your photo using the SmartShare function. Tap to take another photo immediately. Tap to send your photo to others or share it via social network services. Tap to delete the photo.
Camera Crop – Crop your photo. Move your finger across the screen to select the area to be cropped. Edit – View and edit the photo. Slideshow – Automatically shows you the images in the current folder one after the other. Add location – To add the location information. Details – Find out more information about the file. From your Gallery Tap Gallery and select Camera. t To view more photos, scroll left or right.
Video camera Getting to know the viewfinder Flash – Choose from Off , On , Auto . Swap camera – Switch between the rear–facing camera lens and the front-facing camera lens. Recording mode – Choose from Normal, Live effect, Dual recording, or Tracking zoom. Settings – Tap this icon to open the settings menu. Camera mode – Tap and slide up this icon to switch to camera mode. Start recording Gallery – Tap to view the last video you recorded.
Video camera Using the advanced settings Using the viewfinder, tap to open all the advanced options. Tap to turn on Audio zoom feature. You can record only the sound you want clearly and loudly. After turning this on, focus the subject you want to zoom, on inside the blue circle. To zoom in on sounds as well as sight, pinch in. NOTES t Only available in landscape view. t Do not cover the microphones on both sides. Tap to set the size (in pixels) of the video you are recording.
Recording a quick video 1 Open the Camera application and slide the Video mode button. 2 The video camera viewfinder appears on the screen. 3 Holding the phone, point the lens towards the subject you wish to capture in your video. 4 Tap once to start recording. 5 A red light will appear at the top left corner of the viewfinder with a timer showing the length of the video. 6 Tap on the screen to stop recording. TIP! – Tap to capture image during recording a video. – Tap to pause during recording a video.
Video camera From your Gallery Tap Gallery and select Camera. Tap on video play icon to play the video. Adjusting the volume when viewing a video To adjust the volume of a video while it is playing, use the volume keys on the back side of the phone. Using Audio Zoom Focuses the audio recording on a particular area of your choosing; this will increase microphone sensitivity and reduce background noise. 1 Open the Camera application and change to video mode 2 Tap > Audio zoom and select On.
Using Dual recording mode Allows you to record videos with the front and rear cameras at the same time, combined into one recording. 1 Open the Camera application and change to video mode 2 Tap > Dual recording. 3 A small viewfinder box appears on the main viewfinder screen. Set up your shot. t Drag the small viewfinder to move it where you want it in the shot. t Touch and hold the small viewfinder to resize it, if necessary.
Function QuickMemo The QuickMemo allows you to create memos and capture screen shots.Capture screens, draw on them and share them with family and friends with QuickMemo. 1 (While screen is switched off) Press and hold the Volume Up key. OR OR Touch and slide the status bar downward and tap . 2 Select the desired menu option from Pen type, Colour, Eraser and create a memo.
3 Tap in the Edit menu to save the memo with the current screen. To exit QuickMemo at any time, tap . NOTE: Please use a fingertip while using the QuickMemo. Do not use your fingernail. Using the QuickMemo options You can easily use the QuickMenu options when using the QuickMemo. Tap to keep the current QuickMemo as a text overlay on the screen and continue to use the phone. Selects whether to use the background screen or not. Undo or Redo. Selects the pen type and the colour.
Function understand. You can get the real-time translation anywhere and anytime. You can buy additional dictionaries for offline translation from the Google Play Store. Home language. Destination language. Translation of word. Translation of sentence. Translation of block. Settings. 1 2 3 4 Tap > > Apps tab > QuickTranslator. Tap Word, Line or Block. Tap and select the desired language. Hold the phone toward the subject you want to translate for a few seconds.
screen. OR Tap to exit the QSlide and return to full window. Tap to adjust transparency. Tap to end the QSlide. Tap to adjust the size. 1 Touch and slide the status bar downwards > tap QSlide apps or while using applications that support QSlide, tap . The function will be continuously displayed as a small window on your screen. 2 You can make a call, browse the Web, or choose other phone options. You can also use and tap the screen under the small windows when the transparency bar is not full .
Function QuickRemote QuickRemote turns your phone into a Universal Remote for your home TV, Set top box, audio system, DVD/Blu-ray players, air conditioner and projector. 1 Touch and slide the status bar downwards and tap > ADD REMOTE. OR > > Apps tab > Tap QuickRemote > tap . 2 Select the type and brand of device, then follow the on-screen instructions to configure the device(s). 3 Touch and slide the status bar downwards and use QuickRemote functions.
NOTE: The QuickRemote operates the same way as an ordinary remote control infrared (IR) signals. Be careful not to cover the infrared sensor at the top of the phone when you use the QuickRemote function. This function may not be supported depending on the model, the manufacturer or service company. Zoom to Track When you play a video, you can enlarge an object while tracking it. 1 When you play a video, tap . 2 Touch the magnifying glass and drag it to the object to track.
Function Live Zooming Live Zooming allows you to zoom in or zoom out on a portion of a video that is being played to make the desired section appear larger or smaller. When viewing a video, use your index finger and thumb in a pinching or spreading motion to zoom in or out. NOTE: t While a video is playing, slide left side on the screen up or down to adjust the screen brightness. t While a video is playing, slide right side of the screen up or down to adjust the screen volume.
VuTalk With the VuTalk feature, you can make an interactive and more creative notes with the other party. Visual communication is possible while sharing a photo, a map or camera preview. NOTE: t Only available with a phone that supports this feature as well. t You can also use the VuTalk feature during a call. t The screen will lock if there is no input. t Requires data connection. Data charge will apply to both phones. Register VuTalk Before Use 1 Tap > Contacts > .
Function Communicate Visually with VuTalk 1 Tap > Contacts > . Only the contacts who use the VuTalk feature will be displayed. 2 Tap a contact to start VuTalk with. 3 In the contact's details screen, tap . After the other party accepts your VuTalk request, you can start VuTalk with him/her. 4 Use the VuTalk screen to chat and visually communicate with your friend. t Tap to attach a photo, take a new photo, map view, or a sticker. t Tap the Pen icon and Eraser icon to write on the images you attached.
Use Voice Mate 1 Tap 2 Tap > > Voice Mate. to turn it on. Say what you want it to do for you. TIP! Use Voice Mate in a quiet environment so it can accurately recognize your commands. Voice Mate Settings 1 Tap 2 Tap > > Voice Mate. > Settings to configure the environment settings. LG SmartWorld LG SmartWorld offers an assortment of exciting content - games, applications, wallpaper and ringtones - giving LG phone users the chance to enjoy richer "Mobile Life" experiences.
Function How to use LG SmartWorld t Participate in monthly LG SmartWorld promotions. Search content. Find content by category (e.g. Games, Education, Entertainment etc). t Try the easy "Menu" buttons to find what you’re looking for fast. Settings – Set Profile and Display. Sign in – Set your ID and Password. t Try other useful functions as well. (Content Detail screen) NOTE: LG SmartWorld may not be available from all carriers or in all countries.
On-Screen Phone features Real-time transfer and control: displays and controls your mobile phone screen when connected to your PC. t Mouse control: allows you to control your mobile phone by using the mouse to click and drag on your PC screen. t Text input with keyboard: allows you to compose a text message or note using your computer keyboard. t File transfer (mobile phone to PC): sends files from your mobile phone (e.g. photos, videos, music and POLARIS Viewer 5 files) to your PC.
Multimedia Gallery Open the Gallery application to view albums of your pictures and videos. 1 Tap > > Apps tab > Gallery. You can manage and share all your image and video files with Gallery. NOTE: t Some file formats are not supported, depending on the software installed on the device. t Some files may not play properly, depending on how they are encoded. Viewing pictures Launching Gallery displays your available folders.
Playing videos Video files show the icon in the preview. Select a video to watch it and tap Videos application will launch. . The Editing photos When viewing an photo, tap the Menu key > Edit. Deleting photos/videos Use one of the following methods: t In a folder, tap and select photos/videos by ticking, and then tap on Delete. t When viewing a photo/Video, tap . Setting as wallpaper When viewing a photo, tap the Menu key wallpaper or assign to a contact.
Multimedia Playing a video 1 Tap > > Apps tab > Videos. 2 Select the video you want to play. Tap the desired direction for audio zoom. Tap to use Zoom to Track feature. Tap to enter into Qslide mode. Tap to share your video via the SmartShare function. Tap to lock a video screen. Tap to view the video list. Tap to capture the screen shot. Tap to pause video playback. Tap to resume video playback. Tap to go 10 seconds forward. Tap to go 10 seconds backward. Tap to manage the video volume.
Video Editor You can edit the photos or videos stored on the phone. X Tap > > Apps tab > Video Editor. NOTE: Video Editing function is supported only for photos or videos which recorded with this phone. < Project list screen > Project List Area Tap a project to edit it. Project Title Tap here to edit the title. Buttons Area Create a new project. Share the video project with other applications, such as YouTube. Export the finished project to play in other applications. Delete the video project.
Multimedia < Project edit screen > Viewer area Timeline area Tap to view the Project list screen. Tap to play the current clip. Tap to remove the last the selected clip. Tap to add additional video, images, or audio clips. Tap to choose to video style. Tap to add text in video clip. Tap to split video clip. Music Your phone has a built-in music player that lets you play all your favorite tracks. To access the music player, tap > > Apps tab > Music.
t Receive files via Bluetooth. Transfer music using Media sync (MTP) 1 Connect the phone to your PC using the USB cable. 2 Select the Media sync (MTP) option. Your phone will appear as another hard drive on your computer. Click on the drive to view it. Copy the files from your PC to the drive folder. 3 When you’re finished transferring files, swipe down on the Status Bar and tap USB connected > Charge phone. You may now safely unplug your device. Playing a song 1 Tap > > Apps tab > Music. 2 Tap Songs.
Multimedia Tap to play the current playlist in shuffle mode (tracks are played in random order). Tap to toggle through the repeat modes to repeat all songs, repeat current song, or repeat off. Tap to share your music via the SmartShare funtion. To change the volume while listening to music, press the up and down volume keys on the back side of the phone. Touch and hold any song in the list. The Play, Add to playlist, Share, Set as ringtone, Delete, Details and Search options will be displayed.
Utilities Slide Aside (Quick task-switching with THREE fingers) You can quickly switch to another task using three fingers. 1 Place three fingers on the screen which you are currently working on and slide the screen to the left. The current screen is saved and you can do another task. t You can save up 3 (three) apps in the left side of the screen. 2 To reopen the saved screen and continue to use the app, place three fingers on a screen and slide it to the right.
Utilities NOTE: To change alarm settings in the alarm list screen, tap the Menu key and select Settings. Using your calculator 1 Tap > > Apps tab > Calculator. 2 Tap the number keys to enter numbers. 3 For simple calculations, tap the function you want to perform (+, –, x or ÷) followed by =. 4 For more complex calculations, slide the left then choose sin, cos, tan, log etc. 5 To check the history, tap the icon . Adding an event to your calendar 1 Tap > > Apps tab > Calendar.
Voice Recorder Use the voice recorder to record voice memos or other audio files. Recording a sound or voice 1 2 3 4 Tap Tap Tap Tap > > Voice Recorder. to begin recording. to end the recording. to listen to the recording. NOTE: Tap to access your album. You can listen to the saved recording. The available recording time may differ from actual recording time. Sending the voice recording 1 Once you have finished recording, you can send the audio clip by tapping .
Utilities Tasks This task can be synchronized with MS Exchange account. You can create task, revise it and delete it in MS outlook or MS Office Outlook Web Access. To Synchronize MS Exchange 1 From the Home Screen, Tap > > Apps tab > Settings. 2 Tap General tab > Accounts & sync > Add account. 3 Tap Microsoft Exchange to create Email address and Password. 4 Make sure if you checkmark Sync task. NOTE: MS Exchange may not be supported depending on email server.
Google+ Use this application to stay connected with people via Google’s social network service. t Tap > > Apps tab > Google+. NOTE: This application may not be available depending on the region or service provider. Voice Search Use this application to search webpages using voice. 1 Tap > > Apps tab > Voice Search. 2 Say a keyword or phrase when Speak now appears on the screen. Select one of the suggested keywords that appear.
The Web Internet Use this application to browse the Internet. Browser gives you a fast, full-color world of games, music, news, sports, entertainment and much more, right on your mobile phone wherever you are and whatever you enjoy. NOTE: Additional charges apply when connecting to these services and downloading content. Check data charges with your network provider. 1 Tap > > Apps tab > Internet. Using the Web toolbar Tap slide it upwards with your finger to open. Tap to go back one page.
Opening a page To go to new page, tap . To go to another webpage, tap , scroll up or down, and tap the page to select it. Searching the web by voice Tap the address field, tap keywords that appear. , speak a keyword, and then select one of the suggested NOTE: This feature may not be available depending on the region or service provider. Bookmarks To bookmark the current webpage, tap > Add to bookmarks > OK. To open a bookmarked webpage, tap and select one.
The Web Chrome Use Chrome to search for information and browse webpages. 1 Tap > > Apps tab > Chrome. NOTE: This application may not be available, depending on your region and service provider. Viewing webpages Tap the Address field, and then enter a web address or search criteria. Opening a page To go to a new page, tab New tab. To go to another webpage, tap , scroll up or down and tap the page to select it.
Settings This section provides an overview of items you can change using your phone's System settings menus. To access the Settings menu: > > System settings. Tap - or > > Apps tab > Settings. Tap Networks < Wi-Fi > Wi-Fi – Turns on Wi-Fi to connect to available Wi-Fi networks. TIP! How to obtain the MAC address To set up a connection in some wireless networks with MAC filters, you may need to enter the MAC address of your phone in the router.
Settings Incoming call pop-up – Display incoming call popup when using camera and videos. Call reject – Allows you to set the call reject function. Choose from Call reject mode or Reject calls from. Decline with message – When you want to reject a call, you can send a quick message using this function. This is useful if you need to reject a call during a meeting. Privacy keeper – Hides the caller name and number for an incoming call.
To switch NFC on or off: From the Home screen, touch and slide the notification panel down with your finger, then select the NFC icon to turn it on. NOTE: When airplane mode is activated, the NFC application can be used. Using NFC: To use NFC, make sure your device is switched on, and activate NFC if disabled. Android Beam – When this feature is turned on, you can beam app content to another NFC-capable device by holding the devices close together.
Settings NOTE: You must set a lock screen PIN or password before you can use credential storage. Mobile networks – Set options for data roaming, network mode & operators, access point names (APNs) etc. Default SMS app – Allows you to set the default SMS app. VPN – Displays the list of Virtual Private Networks (VPNs) that you've previously configured. Allows you to add different types of VPNs. Sound Sound profile – Choose the Sound, either Vibrate only or Silent.
Smart ringtone – Checkmark to increase phone ringtone volume automatically in noisy environments. Incoming call vibration – Sets the incoming call vibration Options. Gentle vibration – Checkmark to gradually increasing vibration up to current strength set. Ringtone with vibration – Checkmark to set the phone to vibrate in addition to the ringtone when you receive calls. Voice notifications – Tap the Voice notifications switch to toggle it On or Off.
Settings If you have enabled a Pattern lock type when you turn on your phone or wake up the screen, you will be asked to draw your unlock pattern to unlock the screen. Screen swipe effect – Sets the screen swipe effect options. Choose from Ripple, Dewdrop, White hole, Particle, and Crystal. NOTE: This setting name may be Pattern effect if the Screen lock is set to Pattern. Weather animation – Checkmark to show weather animation for current location or primary city set in Weather based on auto data updates.
Auto-rotate screen – Checkmark to set the phone to automatically rotate the screen based on the phone orientation (portrait or landscape). Daydream – Tap the Daydream switch to toggle it On or Off. On allows the set screensaver to be displayed when the phone is sleeping while docked and/or charging. Choose from Clock, Colors, Photo Frame, and Photo Table. < FONT > Font type – Sets the type of font used for the phone and menus. Font size – Sets the size of the font displayed in the phone and menus.
Settings Silence incoming calls – Checkmark to enable you to flip the phone to silence incoming calls. Snooze or turn off alarm – Checkmark to enable you to simply flip the device to snooze or stop the alarm. Pause video – Checkmark to enable you to simply flip the device to pause the currently playing video. Help – Opens a help guide on how to use the Gestures features of your device. Motion sensor calibration – Allows you to improve the accuracy of the tilt and speed of the sensor.
BATTERY SAVER Tap the Battery saver switch to toggle it On or Off. Tap Battery saver to access the following settings: Turn Battery saver on – Sets the battery charge percent level that will automatically turn on Battery saver. Choose from Immediately, 10% battery, 20% battery, 30% battery, and 50% battery. BATTERY SAVING ITEMS Auto-sync – Checkmark to turn off Auto-sync when Battery saver is activated. Wi-Fi – Checkmark to turn Wi-Fi off when data is not being used while Battery saver is activated.
Settings < Accounts & sync > Permits applications to synchronize data in the background, whether or not you are actively working in them. Deselecting this setting can save battery power and lower (but not eliminate) data usage. < Cloud > Add a cloud account to quickly and easily use cloud service on LG apps. < Guest mode > To protect your privacy or limit some applications to your children, you can use the Guest mode. When you lend your phone to others, you can limit the applications to be displayed.
Storage type – Software only Trusted credentials – Display trusted CA certificates. Install from storage – Choose to install encrypted certificates. Clear credentials – Remove all certificates. < Language & input > Use the Language & input settings to select the language for the text on your phone and to configure the on-screen keyboard, including words you've added to its dictionary. < Backup & reset > Change the settings for managing your settings and data.
Settings < PC connection > Select USB connection method – Set the desired mode: Charge phone, Media sync (MTP), Tethering, LG software or Send images (PTP). Ask upon connecting – Ask in USB connection mode when connecting to a computer. Help – Help for USB connection. PC Suite – Check this to use LG PC Suite with your Wi-Fi connection. Please note that Wi-Fi network should be connected to LG PC Suite via a Wi-Fi connection. Help – Help for LG software.
PC software (LG PC Suite) "LG PC Suite" PC software is a program that helps you connect your device to a PC via a USB cable and Wi-Fi. Once connected, you can use the functions of your device from your PC. With your "LG PC Suite" PC Software, You Can... t Manage and play your media contents (music, movie, picture) on your PC. t Send multimedia contents to your device. t Synchronizes data (schedules, contacts, bookmarks) in your device and PC. t Backup the applications in your device.
PC software (LG PC Suite) System Requirements for "LG PC Suite" PC software t OS: Windows XP (Service pack 3) 32bit, Windows Vista, Windows 7, Windows 8 t CPU: 1 GHz or higher processors t Memory: 512 MB or higher RAMs t Graphic card: 1024 x 768 resolution, 32 bit color or higher t HDD: 500 MB or more free hard disk space (More free hard disk space may be needed depending on the volume of data stored.
Moving contacts from your Old Device to your New Device 1 Export your contacts as a CSV file from your old device to your PC using a PC sync program. 2 Install "LG PC Suite" on the PC first. Run the program and connect your Android mobile phone to the PC using a USB cable. 3 On the top menu, select Device > Import to device > Import contacts. 4 A popup window to select the file type and a file to import will appear. 5 On the popup, click the Select a file and Windows Explorer will appear.
Phone software update Phone software update LG Mobile phone software update from the Internet For more information about using this function, please visit http://www.lg.com/common/ index.jsp select your country and language. This feature allows you to conveniently update the firmware on your phone to a newer version from the Internet without needing to visit a service center. This feature will only be available if and when LG makes a newer firmware version available for your device.
NOTE: Your personal data from internal phone storage—including information about your Google account and any other accounts, your system/ application data and settings, any downloaded applications and your DRM licence—might be lost in the process of updating your phone's software. Therefore, LG recommends that you backup your personal data before updating your phone's software. LG does not take responsibility for any loss of personal data.
About this user guide About this user guide Before using your device, please carefully read this manual. This will ensure that you use your phone safely and correctly. t Some of the images and screenshots provided in this guide may appear differently on your phone. t Your content may differ from the final product, or from software supplied by service providers or carriers, This content may be subject to change without prior notice. For the latest version of this manual, please visit the LG website at www.
DivX HD ABOUT DIVX VIDEO: DivX® is a digital video format created by DivX, LLC, a subsidiary of Rovi Corporation. This is an official DivX Certified® device that has passed rigorous testing to verify that it plays DivX video. Visit divx.com for more information and software tools to convert your files into DivX videos. ABOUT DIVX VIDEO-ON-DEMAND: This DivX Certified® device must be registered in order to play purchased DivX Video-on-Demand (VOD) movies.
Accessories These accessories are available for use with the your phone. (Items described below may be optional.) Travel adaptor Stereo headset Quick Start Guide Data cable NOTE: t Always use genuine LG accessories. t Failure to do this may void your warranty. t Accessories may vary in different regions.
Troubleshooting This chapter lists some problems you might encounter when using your phone. Some problems require you to call your service provider, but most are easy to fix yourself. Message Micro-USIM card error No network connection/ Dropped network Codes do not match Possible causes Possible corrective measures There is no Micro-USIM card in the phone or it is inserted incorrectly. Make sure that the Micro-USIM card is correctly inserted. Signal is weak or you are outside the carrier network.
Troubleshooting Message Possible causes No applications can be set Not supported by service provider or registration required. Contact your service provider. Dialling error New network not authorized. New Micro-USIM card inserted. Check for new restrictions. Pre-paid charge limit reached. Contact service provider or reset limit with PIN2. On/Off key pressed too briefly. Press the On/Off key for at least two seconds. Battery is not charged. Charge battery.
Message Possible causes Possible corrective measures Battery is not charged. Charge battery. Outside temperature is too hot or cold. Make sure phone is charging at a normal temperature. Contact problem Check the charger and its connection to the phone. No voltage Plug the charger into a different socket. Charger defective Replace the charger. Wrong charger Use only original LG accessories. Number not allowed The Fixed dialling number function is on.
Troubleshooting Message The screen does not turn on when I receive a call. 120 Possible causes Possible corrective measures Proximity sensor problem If you use a protection tape or case, make sure it has not covered the area around the proximity sensor. Make sure that the area around the proximity sensor is clean. No sound Vibration mode Check the settings status in the sound menu to make sure you are not in vibration or silent mode.
FAQ Category SubCategory Question Answer BT Bluetooth Devices You can connect a Bluetooth audio device such as a Stereo/Mono headset What are the functions or Car Kit. Also, when the FTP server available via Bluetooth is connected to a compatible device, you can share content stored on the storage media. BT Bluetooth Headset If my Bluetooth headset is connected, can I listen to my music through my 3.
FAQ Category SubCategory Google™ Service Google Account Question Is it possible to filter emails? What happens when I execute another application while writing an email? Is there a file size Phone limitation for when I Function want to use MP3 file Ringtone as ring tone? My phone does not Phone display the time of Function receipt for messages Message older than 24 hrs.
Category SubCategory Phone Function Wait and Pause Phone Function Security Question Answer If you transferred a contact with the W & P functions saved into the number, you will not be able to use those features. You will need to re-save each Is it possible to save a number. contact with Wait and How to save with Wait and Pause: Pause in the numbers? 1. From the Home screen, tap the Phone icon . 2. Dial the number, then tap the Menu . Key 3. Tap Add 2-sec pause or Add wait.
FAQ Category SubCategory Phone Function Unlock Pattern 124 Question How do I create the Unlock Pattern? Answer 1. From the Home screen, tap the . Menu Key 2. Tap System settings > Display tab > Lock screen. 3. Tap Select screen lock > Pattern. The first time you do this, a short tutorial about creating an Unlock Pattern will appear. 4. Set up by drawing your pattern once, and once again for confirmation. Precautions to take when using the pattern lock.
Category SubCategory Question Answer Phone Function Unlock Pattern What should I do if I forget the unlock pattern and I didn’t create my Google account on the phone? If you have forgotten your pattern: If you logged into your Google account on the phone but failed to enter the correct pattern 5 times, tap the forgot pattern button. You are then required to log in with your Google account to unlock your phone.
FAQ Category SubCategory Question Answer VPN access configuration is different Phone for each company. To configure VPN How do I set up a Function access from your phone, you must VPN? obtain the details from your company’s VPN network administrator. 1. From the Home screen, tap the My screen turns off . Menu Key Phone after only 15 seconds. Function 2. Tap System settings > Display tab. How can I change the Screen time 3. Tap Screen timeout. amount of time for the out 4.
Category SubCategory Phone Function Application Phone Function Charger Phone Function Alarm Phone Function Alarm Phone Function Alarm Question Answer I downloaded an application and it causes a lot of errors. How do I remove it? 1. From the Home screen, tap the . Menu Key 2. Tap System settings > General tab > Apps > DOWNLOADED. 3. Tap the application, then tap Uninstall.
FAQ Category SubCategory Recovery Solution Hard Reset (Factory Reset) 128 Question How can I perform a factory reset if I can’t access the phone’s setting menu? Answer If your phone does not restore to its original condition, use a hard reset (factory reset) to initialize it.