LCD TV OWNER’S MANUAL 26LG40 32LG40 Please read this manual carefully before operating your set and retain it for future reference. Write the model number and serial number from the label on the back cabinet on the front or back of this manual. ENERGY STAR is a set of power-saving guidelines issued by the U.S. Environmental Protection Agency(EPA). As an ENERGY STAR Partner LGE U. S. A.,Inc. has determined that this product meets the ENERGY STAR guidelines for energy efficiency.
WARNING / CAUTION WARNING / CAUTION To prevent fire or shock hazards, do not expose this product to rain or moisture. TO REDUCE THE RISK OF ELECTRIC SHOCK DO NOT REMOVE COVER (OR BACK). NO USER SERVICEABLE PARTS INSIDE. REFER TO QUALIFIED SERVICE PERSONNEL.
SAFETY INSTRUCTIONS IMPORTANT SAFETY INSTRUCTIONS Important safety instructions shall be provided with each apparatus. This information shall be given in a separate booklet or sheet, or be located before any operating instructions in an instruction for installation for use and supplied with the apparatus. This information shall be given in a language acceptable to the country where the apparatus is intended to be used. The important safety instructions shall be entitled “Important Safety Instructions”.
10 Use only with the cart, stand, tripod, bracket, or table specified by the manufacturer, or sold with the apparatus. When a cart is used, use caution when moving the cart/apparatus combination to avoid injury from tip-over. 11 Never touch this apparatus or antenna during a thunder or lighting storm. 12 Do not allow a impact shock or any objects to fall into the product, and do not drop onto the screen with something. 13 Refer all servicing to qualified service personnel.
CONTENTS WARNING / CAUTION . . . . . . . . . . . . . . . . . . . . . . . . . . . . 1 SAFETY INSTRUCTIONS . . . . . . . . . . . . . . . . . . . . . . . . . . 2 PREPARATION Accessories . . . . . . . . . . . . . . . . . . . . . . . . . . . . . . . . . . . . . . . . . . . . . . . . . . . . . . 7 Front Panel Information . . . . . . . . . . . . . . . . . . . . . . . . . . . . . . . . . . . . . 8 Back Panel Information . . . . . . . . . . . . . . . . . . . . . . . . . . . . . . . . . . . . 10 Stand Installation .
TIME SETTING Clock Setting - Auto Clock Setup . . . . . . . . . . . . . . . . . . . . . . . . . . . . . . . . . . . . 73 - Manual Clock Setup . . . . . . . . . . . . . . . . . . . . . . . . . . . . . . . . . 74 Auto On/Off Time Setting . . . . . . . . . . . . . . . . . . . . . . . . . . . . . . 75 Sleep Timer Setting . . . . . . . . . . . . . . . . . . . . . . . . . . . . . . . . . . . . . . . . . 76 Auto Shut-off Setting . . . . . . . . . . . . . . . . . . . . . . . . . . . . . . . . . . . . . . .
Manufactured under license from Dolby Laboratories. “Dolby “and the double-D symbol are trademarks of Dolby Laboratories. is a trademark of DVD format/Logo Licensing Corporation. This product incorporates copy protection technology that is protected by U.S. and foreign patents, including patent number 5,315,448 and 6,836,549, and other intellectual property rights. The use of Macrovision's copy protection technology in the product must be authorized by Macrovision.
PREPARATION ACCESSORIES TV RO TA T Q. E - PO ST W MEN B ER BU U M ILT DVD -IN SE EN TU U/ VC P IN R PU T EN TE R TU RN + SU BT PB SK IP SL OW - SL 7 4 AU C 8 0 SK EJ EC T DISC MEN IP CH OM AN B TIT LE DIO RE FLASHB K + MO DE MU TE ZO 2 5 AV MA RK FA V L PL AY A- ITL E - OW 1 AT RO TA VO DIS RE PE TE RE 6 3 E A G P GL E PREPARATION Ensure that the following accessories are included with your TV.
PREPARATION FRONT PANEL INFORMATION PREPARATION ■ Image shown may differ from your TV. ■ NOTE: If your TV has a protection tape attached, remove the tape. And then wipe the TV with a cloth (If a polishing cloth is included with your product, use it). / CH VOL Power/Standby Indicator Illuminates red in standby mode. Illuminates blue when the TV is switched on. (Can be adjusted Power Indicator in the OPTION menu. G p.
BACK PANEL INFORMATION ■ Image shown may differ from your TV. PREPARATION ANTENNA/ CABLE IN HDMI/DVI IN RGB IN RGB(PC) 6 HDMI IN 3 3 DIGITAL AUDIO AUDIO OUT (RGB/DVI) OPTICAL 7 2 4 REMOTE CONTROL IN AUDIO VIDEO COMPONENT IN RS-232C IN (CONTROL & SERVICE) S-VIDEO VIDEO AUDIO OUT (MONO) AUDIO 8 AV IN 1 1 9 VIDEO L/MONO AUDIO R 5 1 USB SERVUCE ONLY 11 10 1 9 AV IN 2 2 1 HDMI/DVI IN, HDMI IN Digital Connection. Supports HD video and Digital audio. Doesn’t support 480i.
PREPARATION STAND INSTALLATION ■ Image shown may differ from your TV Carefully place the TV screen side down on a cushioned surface to protect the screen from damage. 2 Assemble the parts of the STAND BODY with COVER BASE of the TV. PREPARATION 1 STAND BODY COVER BASE 10 3 Assemble the TV as shown. 4 Fix the 4 bolts securely using the holes in the back of the TV.
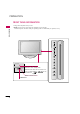
CABLE MANAGEMENT ■ Image shown may differ from your TV Align the hole with the tab on the CABLE MANAGEMENT CLIP. Turn the CABLE MANAGEMENT CLIP as shown. Note: This cable management can be broken by excessive pressure. 2 Connect the cables as necessary. To connect additional equipment, see the EXTERNAL EQUIPMENT SETUP section.
PREPARATION DESKTOP PEDESTAL INSTALLATION ■ Image shown may differ from your TV. For proper ventilation, allow a clearance of 4 inches on all four sides from the wall. PREPARATION 4 inches 4 inches CAUTION G 4 inches 4 inches Ensure adequate ventilation by following the clearance recommendations. SWIVEL STAND After installing the TV, you can adjust the TV set manually to the left or right direction by 20 degrees to suit your viewing position.
PROTECTION COVER ■ Image shown may differ from your TV. PREPARATION You can remove the stand before installing the TV on a wall mount by performing the previous stand instructions in reverse. After removing the stand, install the included protection cover over the hole for the stand. Insert the PROTECTION COVER into the TV until clicking sound.
PREPARATION SECURING THE TV TO THE WALL TO PREVENT FALLING ■ PREPARATION ■ You should purchase necessary components to prevent TV from falling off of the stand. Image shown may differ from your TV. We recommend that you set up the TV close to a wall so it cannot fall over if pushed backwards. Additionally, we recommend that the TV be attached to a wall so it cannot be pulled in a forward direction, potentially causing injury or damaging the product.
■ ■ To prevent damage do not connect to the power outlet until all connections are made between the devices. Image shown may differ from your TV. ANTENNA OR CABLE CONNECTION PREPARATION 1. Antenna (Analog or Digital) Wall Antenna Socket or Outdoor Antenna without a Cable Box Connections. For optimum picture quality, adjust antenna direction if needed.
EXTERNAL EQUIPMENT SETUP ■ To prevent the equipment damage, never plug in any power cords until you have finished connecting all equipment. HD RECEIVER SETUP This TV can receive Digital Over-the-air/Cable signals without an external digital set-top box. However, if you do receive digital signals from a digital set-top box or other digital external device, refer to the figure as shown below.
HDMI Connection 1. How to connect RGB IN RGB(PC) Connect the digital set-top box to HDMI/DVI IN1, 2, or 3 jack on the TV. 2 No separate audio connection is necessary. HDMI supports both audio and video. HDMI/DVI IN 2 2 Y PB PR 1 1 VIDEO COMPONE 2. How to use Turn on the digital set-top box. (Refer to the owner’s manual for the digital set-top box.) ■ Select the HDMI1, HDMI2, or HDMI3 input source on the TV using the INPUT button on the remote control.
EXTERNAL EQUIPMENT SETUP DVI to HDMI Connection EXTERNAL EQUIPMENT SETUP RGB IN AUDIO (RGB/DVI) RGB(PC) REMO CONTRO HDMI/DVI IN 2 2 Y PB PR L R 1 1 AUDIO VIDEO COMPONENT IN 2 1 DVI-DTV OUTPUT L R 1. How to connect 1 Connect the DVI output of the digital set-top box to the HDMI/DVI IN or HDMI/DVI IN 1/2/3 jack on the TV. 2 Connect the PC audio output to the AUDIO IN ( RGB/DVI) or AUDIO ( RGB/DVI) jack on the TV. 2. How to use Turn on the digital set-top box.
DVD SETUP Component Connection Y PB PR L R 2 RGB IN AUDIO (RGB/DVI) RGB(PC) REMOTE CONTROL IN VI IN A O RS (CONTR 2 Y PB PR EXTERNAL EQUIPMENT SETUP 1 R L 1 AUDIO VIDEO COMPONENT IN S-V 1. How to connect 1 Connect the video outputs (Y, PB, PR) of the DVD to the COMPONENT IN VIDEO or COMPONENT IN VIDEO1 jacks on the TV. Match the jack colors (Y = green, PB = blue, and PR = red). 2 Connect the audio outputs of the DVD to the COMPONENT IN AUDIO or COMPONENT IN AUDIO1 jacks on the TV.
EXTERNAL EQUIPMENT SETUP S-Video Connection 1. How to connect Connect the S-VIDEO output of the DVD to the S VIDEO input on the TV. 2 Connect the audio outputs of the DVD to the AUDIO input jacks on the TV. AUDIO S-VIDEO L R ANTENNA/ CABLE IN 2. How to use ■ ■ ■ Turn on the DVD player, insert a DVD. Select the A V or A V 1 input source on the TV using the INPUT button on the remote control. Refer to the DVD player's manual for operating instructions.
VCR SETUP To avoid picture noise (interference), leave an adequate distance between the VCR and TV. ■ If the 4:3 picture format is used; the fixed images on the sides of the screen may remain visible on the screen. This phenomenon is common to all TVs and is not covered by warranty.
EXTERNAL EQUIPMENT SETUP Composite (RCA) Connection ANT IN S-VIDEO ANT OUT OUTPUT SWITCH VIDEO L R 1. How to connect ANTENNA/ CABLE IN 1 2. How to use Insert a video tape into the VCR and press PLAY on the VCR. (Refer to the VCR owner’s manual.) ■ Select the A V or A V 1 input source on the TV using the INPUT button on the remote control. ■ If connected to AV IN2, select AV2 input source on the TV.
OTHER A/V SOURCE SETUP Camcorder 1. How to connect Connect the AUDIO/VIDEO jacks between TV and external equipment. Match the jack colors. (Video = yellow, Audio Left = white, and Audio Right = red) ■ ■ Select the A V 2 input source on the TV using the INPUT button on the remote control. If connected to AV IN1 input, select the A V 1 input source on the TV. Operate the corresponding external equipment. USB IN L HDMI IN 3 ■ 1 VIDEO L/MONO AUDIO R 2.
EXTERNAL EQUIPMENT SETUP AUDIO OUT CONNECTION Send the TV’s audio to external audio equipment via the Audio Output port. Analog RS-232C IN (CONTROL & SERVICE) 1. How to connect AUDIO S-VIDEO VIDEO L (MONO) AUDIO R Set the “TV Speaker option - Off” in the AUDIO menu. (G p.65). See the external audio equipment instruction manual for operation. 2 AV IN 1 EXTERNAL EQUIPMENT SETUP R Connect audio outputs to the TV’s AUDIO OUT jacks. 1 AUDIO OUT 1 Digital L R AUDIO 1.
PC SETUP This TV provides Plug and Play capability, meaning that the PC adjusts automatically to the TV's settings. VGA (D-Sub 15 pin) Connection RGB IN 1. How to connect Connect the VGA output of the PC to the RG B ( P C ) jack on the TV. MI/DVI IN (CO 2 Y 2 Connect the PC audio output to the A U D I O ( RGB/DVI) jack on the TV. 2. How to use ■ ■ REMOTE CONTROL I PB PR L R 1 AUDIO VIDEO COMPONENT IN 1 2 Turn on the PC and the TV.
EXTERNAL EQUIPMENT SETUP DVI to HDMI Connection 1. How to connect EXTERNAL EQUIPMENT SETUP 1 Connect the DVI output of the PC to the HDMI/DVI I N 1 or 2 jack on the TV. 2 Connect the PC audio output to the A U D I O ( RGB/DVI ) jack on the TV. RGB IN ■ ■ 2 2 1 PB PR R L 1 AUDIO VIDEO COMPONENT IN Turn on the PC and the TV. Select the HDMI1, 2 or 3 input source on the TV using the INPUT button on the remote control. 2 1 DVI-PC OUTPUT 26 REMO CONTR HDMI/DVI IN Y 2.
! NOTES To get the the best picture quality, adjust the PC graphics card to 1360x768 (26LG30). G Depending on the graphics card, DOS mode may not work if a HDMI to DVI Cable is in use. G In PC mode, there may be noise associated with the resolution, vertical pattern, contrast or brightness. If noise is present, change the PC output to another resolution, change the refresh rate to another rate or adjust the brightness and contrast on the PICTURE menu until the picture is clear.
EXTERNAL EQUIPMENT SETUP Screen Setup for PC mode Selecting Resolution You can choose the resolution in RGB-PC mode. The Position, Phase, and Size can also be adjusted. EXTERNAL EQUIPMENT SETUP PICTURE Move SCREEN Enter 50 • Brightness 50 • Sharpness 50 • Color 50 • Tint 0 Auto config. Position R G • Advanced Control • Reset Screen (RGB-PC) Size Phase Reset 1 MENU Select PICTURE. 2 ENTER Select Screen (RGB-PC). ENTER Select Resolution. 3 4 ENTER 5 ENTER 28 Move MENU Prev.
Auto Configure Automatically adjusts picture position and minimizes image instability. After adjustment, if the image is still not correct, try using the manual settings or a different resolution or refresh rate on the PC. Move SCREEN Enter E • Contrast 50 • Brightness 50 • Sharpness 50 • Color 50 • Tint 0 Move MENU Prev. Resolution Auto config.
EXTERNAL EQUIPMENT SETUP Adjustment for screen Position, Size, and Phase If the picture is not clear after auto adjustment and especially if characters are still trembling, adjust the picture phase manually. This feature operates only in RGB-PC mode. EXTERNAL EQUIPMENT SETUP PICTURE Move SCREEN Enter Move MENU Prev. E • Contrast 50 • Brightness 50 • Sharpness 50 • Color 50 • Tint 0 Resolution Auto config.
Screen Reset (Reset to original factory values) Returns Position, S ize, and Phase to the default factory settings. This feature operates only in RGB-PC mode. Move SCREEN Enter Move MENU Prev. E • Contrast 50 • Brightness 50 • Sharpness 50 • Color 50 • Tint 0 Resolution Auto config. Position R To set G • Advanced Control Yes Size No EXTERNAL EQUIPMENT SETUP PICTURE • Reset Screen (RGB-PC) Phase Reset G 1 MENU Select PICTURE. 2 ENTER Select Screen (RGB-PC).
WATCHING TV / CHANNEL CONTROL REMOTE CONTROL FUNCTIONS When using the remote control, aim it at the remote control sensor on the TV. BUILT-IN TV/STB/DVD/VCR Select the remote operating mode: TV, STB, DVD, or VCR. POWER Turns your TV or any other programmed equipment on or off, depending on the mode. TV POWER DVD VCR INPUT STB MENU/ Q. MENU SETUP ROTATE - MENU Displays the main menu. Clear all on-screen displays and return to TV viewing from any menu. ROTATE + WATCHING TV / CHANNEL CONTROL Q.
THUMBSTICK Navigate the on-screen menus and adjust the system settings to your preference. (Up/Down/Left Right/ENTER) RETURN Allows the user to move return one step in an interactive application or other user interaction function. AV MODE It helps you select and set images and sounds. G p.61 WATCHING TV / CHANNEL CONTROL SIMPLINK See a list of AV devices connected to TV. When you toggle this button, the SIMPLINK menu appears at the screen. G p.
WATCHING TV / CHANNEL CONTROL TURNING ON TV First, connect power cord correctly. At this moment, the TV switches to standby mode. ■ In standby mode to turn TV on, press the , INPUT, CH (+ or -) button on the TV or press the POWER, INPUT, TV, CH (+ or -), Number (0~9) button on the remote control. 1 Select the viewing source by using the INPUT button on the remote control. ■ This TV is programmed to remember which power state it was last set to, even if the power cord is out.
QUICK MENU Your TV's OSD (On Screen Display) may differ slightly from what is shown in this manual. Q.Menu (Quick Menu) is a menu of features which users might use frequently. ■ ■ ■ ■ ■ ■ ■ Q.Menu Aspect Ratio F Picture Mode Vivid Sound Mode Standard Off Caption G English Multi Audio CH 16:9 3 Backlight Multi Audio: Changes the audio language (Digital signal). SAP: Selects MTS sound (Analog signal). Sleep Timer: Select the amount of time before your TV turns off automatically.
WATCHING TV / CHANNEL CONTROL INITIAL SETTING This Function guides the user to easily set the essential items for viewing the TV for the first time when purchasing the TV. If will be displayed on the screen when turning the TV on for the first time. It can also be activated from the user menus. ■ WATCHING TV / CHANNEL CONTROL ■ In-Store Mode: Picture mode is set to “Vivid”.
Step3. Option setting 1 Step3. Option Setting F 2. Audio Language Setting English Select OSD Language Setting or Audio Language Setting. G French Enter RETURN Exit 2 Select your desired language. 3 ENTER Step4. Auto Tuning 1 Step4. Auto Tuning Auto Tuning can change channel map. Do you want to start Auto Tuning? ENTER Start Auto Tuning. WATCHING TV / CHANNEL CONTROL 1. OSD Language Setting Enter Enter RETURN Exit ! NOTE • You can also adjust Initial Setting in the OPTION menu.
WATCHING TV / CHANNEL CONTROL ON-SCREEN MENUS SELECTION Your TV's OSD (On Screen Display) may differ slightly from that shown in this manual.
CHANNEL SETUP Auto Scan (Auto Tuning) Automatically finds all channels available through antenna or cable inputs, and stores them in memory on the channel list. Run Auto Tuning again after any Antenna/Cable connection changes. Move Enter CHANNEL Auto Tuning Auto Tuning Manual Tuning Manual Tuning Channel Edit Channel Edit Move Enter Press ‘Yes’ button to begin auto tuning. Yes No 1 MENU Select CHANNEL. 2 ENTER Select Auto Tuning.
WATCHING TV / CHANNEL CONTROL Add/Delete Channel (Manual Tuning) If selecting DTV or CADTV input signal, you can view the on-screen signal strength monitor to see the quality of the signal being received. CHANNEL Move Enter Move WATCHING TV / CHANNEL CONTROL Auto Tuning Manual Tuning Manual Tuning Channel Edit Channel Edit Enter DTV F G Select channel type and RF-channel number. Channel 2 DTV 2-1 Bad Normal Good Delete Close 1 MENU Select CHANNEL. 2 ENTER Select Manual Tuning.
Channel Editing A custom list can be created by toggling each channel on or off with ENTER button. The channels in the Custom List are displayed in black and the channels deleted from the Custom List are displayed in gray. Once a channel is highlighted you can add or delete the channel by referring to the small window at the topright corner of the screen. Move Enter Auto Tuning Manual Tuning Channel Edit Add/Delete 1 MENU 2 Select CHANNEL. ENTER Select Channel Edit. ENTER Select a channel.
WATCHING TV / CHANNEL CONTROL INPUT LIST 19/22LG30 TV AV Component RGB-PC HDMI Cable AV1 AV2 Component1 26LG30 WATCHING TV / CHANNEL CONTROL Antenna 1 INPUT ENTER Select the desired input source. Antenna Cable AV1 AV2 Component1 HDMI3 HDMI2 HDMI1 RGB-PC Component2 ie) TV AV Component RGB-PC Q.MENU ■ ■ ■ ■ 42 Antenna: Select it to watch over-the-air broadcasts. Cable: Select it to watch cable and digital cable.
INPUT LABEL You can set a label for each input source when it's not in use. OPTION Language Move Enter : English Input Label SIMPLINK OPTION Language F G AV2 Key Lock : Off RGB-PC Component1 Caption : Off HDMI Component2 Set ID :1 : Off Caption : Off Set ID :1 RGB-PC Power Indicator Initial Setting F HDMI1 : Home HDMI2 Close HDMI3 Close With using OPTION menu With using INPUT button 1 MENU 1 INPUT 2 Select OPTION. ENTER Select Input Label. ENTER Select the source.
WATCHING TV / CHANNEL CONTROL AV MODE You can select the optimal images and sounds. WATCHING TV / CHANNEL CONTROL 1AV MODE Off Cinema Game Sport Press the AV MODE button repeatedly to select the desired source. 2 ENTER ■ ■ 44 If you select “Cinema” in AV mode, Cinema will be selected both for “PICTURE menu - Picture Mode” and “AUDIO menu - Sound Mode” respectively. If you select “O f f” in AV mode, the “Picture Mode” and “Sound Mode” return to previous selected value.
This function operates only with devices with the logo. The TV might not function properly when using it with other products with HDMI-CEC function. This allows you to control and play other AV devices connected with HDMI cable without additional cables and settings. To start using SIMPLINK, turn it on in the user menus.
WATCHING TV / CHANNEL CONTROL SIMPLINK Functions Direct Play: After connecting AV devices to the TV, you can directly control the devices and play media without additional settings. ■ Select AV device: Enables you to select one of the AV devices connected to TV. ■ Disc playback: Control connected AV devices by pressing the , ENTER, G, A, l l, FF and GG buttons. ■ Power off all devices: When you power off the TV, all connected devices are turned off.
SIMPLINK Menu 1 2 4 5 1 2 3 4 5 G G G When no device is connected (displayed in gray) Selected Device When a device is connected (displayed in bright color) WATCHING TV / CHANNEL CONTROL 3 TV viewing: Switch to the previous TV channel regardless of the current mode. DISC playback: Select and play discs. When multiple discs are available, the titles of discs are conveniently displayed at the bottom of the screen. VCR playback: Control the connected VCR.
DVD OPERATION DVD operation Notes on Discs Symbol Used in this Manual DVD-V VCD On storing discs v Do not store discs in a place subject to direct sunlight or near heat sources. v Do not store discs in places subject to moisture and dust such as a bathroom or near a humidifier. v Store discs vertically in a case. Stacking or placing objects on discs outside of their case may cause warping.
Types of Playable Discs • DVD (8 cm / 12 cm disc) • Video CD (VCD) (8 cm / 12 cm disc) • Audio CD (8 cm / 12 cm disc) In addition, this unit plays DivX file, DVD -R, DVD +R, DVD -RW, DVD +RW, Kodak Picture CDs, SVCD, and CD-R / CD-RW that contains audio titles, MP3, WMA, and/or JPEG files. Note • Depending on the conditions of the recording equipment or the CD-R/RW (or DVD -R, DVD +R, DVD -RW, DVD +RW) disc itself, some CD-R/RW (or DVD -R, DVD +R, DVD -RW, DVD +RW) discs cannot be played on the unit.
DVD OPERATION DVD Menu options - LANGUAGE By using the DVD menu, you can make various adjustments to items such as picture and sound. You can also set a language for the subtitles and the DVD menu, among other things. Menu Language LANGUAGE Menu MenuLanguage Language G Disc Audio Disc Subtitle Disc Menu DVD OPERATION F Prev. - Select your preferred language for the DVD menus and on screen displays messages.
DVD Menu options - DISPLAY Progressive Scan DISPLAY G F Prev. D E On Off Move G Select 1 Press the MENU button twice and then use the D / E button to select DISPLAY. 2 Press the G button to select Progressive Scan. 3 Press the G button and then use D / E button to select On or Off. 4 Press the OK button. 5 Press the EXIT button to exit the menu. DVD OPERATION - Progressive Scan Video provides the highest quality pictures with less flickering. Set Progressive Scan to On.
DVD OPERATION DVD Menu options - AUDIO Each DVD disc has a variety of audio output options. Set the player’s AUDIO options according to the type of audio system you use. Dolby Digital / DTS / MPEG DVD-V DivX AUDIO Dolby Digital G DTS Bitstream PCM MPEG Sample Freq. DRC Vocal DVD OPERATION F Prev. • Bitstream: Select Bitstream if you connect the DVD Player’s DIGITAL OUT jack to an amplifier or other equipment with a Dolby Digital, DTS or MPEG decoder.
DRC (Dynamic Range Control) DVD-V DivX AUDIO Dolby Digital DTS MPEG Sample Freq. DRC G Vocal F Prev. Move G Select 1 Press the MENU button twice and then use the D AUDIO. / E button to select DVD OPERATION - With the DVD format, you can hear a program’s soundtrack in the most accurate and realistic presentation possible, thanks to digital audio technology. However, you may wish to compress the dynamic range of the audio output (the difference between the loudest sounds and the quietest ones).
DVD OPERATION DVD Menu options - LOCK Rating LOCK Rating LOCK G Password Area Code DVD OPERATION F Prev. DVD-V D E Unlock 8 (Adult) 7 6 5 4 3 2 1 (Kids) Move Rating Area Code G Select - Some movies contain scenes that may not be suitable for children to view. Many of these discs contain parental control information that applies to the complete disc or to certain scenes on the disc. Movies and scenes are rated from 1 to 8, depending on the country.
Password (Security Code) LOCK LOCK Rating Rating Password G Password Change F Prev. New Password Area Code Area Code D E G Select Move CLEAR OK F Delete Clear 0-9 Input 1 Press the MENU button twice and then use the D - You can enter or change password. / E button to select LOCK. In case of “New” Input a 4-digit password and press OK button. Enter it again and press OK button to verify. If you make a mistake before pressing OK button, press CLEAR button. In case of “Change” 1.
DVD OPERATION DVD Menu options - OTHERS PBC VCD OTHERS PBC G Auto Play On Off DivX(R) VOD F Prev. DVD OPERATION - Set Playback Control (PBC) to On or Off. On: Video CDs with PBC are played according to the PBC. Off: Video CDs with PBC are played the same way as Audio CDs. D E Move G Select 1 Press the MENU button twice and then use the D / E button to select OTHERS. 2 Press the G button and then use D / E button to select PBC. 3 Press the G button and then use D / E button to select On or Off.
DivX(R) VOD Div-X OTHERS PBC DivX(R) Video on demand Auto Play DivX(R) VOD G Your registration code is : XXXXXXXX Select To lern more visit www.divx.com.vod (Done) F Prev. D E Move G Select 1 Press the MENU button twice and then use the D / E button to select OTHERS. 2 Press the G button and then use D / E button to select DivX(R) VOD. 3 Press the G and OK button. 4 Press the EXIT button to exit the menu.
DVD OPERATION Playing a DVD or V ideo CD Basic Playback DVD-V VCD DivX 1 Press the POWER button to turn the unit on. 2 Press OPEN/CLOSE button to open the disc tray and load your chosen disc in the tray, with the playback side down. 3 Press OPEN/CLOSE button to close the tray. Playback starts automatically. If playback does not start, press G PLAY button. DVD OPERATION Stop Playback DVD-V VCD DivX 1 Press the A STOP button to stop playback.
Slow Motion DVD-V VCD DivX II PAUSE/STEP button on the remote control during playback. 1 Press The DVD player will now go into PAUSE mode. 2 Use the FF SCAN or GG SCAN button to select the required speed: F I 1/16, F I 1/8, F I 1/4, or F I 1/2 (backward), or I G 1/16, I G 1/8, I G 1/4, or I G 1/2 (forward). With a DivX Disc and Video CD, the Slow speed changes: I G 1/16, I G 1/8, I G 1/4 or I G 1/2 (forward). 3 To exit Slow Motion mode, press G PLAY button.
DVD OPERATION Playing a DVD or V ideo CD Disc Menu DVD-V 1 Press the DISC MENU button during playback. 2 Use the D / E / F / G button or OK button to select the desired menu option. Title Menu DVD-V 1 Press the TITLE button during playback. 2 Use the D / E / F / G button or OK button to select the desired item. DVD OPERATION 60 Note a. The unit may not be able to select the disc or title menu depending on a sort of DVD disc.
On-Screen Display 1 Press DISPLAY button during playback. 2 Use D / E button to select an item. 3 Press F / G button to change the setting. You can also use the number buttons if appropriate (e.g. inputting the title number). For some functions, press OK to execute the setting. Some discs may not provide all of the features shown below.
DVD OPERATION Playing a DVD or V ideo CD A-B Repeat Playback DVD-V VCD DivX - A-B repeat playback allows you to repeat material between two selected points. Press the A-B button to select the start point during playback. “ A * ” is dis1 played on the TV screen and the starting point of your selected segment is set up. the A-B button again to select the end point. “ 2 Press the TV screen and the ending point is set up. A B ” is displayed on Playback starts at the point that you selected.
Subtitles DVD-V DivX 1 Press SUB_T button repeatedly during playback to see the different subtitle languages. If a subtitle language is selected, the selected subtitle language is played whenever you start a new disc playback. (The disc must contain the selected language) Note a. The subtitle file of the DivX file is displayed only smi, srt and sub. b. If there is no information or there is a code that can not read in the DivX file, “ 1 ” etc are displayed.
DVD OPERATION Playing an Audio CD or MP3/WMA Disc - The DVD player can play MP3/WMA formatted recordings on CD-ROM, CD-R, or CD-RW discs. A Audio CD A CD 1. Once you insert an audio CD a menu appears on the TV screen. 2. Press D / E button to select a track then press G PLAY or OK button. Playback starts. MP3 / WMA WMA 1. Press D / E button to select a folder, and press OK button to see the folder contents. 2. Press D / E button to select a track then press G PLAY or OK button. Playback starts.
Repeat Playback CD MP3 WMA - You can play a track/all on a disc. 1 Press the GIF REPEAT button during playback. 2 Each time you press the GIF REPEAT button, the repeat mode changes as follows. Track → All → (Off) • If you press GGI SKIP button once during repeat track playback, the repeat playback cancels. A-B Repeat Playback CD - A-B repeat playback allows you to repeat material between two selected points. 1 Press the A-B button to select the start point during playback.
DVD OPERATION Programmed Playback - The program function enables you to store your favorite tracks from any disc in the player memory. A program can contain 30 tracks. 1 Insert a disc. 2 Press PROGRAM button. The E mark will appear to the right of the word Program on the right side of the menu screen. • Press PROGRAM button again, then the E mark will disappear to exit the Program Edit mode.
V iewing a JPEG Disc - Using this DVD Player you can view Kodak PICTURE CDs and discs with JPEG files. 1 Insert a disc and close the tray. The PHOTO menu appears on the TV screen. PHOTO List JPEG Folder 1 JPEG Folder 2 JPEG Folder 3 JPEG Folder 4 JPEG Folder 5 JPEG Folder 6 JPEG Folder 7 JPEG Folder 8 Preview E and want to return to the previous Folder list, use the D ton.
DVD OPERATION V iewing a JPEG Disc A To listen to MP3/WMA music watching picture You can display files while listening to MP3/WMA music files recorded on the same disc. 1. Insert the disc containing the two types of file in the player. 2. Press TITLE button to display PHOTO menu. 3. Press D / E button to select a photo file. icon then press OK button. 4. Use G button to select Playback starts. The playback will continue until A STOP button is pressed.
Playing a DivX Movie Disc - Using this DVD Player you can play DivX (Digital Internet Video eXpress) disc. 1 Insert a disc and close the tray. The MOVIE menu appears on the TV screen. MOVIE A 0 : 00 : 00 List Movie Folder 1 Movie Folder 2 Movie Folder 3 Movie Folder 4 Movie Folder 5 Movie Folder 6 Movie Folder 7 Movie Folder 8 Data Duration E and want to return to the Folder list, use the D / E button on the remote to highlight and press OK button.
PICTURE CONTROL PICTURE SIZE (ASPECT RATIO) CONTROL This feature lets you choose the way an analog picture with a 4:3 aspect ratio is displayed on your TV. ■ RGB-PC input source use 4:3 or 16:9 aspect ratio. ! NOTE G PICTURE CONTROL If a fixed image is displayed on the screen for a long time, the image could become imprinted on the screen and remain visible. This phenomenon is common to all manufacturers and is not covered by warranty.