LCD TV OWNER’S MANUAL LCD TV MODELS 20LS7D 20LS7DC 23LS7D 23LS7DC Please read this manual carefully before operating your set. Retain it for future reference. Record model number and serial number of the set. See the label attached on the back cover and quote this information to your dealer when you require service. ENERGY STAR is a set of power-saving guidelines issued by the U.S. Environmental Protection Agency(EPA). As an ENERGY STAR Partner LGE U. S. A.,Inc.
WARNING / CAUTION WARNING / CAUTION To prevent fire or shock hazards, do not expose this product to rain or moisture. TO REDUCE THE RISK OF ELECTRIC SHOCK DO NOT REMOVE COVER (OR BACK). NO USER SERVICEABLE PARTS INSIDE. REFER TO QUALIFIED SERVICE PERSONNEL.
SAFETY INSTRUCTIONS IMPORTANT SAFETY INSTRUCTIONS Important safety instructions shall be provided with each apparatus. This information shall be given in a separate booklet or sheet, or be located before any operating instructions in an instruction for installation for use and supplied with the apparatus. This information shall be given in a language acceptable to the country where the apparatus is intended to be used. The important safety instructions shall be entitled “Important Safety Instructions”.
8 Use only with the cart, stand, tripod, bracket, or table specified by the manufacturer, or sold with the apparatus. When a cart is used, use caution when moving the cart/apparatus combination to avoid injury from tip-over. 9 Unplug this apparatus during lightning storms or when unused for long periods of time. 10 Refer all servicing to qualified service personnel.
CONTENTS WARNING / CAUTION . . . . . . . . . . . . . . . . . . . . . . . . . . . . 1 PICTURE CONTROL SAFETY INSTRUCTIONS . . . . . . . . . . . . . . . . . . . . . . . . . . 2 Picture Size (Aspect Ratio) Control . . . . . . . . . . . . . . . . . . 37 Preset Picture Settings . . . . . . . . . . . . . . . . . . . . . . . . . . . . . . . . . . . . . 39 - EZ Picture - Preset . . . . . . . . . . . . . . . . . . . . . . . . . . . . . . . . . . . . 39 - Color Tone - Preset. . . . . . . . . . . . . . . . . . . .
TIME SETTING Clock Setting . . . . . . . . . . . . . . . . . . . . . . . . . . . . . . . . . . . . . . . . . . . . . . . . . . 55 - Auto Clock Setup . . . . . . . . . . . . . . . . . . . . . . . . . . . . . . . . . . . . 55 - Manual Clock Setup . . . . . . . . . . . . . . . . . . . . . . . . . . . . . . . . . 56 Auto On/Off Timer Setting . . . . . . . . . . . . . . . . . . . . . . . . . . . . . 57 Sleep Timer Setting . . . . . . . . . . . . . . . . . . . . . . . . . . . . . . . . . . . . . . . . .
INTRODUCTION FEATURE OF THIS TV LG's own special digital image generator, consisting of a full digital image processor, six different main picture quality factors. Manufactured under license from Dolby Laboratories. “Dolby “and the double-D symbol are trademarks of Dolby Laboratories. High-definition television. High-resolution digital television broadcast and playback system composed of roughly a million or more pixels, 16:9 aspect-ratio screens, and AC3 digital audio.
PREPARATION ACCESSORIES 3 5 7 6 8 - 9 0 TV FA V BA CK PO W ER SA P PICT MU TE UR 2 4 EX IT INPU D T TIM ER 6 8 - 9 0 VO L UN 3 5 7 Owner's Manual E SO 1 CH C PREPARATION Ensure that the following accessories are included with your product. If an accessory is missing, please contact the dealer where you purchased the product. User must use shielded signal interface cables (D-sub 15 pin cable) with ferrite cores to maintain standard compliance for the product.
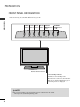
PREPARATION FRONT PANEL INFORMATION ■ Here shown may be somewhat different from your TV. PREPARATION POWER INPUT MENU ENTER VOLUME CHANNEL Button Button Button Button (F,G)Buttons (E,D)Buttons /I INPUT MENU ENTER VOL CH Remote Control Sensor Power Standby Indicator Illuminates red in standby mode. When the TV is turned on, the indicator blinks green and then illuminates green before the picture is displayed. ! NOTE G 8 If your TV stand has a protection film, remove it attached to the stand.
BACK PANEL INFORMATION ■ Here shown may be somewhat different from your TV. PREPARATION 9 4 2 1 3 HDMI/DVI IN AV IN S-VIDEO AUDIO VIDEO SERVICE ONLY ANTENNA/ CABLE IN L(MONO) RGB (PC) IN AUDIO IN (RGB/DVI) 5 R H/P RS-232C IN (CONTROL & SERVICE) 8 AUDIO VIDEO COMPONENT IN 7 6 1 SERVICE ONLY 5 2 HDMI/DVI IN Connect a HDMI signal to this jack. Or DVI (Video) signal to this jack with a HDMI to DVI cable. RGB (PC) IN Connect the output from a PC.
PREPARATION STAND INSTALLATION ■ Here shown may be somewhat different from your TV. PREPARATION 1 Assemble parts of the stand body with cover base of the stand. Insert the stand body into a cover base until clicking sound. stand body cover base 10 2 Carefully place the product screen side down on a cushioned surface that will protect product and screen from damage. 3 Place the product stand on the product as shown.
DETACHING STAND ■ Here shown may be somewhat different from your TV. Carefully place the product screen side down on a cushioned surface that will protect product and screen from damage. 2 Pull cover base backward while pressing button on stand body. 3 Shake the base while pulling, it will separate from stand body. 4 Hold the stand and bend it upward. 5 Pull stand body to separate from set while pressing the 2 latches.
PREPARATION BACK COVER FOR WIRE ARRANGEMENT ■ Here shown may be somewhat different from your TV. PREPARATION 1 Connect the cables as necessary. To connect an additional equipment, see the E X T E R N A L E Q U I P M E N T S E T U P section. 2 Install the C A B L E M A N A G E M E N T as shown. How to remove the CABLE MANAGEMENT First, press the cable management. Hold the C A B L E M A N A G E M E N T with both hands and pull it upward.
POSITIONING YOUR DISPLAY ■ Here shown may be somewhat different from your TV. ■ Adjust the position of the panel in various ways for maximum comfort.
PREPARATION VESA WALL MOUNTING This product accepts a VESA-compliant mounting interface pad. (optional) There 4 threaded holes are available for attaching the bracket. PREPARATION 100 mm 100 mm ! NOTE G Screw length needed depends on the wall mount used. For further information, refer to the VESA Wall Mounting Instruction Guide. DESKTOP PEDESTAL INSTALLATION For proper ventilation, allow a clearance of 4inches on all four sides from the wall.
KENSINGTON SECURITY SYSTEM PREPARATION - The TV is equipped with a Kensington Security System connector on the back panel. Connect the Kensington Security System cable as shown below. - For the detailed installation and use of the Kensington Security System, refer to the user’s guide provided with the Kensington Security System. For further information, contact h t t p : / / w w w . k e n s i n g t o n . c o m, the internet homepage of the Kensington company.
PREPARATION ANTENNA OR CABLE CONNECTION 1. Antenna (Analog or Digital) PREPARATION Wall Antenna Socket or Outdoor Antenna without a Cable Box Connections. For optimum picture quality, adjust antenna direction if needed.
EXTERNAL EQUIPMENT SETUP ■ To prevent the equipment damage, never plug in any power cords until you have finished connecting all equipment. HD RECEIVER SETUP This TV can receive Digital Over-the-air/Cable signals without an external digital set-top box. However, if you do receive digital signals from a digital set-top box or other digital external device, refer to the figure as shown below. EXTERNAL EQUIPMENT SETUP When connecting Component cable 1.
EXTERNAL EQUIPMENT SETUP When connecting HDMI cable 1. How to connect EXTERNAL EQUIPMENT SETUP 1 Connect the digital set-top box to H D M I / D V I I N jack on the set. 2 No separated audio connection is necessary. HDMI supports both audio and video. AV IN VIDEO AUDIO S-VIDEO SERVICE ONLY L(MONO) R 2. How to use ■ ■ Turn on the digital set-top box. (Refer to the owner’s manual for the digital set-top box.
When connecting HDMI to DVI cable AV IN VIDEO AUDIO L(MONO) S-VIDEO RGB (PC) IN SERVICE ONLY AUDIO IN (RGB/DVI) R 1 H/P RS-232C IN (CONTROL & SERVICE) AUDIO VIDEO COMPONENT IN 2 DVI-DTV OUTPUT L EXTERNAL EQUIPMENT SETUP ANTENNA/ CABLE IN HDMI/DVI IN R 1. How to connect 1 Connect the DVI output of the digital set-top box to the H D M I / D V I I N jack on the set. 2 Connect the audio output of the digital set-top box to the A U D I O I N ( R G B / D V I) jack on the set. 2.
EXTERNAL EQUIPMENT SETUP DVD SETUP When connecting Component cable 1. How to connect EXTERNAL EQUIPMENT SETUP 1 2 Connect the video outputs (Y, PB, PR) of the DVD to the C O M P O N E N T I N V I D E O jacks on the set. Match the jack colors (Y = green, PB = blue, and PR = red). Y Connect the audio outputs of the DVD to the C O M P O N E N T I N A U D I O jacks on the set. PB 1 AV IN VIDEO ■ Turn on the DVD player, insert a DVD.
When connecting with an S-Video cable 1. How to connect ANTENNA/ CABLE IN HDMI/DVI IN AV IN 1 Connect the S-VIDEO output of the DVD to the S - V I D E O input on the set. VIDEO L(MONO) Connect the audio outputs of the DVD to the A U D I O input jacks on the set. Turn on the DVD player, insert a DVD. ■ Select A V input source by using the I N P U T button on the remote control. ■ Refer to the DVD player's manual for operating instructions. RR H/P 32C IN & SERVICE) AUDIO VIDEO COMPONENT IN 2.
EXTERNAL EQUIPMENT SETUP VCR SETUP To avoid picture noise (interference), leave an adequate distance between the VCR and TV. ■ If the 4:3 picture format is used; the fixed images on the sides of the screen may remain visible on the screen. This phenomenon is common to all manufactures and in consequence the manufactures warranty does not cover the product bearing this phenomenon.
HDMI/DVI IN When connecting with a RCA cable 1. How to connect 1 AV IN VIDEO AUDIO S-VIDEO RGB SERVICE ONLY L(MONO) V I D E O jacks between TV and Connect the A U D I O/V VCR. Match the jack colors (Video = yellow, Audio Left = white, and Audio Right = red) R H/P RS-232C IN (CONTROL & SERVICE) 1 2. How to use ■ Insert a video tape into the VCR and press PLAY on the VCR. (Refer to the VCR owner’s manual.) ■ Select A V input source by using the I N P U T button on the remote control.
EXTERNAL EQUIPMENT SETUP HEADPHONE SETUP You can listen to the sound through the headphone. 1. How to connect EXTERNAL EQUIPMENT SETUP 24 1 Plug the headphone into the headphone socket. HDMI/DVI IN 2 To adjust the headphone volume, press the V O L + or - button. If you press the M U T E button, the sound from the headphone is switched off.
PC SETUP This TV provides Plug and Play capability, meaning that the PC adjusts automatically to the TV's settings. AV IN When connecting D-sub 15pin cable 1. How to connect Connect the RGB output of the PC to the R G B ( P C) I N jack on the set. 2 Connect the PC audio output to the A U D I O I N ( R G B / D V I) jack on the set. L(MONO) AUDIO IN (RGB/DVI) RGB (PC) IN R /P AUDIO VIDEO COMPONENT IN 1 2 RGB OUTPUT AUDIO 2. How to use ■ Turn on the PC and the TV.
EXTERNAL EQUIPMENT SETUP ! NOTES EXTERNAL EQUIPMENT SETUP G To get the the best picture quality, adjust the PC graphics card to 1024x768, 60Hz. G Depending on the graphics card, DOS mode may not work if a HDMI to DVI Cable is in use. G If the video doesn’t fit the screen, try pressing the ADJUST button to adjust the screen position of TV. G Check the image on your TV. There may be noise associated with the resolution, vertical pattern, contrast or brightness in PC mode.
Screen Setup for PC mode CC MENU EXIT ADJUST Overview When the RGB input of the set is connected to a PC output, select the RGB-PC as the main input mode. When HDMI connect to PC output and select HDMI/DVI input, this function is used. After connecting RGB-PC or HDMI/DVI to PC ouput and checking the screen quality. When you change the resolution, select the proper resolution in present input to see the best picture appearance.
WATCHING TV / CHANNEL CONTROL REMOTE CONTROL FUNCTIONS When using the remote control, aim it at the remote control sensor on the TV. SAP Analog mode: Selects MTS sound (Mono, Stereo, or a SAP) G p.49 DTV mode: Changes the audio language. POWER TV SAP INPUT PICTURE SOUND TIMER PICTURE Selects the factory preset picture depend on the viewing environment. G p.39 WATCHING TV / CHANNEL CONTROL SOUND Selects the factory preset sound for type of program. G p.
POWER Turns your TV or any other programmed equipment on or off, depending on the mode. TV In AV, Component, RGB-PC, and HDMI/DVI input sources, screen returns to the last TV channel. INPUT External input modes rotate in regular sequence: TV, AV, Component, RGB-PC, and HDMI/DVI. (AV, Component, RGB-PC, and HDMI/DVI input sources are linked automatically, only if a device is connected.) — (DASH) Used to enter a program number for multiple program channels such as 2-1, 2-2, etc.
WATCHING TV / CHANNEL CONTROL TURNING ON TV POWER TV First, connect power cord correctly. At this moment, the TV switches to standby mode. ■ In standby mode to turn TV on, press the , INPUT, C H (+ or -)) button on the TV or press the POWER, T V, INPUT, C H (+ or -)), Number (0~9 9 ) button on the remote control. 1 WATCHING TV / CHANNEL CONTROL Select the viewing source by using the T V, INPUT button on the remote control.
ON-SCREEN MENUS SELECTION Your TV's OSD (On Screen Display) may differ slightly from what is shown in this manual. 1 Press the M E N U button and then use D or E button to select the each menu. 2 Press the G button and then use D E F G button to display the available menus.
WATCHING TV / CHANNEL CONTROL CC CHANNEL SETUP MENU EXIT ADJUST Auto Scan (EZ Scan) ENTER WATCHING TV / CHANNEL CONTROL Automatically finds all channels available through antenna or cable inputs, and stores them in memory on the channel list. Run EZ Scan again after any Antenna/Cable connection changes. A password is required to gain access to EZ Scan menu if the Lock System is turned on. EZ Scan 1 Press the M E N U button and then use D or E button to select the S E T U P menu.
CC MENU EXIT ADJUST Add/Delete Channel (Manual Scan) ENTER A password is required to gain access to Manual Scan menu if the Lock System is turned on. 1 Manual Scan Channel Edit DTV Signal Input Source Set ID 2 Press the G button and then use D or E button to select Manual Scan. 1 3 Press the G button and then use D or E button to select T V, D T V, C A T V, and C A D T V. EZ Scan Manual Scan Channel Edit G Select channel type and RF-channel number.
WATCHING TV / CHANNEL CONTROL - 0 FAV BACK Channel Editing VOL MUTE CH CC WATCHING TV / CHANNEL CONTROL There are two different ways in order to add or delete scanned channels. One is "Custom List" and the other is "Favorite List" in the channel list. Both of them are available after EZ Scan on the SETUP menu. A Custom List can be created by toggling each channel on or off with ENTER button.
CC DTV SIGNAL STRENGTH MENU This feature displays the DTV signal levels being received and indicates whether you need to adjust your antenna or digital cable input. The higher the signal strength, the less likely you are to experience picture degradation. DTV Signal: This function is only available when the input signal is DTV or CADTV. EXIT ENTER EZ Scan Press the M E N U button and then use D or E button to select the S E T U P menu.
WATCHING TV / CHANNEL CONTROL CC INPUT SOURCE SELECTION MENU Changes the picture source so you can watch your off-air TV, cable TV, VCR, DVD, or any other devices that are connected to your TV. ADJUST EXIT ENTER WATCHING TV / CHANNEL CONTROL EZ Scan 1 Press the M E N U button and then use to select the S E T U P menu. D or E button Manual Scan Channel Edit DTV Signal Input Source Set ID 2 Press the G button and then use select I n p u t S o u r c e .
PICTURE CONTROL PICTURE SIZE (ASPECT RATIO) CONTROL CC MENU This feature allows an analog picture with a 4:3 aspect ratio is displayed on your TV. When you receive an analog picture with a 4:3 aspect ratio on your 16:9 TV, you need to specify how the picture is to be displayed. ■ RGB-PC input source use 4:3 or 16:9 aspect ratio. ADJUST EXIT ENTER ! NOTE G Press the M E N U button and then use to select the O P T I O N menu.
PICTURE CONTROL Set by program Horizon Selects the proper picture proportion to match the source’s image. The screen size is, more enlarged at both sides, to create a spectacular view. (4:3 4:3) Horizon Set By Program PICTURE CONTROL (16:9 16:9) Zoom Choose Zoom when you want to view the picture without any alteration. However, the top and bottom portions of the picture will be cropped. Set By Program 4:3 Choose 4:3 when you want to view a picture with an original 4:3 aspect ratio.
PRESET PICTURE SETTINGS POWER TV EZ Picture - Preset EZ Picture adjusts the TV for the best picture appearance. Select the preset value in the EZ Picture menu based on the program category. D a y l i g h t, N o r m a l, N i g h t T i m e Settings are preset for the optimum picture quality at the factory and are not adjustable. In the U s e r 1 and U s e r 2 modes only, user can directly adjust the contrast, brightness, color, sharpness, tint.
PICTURE CONTROL MUTE VOL CH CC MENU ADJUST EXIT Color Tone - Preset Choose one of three automatic color adjustments. Set to warm to enhance hotter colors such as red, or set to cool to see less intense colors with more blue. ENTER PICTURE CONTROL EZ Picture 1 Press the M E N U button and then use to select the V I D E O menu. D or E button Color Temperature XD Advanced Video Reset 2 Press the G button and then use select C o l o r T e m p e r a t u r e.
MANUAL PICTURE ADJUSTMENT VOL MUTE CH CC MENU ADJUST EXIT EZ Picture - User Mode Adjust the picture appearance to suit your preference and viewing situations. ENTER PICTURE CONTROL EZ Picture 1 Press the M E N U button and then use to select the V I D E O menu. D or E button Color Temperature XD Advanced Video Reset 2 Press the G button and then use select E Z P i c t u r e. D or E button to 1 3 4 Press the G button and then use select U s e r 1 or U s e r 2.
PICTURE CONTROL MUTE VOL CH CC MENU ADJUST EXIT Color Tone - User Mode You can also adjust the detailed settings (Red, Green, Blue) by selecting the C o l o r T e m p e r a t u r e - U s e r menu. PICTURE CONTROL 1 Press the M E N U button and then use to select the V I D E O menu. D or E ENTER EZ Picture button Color Temperature XD Advanced Video Reset 2 Press the G button and then use select C o l o r T e m p e r a t u r e.
XD - PICTURE IMPROVEMENT TECHNOLOGY MUTE VOL MENU ADJUST XD is LG Electronic’s unique picture improving technology to display a real HD source through an advanced digital signal processing algorithm. When selecting EZ Picture options (Daylight, Normal and Night time), XD is automatically changed to Auto. When selecting EZ Picture options (User 1 and User 2), you can choose the Auto / Manual. When selecting the Manual, you can adjust the XD Contrast, XD color and XD Noise.
PICTURE CONTROL ADVANCED - BLACK (DARKNESS) LEVEL VOL MUTE CH CC MENU EXIT ADJUST Adjusting the contrast and the brightness of the screen using the black level of the screen. This feature operates only in AV or HDMI/DVI. ENTER PICTURE CONTROL 1 Press the M E N U button and then use to select the V I D E O menu. D or E EZ Picture button Color Temperature XD Advanced Video Reset 2 Press the G button and then use select A d v a n c e d.
PICTURE RESET VOL MUTE CH CC MENU ADJUST EXIT Use to quickly reset all the Video menu options to their original factory preset values. ENTER PICTURE CONTROL EZ Picture 1 Press the M E N U button and then use to select the VIDEO menu. D or E button Color Temperature XD Advanced Video Reset 2 Press the G button and then use select Video Reset. D or E button to 1 3 Press the G button to reset the Video menu options to original values.
SOUND & LANGUAGE CONTROL PRESET SOUND SETTINGS (EZ SOUND) POWER TV EZ Sound lets you enjoy the best sound without any special adjustment because the TV sets the appropriate sound options based on the program content. Normal, Stadium, News, Music and Theater are preset for good sound quality at the factory and are not adjustable. When you select the Stadium or Theater, the AUDIO menuBalance option is disabled and the Balance option is set to 0 automatically.
SOUND SETTING ADJUSTMENT - USER MODE MUTE VOL CH CC Adjust the sound to suit your taste and room situations. MENU ADJUST EXIT ENTER Audio Language EZ Sound Balance 1 Press the M E N U button and then use to select the A U D I O menu. D or E 2 Press the G button and then use select E Z S o u n d. or E button to 1 Audio Language 3 Press the G button and then use select U s e r.
SOUND &LANGUAGE CONTROL BALANCE VOL MUTE CH CC MENU ADJUST EXIT Adjust the left/right sound of speaker to suit your taste and room situations. ENTER Audio Language SOUND & LANGUAGE CONTROL 1 Press the M E N U button and then use D or E button to select the A U D I O menu. 2 Press the G button and then use D or E button to select B a l a n c e. EZ Sound Balance 1 3 Press the G button and then use F or G button to make appropriate adjustments.
STEREO/SAP BROADCASTS SETUP POWER TV This TV can receive MTS stereo programs and any SAP (Secondary Audio Program) that accompanies the stereo program if the station transmits an additional sound signal as well as the original one and when you select Stereo or SAP on the remote control. Mono sound is automatically received if the broadcast is only in Mono; even though Stereo or SAP has been selected. Select Mono if you want to listen to the mono sound in remote areas during stereo/SAP broadcasting.
SOUND &LANGUAGE CONTROL AUDIO LANGUAGE VOL MUTE CH CC MENU ADJUST EXIT Other languages may be available if a digital signal is provided by the broadcasting station. This feature operates only in DTV/CADTV mode. ENTER Audio Language SOUND & LANGUAGE CONTROL 1 Press the M E N U button and then use D or E button to select the A U D I O menu. 2 Press the G button and then use D or E button to select A u d i o L a n g u a g e.
ON-SCREEN MENUS LANGUAGE SELECTION VOL MUTE CH CC MENU ADJUST EXIT The menus can be shown on the screen in the selected language. First select your language. ENTER Aspect Ratio 1 Press the M E N U button and then use D or E button to select the O P T I O N menu. Caption/Text Caption Option 2 Press the G button and then use D or E button to select L a n g u a g e . 1 3 Press the G button and then use D or E button to select your desired language.
SOUND &LANGUAGE CONTROL CAPTION / TEXT VOL MUTE CH CC MENU ADJUST Analog Broadcasting System Captions Select a caption mode for displaying captioning information if provided on a program. Analog caption displays information at any position on the screen and is usually the program's dialog. Text displays information, usually at the bottom position and is used for a data service, generally not program related.
MUTE VOL CH CC MENU ADJUST EXIT Digital Broadcasting System Captions Choose the language you want the DTV/CADTV Captions to appear in. Other Languages can be chosen for digital sources only if they are included on the program. 1 ENTER Aspect Ratio Press the M E N U button and then use D or E button to select the O P T I O N menu. Caption/Text Caption Option 2 Press the G button and then use D or E button to T e x t.
SOUND &LANGUAGE CONTROL CAPTION OPTION VOL MUTE CH CC MENU EXIT ADJUST Customize the DTV/CADTV captions that appear on your screen. ENTER Aspect Ratio Press the M E N U button and then use D or E button to select the O P T I O N menu. 1 Caption/Text Caption Option Language SOUND & LANGUAGE CONTROL Press the G button and then use D or E button to select C a p t i o n O p t i o n. 2 1 Press the G button and then use F or G button to select C u s t o m.
TIME SETTING CLOCK SETTING MUTE VOL CH CC MENU EXIT ADJUST Auto Clock Setup The time is set automatically from a digital channel signal. The digital channel signal includes information for the current time provided by the broadcasting station. Set the clock manually if the current time is set incorrectly by the auto clock function. The factory default value of the Auto Clock is Off, because a clock information sent each broadcasting station is different.
TIME SETTING VOL MUTE CH CC MENU ADJUST EXIT Manual Clock Setup If the current time setting is wrong, reset the clock manually. ENTER 1 Press the M E N U button and then use to select the T I M E menu. D or E Auto Clock button Manual Clock Off Timer On Timer Sleep Timer TIME SETTING 2 Press the G button and then use select M a n u a l C l o c k. 3 Press the G button and then use F or G button to select either the year, date, or time option.
AUTO ON/OFF TIMER SETTING MUTE VOL CC MENU Press the M E N U button and then use to select the T I M E menu. D or E EXIT ADJUST The timer function operates only if the current time has been set. The Off-Timer function overrides the On-Timer function if they are both set to the same time. The TV must be in standby mode for the On-Timer to work. If you do not press any button within 2 hours after the TV turns on with the On Timer function, the TV will automatically revert to standby mode.
TIME SETTING SLEEP TIMER SETTING POWER TV The Sleep Timer turns the TV off at the preset time. Note that this setting is cleared when the TV is turned off. INPUT PICTURE SOUND SAP TIMER 1 2 3 4 5 6 7 8 9 - 0 FAV BACK VOL 1 Press the T I M E R button repeatedly to select the number of minutes. First the O f f option appears on the screen, followed by the following sleep timer options : 10, 20, 30, 60, 90, 120, 180, and 240 minutes.
AUTO SHUT-OFF SETTING MUTE VOL CH CC MENU ADJUST EXIT If set to on and there is no input signal, the TV turns off automatically after 10 minutes. ENTER Auto Clock 1 Press the M E N U button and then use D or E button to select the T I M E menu. Manual Clock Off Timer On Timer Sleep Timer Auto Off Press the G button and then use D or E button to select A u t o O f f. 1 3 Press the G button and then use D or E button to select O n or O f f.
PARENTAL CONTROL / RATINGS Parental Control can be used to block specific channels, ratings and other viewing sources. The Parental Control Function (V-Chip) is used to block program viewing based on the ratings sent by the broadcasting station. The default setting is to allow all programs to be viewed. Viewing can be blocked by choosing the type of the program and the categories. It is also possible to block all program viewing for a time period. To use this function, the following must be done : 1.
Set Password Change the password by inputting a new password twice. For USA After inputting the password, use the D or E button to choose S e t p a s s w o r d. 1 Press the G button and then choose any 4 digits for your new password. As soon as the 4 digits are entered, re-enter the same 4 digits on the C o n f i r m. Then your changed password has been memorized. 2 Press E X I T to return to TV viewing or press M E N U to return to the previous menu.
PARENTAL CONTROL /RATINGS CHANNEL BLOCKING Blocks any channels that you do not want to watch or that you do not want your children to watch. Lock System Set Password Block Channel 1 After inputting the password, use the to choose B l o c k C h a n n e l. D or E button G Selection ( G or ) leads you to the block channel screen. Movie Rating TV Rating-Children TV Rating-General Input Block 2 Press the G button. You will now see a screen filled with channel numbers and a preview picture.
MOVIE & TV RATING VOL MUTE CH CC MENU ADJUST EXIT Movie Rating (MPAA) - for USA only Blocks movies according to the movie ratings limits specified, so children cannot view certain movies. You can set the ratings limit by blocking out all the movies with the ratings above a specified level. Keep in mind that the movie ratings limit only applies to movies shown on TV, not TV programs, such as soap operas.
PARENTAL CONTROL /RATINGS TV Rating Children - for USA only Prevents children from watching certain children's TV programs, according to the ratings limit set. The children rating does not apply to other TV programs. Unless you block certain TV programs intended for mature audiences in the TV Rating - sub menu, your children can view those programs.
TV Rating English - for CANADA only Selecting canadian english language rating system. 1 After inputting the password, use the choose T V R a t i n g - E n g l i s h. D or E Lock System button to Set Password Block Channel TV Rating-English 2 Press the G button and then use the D or E button to select E , C , C 8 +, G , P G, 1 4 +, 1 8 +, or B l o c k i n g O f f.
APPENDIX TROUBLESHOOTING The operation does not work normally. Check to see if there is any object between the product and the remote control causing obstruction. Ensure you are pointing the remote control directly at the TV. ■ Ensure that the batteries are installed with correct polarity (+ to +, - to -). ■ Ensure that the correct remote operating mode is set: TV, VCR etc. ■ Install new batteries.
The audio function does not work. Press the VOL or VOLUME button. ■ Sound muted? Press MUTE button. ■ Try another channel. The problem may be with the broadcast. ■ Are the audio cables installed properly? ■ Picture OK & No sound No output from one of the speakers ■ Adjust Balance in menu option. ■ A change in ambient humidity or temperature may result in an unusual noise when the product is turned on or off and does not indicate a fault with the product.
APPENDIX MAINTENANCE Early malfunctions can be prevented. Careful and regular cleaning can extend the amount of time you can enjoy your new TV. Caution: Be sure to turn the power off and unplug the power cord before you begin any cleaning. Cleaning the Screen Here’s a great way to keep the dust off your screen for a while. Wet a soft cloth in a mixture of lukewarm water and a little fabric softener or dish washing detergent. Wring the cloth until it’s almost dry, and then use it to wipe the screen.
PRODUCT SPECIFICATIONS ■ The specifications shown above may be changed without prior notice for quality improvement. 20LS7D (20LS7D-UB) 20LS7DC (20LS7DC-UB) MODELS 19.7 x 15.8 x 6.9 inches 22.9 x 18.1 x 7.8 inches 499.4 x 401.2 x 175.1 mm 581.3 x 458.9 x 198.8 mm 19.7 x 14.0 x 2.9 inches 22.9 x 16.3 x 3.3 inches 499.4 x 355.0 x 72.9 mm 581.3 x 412.9 x 83.9 mm including stand 14.1 pounds / 6.4 kg 17.9 pounds / 8.1 kg excluding stand 13.2 pounds / 6.0 kg 16.1 pounds / 7.
APPENDIX EXTERNAL CONTROL THROUGH RS-232C The RS-232C port allows you connect the RS-232C input jack to an external control device (such as a computer or an A/V control system) to control the TV’s functions externally. ■ Note: RS-232C on this unit is intended to be used with third party RS-232 control hardware and software. The instructions below are provided to help with programming software or to test functionality using telenet software.
RS-232C Configurations Either cable below can be used. 7-Wire Configuration (Serial female-female NULL modem cable) PC TV 2 3 5 4 6 7 8 3 2 5 6 4 8 7 D-Sub 9 D-Sub 9 RXD TXD GND DTR DSR RTS CTS 3-Wire Configurations (Not standard) TXD RXD GND DSR DTR CTS RTS PC TV 2 3 5 4 6 7 8 3 2 5 6 4 7 8 D-Sub 9 D-Sub 9 RXD TXD GND DTR DSR RTS CTS Set ID MENU Use this function to specify a TV ID number. Refer to ‘Real Data Mapping’. G p.73.
APPENDIX Command Reference List COMMAND1 COMMAND2 DATA (Hexadecimal) COMMAND1 COMMAND2 DATA (Hexadecimal) k j 0 ~ 64 11. Sharpness k k 0 ~ 64 12. OSD Select k l 0~1 k m 0~1 10. Tint 01. Power k a 0~1 02. Input Select k b (G p.73) 03. Aspect Ratio k c (G p.73) 04. Screen Mute k d 0~1 13. Remote Control 05. Volume Mute k e 0~1 Lock Mode 06. Volume Control k f 0 ~ 64 14. Treble k r 0 ~ 64 07. Contrast k g 0 ~ 64 15. Bass k s 0 ~ 64 08.
0 1 . Power (Command2:a) To control Power On/Off of the TV. Transmission [k][a][ ][Set ID][ ][Data][Cr] Data 0 : Power Off Data 1 : Power On Acknowledgement [a][ ][Set ID][ ][OK/NG][Data][x] * In a like manner, if other functions transmit ‘FF’ data based on this format, Acknowledgement data feedback presents status about each function. * In this model, TV will send the Acknowledge after power on processing completion. * There might be a time delay between command and acknowledgement. 02.
APPENDIX 10. Tint (Command2:j) 16. Balance (Command2:t) To adjust the screen tint. You can also adjust tint in the Video menu. Transmission [k][j][ ][Set ID][ ][Data][Cr] Data Red : 0 ~ Green : 64 To adjust balance. You can also adjust balance in the Audio menu. Transmission [k][t][ ][Set ID][ ][Data][Cr] Data Min: 0 ~ Max: 64(*transmit by Hexadecimal code) *Refer to ‘Real data mapping’. G p.73. Acknowledgement [ j ][ ][Set ID][ ][OK/NG][Data][x] *Refer to ‘Real data mapping’. G p.73.
Data5: 7 Main/Sub Picture 6 Two/One Part Channel 5 Using Physical Channel 4 3 2 1 0 Step NTSC Air NTSC Cable ATSC Air ATSC Cable_std ATSC Cable_hrc ATSC Cable_irc ATSC cable_auto Reserved Reserved Reserved 0 Main 0 Two 0 Use x 0 0 0 0 1 1 One 1 No Use x 0 0 0 1 x 0 0 1 0 x 0 0 1 1 x 0 1 0 0 x 0 1 0 1 x 0 1 1 0 x 0 1 1 1 x x x x x x 1 1 1 1 The table above lists the binary code which must be converted to Hexadecimal before sending.