website http://www.lgservice.com OWNER'S MANUAL FRANÇAIS ITALIANO LG Floor Standing-Type Air Conditioner ENGLISH LG ESPAÑOL ESPAÑOL FRANÇAIS DEUTSCH IMPORTANT • Please read this owner's manual carefully and thoroughly before installing and operating your air conditioner. • Please retain this owner's manual for future reference after reading it thoroughly.
Floor Standing- Type Air Conditioner Owner’s Manual TABLE OF CONTENTS FOR YOUR RECORDS Safety Precautions.................3 Write the model and serial numbers here: Model # Serial # Operating Instructions...........9 You can find them on a label on the side of each unit. Dealer's Name Date Purchased Care and Maintenance .........24 Before you call for service .............................26 Celsius(°C) ↔ Fahrenheit (°F) Convert Table .......................
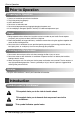
Safety Precautions Safety Precautions To prevent injury to the user or other people and property damage, the following instructions must be followed. ■ Incorrect operation due to ignoring instruction will cause harm or damage. The seriousness is classified by the following indications. WARNING This symbol indicates the possibility of death or serious injury. CAUTION This symbol indicates the possibility of injury or damage. ■ Meanings of symbols used in this manual are as shown below.
Safety Precautions Do not modify or extend the power cable. • There is risk of fire or electric shock. For installation, always contact the dealer or an Authorized Service Center. • There is risk of fire, electric shock, explosion, or injury. Do not install, remove, or reinstall the unit by yourself (customer). • There is risk of fire, electric shock, explosion, or injury. Do not install the product on a defective installation stand. • It may cause injury, accident, or damage to the product.
Safety Precautions Do not allow water to run into electric parts. • It may cause There is risk of fire, failure of the product, or electric shock. Do not store or use flammable gas or combustibles near the product. • There is risk of fire or failure of product. Do not use the product in a tightly closed space for a long time. • Oxygen deficiency could occur. Gasolin When flammable gas leaks, turn off the gas and open a window for ventilation before turn the product on.
Safety Precautions When the product is not be used for a long time, disconnect the power supply plug or turn off the breaker. • There is risk of product damage or failure, or unintended operation. Take care to ensure that nobody could step on or fall onto the outdoor unit. • This could result in personal injury and product damage. CAUTION ■ Installation Always check for gas (refrigerant) leakage after installation or repair of product. • Low refrigerant levels may cause failure of product.
Safety Precautions Use a soft cloth to clean. Do not use harsh detergents, solvents, etc. • It may cause product failure. • There is risk of fire, electric shock, or damage to the plastic parts of the product. Do not touch the metal parts of the product when removing the air filter. They are very sharp! • There is risk of personal injury. ENGLISH Do not block the inlet or outlet of air flow. x Wa Thinner Do not step on or put anyting on the product. (outdoor units) Always insert the filter securely.
Prior to Operation Prior to Operation Preparing for Operation 1. Contact an installation specialist for installation. 2. Plug in the power plug properly. 3. Use a dedicated circuit. 4. Do not use an extension cord. 5. Do not start/stop operation by plugging/unplugging the power cord. 6. If the cord/plug is damaged, replace it with only an authorized replacement part. Usage 1. Being exposed to direct airflow for a long time may be hazardous to your health.
Operating Instructions Operating Instructions Features and Specifications ENGLISH 1. Design for cooling 6. 3 cooling speeds 2. Super energy efficiency 7. Removable air filter 3. Micom control 8. Anti-Bacteria filter 4. Whisper quiet operation 9. 3 minutes delay circuit 5.
Operating Instructions Indoor Unit Controls and Indicators 7 9 6 5 8 11 2 10 4 1 3 1. START/STOP BUTTON Operation starts when this button is pressed and stops when the button is pressed again. 6. COOLING OPERATION LAMP 2. OPERATION MODE SELECTION BUTTON Used to select the operation Mode. 8. OUTDOOR UNIT OPERATION LAMP 3. ROOM TEMPERATURE SETTING BUTTONS Used to select the room temperature. 10. OFF TIMER OPERATION LAMP 4.
Operating Instructions Features of the Remote Control- Door Closed START/STOP BUTTON 2 ROOM TEMPERATURE SETTING BUTTONS Operation starts when this button is pressed and stops when the button is pressed again. Used to select the room temperature. 5 4 3 3 1 INDOOR FAN SPEED SELECTOR Used to select fan speed in 3 steps low, high, super high. 2 4 TURBO-Z 5 AUTO AIRFLOW DIRECTION CONTROL BUTTON Flip-up door (closed) Used to start or stop the speed cooling.
Operating Instructions Features of the Remote Control- Door Opened ON OFF 4 1 ON/OFF TIMER BUTTONS 2 TIME SETTING BUTTONS 3 TIMER SET/CANCEL BUTTONS 4 SIMPLE OFF TIMER SET BUTTON SET CANCEL 3 6 9 8 Used to set the timer when the desired time is obtained and to cancel the Timer operation.
Operating Instructions Remote Control Preparation ENGLISH 1. How to mount onto a wall Use the screws to secure the holder to the wall or attach the holder side of indoor unit. 2. To insert the remote control to the holder. Insert Pull How to insert batteries 1. Remove the cover from the back of the remote controller. • Slide the cover according to the arrow direction. • Do not use rechargeable batteries such batteries as different from standard dry cells in shape, dimensions, and performance. 2.
Operating Instructions How to use the Operation Mode Button • Each time the Operation Mode Selection Button is pressed, the Operation Mode is shifted in the arrow direction. Auto Operation Cooling Operation Soft Dry Operation Open the door on the remote control. Each time the button is pressed, the operation mode is shifted in the direction of the arrow.
Operating Instructions Cooling Operation Mode 2 3 ENGLISH 1 Press the Start/Stop Button. Press the Operation Mode Selection Button. Press the Operation Mode Button on the remote controller. Select Cooling Operation. ON OFF SET CANCEL Set the temperature lower than the room temperature. The temperature can be set within a range of 60°F~86°F by 1°F. To raise the temperature To lower the temperature 4 Set the Fan Speed.
Operating Instructions Soft Dry Operation 1 2 3 Press the Start/Stop Button. Press the Operation Mode Selection Button. Press the Operation Mode Button on the remote controller. Select Soft Dry Operation. ON OFF SET CANCEL Set the temperature lower than the room temperature. The temperature can be set within a range of 60°F~86°F by 1°F.
Operating Instructions Auto Operation Mode 2 3 ENGLISH 1 Press the Start/Stop Button. Press the Operation Mode Selection Button. Press the Operation Mode Button on the remote controller. Select Auto Dry Operation. ON OFF SET CANCEL Set the temperature upper or lower than the standard temperature. The temperature can be set within a range of by 1 level. Cold Cool Proper Warm Hot (This indication will be shifted to the initial Auto Mode Display state after 4 seconds.) To raise the temperature.
Operating Instructions Turbo-Z Operation 1 Press the Start/Stop Button. 2 Press the TURBO-Z button to operate the speed cooling mode and the unit will operate in super high fan speed in cooling mode. 3 To cancel the TURBO-Z mode, press the TURBO-Z button again or the Auto Swing Direction Control Button (Up & Down, Left & Right) or Operation Mode Button and the unit will operate in High. Fan speed on cooling mode.
Operating Instructions Press °C ↔ °F Switching Button. 2 ENGLISH 1 Press the Start/Stop Button. Press the Operation Mode button and Low temperature setting buttons simultaneously for 3 seconds. The unit will respond with beep. After 3 second, it will shift 3 Press °C ↔ °F Switching Button. ON OFF SET CANCEL Auto restart In case the power comes on again after a power failure, Auto Restarting Operation is the function to operate procedures automatically to the previous operating conditions.
Operating Instructions Fan Operation Mode 1 3 Press the Start/Stop Button. 2 Press Fan Operation Button. ON OFF SET CANCEL Set the Fan Speed. ❑ Each time the Button is pressed, the Fan Speed mode is shifted. Fan speed is on Low. Fan speed is on High Fan speed is on Super High Airflow Direction Procedure 1 Press the Start/Stop Button. 2 ON OFF SET CANCEL Press this button to make the vertical louver auto swing in right and left directions.
Operating Instructions OFF Timer Setting Procedure(OFF TIMER Setting, or CANCEL) 2 ENGLISH 1 Press the Start/Stop Button. Press the Timer Button. ON OFF SET CANCEL • If you press the button, the selected off timer is displayed as follows; • If you select ‘ ’, the Off Timer function will be cancelled. 3 When you finish the Off Timer setting, the Timer indicator lights off.
Operating Instructions Child Lock Operation Procedure 1 Press the fan speed button and High temperature setting buttons simultaneously for 3 seconds. The unit will respond with beep. After 3 second, it will shift 2 After 3 seconds, it will shift During Child Lock Operation ➊ Whenever you press any Button, it will immediately display “ ”, which means Button is Locked. ❷ All the Button on the indoor unit will not work. ❸ But the Button on the remote controller will work.
Operating Instructions Additional features ENGLISH Setting the Time 1 Time can be set only when you have pressed the Reset button. If you have just replaced the batteries, the Reset button should be pressed to reset the time. 2 Press the Time Setting buttons until the desired time is set. Press the Start/Stop button. 3 Press the Timer SET button. SET Note: Check the indicator for A.M. and P.M. Delay Start/Pre-Set Stop 1 Make sure the time is set correctly on the remote control display.
Care and Maintenance Care and Maintenance CAUTION: Before performing any maintenance, turn off the main power to the system. During the season Cleaning of the air filters. Recommended about once every two weeks 1 Remove the Air Filter. Take hold of the tab and pull slightly forward to remove the filter. Cleaning of the air conditioner • Don’t wash with water. • Wipe with a soft dry cloth. There’s the danger of electrical shock. 24 Floor Standing-Type Air Conditioner 2 Clean.
Care and Maintenance When the air conditioner is not going to be used for a long time. 1 Operate the air conditioner at the following settings for 2 to 3 hours. • Type of operation : Cooling. • Temperature setting : 86°F. 2 This will dry out the internal mechanisms. Remove the batteries from the Remote Control. 3 Turn off the circuit breaker. At the start of the season 1 Clean the air filters, re-insert, then operate the air conditioner.
Before you call for service... Before you call for service... Troubleshooting Tips! Save time and money! Check the following points before requesting repairs or service.... If the fault persists, please contact your dealer or service center. Case Does not operate.
Celsius(°C) ↔ Fahrenheit (°F) Convert Table Celsius(°C) ↔ Fahrenheit (°F) Convert Table °F 32 33 34 35 36 37 38 39 40 41 42 43 44 45 46 47 48 49 50 51 52 53 54 55 56 57 58 59 60 61 62 63 64 65 66 67 68 69 70 71 72 73 74 75 76 77 °C 26 26 27 27 28 28 29 29 30 31 31 32 32 33 33 34 34 35 36 36 37 37 38 38 39 39 40 41 41 42 42 43 43 44 44 45 46 46 47 47 48 48 49 49 50 °F 78 79 80 81 82 83 84 85 86 87 88 89 90 91 92 93 94 95 96 97 98 99 100 101 102 103 104 105 106 107 108 109 110 111 112 113 114 115 116 117 1
Memo 28 Floor Standing-Type Air Conditioner