ENGLISH ESPAÑOL OWNER'S MANUAL DRYER Read this owner's manual thoroughly before operating the appliance and keep it handy for reference at all times. DLE3500*, DLG3501* DLEX3700*, DLGX3701* DLEX3900*, DLGX3901* MFL67652514 Rev.00_011018 www.lg.com Copyright © 2018 LG Electronics Inc. All Rights Reserved.
TABLE OF CONTENTS 3 PRODUCT FEATURES 43 SMART FUNCTIONS 43 45 LG SmartThinQ Application Smart Diagnosis™ Function 4 SAFETY INSTRUCTIONS 5 IMPORTANT SAFETY INSTRUCTIONS 47 MAINTENANCE 9 PRODUCT OVERVIEW 47 9 9 Parts Accessories 48 TROUBLESHOOTING 10 INSTALLATION 10 10 11 12 14 15 16 17 18 19 21 26 26 27 Installation Overview Product Specifications Installation Location Requirements Clearances Leveling the Dryer Reversing the Door Installing the Side Vent Kit Stacking the Dryer Venting the
PRODUCT FEATURES 3 PRODUCT FEATURES Rotate the cycle selector knob to select the desired dry cycle. Add cycle options or adjust settings with the touch of a button. Easy-Access Reversible Door The wide-opening door provides easy access for loading and unloading. The door hinge can be reversed to adjust for installation location. Steam Functions (Steam Models) LG’s steam technology allows you to inject fabrics with a swirling jet of hot steam to refresh clothes, reduce static, and make ironing easier.
SAFETY INSTRUCTIONS SAFETY INSTRUCTIONS READ ALL INSTRUCTIONS BEFORE USE Your safety and the safety of others are very important. We have provided many important safety messages in this manual and on your appliance. Always read and follow all safety messages. This is the safety alert symbol. This symbol alerts you to potential hazards that can kill or injure you and others. All safety messages will follow the safety alert symbol and either the word WARNING or CAUTION.
SAFETY INSTRUCTIONS 5 IMPORTANT SAFETY INSTRUCTIONS WARNING California Safe Drinking Water and Toxic Enforcement Act • This product contains chemicals known to the state of California to cause cancer and birth defects or other reproductive harm. Wash hands after handling. INSTALLATION • Before use, the appliance must be properly installed as described in this manual. • Connect to a properly rated, protected, and sized power circuit to avoid electrical overload.
SAFETY INSTRUCTIONS • Place the dryer at least 18 inches above the floor for a garage installation. • Do not use sheet metal screws or other fasteners which extend into the duct that could catch lint and reduce the efficiency of the exhaust system. Secure all joints with duct tape. • Use only rigid, semi-rigid or flexible metal 4-inch diameter duct inside the dryer cabinet or for exhausting to the outside. Use of plastic or other combustible ductwork may cause a fire.
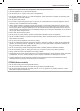
SAFETY INSTRUCTIONS 7 • Read all instructions before using the appliance and save these instructions. • Use this appliance only for its intended purpose. • Do not allow children to play on, in or with the appliance. Close supervision of children is necessary when the appliance is used near children. • Do not tamper with controls. • In the event of a gas leak (propane gas, LP gas, etc.) do not operate this or any other appliance. Open a window or door to ventilate the area immediately.
SAFETY INSTRUCTIONS MAINTENANCE • Do not repair or replace any part of the appliance. All repairs and servicing must be performed by qualified service personnel unless specifically recommended in this Owner’s Manual. Use only authorized factory parts. • Do not disassemble or repair the appliance by yourself. • Remove any dust or foreign matter from the power plug pins. • Disconnect this appliance from the power supply before cleaning and attempting any user maintenance.
PRODUCT OVERVIEW 9 PRODUCT OVERVIEW Reversible door ENGLISH Parts Power Cord (gas models) Terminal Block Access Panel (electric models) Control panel Lint filter Leveling feet Gas connection (gas models) Exhaust Duct Outlet Accessories Included Accessories Drying Rack (on some models) Optional Accessories Pedestal (sold separately) Stacking kit (sold separately) NOTE • For your safety and extended product life, use only authorized components.
INSTALLATION INSTALLATION Installation Overview Please read the following installation instructions first after purchasing this product or transporting it to another location. Check and choose the proper location Level the dryer Connect the Gas dryer Vent the dryer Connect the Electric dryer Gas dryer Electric dryer Plug in the power cord Installation test Test run Product Specifications The appearance and specifications listed in this manual may vary due to constant product improvements.
INSTALLATION 11 Installation Location Requirements WARNING The installation requires: • A location that allows for proper exhaust installation. A gas dryer must be exhausted to the outdoors. See Venting the Dryer. • A grounded electrical outlet located within 2 ft. (61 cm) of either side of the dryer. See Connecting Electric Dryers. • A sturdy floor to support the total dryer weight of 200 lb (90.7 kg). The combined weight of a companion appliance should also be considered.
INSTALLATION Clearances 14" max.* (356 mm) 14" max.* (356 mm) 18" min.* (457 mm) 18" min.* (457 mm) 1"* 30" (25 mm) (761mm) 1"* 30" (25 mm) (761mm) 5"** (127 mm) 5"** (127 mm) 3" * (76 mm) 48 in. 2* (310 cm 2 ) 0" (0 mm) 39" (991 mm) 24 in. 2* (155 cm 2) 1" (25 mm) 3" * (76 mm) Closet Door Vent Requirements 1" (25 mm) 27" (686 mm) 27" (686 mm) 1" (25 mm) 1" (25 mm) Installation Spacing for Recessed Area or Closet Installation The following clearances are recommended for this dryer.
INSTALLATION 13 Installation Spacing for Recessed Area or Closet, with Stacked Washer and Dryer ENGLISH 48 in. 2* 2 6" * (152 mm) 3" * (76 mm) (310 cm ) 77 ½" (1968 mm) 24 in. 2* (155 cm 2) 3" * (76 mm) 1"* (25 mm) 5 ½" ** (140 mm) 1" (25 mm) 27" (686 mm) 1" (25 mm) * Required spacing ** For side or bottom venting, 2-inch (5.1 cm) of spacing is allowed. Installation Spacing for Cabinet For cabinet installation with a door, minimum ventilation openings in the top of the cabinet are required.
INSTALLATION Leveling the Dryer 2 WARNING To reduce the risk of serious injury or death, follow basic precautions, including the following: • Use long-sleeved gloves and safety glasses. • The appliance is heavy. Two or more people are required when installing the dryer. NOTE • Adjust the leveling feet only as far as necessary to level the dryer. Extending the leveling feet more than necessary may cause the dryer to vibrate.
INSTALLATION 15 Reversing the Door 2 While supporting the door, remove the 2 screws on the door hinge. Remove the door. 3 Turn the door upside down and line up the holes in the hinge with the holes on the opposite side of the cabinet. Reinstall the door with the screws removed in step 2.
INSTALLATION Installing the Side Vent Kit 3 WARNING To reduce the risk of serious injury, death or property damage, follow basic precautions, including the following: • Use long-sleeved gloves and safety glasses. • Use a heavy metal vent. Preassemble a 4-inch (10.2 cm) elbow to the next 4-inch (10.2 cm) duct section, and secure all joints with duct tape. Be sure that the male end of the elbow faces AWAY from the dryer.
INSTALLATION 17 Stacking the Dryer Stacking Kit Installation 1 Make sure the surface of the washer is clean and dry. Remove paper backing from the tape on one of the stacking kit side brackets. 2 Fit the side bracket to the side of the washer top as shown in the below illustration. Firmly press the adhesive area of the bracket to the washer surface. Secure the side bracket to the washer with a screw on the back side of the bracket. Repeat steps 1 and 2 to attach the other side bracket.
INSTALLATION Venting the Dryer WARNING To reduce the risk of fire or explosion, electric shock, property damage, injury to persons or death when using this appliance, follow basic safety precautions, including the following: WARNING • Ductwork is not provided with the dryer. You should obtain the necessary ductwork locally. The vent hood should have hinged dampers to prevent backdraft when the dryer is not in use. • The total length of flexible metal duct must not exceed 8 ft. (2.4 m).
INSTALLATION 19 Routing and Connecting Ductwork • Use 4-inch (10.2 cm) diameter rigid, semi-rigid or flexible metal ductwork. • The exhaust duct run should be as short as possible. • Use as few elbow joints as possible. • The male end of each section of exhaust duct must point away from the dryer. • Use duct tape on all duct joints. • Insulate ductwork that runs through unheated areas in order to reduce condensation and lint buildup on duct surfaces.
INSTALLATION WARNING Gas Supply Requirements (continued) • Supply line requirements: Your laundry room must have a rigid gas supply line to your dryer. In the United States, an individual manual shutoff valve MUST be installed within at least 6 ft. (1.8 m) of the dryer, in accordance with the National Fuel Gas Code ANSI Z223.1 or Canadian gas installation code CSA B149.1. A 1/8-inch NPT pipe plug must be installed. • If using a rigid pipe, the rigid pipe should be 0.5-inch IPS.
INSTALLATION 21 Connecting Electric Dryers To reduce the risk of fire or explosion, electric shock, property damage, injury to persons, or death when using this appliance, follow requirements including the following: Electrical Requirements for Electric Models Only • The wiring and grounding must conform to the latest edition of the National Electrical Code, ANSI/NFPA 70 and all applicable local regulations.
INSTALLATION Four-Wire Power Cord • A 4-wire connection is required for all mobile and manufactured home installations, as well as all new construction after January 1, 1996. 8 Tighten all screws securely. 9 Reinstall the terminal block access cover. Hot (Black) • A UL-listed strain relief is required. • Use a 30-amp, 240-volt, 4-wire, UL-listed power cord with #10 AWGminimum copper conductor and closed loop or forked terminals with upturned ends.
Four-Wire Direct Wire • A 4-wire connection is required for all mobile and manufactured home installations, as well as all new construction after January 1, 1996. • A UL-listed strain relief is required. • Use UL-listed 4-wire #10 AWGminimum copper conductor cable. Allow at least 5 ft. (1.5 m) of wire to allow for removal and reinstallation of the dryer. 1 Remove 5-inch (12.7 cm) of the outer covering from the wire. Remove 5-inch of insulation from the ground wire. Cut off approximately 1.5-inch (3.
INSTALLATION Three-Wire Power Cord • A 3-wire connection is NOT permitted on new construction after January 1, 1996. • A UL-listed strain relief is required. • Use a 30-amp, 240-volt, 3-wire, UL-listed power cord with #10 AWGminimum copper conductor and closed loop or forked terminals with upturned ends. 1 Remove the terminal block access cover on the upper back of the dryer. 2 Install a UL-listed strain relief into the power cord through-hole.
INSTALLATION 25 6 Attach the neutral (white) wire to the center terminal block screw. • A UL-listed strain relief is required. 7 Connect the external ground (if required by local codes) to the green ground screw. 8 Tighten all screws securely. 9 Reinstall the terminal block access cover. • A 3-wire connection is NOT permitted on new construction after January 1, 1996. • Use UL-listed 3-wire, #10 AWGminimum copper conductor cable. Allow at least 5 ft. (1.
INSTALLATION Special Electrical Requirements (For Mobile or Manufactured Homes) • Any installation in a manufactured or mobile home must comply with the Manufactured Home Construction and Safety Standards Title 24 CFR, Part 3280 or Standard CAN/ CSA Z240 MH and local codes and ordinances. If you are uncertain whether your proposed installation will comply with these standards, please contact a service and installation professional for assistance.
INSTALLATION 27 Installation Test (Duct Check) 4 • Your dryer features Flow Sense™, an innovative sensing system that automatically detects blockages and restrictions in dryer ductwork. Keeping ductwork clean of lint buildup and free of restrictions allows clothes to dry faster and reduces energy use. Press the START/PAUSE button. The dryer will start the test, which will last a few minutes. The heat will be turned on and the temperatures in the drum will be measured. Check the display for results.
INSTALLATION Check the Duct Condition If the Flow Sense™ LED is turned on, check the exhaust system for restrictions and damage. Repair or replace the exhaust system as needed. NOTE • When the dryer is first installed, this test should be performed to alert you to any existing problems with the exhaust duct in your home.
INSTALLATION 29 Restricted or Blocked Airflow Avoid long runs or runs with multiple elbows or bends. ENGLISH Excess or crushed transition duct Too many elbows or exhaust too long Check for blockages and lint buildup. Lint buildup or blockage Make sure the ductwork is not crushed or restricted.
OPERATION OPERATION WARNING • To reduce the risk of fire, electric shock, or injury to persons, read the SAFETY INSTRUCTIONS before operating this appliance. Using the Dryer 1 Clean the Lint Filter 2 Load the Dryer 3 Turn on the Dryer 4 Select a Cycle If the lint filter has not already been cleaned, lift out the filter and remove the lint from the last load. This will help ensure the fastest and most efficient drying performance.
OPERATION 31 Check the Lint Filter Before Every Load Always ensure the lint filter is properly installed before running the dryer. Running the dryer with a loose or missing lint filter will damage the dryer and articles in the dryer. For best results, sort clothes into loads that can be dried with the same drying cycle. Different fabrics have different care requirements, and some fabrics will dry more quickly than others.
OPERATION Control Panel Non-Steam Models (DLE3500*, DLG3501*) 7 1 2 6 3 5 4 Steam Models (DLEX3700*, DLGX3701*) 8 7 1 2 3 6 5 4 Steam Models (DLEX3900*, DLGX3901*) 8 7 1 2 3 NOTE • Model numbers can be found on the cabinet inside the door.
OPERATION 33 1 Power Button Press the button to turn the dryer ON. Press again to turn the dryer OFF. 2 Cycle Selector Knob Turn this knob to select the desired cycle. Once the desired cycle has been selected, the standard presets will be shown in the display. On Manual Dry cycles, these settings can be adjusted using the cycle Modifier buttons anytime before starting the cycle. 3 Start/Pause Button Press this button to start the selected cycle.
OPERATION 9 13 14 10 15 11 12 9 Flow Sense™ Duct Blockage Sensing System Indicator The Flow Sense™ duct blockage sensing system detects and alerts you to blockages in the ductwork that reduce exhaust flow from the dryer. Maintaining a clean exhaust system improves operating efficiency and helps minimize service calls, saving you money. 10 Custom PGM If you have a special combination of settings that you use frequently, you can save these settings as a Custom Program.
OPERATION 35 Cycle Guide Sensor Dry cycles utilize LG’s unique dual sensor system to detect and compare the moisture level in clothes and in the air and adjust the drying time as needed to ensure superior results. The dryer automatically sets the dryness level and temperature at the recommended setting for each cycle. The estimated time remaining will be shown in the display. NOTE • To protect your garments not every dryness level, temperature, or option is available with every cycle.
OPERATION Non-Steam Models (DLE3500*, DLG3501*) = default setting ● = allowable option * = Energy Saver Cycle Fabric Type Dry Level Temp. Time in Min. Wrinkle Care Damp Dry Signal Anti Bacterial SENSOR DRY Normal* Work clothes, corduroys, etc. Normal Heavy Duty Jeans, heavyweight items Normal Bedding Comforters, Pillows, Shirts Normal Towels Denims, towels, heavy cottons Normal Small Load Only normal & cotton/ towels fabric type (Max. 3lb) Normal Perm.
OPERATION 37 Steam Models (DLEX3700*, DLGX3701*) = default setting ● = allowable option * = Energy Saver Fabric Type Dry Level Temp. Time in Min. Wrinkle Care Damp Dry Signal Reduce Static ● ● ● ● ● ● SENSOR DRY Normal Normal* Work clothes, corduroys, etc. Heavy Duty Jeans, heavyweight items Normal Bedding Comforters, pillows, shirts Normal Anti Bacterial Do not use this cycle with delicate fabrics Very Perm.
OPERATION Steam Models (DLEX3900*, DLGX3901*) = default setting ● = allowable option * = Energy Saver Cycle Fabric Type Dry Level Temp. Time in Min. Wrinkle Care Damp Dry Signal Reduce Static SENSOR DRY Normal* Work clothes, corduroys, etc. Normal Heavy Duty Jeans, heavyweight items Normal Bedding Comforters, pillows, shirts Normal Small Load Only normal & cotton/ towels fabric type (Max. 3lb) Normal Anti Bacterial Do not use this cycle with delicate fabrics Very Perm.
OPERATION 39 Option Buttons Sensor Dry cycles have preset settings that are selected automatically. Manual Dry cycles have default settings, but you may also customize the settings using the cycle modifier buttons. Press the button for that option to view and select other settings. The dryer features several additional cycle options to customize cycles to meet individual needs.
OPERATION Special Functions Some cycle option buttons also activate secondary functions. These special functions are marked with an asterisk (*). Press and hold the option button marked with the special function to activate it. Control Lock Use this option to prevent unwanted use of the dryer or to keep cycle settings from being changed while the dryer is operating. Activating the Control Lock Function Press and hold the Wrinkle Care button for 3 seconds.
OPERATION 41 Using the Steam Fresh™ Cycle Turn on the dryer and turn the cycle selector knob to select the Steam Fresh™ cycle. 2 To add an option function, select Reduce Static, or Wrinkle Care. 3 The display shows the load size (number of items). Change the steam time by pressing the More Time or Less Time buttons to fit the size of the load. 4 Press Start/Pause to start the cycle.
OPERATION STEAM STEAM SANITARY™ STEAM FRESH™ STEAM OPTION TIME DRY DEFAULT TIME TEMP. DRY LEVEL 39 minutes 20 minutes FABRIC STATE FABRIC TYPE MAXIMUM AMOUNT Comforter Bedding Single (1 each) Children’s clothing 3 lbs. Comforter Single (1 each) Shirts* 5 each Dry Shirts* 8 lbs. (18 Items.) Dry ● Dry REDUCE STATIC 10 minutes REDUCE STATIC FOLLOWS SELECTED CYCLE ● Wet Varies by selected cycle 8 lbs. (18 Items.
SMART FUNCTIONS 43 SMART FUNCTIONS The LG SmartThinQ application allows you to communicate with the appliance using a smartphone. Before Using LG SmartThinQ • For appliances with the 1 or logo Use a smartphone to check the strength of the wireless router (Wi-Fi network) near the appliance. • If the distance between the appliance and the wireless router is too far, the signal strength becomes weak. It may take a long time to register or installation may fail.
SMART FUNCTIONS LG SmartThinQ Application Features • For appliances with the or logo Dryer Cycle Download new and special cycles that are not included in the basic cycles on the appliance. Appliances that have been successfully registered can download a variety of specialty cycles specific to the appliance. Only one cycle can be stored on the appliance at a time. Once cycle download is completed in the appliance, the appliance keeps the downloaded cycle until a new cycle is downloaded.
SMART FUNCTIONS 45 FCC RF Radiation Exposure Statement This equipment should be installed and operated with a minimum distance of 20 cm (7.8 inches) between the antenna and your body. Users must follow the specific operating instructions for satisfying RF exposure compliance. Open Source Software Notice Information To obtain the source code under GPL, LGPL, MPL, and other open source licenses, that is contained in this product, please visit http://opensource.lge.com.
SMART FUNCTIONS SmartThinQ Smart Diagnosis™ • For appliances with the or logo Use the Smart Diagnosis feature in the SmartThinQ application for help diagnosing issues with the appliance without the assistance of the LG Customer Information Center. Follow the instructions in the SmartThinQ application to perform a Smart Diagnosis using your smartphone. NOTE • Smart Diagnosis™ cannot be activated unless the appliance can be turned on using the Power button.
MAINTENANCE 47 MAINTENANCE WARNING To reduce the risk of fire, electric shock, injury to persons, or death when using this appliance, follow basic precautions, including the following: Vent ductwork should be checked for lint buildup once per month and cleaned at least once per year. If any noticeable reduction in airflow or drying performance occurs, immediately check ductwork for obstructions and blockages. Contact a qualified technician or service provider.
TROUBLESHOOTING TROUBLESHOOTING FAQs: Frequently Asked Questions Q: When I press a button, why does my dryer beep and then nothing happens? A: The Control Lock feature is turned on. To turn off Control Lock, turn the dryer on, then press and hold the button that has *Control Lock on or under it for 3 seconds. Q: Why does my dryer take so long to dry clothes? A: Proper airflow is critical to the efficient operation of clothes dryers.
TROUBLESHOOTING 49 Before Calling for Service Operation Problem Possible Cause The Flow Sense™ indicator remains active after clearing the restriction in the venting. After clearing the restriction, the Flow Sense™ system requires multiple, consecutive cycles to determine that the performance value has improved before the Flow Sense™ indicator is reset. • If the Flow Sense™ indicator remains active for more than five cycles after the restriction has been cleared, call for service.
TROUBLESHOOTING Problem Clothes take too long to dry Drying time is not consistent Possible Cause Solutions Large load of heavy fabrics. • Heavy fabrics take longer to dry because they tend to retain more moisture. To help reduce and maintain more consistent drying times for large and heavy fabrics, separate these items into smaller loads of a consistent size. Dryer controls are not set properly. • Use the appropriate control settings for the type of load you are drying.
TROUBLESHOOTING 51 Performance Problem Clothes are wrinkled Clothes are shrinking Solutions ••Confirm and follow the instructions provided with your fabric softener. Clean and dirty clothes are being dried together. ••Use your dryer to dry only clean items. Soil from dirty clothes can transfer to the clean clothes in the same or later loads. Clothes were not properly cleaned or rinsed before being placed in the dryer.
TROUBLESHOOTING Problem Excess static in clothes after drying Possible Cause Solutions Fabric softener is not used or used incorrectly. ••Use a fabric softener or the REDUCE STATIC option, if equipped, to reduce static electricity. Be sure to follow the manufacturer’s instructions. Clothes dried too long (overdried). ••Overdrying a load of laundry can cause a buildup of static electricity. Adjust settings and use a shorter drying time, or use MANUAL DRY cycles.
TROUBLESHOOTING 53 Steam Functions (Steam Models) Problem Possible Cause Solutions This is normal. Garments still wrinkled after Steam Fresh™ Too many or overly different types of garments in dryer. ••Small loads of 1 to 5 items work best. Load fewer garments. Load similar types of garments. Creases or pleats are gone from garments after Steam Fresh™ The function of this cycle is to remove wrinkles from fabric. ••Use an iron to replace creases and pleats in garments.
TROUBLESHOOTING Error Codes Problem Possible Cause Solutions Error code: tE1 through tE7 Temperature sensor failure. ••Turn off the dryer and call for service. Display shows error code: PS Power cord is connected incorrectly. ••Check the connection of the power cord to the terminal block. Exhaust system is too long or has too many turns/restrictions. ••Install a shorter or straighter duct run. See the Installation Instructions for details.
WARRANTY 55 WARRANTY Should your LG Dryer (“Product”) fail due to a defect in materials or workmanship under normal home use, during the warranty period set forth below, LG will at its option repair or replace the product. This limited warranty is valid only to the original retail purchaser of the product and applies only when purchased and used within the United States including U.S. Territories. Proof of original retail purchase is required to obtain warranty service under this limited warranty.
WARRANTY ••Products with original serial numbers that have been removed, altered, or cannot be readily determined. Model and serial numbers, along with original retail sales receipts, are required for warranty validation. ••Increases in utility costs and additional utility expenses. ••Repairs when your product is used for other than normal and usual household use (e.g. commercial use, in offices and recreational facilities) or contrary to the instructions outlined in the product’s owner’s manual.
WARRANTY 57 PROCEDURE FOR RESOLVING DISPUTES: Definitions. For the purposes of this section, references to “LG” mean LG Electronics U.S.A., Inc.
WARRANTY Hearings and Location. If your claim is for $25,000 or less, you may choose to have the arbitration conducted solely on the basis of (1) documents submitted to the arbitrator, (2) through a telephonic hearing, or (3) by an in-person hearing as established by the AAA Rules. If your claim exceeds $25,000, the right to a hearing will be determined by the AAA Rules.
MEMO 59
MEMO
MEMO 61
MEMO
ESPAÑOL MANUAL DEL PROPIETARIO SECADORA Lea el manual del propietario detenidamente previo a operar el electrodoméstico y mantengalo al alcance para futuras referencias. DLE3500*, DLG3501* DLEX3700*, DLGX3701* DLEX3900*, DLGX3901* www.lg.com Copyright © 2018 LG Electronics Inc. Todos los Derechos Reservados.
2 TABLA DE CONTENIDOS 3 CARACTERÍSTICAS DEL PRODUCTO 43 FUNCIONES INTELIGENTES 43 45 Aplicación LG SmartThinQ Función Smart Diagnosis ™ (Diagnóstico Inteligente) 4 INSTRUCCIONES DE SEGURIDAD 5 INSTRUCCIONES IMPORTANTES DE SEGURIDAD 47 MANTENIMIENTO 9 DESCRIPCIÓN GENERAL DEL PRODUCTO 48 SOLUCIÓN DE PROBLEMAS 9 9 Partes Accesorios 48 48 49 10 INSTALACIÓN 10 10 11 12 14 15 16 17 18 19 21 26 26 27 Descripción general de la instalación Especificaciones del producto Requisitos del lugar de ins
CARACTERÍSTICAS DEL PRODUCTO 3 CARACTERÍSTICAS DEL PRODUCTO Panel de control fácil de usar Gire la perilla selectora de ciclos para seleccionar el ciclo de secado deseado. Añada opciones de ciclo o ajuste las configuraciones con solo tocar un botón. Puerta Reversible de Fácil Acceso Funciones de vapor (Modelos con vapor) La tecnología de vapor de LG permite inyectar un chorro de vapor caliente en forma de remolino en los tejidos para refrescar la ropa, reducir la estática y facilitar el planchado.
4 INSTRUCCIONES DE SEGURIDAD INSTRUCCIONES DE SEGURIDAD LEA TODAS LAS INSTRUCCIONES ANTES DE UTILIZAR Su seguridad y la de los demás son muy importantes. Tanto en este manual como en el equipo, hemos proporcionado muchos mensajes de seguridad importantes. Siempre debe leer y respetar todos los mensajes de seguridad. Este es el símbolo de alerta de seguridad. Este símbolo le advierte sobre posibles riesgos que pueden ocasionar lesiones o la muerte a usted o a otros.
INSTRUCCIONES DE SEGURIDAD 5 INSTRUCCIONES IMPORTANTES DE SEGURIDAD ADVERTENCIA Para disminuir el riesgo de explosiones, incendios, descargas eléctricas, quemaduras, lesiones o muerte para las personas que usen este artefacto, siga las precauciones básicas, incluidas las siguientes: INSTALACIÓN ••Antes de ser utilizado, este artefacto debe ser correctamente instalado, conforme a lo descrito en este manual.
6 INSTRUCCIONES DE SEGURIDAD ••Para una instalación en el garaje, coloque la secadora a un altura mínima de 18 pulgadas sobre el piso. ••No utilice tornillos para chapa metálica ni ningún otro tipo de sujetadores que se extiendan dentro del conducto y puedan atrapar pelusa, y, así, reducir la eficiencia del sistema de escape. Asegure todas las uniones con cinta adhesiva para conductos.
INSTRUCCIONES DE SEGURIDAD 7 ••Lea todas las instrucciones antes de usar el artefacto y consérvelas. ••Use el artefacto únicamente para el fin previsto. ••No maltrate la puerta, no se siente ni se pare sobre ella. ••No permita que los niños jueguen con el artefacto. Es necesario supervisar atentamente a los niños cuando el artefacto esté en funcionamiento cerca de ellos. ••No utilice indebidamente los controles.
8 INSTRUCCIONES DE SEGURIDAD MANTENIMIENTO ••No repare ni reemplace ninguna pieza del artefacto. Todas las reparaciones y el servicio de mantenimiento deben ser realizados por un miembro del personal de servicio calificado, a menos que se recomiende lo contrario en este Manual del propietario. Use solamente piezas de fábrica autorizadas. ••No desarme ni repare el artefacto por su cuenta. ••Remueva todo rastro de polvo y material extraño de los pines del enchufe.
DESCRIPCIÓN GENERAL DEL PRODUCTO 9 DESCRIPCIÓN GENERAL DEL PRODUCTO Partes Panel de control Cable de alimentación (Modelos de gas) Panel de acceso del bloque de bornes (Modelos eléctricos) Filtro de pelusa Patas de nivelación Conexión de gas (Modelos de gas) Salida del conducto de escape Accesorios Accesorios incluidos Rejilla de secado (en algunos modelos) Accesorios opcionales Pedestal (se vende por separado) Kit de apilamiento (se vende por separado) NOTA ••Para su seguridad y con el fin de
10 INSTALACIÓN INSTALACIÓN Descripción general de la instalación Lea las siguientes instrucciones de instalación antes de adquirir este producto o transportarlo a otra ubicación.
INSTALACIÓN 11 Requisitos del lugar de instalación ADVERTENCIA ••¡Lea todas las instrucciones de instalación antes de instalar y operar su secadora! Es importante que revise este manual por completo antes de instalar y usar su secadora. En las siguientes páginas, se proporcionan instrucciones detalladas con respecto a las conexiones eléctricas, a las conexiones de gas y a los requisitos de escape. ••Un lugar que permita la instalación correcta del sistema de escape.
12 INSTALACIÓN Espacios libres 14" max.* (356 mm) 14" max.* (356 mm) 18" min.* (457 mm) 18" min.* (457 mm) 1"* 30" (25 mm) (761mm) 1"* 30" (25 mm) (761mm) 5"** (127 mm) 5"** (127 mm) 3" * (76 mm) 48 in. 2* (310 cm 2 ) 0" (0 mm) 39" (991 mm) 24 in.
INSTALACIÓN 13 Espacio necesario para la instalación de lavadora y secadora apiladas en áreas empotradas o dentro de armarios 48 in. 2* 2 6" * (152 mm) 3" * (76 mm) (310 cm ) ESPAÑOL 77 ½" (1968 mm) 24 in. 2* (155 cm 2) 3" * (76 mm) 1"* (25 mm) 5 ½" ** (140 mm) 1" (25 mm) 27" (686 mm) 1" (25 mm) * Separación requerida ** For side or bottom venting, 2-inch (5,1 cm) of spacing is allowed.
14 INSTALACIÓN Nivelación de la secadora 2 ADVERTENCIA Para reducir el riesgo de lesiones graves o muerte, siga las precauciones básicas, que incluyen las siguientes: ••Use guantes con mangas largas y gafas de seguridad. ••El aparato es pesado. Se necesitan dos o más personas para la instalación de la secadora. NOTA ••Ajuste las patas niveladoras solo en la medida necesaria para nivelar la secadora. Si se extienden las patas niveladoras más de lo necesario, esto puede causar vibración de la secadora.
INSTALACIÓN 15 Inversión de la puerta 2 Mientras sostiene la puerta, quite los 2 tornillos de la bisagra de la puerta. Retire la puerta. 3 Coloque la puerta boca abajo y alinee los agujeros en la bisagra con los del lado opuesto del gabinete. Reinstale la puerta con los tornillos removidos en el paso 2.
16 INSTALACIÓN Instalación del kit de ventilación lateral 3 ADVERTENCIA Para reducir el riesgo de lesiones graves, muerte o daños materiales, siga las precauciones básicas, que incluyen las siguientes: ••Use guantes con mangas largas y gafas de seguridad. Ensamble un codo de 4 pulgadas (10,2 cm) a la siguiente sección de conducto de 4 pulgadas (10,2 cm) y asegure todas las conexiones con cinta adhesiva para conductos. Asegúrese de que el extremo macho del codo apunte hacia FUERA de la secadora.
INSTALACIÓN 17 Apilamiento de la secadora Instalación del kit de apilamiento Este kit de apilamiento incluye: Para asegurarse de realizar una instalación segura y sin riesgos, siga las siguientes instrucciones. 1 Asegúrese de que la superficie de la lavadora esté limpia y seca. Quite el papel protector de la cinta adhesiva de uno de los soportes laterales del kit de apilamiento. 2 Ajuste el soporte lateral al lado de la superficie de la lavadora como se muestra en la siguiente ilustración.
18 INSTALACIÓN Ventilación de la secadora ADVERTENCIA Para reducir el riesgo de incendio o explosión, descargas eléctricas, daños a la propiedad, lesiones personales o la muerte al usar este aparato, siga las precauciones básicas de seguridad, incluso lo siguiente: ••No aplaste ni haga colapsar los conductos. ••No permita que los conductos se apoyen sobre objetos puntiagudos ni entren en contacto con ellos.
INSTALACIÓN 19 Recorrido y conexión de los conductos NOTA Siga las pautas a continuación para maximizar el rendimiento de secado, para reducir la acumulación de pelusa y la condensación en los conductos. Los conductos y las conexiones NO están incluidos y deben adquirirse por separado. ••El tendido del conducto de escape debe ser lo más corto posible. ••Use la menor cantidad de conexiones de codos posible. ••El extremo macho de cada sección del conducto de escape debe apuntar hacia fuera de la secadora.
20 INSTALACIÓN ADVERTENCIA Requisitos de suministro de gas (continuación) ••Requerimientos de la línea de suministro: Su cuarto de lavandería debe tener una línea de suministro rígido de gas para su secadora. En los Estados Unidos, una válvula de cierre manual individual DEBE ser instalada a menos de 6 pies (1,8 m) de la secadora, de acuerdo con el Código de Gas de Combustión Nacional ANSI Z223.1 o el código canadiense de instalación de gas CSA B149.1.
INSTALACIÓN 21 Conexión de secadoras eléctricas ADVERTENCIA Requisitos eléctricos para modelos eléctricos únicamente ••El cableado y la descarga a tierra deben cumplir con la última edición del Código Eléctrico Nacional, ANSI/NFPA 70 y todas las regulaciones locales correspondientes. Comuníquese con un electricista calificado para que revise el cableado y los fusibles de su casa para asegurarse de que su casa posee la energía eléctrica adecuada para que funcione la secadora.
22 INSTALACIÓN Cable de alimentación de cuatro hilos ••Se requiere una conexión de 4 hilos en todas las instalaciones de casas móviles y prefabricadas, así como en todas las construcciones nuevas posteriores al 1 de enero de 1996. ••Se requiere un aliviador de tensión homologado por UL. ••Use un cable de alimentación de 30 amperios, 240 voltios, de 4 hilos homologado por UL con un conductor de cobre N.° 10 AWG como mínimo y terminales de bucle cerrado o de horquilla con extremos doblados hacia arriba.
Conexión directa de cuatro hilos ••Se requiere una conexión de 4 hilos en todas las instalaciones de casas móviles y prefabricadas, así como en todas las construcciones nuevas posteriores al 1 de enero de 1996. ••Se requiere un aliviador de tensión homologado por UL. ••Use un cable conductor de cobre de 4 hilos homologado por UL N.° 10 AWG como mínimo. Deje un mínimo de 5 pies (1,5 m) de longitud de cable para poder retirar y reinstalar la secadora.
24 INSTALACIÓN Cable de alimentación de tres hilos ••NO se permite una conexión de 3 hilos en construcciones nuevas posteriores al 1 de enero de 1996. ••Se requiere un aliviador de tensión homologado por UL. 8 Reinstale la cubierta de acceso al bloque de bornes. Vivo (negro) Vivo (rojo) Tornillo de conexión a tierra ••Use un cable de alimentación de 30 amperios, 240 voltios, de 3 hilos homologado por UL con un conductor de cobre N.
INSTALACIÓN 25 Conexión directa de tres hilos ••NO se permite una conexión de 3 hilos en construcciones nuevas posteriores al 1 de enero de 1996. ••Se requiere un aliviador de tensión homologado por UL. Conecte el alambre neutro (blanco) al tornillo central del bloque de bornes. 7 Conecte el cable de conexión a tierra exterior (si así lo requieren los códigos locales) al tornillo de conexión a tierra de color verde. 8 Ajuste bien todos los tornillos.
26 INSTALACIÓN Requisitos eléctricos especiales (Para casas móviles o prefabricadas) ••Toda instalación en una casa móvil o prefabricada debe realizarse de conformidad con los Estándares de seguridad y construcción de casas prefabricadas, Título 24 CFR, Parte 3280 o el Estándar CAN/CSA Z240 MH y con los códigos y las ordenanzas locales.
INSTALACIÓN 27 Prueba de instalación (Revisión de conductos) Después de completar la instalación de la secadora, haga esta prueba para asegurarse de que las condiciones del sistema de escape sean las adecuadas para el funcionamiento correcto de la secadora. Esta prueba debe realizarse para identificar si existe algún problema grave en el sistema de escape de su casa. 3 Presione el botón de START/PAUSE. 4 Verifique la pantalla para ver los resultados.
28 INSTALACIÓN Verifique las condiciones del conducto Si el LED de Flow Sense™ está encendido, revise el sistema de escape para verificar que no haya restricciones ni daños. Repare o reemplace el sistema de escape según sea necesario. NOTA ••Cuando recién se instale la secadora, debe realizarse esta prueba para identificar la presencia de cualquier problema relacionado con el conducto de escape de su casa.
INSTALACIÓN 29 Flujo de aire restringido o bloqueado Evite tendidos largos o con muchos codos o curvas. Demasiado largo o con demasiados codos Compruebe la presencia de bloqueos y acumulación de pelusa. Acumulación de pelusa o bloqueo Asegúrese de que los conductos no estén aplastados ni restringidos.
30 FUNCIONAMIENTO FUNCIONAMIENTO ADVERTENCIA ••Para reducir el riesgo de incendios, descargas eléctricas o lesiones a las personas, lea las INSTRUCCIONES DE SEGURIDAD antes de operar este artefacto. Cómo usar la secadora 1 Limpie el filtro de pelusa 2 Cargue la secadora 3 Encienda la secadora 4 Seleccione un Ciclo Si el filtro de pelusa no se ha limpiado aún, extráigalo y elimine las pelusas de la última carga. Esto le ayudará a asegurar un rendimiento de secado más rápido y eficiente.
FUNCIONAMIENTO 31 Revise el filtro de pelusa antes de cada carga Asegúrese siempre de que el filtro de pelusa esté instalado correctamente antes de poner en funcionamiento la secadora. Hacer funcionar la secadora sin el filtro o con el filtro de pelusa suelto podría dañar la secadora y las prendas que se encuentran en su interior. Para lograr mejores resultados, clasifique las prendas en cargas que puedan secarse con el mismo ciclo de secado.
32 FUNCIONAMIENTO Panel de control Modelos sin Vapor (DLE3500*, DLG3501*) 7 1 2 6 3 5 4 Modelos a Vapor (DLEX3700*, DLGX3701*) 8 7 1 2 3 6 5 4 Modelos a Vapor (DLEX3900*, DLGX3901*) 8 7 1 2 3 NOTA ••Los números de los modelos se encuentran en el gabinete, dentro de la puerta.
FUNCIONAMIENTO 33 1 Botón de Power(Encendido/Apagado) Presione el botón para On (Encendido) la secadora. Presione nuevamente para Off (Apagado) la secadora. NOTA ••Al presionar el botón de Power(Encendido/Apagado) durante un ciclo, ese ciclo se cancelará y se perderá cualquier configuración ingresada. Gire esta perilla para seleccionar el ciclo deseado. Una vez que haya seleccionado el ciclo deseado, aparecerán las configuraciones predeterminadas en la pantalla.
34 FUNCIONAMIENTO 9 13 14 10 15 11 12 9 Indicador del sistema de detección de bloqueo del conducto Flow Sense™ El sistema de detección de bloqueo del conducto Flow Sense™ detecta y alerta en el caso de que haya bloqueos en los conductos que reduzcan el flujo de escape de la secadora. El mantenimiento de un sistema de escape limpio mejora la eficacia de funcionamiento y ayuda a minimizar las llamadas al servicio técnico, lo que le permite ahorrar dinero. 10 Custom PGM (Prog.
FUNCIONAMIENTO 35 Guía de ciclos Ciclos de Sensor Dry(Secado con sensor) NOTA ••Para proteger sus prendas, no todos los niveles de secado, la temperatura o las opciones están disponibles en todos los ciclos. Consulte la Guía de ciclos para obtener más detalles. NSF Internacional (anteriormente Fundación Nacional de Saneamiento), certifica que el ciclo Anti Bacterial (Antibacteriano) reduce el 99.9% de las bacterias en el lavado, y ninguna de las bacterias se transmitirá a la siguiente carga.
36 FUNCIONAMIENTO Modelos sin Vapor (DLE3500*, DLG3501*) = configuración predeterminada ● = opción admisible * = Energy Saver(Ahorro de Energía) Ciclo Tipo de tela Dry Temp. Tiempo en Level min. (Nivel de (Temperatura) Secado) Damp Dry Signal (Señal de Secado Húmedo) Anti Bacterial (Antibacteriano) ● ● ● ● ● ● ● ● Wrinkle Care (Prevención de Arrugas) SENSOR DRY (SECADO CON SENSOR) Normal* (Normal) Ropa de trabajo, ropa de pana, etc.
FUNCIONAMIENTO 37 Modelos a Vapor (DLEX3700*, DLGX3701*) = configuración predeterminada ● = opción admisible * = Energy Saver(Ahorro de Energía) Ciclo Tipo de tela Wrinkle Care (Prevención de Arrugas) Damp Dry Signal (Señal de Secado Húmedo) Reduce Static (Estática Reducida) ● ● ● ● ● ● SENSOR DRY (SECADO CON SENSOR) Normal* (Normal) Ropa de trabajo, ropa de pana, etc.
38 FUNCIONAMIENTO Modelos a Vapor (DLEX3900*, DLGX3901*) = configuración predeterminada ● = opción admisible * = Energy Saver(Ahorro de Energía) Ciclo Tipo de tela Dry Temp. Tiempo en Level min. (Nivel de (Temperatura) Secado) Wrinkle Care (Prevención de Arrugas) Damp Dry Signal (Señal de Secado Húmedo) Reduce Static (Estática Reducida) ● ● ● ● ● ● SENSOR DRY (SECADO CON SENSOR) Normal (Normal) Normal* (Normal) Ropa de trabajo, ropa de pana, etc.
FUNCIONAMIENTO 39 Botones modificadores de ciclo Botones de opción Los ciclos Sensor Dry(Secado con Sensor) tienen ajustes predeterminados que se seleccionan de manera automática. Los ciclos de Manual Dry(Secado Manual) tienen ajustes predeterminados, pero también pueden personalizarse a través de los botones de modificación de ciclo. Presione el botón de la opción deseada para visualizar y seleccionar otros ajustes.
40 FUNCIONAMIENTO Funciones especiales Algunos botones de opciones de ciclo también activan funciones secundarias. Estas funciones especiales están marcadas con un asterisco (*). Mantenga presionado el botón de opción que indica la función especial para activarla. Control Lock (Bloqueo Infantil) Use esta opción para evitar un uso no deseado de la secadora o para evitar modificaciones en los ajustes de ciclo mientras la secadora está en funcionamiento.
FUNCIONAMIENTO 41 Usar el ciclo Steam Fresh™ Encienda la secadora y gire la perilla de selección de ciclos para seleccionar el ciclo Steam Fresh™. 2 Para añadir una función opcional, seleccione Reduce Static (Estática Reducida), o Wrinkle Care (Prevención de arrugas) 3 La pantalla mostrará el tamaño de la carga (cantidad de prendas). Cambie el tiempo de vapor presionando los botones More Time(Más tiempo) o Less Time(Menos tiempo) según el tamaño de la carga.
42 FUNCIONAMIENTO VAPOR STEAM SANITARY™ TIEMPO PREDET. OPCIÓN DE VAPOR TIME DRY (SECADO CON TEMPORIZADOR) DRY LEVEL (NIVEL DE SECADO) 39 minutos 20 minutos STEAM FRESH™ Temp.
FUNCIONES INTELIGENTES 43 FUNCIONES INTELIGENTES ••Si el aparato tiene problemas para conectarse a la red Wi-Fi, es posible que se encuentre demasiado lejos del router. Adquiera un repetidor Wi-Fi (extensor de alcance) para mejorar la intensidad de la señal Wi-Fi. Aplicación LG SmartThinQ La aplicación SmartThinQ le permite comunicarse con el electrodoméstico usando un teléfono inteligente.
44 FUNCIONES INTELIGENTES Características de la Aplicación LG SmartThinQ ••Para electrodomésticos con el o logo Ciclo del secador Descargue ciclos nuevos y especiales que no se encuentran incluidos en los ciclos básicos del artefacto. Los artefactos que se encuentran correctamente registrados tienen la posibilidad de descargar una variedad de ciclos especiales específicos para el artefacto. Solamente puede guardarse un ciclo por vez en el artefacto.
FUNCIONES INTELIGENTES 45 Declaración sobre exposición a la radiación de RF de la FCC Este equipo cumple con los límites de exposición a la radiación de la FCC establecidos para entornos no controlados. Este transmisor no se debe ubicar ni operar junto con ninguna otra antena ni transmisor. Información de anuncio de programas de código abierto Para obtener el código fuente bajo GPL, LGPL, MPL y otras licencias de código abierto que contiene este producto, visite http://opensource.lge.com.
46 FUNCIONES INTELIGENTES SmartThinQ Smart Diagnosis™ (Diagnóstico Inteligente) ••Para electrodomésticos con el o logo Use la función de diagnóstico inteligente en la aplicación SmartThinQ para ayudar a diagnosticar problemas sin la ayuda del Centro de información del cliente de LG. Siga las instrucciones en la aplicación SmartThinQ para realizar un diagnóstico inteligente usando su teléfono inteligente.
MANTENIMIENTO 47 MANTENIMIENTO Limpieza regular ADVERTENCIA ••Desenchufe la secadora antes de limpiarla. Se deben revisar los conductos de ventilación para verificar que no tengan acumulación de pelusa una vez por mes y se deben limpiar, al menos, una vez por año. Si se percibe una reducción notoria del flujo de aire o del desempeño de secado, revise los conductos de inmediato para verificar que no estén bloqueados ni tengan obstrucciones.
48 SOLUCIÓN DE PROBLEMAS SOLUCIÓN DE PROBLEMAS Preguntas frecuentes P: Cuando presiono un botón, ¿por qué la secadora emite un pitido y luego no sucede nada? R: La función Control Lock (Bloqueo Infantil) está activada. Para apagar esta función, encienda la secadora, y luego mantenga presionado el botón, sobre o bajo el que se muestre *Control Lock (Bloqueo Infantil), por 3 segundos.
SOLUCIÓN DE PROBLEMAS 49 Antes de llamar al servicio técnico Esta secadora está equipada con un sistema de monitoreo de errores automático para la detección y el diagnóstico de problemas en una etapa temprana. Si la secadora no funciona correctamente o no funciona en absoluto, consulte la siguiente información antes de llamar al servicio técnico.
50 SOLUCIÓN DE PROBLEMAS Problema La ropa tarda demasiado tiempo en secarse El tiempo de secado no concuerda Causa posible Soluciones Carga grande de tejidos pesados. ••Los tejidos pesados tardan más tiempo en secarse, ya que tienden a retener más humedad. Para ayudar a reducir y mantener tiempos de secado más constantes para tejidos pesados y de mayor tamaño, separe estas prendas en cargas más pequeñas de un tamaño similar. No se han ajustado adecuadamente los controles de la secadora.
SOLUCIÓN DE PROBLEMAS 51 Desempeño Problema La ropa está arrugada La ropa se encoge Soluciones ••Confirme y siga las instrucciones provistas por el fabricante del suavizante. Se están secando juntas ropa limpia y sucia. ••Use la secadora para secar prendas limpias solamente. La suciedad de la ropa sucia puede transferirse a la ropa limpia en la misma carga o en cargas posteriores. La ropa no se lavó ni se enjuagó correctamente antes de colocarse en la secadora.
52 SOLUCIÓN DE PROBLEMAS Problema Exceso de estática en la ropa después del secado Causa posible Soluciones No se usó suavizante de ropa o no se lo usó adecuadamente. ••Use suavizante de ropa o la opción REDUCE STATIC (ESTÁTICA REDUCIDA), si su secadora la incluye, para reducir la electricidad estática. Asegúrese de seguir las instrucciones del fabricante. La ropa se secó durante demasiado tiempo (secado excesivo).
SOLUCIÓN DE PROBLEMAS 53 Funciones de vapor (Modelos con vapor) Problema Causa posible Soluciones Esto es normal. Las prendas aún están arrugadas después de la función Steam Fresh™ Demasiadas prendas o diferentes tipos de prendas dentro de la secadora. ••Las cargas pequeñas de 1 a 5 prendas funcionan mejor. Cargue menos prendas. Cargue tipos de prendas similares.
54 SOLUCIÓN DE PROBLEMAS Códigos de error Problema Causa posible Soluciones Código de error: tE1 a tE7 Falla del sensor de temperatura. ••Apague la secadora y llame al servicio técnico. La pantalla muestra el código de error: PS El cable de alimentación no está bien conectado. ••Revise la conexión del cable de alimentación al bloque de bornes. El sistema de escape es muy extenso o tiene muchas vueltas u obstrucciones. ••Instale un tendido de conductos más corto o más recto.
GARANTÍA 55 GARANTÍA AVISO DE ARBITRAJE: ESTA GARANTÍA LIMITADA CONTINE UNA CLÁUSULA DE ARBITRAJE QUE LE DEMANDA A USTED Y A LG RESOLVER CONFLICTOS A TRAVÉS DE UN ARBITRAJE VINCULANTE EN LUGAR DE HACERLO EN LA CORTE, A MENOS QUE USTED DECIDA NO PARTICIPAR. EN EL ARBITRAJE NO ESTÁN PERMITIDAS LAS ACCIONES COLECTIVAS NI LOS JUCIOS CON JURADO. POR FAVOR, VEA A CONTINUACIÓN LA SECCIÓN TITULADA “PROCEDIMIENTO PARA RESOLVER CONFLICTOS”.
56 GARANTÍA ••Productos cuyos números de serie originales hayan sido retirados, alterados o no se puedan determinar fácilmente. Los números de serie y de modelo, junto con el comprobante de venta minorista original, son necesarios para validar la garantía. ••Aumentos en los costos de los servicios públicos y otros gastos adicionales de dichos servicios. ••Reparaciones cuando el producto se use de otra forma que no sea uso doméstico usual y normal (p. ej.
GARANTÍA 57 PROCEDIMIENTO PARA RESOLVER CONFLICTOS: TODOS LOS CONFLICTOS ENTRE USTED Y LG QUE SURJAN FUERA DE O RELACIONADOS DE ALGUNA MANERA CON ESTA GARANTÍA LIMITADA O CON EL PRODUCTO, SE RESOLVERÁN EXCLUSIVAMENTE A TRAVÉS DE UN ARBITRAJE VINCULANTE Y NO EN UNA CORTE DE JURISDICCIÓN GENERAL. ARBITRAJE VINCULANTE SIGNIFICA QUE USTED Y LG RENUNCIAN AL DERECHO DE UN JUICIO CON JURADO Y A REALIZAR O PARTICIPAR EN UNA DEMANDA COLECTIVA. Aviso de disputa.
58 GARANTÍA Audiencias y ubicación. Si su reclamo es por $25,000 o menos, usted puede optar que el arbitraje sea realizado únicamente sobre la base de: (1) documentos presentados al árbitro, (2) a través de una audiencia telefónica o (3) por una audiencia en persona, según lo establecido por las Normas de la AAA. Si su reclamo excede $25,000, el derecho a una audiencia estará determinado por las Normas de la AAA.
MEMO 59
60 MEMO
MEMO 61
LG Customer Information Center For inquiries or comments, visit www.lg.com or call: 1-800-243-0000 1-888-542-2623 U.S.A. CANADA Register your product Online! www.lg.