ENGLISH ESPAÑOL OWNER’S MANUAL DRYER Before beginning installation, read these instructions carefully. This will simplify installation and ensure that the dryer is installed correctly and safely. Leave these instructions near the dryer after installation for future reference. DLE X5170* P/No. : MFL62512873 DLGX5171* www.lg.
SPECIAL FEATURES SPECIAL FEATURES EASY-TO-USE CONTROL PANEL Rotate the cycle selector knob to select the desired dry cycle. Add cycle options or adjust settings with the touch of a button. EASY-ACCESS REVERSIBLE DOOR The wide-opening door provides easy access for loading and unloading. The door hinge can be reversed to adjust for installation location.
IMPORTANT SAFETY INSTRUCTIONS 3 READ ALL INSTRUCTIONS BEFORE USE WWARNING For your safety, the information in this manual must be followed to minimize the risk of fire or explosion, electric shock, or to prevent property damage, injury to persons, or death. Your Safety and the safety of others is very important. We have provided many important safety messages in this manual and on your appliance. Always read and obey all safety messages. This is the safety alert symbol.
IMPORTANT SAFETY INSTRUCTIONS IMPORTANT SAFETY INSTRUCTIONS READ ALL INSTRUCTIONS BEFORE USE WWARNING For your safety, the information in this manual must be followed to minimize the risk of fire or explosion, electric shock, or to prevent property damage, injury to persons, or death.
IMPORTANT SAFETY INSTRUCTIONS 5 READ ALL INSTRUCTIONS BEFORE USE WWARNING For your safety, the information in this manual must be followed to minimize the risk of fire or explosion, electric shock, or to prevent property damage, injury to persons, or death. (306/%*/( */4536$5*0/4 This appliance must be grounded. In the event of malfunction or breakdown, grounding will reduce the risk of electric shock by providing a path of least resistance for electric current.
IMPORTANT SAFETY INSTRUCTIONS IMPORTANT SAFETY INSTRUCTIONS READ ALL INSTRUCTIONS BEFORE USE WWARNING For your safety, the information in this manual must be followed to minimize the risk of fire or explosion, electric shock, or to prevent property damage, injury to persons, or death. 4"'&5: */4536$5*0/4 '03 */45"--"5*0/ WWARNING To reduce the risk of injury to persons, follow all industry recommended safety procedures including the use of long sleeved gloves and safety glasses.
IMPORTANT SAFETY INSTRUCTIONS 7 READ ALL INSTRUCTIONS BEFORE USE WWARNING For your safety, the information in this manual must be followed to minimize the risk of fire or explosion, electric shock, or to prevent property damage, injury to persons, or death.
TABLE OF CONTENTS TABLE OF CONTENTS 2 SPECIAL FEATURES 3 IMPORTANT SAFETY INSTRUCTIONS 3 4 4 WHAT TO DO IF YOU SMELL GAS BASIC SAFETY PRECAUTIONS CALIFORNIA SAFE DRINKING WATER AND TOXIC ENFORCEMENT ACT GROUNDING INSTRUCTIONS SAFETY INSTRUCTIONS FOR INSTALLATION SAFETY INSTRUCTIONS FOR STEAM FUNCTIONS SAFETY INSTRUCTIONS FOR CONNECTING ELECTRICITY 5 5 6 7 9 INTRODUCING YOUR DRYER 9 9 10 11 Parts Accessories Control Panel Features Display 12 INSTALLATION INSTRUCTIONS 12 13 13 14 15 16 17 19
INTRODUCING YOUR DRYER ENGLISH INTRODUCING YOUR DRYER PARTS AND ACCESSORIES Parts Control panel Reversible door Lint filter Leveling feet 9 Terminal block access panel (Electric models) Power cord location (Gas models) Gas connection location (Gas models) Exhaust duct outlet Accessories *ODMVEFE BDDFTTPSJFT %SZJOH SBDL NOTE t $POUBDU -( $VTUPNFS 4FSWJDF BU JO $BOBEB JG BOZ BDDFTTPSJFT BSF NJTTJOH t 'PS ZPVS TBGFUZ BOE GPS FYUFOEFE QSPEVDU MJGF VTF POMZ BVUIPS
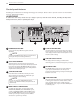
INTRODUCING YOUR DRYER Control panel features Following are instructions for starting and using your new dryer. Please refer to specific sections of this manual for more detailed information. WWARNING To reduce the risk of fire, electric shock, or injury to persons, read this entire manual, including the Important Safety Instructions, before operating this dryer. F B C A E A 108&3 0/ 0'' #6550/ Press to turn the dryer ON. Press again to turn the dryer OFF.
INTRODUCING YOUR DRYER ENGLISH Display The display shows the settings, estimated time remaining, options, and status messages for your dryer. When the dryer is turned on, the light in the display will illuminate. B G C A E D F A &45*."5&% 5*.& 3&."*/*/( E $)&$, '*-5&3 3&.*/%&3 5IF EJTQMBZ XJMM TIPX $)&$, '*-5&3 XIFO UIF ESZFS JT turned on as a reminder to check the filter. It turns off when the START/PAUSE button is pressed.
INSTALLATION INSTRUCTIONS INSTALLATION INSTRUCTIONS Preview installation order Checking and choosing the proper location Leveling the dryer Venting the Dryer 120V Connecting Gas Dryers (Gas Dryer Type) Connecting Electric Dryers (Electric Dryer Type) Press and hold Installation test (Refer to page 27.
INSTALLATION INSTRUCTIONS 13 WWARNING 3FBE BMM JOTUBMMBUJPO JOTUSVDUJPOT DPNQMFUFMZ CFGPSF JOTUBMMJOH BOE PQFSBUJOH ZPVS ESZFS It is important that you review this entire manual before installing and using your dryer. Detailed instructions concerning electrical connections, gas connections, and exhaust requirements are provided on the following pages. t " MPDBUJPO UIBU BMMPXT GPS QSPQFS FYIBVTU JOTUBMMBUJPO " HBT ESZFS must be exhausted to the outdoors.
INSTALLATION INSTRUCTIONS Clearances (cont.) RECOMMENDED INSTALLATION SPACING FOR CABINET INSTALLATION t For cabinet installation with a door, minimum ventilation openings in the top of the cabinet are required. *Required spacing 7"* (17.8 cm) 7"* (17.8 cm) **For side or bottom venting, JODIFT DN TQBDJOH JT BMMPXFE 5"* 28 1"* (12.7 cm) (73.4 cm) (2.5 cm) 1" 29/32" (2.54 cm) (68.6 cm) 1" (2.
INSTALLATION INSTRUCTIONS 15 WWARNING t To avoid damage to the dryer or the door, support the door with a stool or box that fits under the door, or have an assistant support the weight of the door. t Avoid dropping the door to avoid damage to the door or the floor. 4. Remove the 4 screws securing the hinges to the door frame. Remove the two plastic cover caps. Reinstall the hinges and cover caps on the opposite sides from which they were removed. THE DRYER DOOR IS VERY LARGE AND HEAVY.
INSTALLATION INSTRUCTIONS Installing the side vent kit WWARNING t 6TF B IFBWZ NFUBM WFOU t %P OPU VTF QMBTUJD PS UIJO GPJM EVDU t $MFBO PME EVDUT CFGPSF JOTUBMMJOH UIJT ESZFS t 5P SFEVDF UIF SJTL PG JOKVSZ UP QFSTPOT BEIFSF UP BMM JOEVTUSZ SFDPNNFOEFE TBGFUZ QSPDFEVSFT JODMVEJOH UIF VTF PG MPOH TMFFWFE HMPWFT BOE TBGFUZ HMBTTFT 1SFBTTFNCMF B JODIFT DN FMCPX UP UIF OFYU JODIFT DN EVDU TFDUJPO BOE TFDVSF BMM KPJOUT XJUI EVDU UBQF #F sure that the male end of the elbow fa
INSTALLATION INSTRUCTIONS 17 WWARNING To reduce the risk of fire, electric shock, or injury to persons when using this appliance, follow basic precautions, including the following: t %P OPU DSVTI PS DPMMBQTF EVDUXPSL Failure to follow these instructions can result in fire or death. t %P OPU BMMPX EVDUXPSL UP SFTU PO PS DPOUBDU TIBSQ PCKFDUT Failure to follow these instructions can result in fire or death.
INSTALLATION INSTRUCTIONS Venting the dryer (cont.) Ductwork 8"-- $"1 5:1& Recommended 4" (10.2 cm) 4" (10.2 cm) Use only for short run installations 21/2" (6.35 cm) ."9*.6. -&/(5) 0' /6.#&3 0' ¡ ű*/$) %*".&5&3 3*(*% &-#084 .
INSTALLATION INSTRUCTIONS 19 ENGLISH Connecting gas dryers WWARNING To reduce the risk of fire, electric shock, or injury to persons when using this appliance, follow basic precautions, including the following: t (BT TVQQMZ SFRVJSFNFOUT "T TIJQQFE GSPN UIF GBDUPSZ UIJT ESZFS JT DPOGJHVSFE GPS VTF XJUI OBUVSBM HBT *U DBO CF DPOWFSUFE GPS VTF XJUI -1 -JRVFGJFE 1SPQBOF HBT (BT QSFTTVSF NVTU OPU FYDFFE JODIFT PG XBUFS DPMVNO t " RVBMJGJFE TFSWJDF PS HBT DPNQBOZ UFDIOJDJBO NVTU DPOOFDU UIF E
INSTALLATION INSTRUCTIONS Connecting gas dryers (cont.) WWARNING To reduce the risk of fire, electric shock, or injury to persons when using this appliance, follow basic precautions, including the following: t *OTUBMMBUJPO BOE TFSWJDF NVTU CF QFSGPSNFE CZ B RVBMJGJFE JOTUBMMFS TFSWJDF BHFODZ PS UIF HBT TVQQMJFS Failure to do so can result in fire, explosion, or death.
INSTALLATION INSTRUCTIONS 21 WWARNING WWARNING To help prevent fire, electric shock, serious injury, or death, the wiring and grounding must conform to the latest edition of the /BUJPOBM &MFDUSJDBM $PEF "/4* /'1" BOE BMM BQQMJDBCMF MPDBM regulations. Please contact a qualified electrician to check your home’s wiring and fuses to ensure that your home has adequate electrical power to operate the dryer.
INSTALLATION INSTRUCTIONS Connecting electric dryers (cont.
INSTALLATION INSTRUCTIONS 23 WWARNING t $POOFDU UIF QPXFS DPSE UP UIF UFSNJOBM CMPDL &BDI DPMPSFE XJSF TIPVME CF DPOOFDUFE UP TBNF DPMPS TDSFX 8JSF DPMPS JOEJDBUFE PO NBOVBM JT DPOOFDUFE UP UIF TBNF DPMPS TDSFX JO CMPDL 'BJMVSF UP GPMMPX UIFTF JOTUSVDUJPOT NBZ SFTVMU JO B TIPSU PS PWFSMPBE t (SPVOEJOH UISPVHI UIF OFVUSBM DPOEVDUPS JT QSPIJCJUFE GPS OFX CSBODI DJSDVJU JOTUBMMBUJPOT NPCJMF IPNFT SFDSFBUJPOBM WFIJDMFT BOE BSFBT XIFSF MPDBM DPEFT QSPIJCJU HSPVOEJOH UISPVHI UIF
INSTALLATION INSTRUCTIONS Connecting electric dryers (cont.
INSTALLATION INSTRUCTIONS 25 WWARNING t $POOFDU UIF QPXFS DPSE UP UIF UFSNJOBM CMPDL &BDI DPMPSFE XJSF TIPVME CF DPOOFDUFE UP TBNF DPMPS TDSFX 8JSF DPMPS JOEJDBUFE PO NBOVBM JT DPOOFDUFE UP UIF TBNF DPMPS TDSFX JO CMPDL 'BJMVSF UP GPMMPX UIFTF JOTUSVDUJPOT NBZ SFTVMU JO B TIPSU PS PWFSMPBE t (SPVOEJOH UISPVHI UIF OFVUSBM DPOEVDUPS JT QSPIJCJUFE GPS OFX CSBODI DJSDVJU JOTUBMMBUJPOT NPCJMF IPNFT SFDSFBUJPOBM WFIJDMFT BOE BSFBT XIFSF MPDBM DPEFT QSPIJCJU HSPVOEJOH UISPVHI UIF
INSTALLATION INSTRUCTIONS Special requirements for manufactured or mobile homes Any installation in a manufactured or mobile home must comply with the Manufactured Home Construction and Safety Standards 5JUMF $'3 1BSU PS 4UBOEBSE $"/ $4" ; .) BOE local codes and ordinances. If you are uncertain whether your proposed installation will comply with these standards, please contact a service and installation professional for assistance.
INSTALLATION INSTRUCTIONS 27 Once you have completed the installation of the dryer, use this test to make sure the condition of the exhaust system is adequate for proper operation of the dryer. This test should be performed to alert you to any serious problems in the exhaust system of your home.
INSTALLATION INSTRUCTIONS Installation test (Duct check) (cont.) t $IFDL UIF FSSPS DPEF CFGPSF ZPV DBMM GPS TFSWJDF Error Code U& or U& HS Possible Causes Solutions t Temperature sensor failure t Turn off the dryer and call for service. t Humidity sensor failure. t Turn off the dryer and call for service. t Electric dryer power cord is not t Check the power supply or the connected correctly, or house power supply is incorrect.
HOW TO USE 29 ENGLISH HOW TO USE Operating the dryer 1 $-&"/ 5)& -*/5 '*-5&3 If the lint filter has not already been cleaned, lift out the filter and remove the lint from the last load. This will help ensure the fastest and most efficient drying performance. Lint Filter 2 -0"% 5)& %3:&3 Load the dryer with the wet laundry from the washer. If the load is extra large, you may need to divide it into smaller loads for proper performance and fabric care.
HOW TO USE Cycle guide $ZDMF 'BCSJD 5ZQF %SZ -FWFM 5FNQFSBUVSF 5JNF JO .JO MEDIUM HIGH Adjustable Adjustable .PSF 5JNF -FTT 5JNF 8SJOLMF Care Å Å %BNQ %SZ 4JHOBM 3FEVDF 4UBUJD &BTZ *SPO Å Å Comforter, Shirts, Trouser (except especially delicate fabrics) Off STEAM SANITARY TM $PNGPSUFS #FEEJOH Children’ clothing Off HIGH Å ANTI #"$5&3*"- Do not use this cycle with delicate fabrics.
HOW TO USE 31 Fabric care labels Check the lint filter before every load Most articles of clothing feature fabric care labels that include instructions for proper care. Always make sure the lint filter is clean before starting a new load; a clogged lint filter will increase drying times. Sorting load Fabric care labels To clean, pull the lint filter straight up and roll any lint off the filter with your fingers. Do not rinse or wash the filter to remove lint.
HOW TO USE Cycle setting buttons Sensor dry cycles have preset settings that are selected automatically. Manual dry cycles have default settings, but you may also customize the settings using the cycle setting buttons. Press the button for that option to view and select other settings. NOTE To protect your garments, not every dryness level, temperature, or option is available with every cycle. See the $ZDMF HVJEF for details. DRY LEVEL Selects the level of dryness for the cycle.
HOW TO USE Custom program 33 If you have a special combination of settings that you use frequently, you can save these settings as a custom program.. * To save a custom program: Steam Feeder Water ONLY ENGLISH 'JMM UIF TUFBN GFFEFS UP UIF ."9 MJOF XJUI XBUFS M AX 5VSO PO UIF ESZFS BOE UVSO UIF DZDMF TFMFDUPS LOPC UP TFMFDU UIF desired cycle. 6TF UIF DZDMF TFUUJOH CVUUPOT UP BEKVTU UIF TFUUJOHT GPS UIBU cycle.
HOW TO USE Steam functions (cont.) Using the steam options: LG’s new steam technology allows you to inject fabrics with a swirling jet of hot steam to refresh clothes, reduce static, and make ironing easier. Simply select the STEAM FRESH™ cycle, or you can add a steam option to selected cycles. The REDUCE STATIC option injects steam late in the drying cycle to reduce the static electricity caused by dry fabrics rubbing together.
HOW TO USE NOTE t 4UFBN NBZ OPU CF DMFBSMZ WJTJCMF EVSJOH UIF TUFBN DZDMFT 5IJT is normal. t %P OPU VTF STEAM FRESH™ with items such as wool, wool blanket, leather jackets, silk, wet clothes, lingerie, foam products, or electric blankets. t 'PS CFTU SFTVMUT MPBE BSUJDMFT PG TJNJMBS TJ[F BOE GBCSJD UZQF %P not overload. t 8IFO UIF GJMUFS EVDU JT DMPHHFE UIF TUFBN PQUJPO NBZ OPU have optimal results. t 8IFO UIF TUFBN GVODUJPO JT PQFSBUJOH UIF ESVN XJMM TUPQ UP allow steam to stay in the drum.
MAINTENANCE MAINTENANCE Regular cleaning Cleaning the lint filter Always clean the lint filter after every cycle. WWARNING To reduce the risk of fire, electric shock, or injury to persons when using this appliance, follow basic precautions, including the following: t 6OQMVH UIF ESZFS CFGPSF DMFBOJOH UP BWPJE UIF SJTL PG FMFDUSJD TIPDL Failure to follow this warning can cause serious injury, fire, electrical shock, or death.
TROUBLESHOOTING 37 ENGLISH TROUBLESHOOTING Before calling for service Your dryer is equipped with an automatic error-monitoring system to detect and diagnose problems at an early stage. If your dryer does not function properly or does not function at all, check the following before you call for service. 1SPCMFN 1PTTJCMF $BVTFT t )PVTF GVTF JT CMPXO DJSDVJU CSFBLFS IBT tripped, or power outage has occurred. t .
TROUBLESHOOTING Before calling for service (cont.) 1SPCMFN 1PTTJCMF $BVTFT 4PMVUJPOT Drying time is not consistent t )FBU TFUUJOHT MPBE TJ[F PS EBNQOFTT PG clothing is not consistent. t 5IF ESZJOH UJNF GPS B MPBE XJMM WBSZ EFQFOEJOH PO UIF IFBU TFUUJOH UIF UZQF of heat used (electric, natural gas, or LP gas), the size of the load, the type of fabrics, the wetness of the clothes, and the condition of the exhaust ducts and lint filter.
SPECIFICATIONS 39 1SPCMFN 1PTTJCMF $BVTFT 4PMVUJPOT Steam does not generate but no error code is shown t 8BUFS MFWFM FSSPS t 6OQMVH ESZFS BOE DBMM GPS TFSWJDF Garments still wrinkled after STEAM FRESH™ t 5PP NBOZ PS UPP EJGGFSFOU UZQFT PG HBSNFOUT t 4NBMM MPBET PG UP JUFNT XPSL CFTU in dryer. t -PBE GFXFS HBSNFOUT -PBE TJNJMBS UZQF HBSNFOUT There are no creases left on garment after STEAM FRESH™ t 5IF GVODUJPO PG UIJT DZDMF JT UP SFNPWF wrinkles from fabric.
USING SMARTDIAGNOSISTM USING SMARTDIAGNOSISTM NOTE - Only use this feature when instructed to do so by the call center. The transmission sounds similar to a fax machine, and so has no meaning except to the call center. - SMARTDIAGNOSIS™ cannot be activated if the dryer does not power up. If this happens, then troubleshooting must be done without SMARTDIAGNOSIS™.
WARRANTY 41 -( &-&$530/*$4 */$ -( %3:&3 -*.*5&% 8"33"/5: 64" 8"33"/5: 1&3*0% )08 4&37*$& *4 )"/%-&% -"#03 0OF :FBS from the Date of Purchase. *O )PNF 4FSWJDF 1"354 0OF :FBS from the Date of Purchase. Please retain dealer’s dated bill of sale or delivery ticket as evidence of the Date of Purchase for proof of warranty, and submit a copy of the bill of sale to the service person at the time warranty service is provided. Replacement Units and Repair Parts may be new or remanufactured.
ESPAÑOL MANUAL DE PROPIETARIO SECADORA Antes de comenzar la instalacion, lea atentamente estas instrucciones. Esto simplificara la instalacion y asegurara que la secadora esta instalada en forma correcta y segura. Conserve estas instrucciones cerca de la secadora luego de la instalacion para futuras consultas. DLE X5170* DLGX5171* www.lg.
2 CARACTERÍSTICAS ESPECIALES CARACTERÍSTICAS ESPECIALES PANEL DE CONTROL FÁCIL PARA USAR Gire la perilla selectora de ciclos al ciclo de secado deseado. Añada los ajustes de ciclo o programe las opciones con el toque de un botón. PUERTA REVERSIBLE DE FÁCIL ACCESO La amplia puerta provee acceso para carga y descarga. Se puede invertir el sentido de la puerta para adaptarlo al lugar de la instalación.
INSTRUCCIONES IMPORTANTES DE SEGURIDAD 3 INSTRUCCIONES IMPORTANTES DE SEGURIDAD LEA TODAS LA INSTRUCCIONES ANTES DE USAR Por su seguridad, debe seguir la información indicada en este manual para minimizar el riesgo de incendio o explosión, descarga eléctrica, o para prevenir daños a la propiedad, lesiones personales o muerte. Su Seguridad y la de los demás son de suma importancia. En este manual y en su electrodoméstico figuran muchos mensajes importantes de seguridad.
4 INSTRUCCIONES IMPORTANTES DE SEGURIDAD INSTRUCCIONES IMPORTANTES DE SEGURIDAD LEA TODAS LA INSTRUCCIONES ANTES DE USAR W ADVERTENCIA Por su seguridad, se debe seguir la información indicada en este manual para minimizar el riesgo de incendio o explosión, descarga eléctrica, o para prevenir daños a la propiedad, lesiones personales o muerte.
INSTRUCCIONES IMPORTANTES DE SEGURIDAD 5 INSTRUCCIONES IMPORTANTES DE SEGURIDAD LEA TODAS LA INSTRUCCIONES ANTES DE USAR Por su seguridad, se debe seguir la información indicada en este manual para minimizar el riesgo de incendio o explosión, descarga eléctrica, o para prevenir daños a la propiedad, lesiones personales o muerte. */4536$$*0/&4 %& $0/&9*»/ " 5*&33" Este electrodoméstico deberá estar conectado a tierra.
6 INSTRUCCIONES IMPORTANTES DE SEGURIDAD INSTRUCCIONES IMPORTANTES DE SEGURIDAD LEA TODAS LA INSTRUCCIONES ANTES DE USAR W ADVERTENCIA Por su seguridad, se debe seguir la información indicada en este manual para minimizar el riesgo de incendio o explosión, descarga eléctrica, o para prevenir daños a la propiedad, lesiones personales o muerte. */4536$$*0/&4 *.
INSTRUCCIONES IMPORTANTES DE SEGURIDAD 7 INSTRUCCIONES IMPORTANTES DE SEGURIDAD LEA TODAS LA INSTRUCCIONES ANTES DE USAR Por su seguridad, se debe seguir la información indicada en este manual para minimizar el riesgo de incendio o explosión, descarga eléctrica, o para prevenir daños a la propiedad, lesiones personales o muerte. */4536$$*0/&4 *.1035"/5&4*.
8 TABLA DE CONTENIDOS TABLA DE CONTENIDOS 2 CARACTERÍSTICAS ESPECIALES 3 INSTRUCCIONES IMPORTANTES DE SEGURIDAD 3 4 4 QUÉ HACER SI HUELE GAS PRECAUCIONES BÁSICAS DE SEGURIDAD LEY EJECUTIVA PARA LA SEGURIDAD DEL AGUA POTABLE Y LOS TÓXICOS DE CALIFORNIA (CALIFORNIA SAFE DRINKING WATER AND TOXIC ENFORCEMENT ACT) INSTRUCCIONES DE CONEXIÓN A TIERRA INSTRUCCIONES IMPORTANTES PARA LA INSTALACIÓN INSTRUCCIONES DE SEGURIDAD PARA FUNCIONES DE VAPOR INSTRUCCIONES IMPORTANTES PARA CONECTAR LA ELECTRICIDAD 5 5 6
LA INTRODUCCIÓN DE LA SECADORA 9 LA INTRODUCCIÓN DE LA SECADORA PARTES Y ACCESORIOS Partes ESPAÑOL Panel de control Puerta reversible Filtro de pelusa Patas niveladoras Ubicación del cable eléctrico (Modelos a gas) Panel de acceso del bloque terminal (Modelos eléctricos) Ubicación de la toma de gas (Modelos a gas) Salida del conducto de escape Accesorios Accesorios incluidos Secado en parrilla NOTA t 1ØOHBTF FO DPOUBDUP DPO FM %FQBSUBNFOUP EF BUFODJØO BM DMJFOUF EF -( FO FM OÞNFSP
10 LA INTRODUCCIÓN DE LA SECADORA Características del panel de control A continuación encontrará instrucciones para comenzar a usar su secadora nueva. Para más información por favor consulte las secciones específicas de este manual. W ADVERTENCIA Para reducir el riesgo de incendios, descargas eléctricas o heridas, lea este manual en su totalidad, incluyendo las Instrucciones Importantes de Seguridad, antes de operar la secadora.
LA INTRODUCCIÓN DE LA SECADORA 11 Pantalla La pantalla muestra los ajustes, el tiempo restante estimado, las opciones y los mensajes de estado correspondientes a su secadora. Cuando se gira el secador, la luz en la exhibición iluminará. G C ESPAÑOL B A E D F A 5*&.10 3&45"/5&3&45"/5& &45*."%0 ŷ&45*."5&% 5*.& 3&."*/*/(Ÿ D La pantalla mostrará REVISION DE FILTRO(CHECK FILTER) cuando se ha encendido la secadora como un recordatorio para revisar el filtro.
12 INSTRUCCIONES PARA LA INSTALACIÓN INSTRUCCIONES PARA LA INSTALACIÓN Vista previa del orden de instalación Comprobación y elección de la ubicación adecuada Nivelación de la secadora ventilación de la secadora 120V Conexión de secadoras a gas (Tipo de secadoras gas) Cómo conectar las secadoras eléctricas (Tipo secadoras eléctricas) Pulse y mantenga Test de Instalación (consulte la página 27) Prueba de funcionamiento Conexión del enchufe y la toma de tierra 240V
INSTRUCCIONES PARA LA INSTALACIÓN 13 Requisitos del lugar de instalación W ADVERTENCIA t 6O MVHBS RVF QFSNJUB MB JOTUBMBDJØO DPSSFDUB EFM TJTUFNB EF escape. El secador de gas debe tener una salida de escape hacia el exterior. Consulte 3FRVJTJUPT EF WFOUJMBDJØO. t -B TBMJEB FMÏDUSJDB EF UPNB B UJFSSB EFCF FTUBS B DN QJFT EF ambos lados de la secadora.Consulte 3FRVJTJUPT FMÏDUSJDPT.
14 INSTRUCCIONES PARA LA INSTALACIÓN Espacios de instalación (cont.
INSTRUCCIONES PARA LA INSTALACIÓN 15 Inversion de la puerta W ADVERTENCIA Montaje de bisagra 1. Abra la puerta y retire las dos cubiertas de plástico que cubren el agujero en la zona de sujeción; para ello, presione con cuidado hacia arriba con un destornillador de punta plana. Guárdelas para el paso 6. Tapa de cubierta 5. Con las bisagras y los rellenadores en la nueva posición, monte de nuevo el panel interior de la puerta en la estructura de ésta con los tornillos retirados en el paso 3 anterior.
16 INSTRUCCIONES PARA LA INSTALACIÓN Instalación del kit de ventilación lateral W ADVERTENCIA t 6UJMJDF NBUFSJBM QBSB WFOUJMBDJØO EF NFUBM QFTBEP t /P VUJMJDF DPOEVDUPT EF QMÈTUJDP P BMVNJOJP EFMHBEP t -JNQJF MPT DPOEVDUPT BOUJHVPT BOUFT EF JOTUBMBS FTUB secadora.
INSTRUCCIONES PARA LA INSTALACIÓN 17 Cónexión del conducto de ventilación de la secadora W ADVERTENCIA Para reducir el riesgo de incendio, descargas eléctricas o heridas al usar su electrodoméstico, siga las precauciones básicas, incluyendo lo siguiente: t /P QFSNJUB RVF FM TJTUFNB EF DPOEVDUP TF BTJFOUF TPCSF PCKFUPT QVOUJBHVEPT OJ FOUSF FO DPOUBDUP DPO MPT NJTNPT Si no se siguen estas instrucciones se podrá producir incendio o muerte.
18 INSTRUCCIONES PARA LA INSTALACIÓN Conexión del conducto de ventilación de la secadora (cont.) Sistema de conducto -0/( .«9 %& $0/%6$50 .&5«-*$0 '-&9*#-& %& %*«. w 5*10 %& 5"1" %& 1"3&% /Á.
INSTRUCCIONES PARA LA INSTALACIÓN 19 Conexión de secadoras a gas W ADVERTENCIA t 3FRVJTJUPT EF TVNJOJTUSP EF HBT $PNP FOWJBEP EF GÈCSJDB TJ DPOGJHVSB MB TFDBEPSB QBSB VTP DPO HBT OBUVSBM 1VFEF DPOWFSUJSTF QBSB VTBS DPO HBT -1 QSPQBOP MÓRVJEP -B QSFTJØO EF HBT OP EFCF TPCSFQBTBS MB columna de agua de 13 pulgadas.
20 INSTRUCCIONES PARA LA INSTALACIÓN Conexión de secadoras a gas (cont.) W ADVERTENCIA Conexión del suministro de gas Para reducir el riesgo de incendio, descargas eléctricas o heridas al usar su electrodoméstico, siga las precauciones básicas, incluyendo lo siguiente: 1. Asegúrese de que el suministro de gas al cuarto de lavado se encuentre APAGADO.Confirme que el tipo de gas disponible en su cuarto de lavado sea el adecuado para la secadora.
INSTRUCCIONES PARA LA INSTALACIÓN 21 Cómo conectar las secadoras eléctricas W ADVERTENCIA Para ayudar a evitar incendios, descargas eléctricas, heridas graves o muerte, el cableado e instalación a tierra deben cumplir DPO MB ÞMUJNB FEJDJØO EFM $ØEJHP &MÏDUSJDP /BDJPOBM "/4* /'1" y todas las regulaciones locales aplicables.
22 INSTRUCCIONES PARA LA INSTALACIÓN Cómo conectar las secadoras eléctricas (cont.) SÓLO EE.UU.
INSTRUCCIONES PARA LA INSTALACIÓN 23 Cómo conectar las secadoras eléctricas (cont.) SÓLO EE.UU. W ADVERTENCIA t $POUBDUP QPS DPOEVDUPS OFVUSP FTUÈ QSPIJCJEP QBSB OVFWBT JOTUBMBDJPOFT EF DJSDVJUP EFSJWBEP MBT DBTBT NØWJMFT WFIÓDVMPT SFDSFBDJPOBMFT Z ÈSFBT EPOEF MPT DØEJHPT QSPIÓCFO VOB DPOFYJØO B UJFSSB QPS FM DPOEVDUPS neutro. t 1SFQBSF VO NÓOJNP EF QJFT N EF MPOHJUVE QBSB QPEFS quitar y reemplazar la secadora.
24 INSTRUCCIONES PARA LA INSTALACIÓN Cómo conectar las secadoras eléctricas (cont.) SÓLO EE.UU.
INSTRUCCIONES PARA LA INSTALACIÓN 25 Cómo conectar las secadoras eléctricas (cont.) SÓLO EE.UU. W ADVERTENCIA t $POUBDUP QPS DPOEVDUPS OFVUSP FTUÈ QSPIJCJEP QBSB OVFWBT JOTUBMBDJPOFT EF DJSDVJUP EFSJWBEP MBT DBTBT NØWJMFT WFIÓDVMPT SFDSFBDJPOBMFT Z ÈSFBT EPOEF MPT DØEJHPT QSPIÓCFO VOB DPOFYJØO B UJFSSB QPS FM DPOEVDUPS neutro. t 1SFQBSF VO NÓOJNP EF QJFT N EF MPOHJUVE QBSB QPEFS quitar y reemplazar la secadora.
26 INSTRUCCIONES PARA LA INSTALACIÓN Requisitos especiales para viviendas móviles o prefabricadas Cualquier instalación en una vivienda móvil o prefabricada debe realizarse de conformidad con los Estándares de seguridad Z DPOTUSVDDJØO EF WJWJFOEBT QSFGBCSJDBEBT 5ÓUVMP $'3 1BSUF P FTUÈOEBS $"/ $4" ; .) Z DPO MPT DØEJHPT Z regulaciones locales.
INSTRUCCIONES PARA LA INSTALACIÓN 27 Test de Instalación (conducto de comprobar) t &TUB TFDBEPSB DVFOUB DPO FM TJTUFNB FLOW SENSE™, un sistema innovador que detecta automáticamente los bloqueos y restricciones en la tubería de la secadora. Mantener la tubería sin acumulación de pelusa y libre de restricciones le permitirá secar la ropa más rápido y reducir el gasto de energía. 4.
28 INSTRUCCIONES PARA LA INSTALACIÓN Test de Instalación (conducto de comprobar) (cont.) t Compruebe el código de error antes de llamar al servicio técnico Código de error U& o U& HS Causas posibles Soluciones t Fallo del sensor de temperatura. t Apague la secadora y llame al servicio técnico. t Fallo del sensor de humedad. t Apague la secadora y llame al servicio técnico.
CÓMO USAR 29 CÓMO USAR Funcionamiento de la secadora -*.1*"3 &- '*-530 %& 1&-64"4 Si aún no ha limpiado el filtro de pelusas, extráigalo y elimine las pelusas procedentes de la última carga. Esto le ayudará a asegurar un funcionamiento más rápido y eficiente de secado. Filtro de pelusa 2 $"3("3 -" 4&$"%03" Cargue en la secadora la carga húmeda procedente de la lavadora. Si la carga es muy grande, deberá dividirla en cargas más pequeñas para obtener un buen rendimiento y proteger los tejidos.
30 CÓMO USAR Guía de ciclos .ÈT UJFNQP .FOPT tiempo Cuidado de arrugas Å Å Sonido de secado IÞNFEP 5FNQFSBUVSB 5JFNQP en min. MEDIA ALTA Regulable Regulable Apagado ALTA Å No utilizar este ciclo con prendas delicadas. MUY SECO ALTA Å PRENDAS VOLUMINOSAS / ROPA DE CAMA Acolchados, almohadas, camisas. Normal seco MEDIA SECADO INTENSO Vaqueros, prendas pesadas. Normal seco ALTA Å Å Å Å PLANCHADO PERM., INFORMAL Prendas sintéticas, planchado permanente.
CÓMO USAR 31 A continuación encontrará instrucciones para comenzar a usar su secadora nueva. Para más información por favor consulte las secciones específicas de este manual. La mayoría de las prendas de vestir tienen etiquetas de mantenimiento de las telas para lograr un mantenimiento adecuado. Asegúrese siempre de que el filtro de pelusa esté limpio antes de iniciar una carga nueva; un filtro de pelusa bloqueado incrementará los tiempos de secado.
32 CÓMO USAR Botones de ajuste de ciclos Los ciclos de secado con sensor (sensor dry) tienen ajustes preprogramados que se seleccionan automaticamente. Los ciclos de csecado manual (manual dry) tienen ajustes predeterminados, pero pueden Personalizarse usando los botones de ajustes de ciclos. Apriete el botón de esa opción para ver y seleccionar otros ajustes. NOTE Para proteger las prendas, no todos los niveles de secado, temperatura u opción están disponibles en todos los ciclos.
CÓMO USAR Programa personalizado 33 -MFOF FM BMJNFOUBEPSS DPO BHVB IBTUB MB DBQBDJEBE NÈYJNB Si tiene una combinacion especial de ajustes que usa con frecuencia, puede guardar estos ajustes a manera de programa personalizado. SÓLO Alimentador de agua vapor M * Para guardar un programa personalizado: 1. Encienda la secadora y gire la perilla selectora de ciclos para seleccionar el ciclo deseado. 6TF MPT CPUPOFT EF QSPHSBNBDJØO EF DJDMP QBSB GJKBS MPT BKVTUFT para ese ciclo.
34 CÓMO USAR Funciones de vapor (cont.) Cómo usar las opciónes de vapór La nueva tecnologia de vapor de LG le permite inyectar las telas con un chorro giratorio de vapor caliente para refrescar las prendas, reducir la estatica, y facilitar el planchado. Simplemente seleccione el ciclo STEAM FRESH™ o agregue la opción vapor a los ciclos seleccionados.
CÓMO USAR Funciones de vapor (cont.) 35 NOTA t /P BCSB MB QVFSUB EF MB TFDBEPSB EVSBOUF DJDMPT EF WBQPS Si no se cumple con esto se podrá producir una explosión, incendio, quemaduras o muerte. t /P VTF FM DJDMP STEAM FRESH™ con elementos como lana, manta de lana, camperas de cuero, seda, ropa húmeda, lencería, productos de espuma o mantas eléctricas.
36 MANTENIMIENTO MANTENIMIENTO Limpieza regular Limpieza del filtro de pelusa Limpie siempre el filtro de pelusa después de cada ciclo.
RESOLUCIÓN DE PROBLEMAS 37 RESOLUCIÓN DE PROBLEMAS Antes de llamar a mantenimiento 1SPCMFNB $BVTBT QPTJCMFT t &M GVTJCMF EFM IPHBS FTUÈ RVFNBEP FM cortacircuitos se ha accionado, o ha ocurrido una interrupción eléctrica. t "TFHÞSFTF EF RVF FM FODIVGF FTUÏ DPOFDUBEP EF NBOFSB TFHVSB FO VO tomacorriente con conexión a tierra, que se corresponda con la placa de clasificación.
38 RESOLUCIÓN DE PROBLEMAS Antes de llamar a mantenimiento (cont.) 1SPCMFNB $BVTBT QPTJCMFT Soluciones El tiempo de secado no es constante t -PT BKVTUFT EF DBMPS FM UBNB×P EF MB DBSHB o la humedad de las prendas no son constantes.
RESOLUCIÓN DE PROBLEMAS 39 Antes de llamar a mantenimiento (cont.) 1SPCMFNB $BVTBT QPTJCMFT t 7FSJGJRVF FM DBKØO EFM BMJNFOUBEPS EF WBQPS (1) El alimentador de vapor debe estar lleno de agua hasta la línea MAX. $POTUBUF RVF FM BMJNFOUBEPS EF WBQPS FTUÏ CJFO DPMPDBEP Z RVF FM DBKØO FTUÏ completamente cerrado. "QBHVF MB TFDBEPSB MVFHP WVFMWB B JOJDJBS FM DJDMP EF WBQPS t /P VTF BHVB EFTUJMBEB FM TFOTPS EF OJWFM EF BHVB EFM HFOFSBEPS EF WBQPS OP funcionará.
40 ESPECIFICACIONES Antes de llamar a mantenimiento (cont.) 1SPCMFNB $BVTBT QPTJCMFT Soluciones No se ve vapor durante el ciclo de vapor t &TUP FT OPSNBM t &T EJGÓDJM WFS FM WBQPS DPO MB QVFSUB DFSSBEB Sin embargo, la condensación se forma normalmente en el interior de la puerta de la secadora si el sistema funciona con normalidad.
UTILIZACIÓN DEL SMARTDIAGNOSIS™ 41 UTILIZACIÓN DEL SMARTDIAGNOSIS™ NOTA - Utilice esta función sólo cuando así se lo indique el agente del Centro de Atención al Cliente. La transmisión tiene un sonido similar a la de un fax, y no tiene ningún significado, excepto para el Centro de Atención al Cliente.
42 GARANTÍA -( &-&$530/*$4 */$ ("3"/5¶" -*.*5"%" %& -" 4&$"%03" -( o && 66 Su secadora LG será reparada o reemplazada, a discreción de LG, si se comprueba que existe un defecto en el material o la mano de obra bajo condiciones de uso normales, durante el período de garantía (“Período de garantía”) establecido más abajo, vigente desde la fecha (“Fecha de compra”) de la compra del cliente original de producto.
43 ESPAÑOL
44
45 ESPAÑOL
LG Customer Information Center 1-800-243-0000 USA 1-888-542-2623 CANADA Register your product Online! www.lg.