RC69221M NA1ULL-ENG VCR / DVD Recorder OWNER’S MANUAL MODEL: LGXBR446 CD-R/RW Before connecting, operating or adjusting this product, please read this owner’s manual carefully and completely. Call us and we will guide you through your first recording, for free.
Safety Precautions CAUTION RISK OF ELECTRIC SHOCK DO NOT OPEN CAUTION: TO REDUCE THE RISK OF ELECTRIC SHOCK DO NOT REMOVE COVER (OR BACK) NO USER-SERVICEABLE PARTS INSIDE REFER SERVICING TO QUALIFIED SERVICE PERSONNEL. This lightning flash with arrowhead symbol within an equilateral triangle is intended to alert the user to the presence of uninsulated dangerous voltage within the product’s enclosure that may be of sufficient magnitude to constitute a risk of electric shock to persons.
CAUTION: PLEASE READ AND OBSERVE ALL WARNINGS AND INSTRUCTIONS IN THIS OWNER’S MANUAL. AND THOSE MARKED ON THE PRODUCT. RETAIN THIS MANUAL FOR FUTURE REFERENCE. This product has been designed and manufactured to assure personal safety. Improper use can result in electric shock or fire hazard. The safeguards incorporated in this product will protect you if you observe the following procedures for installation, use, and servicing. This product does not contain any parts that can be repaired by the user.
Table of Contents INTRODUCTION Safety Precautions. . . . . . . . . . . . . . . . . . . . . . . 2 IMPORTANT SAFETY INSTRUCTIONS . . . . . . . 3 Table of Contents . . . . . . . . . . . . . . . . . . . . . . 4-5 Overview . . . . . . . . . . . . . . . . . . . . . . . . . . . . 6-11 Recordable Discs . . . . . . . . . . . . . . . . . . . . . . . 6 Playable Discs . . . . . . . . . . . . . . . . . . . . . . . . . 6 Disc-related terms . . . . . . . . . . . . . . . . . . . . . . 7 About Symbols . . . . . . . . . . .
Table of Contents RECORDING Basic Recording . . . . . . . . . . . . . . . . . . . . . 44-45 Basic Recording from a TV . . . . . . . . . . . . . . . 44 Instant Timer Recording . . . . . . . . . . . . . . . . . 44 Dubbing from DVD to VCR . . . . . . . . . . . . . . . 45 Dubbing from VCR to DVD . . . . . . . . . . . . . . . 45 Timer Recording . . . . . . . . . . . . . . . . . . . . . . . 46 Checking Timer Recording Details . . . . . . . . . 46 Canceling a Timer Recording . . . . . . . . . . . . .
Overview Recordable Discs DVD-RW (DVD - ReWritable): These Discs can be recorded on repeatedly. Recordings can be erased, then you can record again on the same Disc. DVD-R (DVD - Recordable): These Discs can be recorded only once. After you finalize a DVD-R, you cannot record on it or edit it. DVD+RW (DVD + ReWritable): These Discs can be recorded on repeatedly. Recordings can be erased, then you can record again on the same Disc. DVD+R (DVD + Recordable): These Discs can be recorded only once.
Overview (Continued) Title (DVD only) The main film content or accompanying feature content or music album. Each title is assigned a title reference number enabling you to locate it easily. Chapter (DVD only) Sections of a picture or a musical piece that are smaller than titles. A title is composed of one or several chapters. Each chapter is assigned a chapter number to enable you to locate the chapter you want. Depending on the disc, chapters may not be labeled.
Overview (Continued) About Recordable discs How are recordable discs different? The essential difference among DVD-R, DVD-RW, DVD+R and DVD+RW is that DVD-R and DVD+R are a record-once medium, while DVD-RW and DVD+RW are a re-recordable/erasable medium. You can re-record/ erase a DVD-RW and DVD+RW disc approximately 1,000 times.
Overview (Continued) otes • This recorder cannot make recordings on CD-R or CD-RW discs. • Our company takes no responsibility for recording failure due to power cuts, defective discs, or damage to the recorder. • Fingerprints and small scratches on a disc can affect playback and/or recording performance. Please take proper care of your discs.
Overview (Continued) Recording TV audio channels This recorder can record one or two channel audio. For TV broadcasts, this usually means mono or stereo, but some programs are broadcast with a main and a SAP (Secondary Audio Program) audio channel. If you’re recording in Video mode (or in VR mode), you can record either the main audio or the SAP audio. Restrictions on video recording • You cannot record copy-protected video using this recorder.
Overview (Continued) Handling the unit When shipping the unit The original shipping carton and packing materials come in handy. For maximum protection, re-pack the unit as it was originally packaged at the factory. When setting up the unit The picture and sound of a nearby TV, VCR, or radio may be distorted during playback. In this case, position the unit away from the TV, VCR, or radio, or turn off the unit after removing the disc.
Front Panel POWER button and indicator Switches the VCR/DVD Recorder ON and OFF. Lights green when the VCR/DVD Recorder is turned on. Cassette Compartment (VCR deck) Insert a video cassette here. Display window Shows the current status of the VCR/DVD Recorder. Z OPEN/CLOSE Opens or closes the disc tray. Z EJECT Ejects the tape in the VCR deck. Disc Tray (DVD deck) Insert a disc here. MEMORY CARD Slot Insert a memory card (CF, MD, SMC, MMC, SD, MS or MS-Pro).
Function Display Window Disc type indicators Indicates the type of disc loaded. INTRODUCTION Indicates when the recorder is in timer recording or a timer recording is programmed. REC The recorder is recording. PRG Programmed playback active. TTL Indicates current title. A disc is inserted in the DVD deck. A VHS tape is inserted in the VCR deck. Indicates a DVD-RW disc (VR mode only) is inserted in the DVD deck. TV Indicates that TV mode is active.
Remote Control Overview POWER EJECT, OPEN/CLOSE Turns VCR/DVD Recorder ON and OFF. - Opens and closes the disc tray. - Ejects the tape in the VCR deck. DVD TV Control Buttons Select the VCR/DVD Recorder’s function mode to DVD. -POWER: Switches TV ON and OFF. -INPUT: Selects the TV’s source. -CH +/–: Selects TV’s channel. -VOL +/–: Adjusts TV’s volume. -MUTE: Turns on or off TV sound. VCR Select the VCR/DVD Recorder’s function mode to VCR. AUDIO INPUT Selects an audio language.
Rear Panel INTRODUCTION ANT.IN Connect the VHF/UHF/CATV antenna to this terminal. AV 1 IN (VIDEO IN /AUDIO IN (Left/Right)) Connect the audio/video output of an external source (Audio system, TV/Monitor, VCR, Camcorder). A/V OUT (VIDEO OUT/AUDIO OUT (Left/Right)) Connect to a TV with video and audio inputs. COMPONENT/PROGRESSIVE SCAN VIDEO OUT (Y Pb Pr) Connect to a TV with Y Pb Pr inputs. AUDIO OUT (Left/Right) Connect to a TV or other equipment with audio inputs.
Connections Cable Service Without Cable Box ips Depending on your TV and other equipment you wish to connect, there are various ways you could connect the VCR/DVD Recorder. Use only one of the connections described below. Please refer to the manuals of your TV, VCR, Stereo System or other devices as necessary to make the best connections. For better sound reproduction, connect the recorder’s AUDIO OUT jacks to the audio in jacks of your amplifier, receiver, stereo or audio/video equipment.
Connecting to a TV S-Video connection Make one of the following connections, depending on the capabilities of your existing equipment. 1 RF coaxial connection the Left and Right AUDIO OUT jacks from 2 Connect the VCR/DVD Recorder to the audio left/right in jacks on the TV using the audio cables (A). Connect the RF.OUT jack on the VCR/DVD Recorder to the antenna in jack on the TV using the 75-ohm Coaxial Cable supplied (R).
Connections (Continued) Connecting to Optional Equipment Rear of VCR/DVD Recorder Connecting to an amplifier equipped with two channel analog stereo or Dolby Pro Logic ll/ Pro Logic Connect the Left and Right AUDIO OUT jacks on the VCR/DVD Recorder to the audio left and right in jacks on your amplifier, receiver, or stereo system, using the audio cables (A).
Connections (Continued) Connect the AV 1 IN or AV 2 IN jacks on the VCR/DVD Recorder to the audio/video out jacks on your accessory component, using optional audio/video cables. ote If you use the S-VIDEO IN jack on the front panel, the VIDEO jack on the front panel is not available. Connecting a Digital Camcorder Using the front panel DV IN jack, it is possible to connect a DV digital camcorder or video deck or DVD-R/RW recorder and digitally transfer DV tapes or DVD-R/RW discs to DVD-R/RW.
Before Operation Initial Settings In this menu system, there are several ways to customize the settings provided. Most menus consist of three levels to set up the options, but some require greater depth for the variety of settings. If you press SETUP, only the first and second level of the menu system will appear on the TV screen. The third level can be displayed by pressing B. For navigating the menu levels, you will see “B” on the right side of the menu label to help you go to the next level.
To Add or Erase Channels from Memory This feature allows you to add to or erase channels from memory manually. steps 1-3 as shown above to the 1 Follow previous page (Auto Channel Set). 2 Use v / V to select the CH. Add/Del option. 3 Press B to move to the third level. ENTER. 4 Press The Channel Edit menu appears. the GENERAL menu is selected, press B 3 While to move to the second level. 4 Use v / V to select the “Clock Set” option. 5 Press B to move to the third level.
Before Operation (Continued) TV Aspect Factory Setting 4:3 Letter Box: Select when a standard 4:3 TV is connected. Displays theatrical images with masking bars above and below the picture. 4:3 Pan Scan: Select when a standard 4:3 TV is connected. Displays pictures cropped to fill your TV screen. Both sides of the picture are cut off. 16:9 Wide: Select when a 16:9 wide TV is connected. If you wish, you can reset the VCR/DVD Recorder to its original factory settings. Select “SET” then press ENTER.
Before Operation (Continued) Each DVD disc has a variety of audio output options. Set the VCR/DVD Recorder’s Audio Output according to the type of audio system you use. Dolby Digital PCM: Select when connected to a 2-channel digital stereo amplifier. The VCR/DVD Recorder’s digital audio outputs sounds in the PCM 2ch format when you play a DVD video disc recorded on the Dolby Digital recording system.
Before Operation (Continued) Level 1 to 8: Some discs contain scenes not suitable for children. If you set a rating for the recorder, all disc scenes with the same rating or lower will be played. Higher rated scenes will not be played unless an alternative scene is available on the disc. The alternative must have the same rating or a lower one. If no suitable alternative is found, playback will stop. You must enter the 4-digit password or change the rating level in order to play the disc.
Country Code RECORD Enter the code of a country/area whose standards were used to rate the DVD video disc, referring to the list (See “Country Codes”, page 62). Disc Record Mode Movie Rating You can set the picture quality for DVD recording; XP (High quality), SP (Standard quality), LP (Low quality), EP (Extend quality). Set Password Country Code Prev. U Select S Disc Record Mode XP VCR Record Mode SP DV Record Audio LP Auto Chapter EP Close Press SETUP. The Setup menu appears.
Before Operation (Continued) DV Record Audio Disc Initialize You need to set this if you have a camcorder using 32kHz/12-bit sound connected to the front panel DV IN jack. Some digital camcorders have two stereo tracks for audio. One is recorded at the time of shooting; the other is for overdubbing after shooting. On the Audio 1 setting, the sound that was recorded while shooting is used. On the Audio 2 setting, the overdubbed sound is used.
Disc Finalize Disc Protect Finalizing ‘fixes’ the recordings in place so that the disc can be played on a regular DVD player or computer equipped with a suitable DVD-ROM drive. Finalizing a Video mode disc creates a menu screen for navigating the disc. This is accessed by pressing LIST/DISC MENU or TITLE.
Before Operation (Continued) You can also use the Remote Control to Disc Label Use the Disc Label feature to enter a name for the disc. This name appears when you load the disc and when you display disc information on-screen. • The Disc label can be up to 32 characters long. • For discs formatted on a different DVD Recorder, you will see only a limited character set. Disc Initialize Edit Disc Protect Prev. Select Close steps 1-3 as shown “Disc Initialize” on 1 Follow page 26.
Before Operation (Continued) This manual gives basic instructions for operating the VCR/DVD Recorder. Some DVDs require specific operation or allow only limited operation during playback. When this occurs, the symbol appears on the TV screen, indicating that the operation is not permitted by the VCR/DVD Recorder or is not available on the disc. Displaying Information on-screen You can display various information about the disc or tape loaded on-screen.
Before Operation (Continued) OSD Menu Options by Media Type DVD Shows the elapsed playing time and total time. Shows the current title/chapter number and total number of titles/chapters Title Chapter : 3/28 Menu Options 1/6 Chapter Number 4/26 Time search - : -- : -- Audio language and Digital Audio Output mode Subtitle language 1. ABC Angle Sound 5.
Before Operation (Continued) Video +RW +R Shows the elapsed playing time and total time. Shows the title name, recording date, recording mode. DVD Title 1 01/02/03 Menu Options LP 0:06:32 / 2:12:10 Selection Method Function (Use v / V to select desired option) Title Number Chapter Number Time search Shows the Current mode. 1/6 Shows the current title number and total number of titles, and skips to the desired title number.
Operation with DVD and Video CD Playing a DVD or Video CD Playback Setup Before using the Remote Control, press the DVD button to select the device to be operated. Turn the TV on and select the video input source connected to the VCR/DVD Recorder. Audio system: Turn the audio system on and select the input source connected to the VCR/DVD Recorder. 1 Press OPEN/CLOSE to open the disc tray. your chosen disc in the tray, with the 2 Load playback side down. OPEN/CLOSE to close the tray.
Operation with DVD and Video CD (Continued) Still Picture and Frame-by-Frame Playback DVD Video VR +RW +R VCD 1 Press PAUSE/STEP (X) during playback. The recorder will now go into PAUSE mode. 2 You can advance or back up the picture frame-byframe by pressing b/B repeatedly during PAUSE mode. ote Frame-by-frame reverse playback is not available on Video CDs. Search DVD Video VR +RW +R VCD 1 Press BACKWARD (m) or FORWARD (M) during playback. The recorder will now go into SEARCH mode.
Operation with DVD and Video CD (Continued) Playing a DVD or Video CD (Continued) To Recall a Marked Scene 1 During disc playback, press SEARCH. Time Search DVD Video The Marker Search menu will appear on the TV screen. - : -- : -- VR +RW +R Marker Search The Time Search function allows you to start playing at any chosen time on the disc. 1 Press DISPLAY twice during playback. The on-screen display appears on the TV screen. The Time Search box shows the elapsed playing time of the current disc.
Operation with DVD and Video CD (Continued) Playing a DVD or Video CD (Continued) Subtitles Camera Angle Press SUBTITLE then press b / B repeatedly during playback to see the different subtitle languages. 1/3 If the disc contains scenes recorded at different camera angles, you can change to a different camera angle during playback. Press ANGLE then press b / B repeatedly during playback to select a desired angle. The number of the current angle appears on the TV screen.
Audio CD and MP3/WMA Operation Playing an Audio CD or MP3/WMA Disc CD MP3 WMA The VCR/DVD Recorder can play Audio CDs and MP3/WMA files on CD-ROM, CD-R, CD-RW, DVD+R/+RW, DVD-R/-RW discs or Memory Card. Before playing MP3/WMA files, read “Notes on MP3/WMA Recordings” on page 37. Music menu options 1. To display menu options, select a tack (or folder) on the menu then press ENTER. 2. Use v / V to select an option then press ENTER to confirm your selection.
Audio CD and MP3/WMA Operation (Continued) CD MP3 WMA M/C Repeat A-B CD 1 Press PAUSE/STEP (X) during playback. To repeat a sequence in a title: 2 To return to playback, press PAUSE/STEP (X) again. 1 Press A-B at your chosen start point. Repeat icon and “A-” appears on the menu screen. Moving to Another Track CD MP3 2 Press A-B again at your chosen end point. The Repeat icon and “A - B” appears on the left side of menu screen, and the repeat sequence begins. M/C WMA Press SKIP .
Audio CD and MP3/WMA Operation (Continued) Copying MP3/WMA file(s) on the disc Erasing MP3/WMA file(s) or folder(s) to Memory Card from the Memory Card 1 MP3 WMA M/C Use v / V to select an MP3/WMA file or folder on the Music-CD menu. Selecting multiple files (folders) 1. Select a MP3/WMA file or folder then press MARKER. A check mark appears on the file (folder). Press MARKER again to cancel the marked file or folder 2. Repeat step 1 to mark additional files (folders). Press ENTER.
Programmed Playback with Audio CD and MP3/WMA 1 Insert an Audio CD or MP3/WMA disc. v V to select a track or fold on the List then 2 Use press ENTER. The options appears on the left side of the menu. Music menu will appear. otes Press and hold V for fast to move to the next track or folder. Press and hold v for fast to move to the previous track or folder. v / V to select the track you want to start 6 Use playing. 7 Press PLAY (N) to start.
Programmed Playback with Audio CD and MP3/WMA (Continued) Repeat Programmed Tracks Press REPEAT to select a desired Repeat mode. • TRACK : Repeats the current track. • ALL : Repeats all the tracks on the program list • OFF (no display) : Does not play repeatedly. Erasing a Track from the Program List 1 Select the track that you wish to erase from the Program List then press ENTER. The options appears on the left side of the menu. 2 Select the Delete icon then press ENTER.
Photo Disc Operation Viewing a JPEG File JPEG M/C v / V to select “Full Screen” option then 5 Use press ENTER. 1 Insert a disc and close the tray. To display the Photo-CD menu for JPEG files recorded on the memory card, see “Using Photo or Music menu for Memory Card” on page 10. The Photo-CD menu appears on the TV screen. File 03.jpg 4/20 90 90 Prev Next Stop Hide viewing at any time, press STOP. 6 ToThestop Photo-CD menu reappears.
Photo Disc Operation (Continued) Still picture Use PAUSE/STEP (X) while showing a picture to pause mode. Skip Images While viewing a picture, press SKIP (. or >) once to advance to the next file or return to the previous file. Rotate Images Use v / V while viewing a picture to flip the picture clockwise or counterclockwise. v / V to select a copied folder then press B. 4 Use “Copy” option is highlighted. “Copy” option is highlighted on the Copy 5 When menu, press ENTER to begin copying.
VCR Mode Tape Playback Special Effect Playback Before using the Remote Control, press the VCR button to select the device to be operated. Turn the TV on and select the video input source connected to the VCR/DVD Recorder. Audio system: Turn the audio system on and select the input source connected to the VCR/DVD Recorder. Normal Playback 1 VHS Insert a prerecorded video cassette. The indicator will light and the VCR/DVD Recorder will power-up automatically.
Basic Recording Basic Recording from a TV Instant Timer Recording Follow the instructions below to record a TV program. Recording starts immediately and continues until the disc or tape is full or you stop the recording. Instant Timer Recording allows you to make a recording easily of a preset length without using the program timer. 1 Switch on the VCR/DVD Recorder, select the device (VCR or DVD) for Recording and load a recordable disc or tape. Also make sure that the TV input is set to this recorder.
Dubbing from DVD to VCR Dubbing from VCR to DVD You can copy the contents of a DVD to a VHS tape using the DUBBING (or DUB) button. You can copy the contents of a VHS tape to a DVD±R or DVD±RW using the DUBBING (DUB) button. This allows you to archive your old VHS tapes to DVD. ote If the DVD (or Discs) you are attempting to copy is copy protected, you will not be able to copy the disc. It is not permitted to copy Macrovision encoded DVDs (or Discs). “Copy-protected. Cannot record.
Timer Recording The Timer Recording function allows you to record up to 8 programs within a period of one month. 1 Press TIMER REC. The Timer Record menu will appear. Timer Record Media DVD OK 2 Ch. Ch.11 SP 198 min Free Date Start Time End Time Mode 01/02 Fri 10:07 AM 11:00 AM EP TIMER REC Timer Rec List Programming can be checked whenever the VCR/DVD Recorder is turned on. Press TIMER REC twice. • Use v / V to select a timer recording. • Press ENTER to edit the selected program.
Recording from External Components Recording from a Digital Camcorder You can record from an external component, such as a camcorder or VCR, connected to any of the VCR/DVD Recorder’s external inputs. You can record from a digital camcorder connected to the DV IN jack on the front panel of this VCR/DVD Recorder. You can use the VCR/DVD Recorder’s remote to control both the camcorder and the VCR/DVD Recorder. Before recording, make sure that the audio input for the DV IN jack is set up (see page 26).
Recording from an External Input (Continued) What is DV? DV-Related Messages Using DV, also known as i.LINK, you can connect a DV-equipped camcorder to this recorder using a single DV cable for input and output of audio, video, data and control signals. The i.LINK interface is also known as IEEE 1394-1995. “i.LINK” and the “i.LINK” logo are trademarks. • This recorder is only compatible with DV-format (DVC-SD) camcorders. Digital satellite tuners and Digital VHS video recorders are not compatible.
Title List and Chapter List Menu VR The Title List-Original is where you build and edit your Playlist, and where you can delete titles and make other changes to the Original content of the disc. You can also play individual titles directly from the Title ListOriginal menu. 1 Press LIST/DISC MENU repeatedly to display the Title List-Original menu. • Use the v/V buttons to display the previous/next page if there are more than 6 titles or chapters. • To exit the menu, press RETURN (O).
Title List and Chapter List Menu (Continued) Using the Title List-Playlist Menu 1 VR Press LIST/DISC MENU repeatedly to display the Title List-Playlist menu. • Use the v/V buttons to display the previous/next page if there are more than 6 titles or chapters. • To exit the Title List-Playlist, press RETURN (O). 1/2 Title List Using the Chapter List-Playlist Menu VR DISC MENU/LIST repeatedly to display the 1 Press Title List-Playlist menu.
Title List and Chapter List Menu (Continued) Video From the Title List display you can play, name and erase titles. Once a Video mode disc is finalized, the Title List screen changes its appearance and all you can do is select titles to play. 1 Press LIST/DISC MENU to display the Title List. Title List 1/3 Title DVD VIDEO 1hour 57min SP Free TITLE 1 Date 1/ 3 Duration 0:02:01 TITLE 2 1/ 3 0:06:21 TITLE 3 4/ 12 0:52:31 Select DISPLAY Info. Close Use v / V to choose a title then press ENTER.
Title List and Chapter List Menu (Continued) Using the Title List menu +RW The Title List is where you can see the all recorded titles, and where you can delete titles and make other changes to the Original content of the disc. You can also play titles directly from the Title List menu. The recorder must be stopped in order to edit using the Title List menu. 1 Press LIST/DISC MENU to display the Title List menu. • Use the v / V buttons to display the previous/ next page if there are more than 6 titles.
Title List and Chapter List Menu (Continued) +R The Title List is where you build and edit your Playlist, and where you can delete titles and make other changes to the Original content of the disc. You can also play individual titles directly from the Title List menu. The recorder must be stopped in order to edit using the Title List menu. 1 Press LIST/DISC MENU repeatedly to display the Title List-Original menu.
Title and Chapter Editing Edits you make to the Original content changes the actual content of the disc. For example, if you delete a title or chapter from the Original content (Title or Chapter), that title or chapter is deleted from the disc, freeing up extra recording time. When you edit the Playlist, on the other hand, you are not changing the content of the disc.
Title and Chapter Editing (Continued) VR Use this function to add an Original title or chapter to the Playlist. When you do this, the whole title or chapter is put into the Playlist (you can delete bits you don’t need later — see Deleting a Title/Chapter on page 56). The title appears in the Playlist complete with the chapter markers that appear in the Original. However, if you add more chapter markers to the Original later, these are not automatically copied over into the Playlist title.
Title and Chapter Editing (Continued) Deleting a Title/Chapter VR +RW +R When you erase a title or chapter from the Playlist menu on DVD+R, DVD+RW or DVD-RW discs formatted in VR mode, you only remove it from the Playlist; the title/chapter remains in the Original menu. If you choose to delete a title or chapter from Title List or Chapter List menu, the title or chapter is actually deleted from the disc and the remaining time available for recording increases.
Title and Chapter Editing (Continued) VR Video +RW +R Combining Two Chapters Into One VR You can name Original and Playlist titles independently. 1 On the Title List menu, use v V b B to choose the title you want to name then press ENTER. Options appears on the left side of the menu. 2 Use v/V to select “Title Name” option then press ENTER. The Keyboard menu appears. e.g., If you select “Title Name” on Title List-Original menu.
Title and Chapter Editing (Continued) Moving a Playlist Chapter VR Use this function to re-arrange the playing order of Playlist chapters on the Title List-Playlist menu. 1 Press LIST/DISC MENU repeatedly to display Title List-Playlist menu. To display the Chapter List-Playlist menu, refer to “Using the Chapter List-Playlist” on page 50. ote This function is not available if there is only one chapter.
Title and Chapter Editing (Continued) +RW +R Use this function to hide a title/chapter on the Title List or Chapter List menu. 1 On the Title List or Chapter List menu, use v V b B to choose a title or chapter you want to hide then press ENTER. Options appears on the left side of the screen. 2 Select ‘Hide’ option on the options. Divide One Title Into Two Use this command to split a title up into two new titles. 1 On the Title List menu, select a title you want to divide then press ENTER.
Title and Chapter Editing (Continued) Clean-up Recording Video VR +RW You can simply clean-up (erase) all contents on the disc then start recording from the first section of the disc. The disc format is not changed. on the recorder and load a recordable 1 Switch disc. and hold z REC button for more than 3 2 Press seconds in Tuner mode. The message will appears on the TV screen.
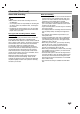
You can control the sound level, input source, and power switch of your LG TV with the supplied remote. Code numbers of controllable TVs You can control your TV using the buttons below. If more than one code number is listed, try entering them one at a time until you find the one that works with your TV. TV Control Buttons By pressing You can POWER INPUT Turn the TV on or off. Switch the TV’s input source between the TV and other input sources. CH +/– Scans up or down through memorized channels.
Language Code and Country Code List Language Codes Use this list to input your desired language for the following initial settings: Disc Audio, Disc Subtitle, Disc Menu.
Troubleshooting Check the following guide for the possible cause of a problem before contacting service. Solution No power. The power cord is disconnected. Plug the power cord into the wall outlet securely. No picture. The TV is not set to receive VCR/DVD Recorder signal output. Select the appropriate video input on the TV so the picture from the VCR/DVD Recorder appears on the TV screen. The video cable is not connected securely. Connect the video cable securely.
Troubleshooting (Continued) Cause Symptom Cannot record or did not record successfully. Timer Recording not possible. Stereo Audio Record and/or Playback not present. Remote control does not work properly. Solution The remaining blank space on the disc is insufficient. Use another disc. The source you are trying to record is copyprotected. You cannot record the source. When setting the recording channel, the channel is tuned on the TV’s own tuner.
Specifications General AC 120V, 60 Hz 35W 430 X 78.5 X 354 mm (16.9 x 3.1 x 13.9 inches) (w x h x d) 5.6 kg (12.32 lbs) 5˚C to 35˚C (41˚F to 95˚F) 5 % to 90 % NTSC REFERENCE Power requirements Power consumption Dimensions (approx.) Mass (approx.
Specifications (Continued) Outputs VIDEO OUT S-VIDEO OUT COMPONENT VIDEO OUT (PROGRESSIVE SCAN) Audio output (digital audio) Audio output (optical audio) Audio output (analog audio) RF OUT 1 Vp-p 75 Ω, sync negative, RCA jack x 1 (Y) 1.0 V (p-p), 75 Ω, negative sync, Mini DIN 4-pin x 1 (C) 0.286 V (p-p) 75 Ω (Y) 1.0 V (p-p), 75 Ω, negative sync, RCA jack x 1 (Pb)/(Pr) 0.7 V (p-p), 75 Ω, RCA jack x 2 0.5 V (p-p), 75 Ω, RCA jack x 1 Optical connector x 1 1.
LG Electronics, Inc. Limited Warranty - USA This LG Electronics product, will be repaired or replaced, at LG’s option, if it proves to be defective in material or workmanship, under normal use, during the warranty period (“Warranty Period”) listed below, effective from the date (“Date of Purchase”) of original consumer purchase of the product. This warranty is good only to the original purchaser of the product and effective only when used in the United States, excluding U.S. Territories.