ENGLISH ESPAÑOL OWNER’S MANUAL GAS DOUBLE OVEN RANGE Please read this guide thoroughly before operating and keep it handy for reference at all times. LDG3017ST P/No.: MFL33029609 www.lg.
3 4 TABLE OF CONTENTS PRODUCT FEATURES IMPORTANT SAFETY INSTRUCTIONS 35 CARE AND CLEANING 35 Gas Surface Burner 35 - Removing and Replacing the Gas Surface Burner 35 - Burner Heads/Caps 36 - Burner Grates 37 - Cooktop Surface 10 BEFORE USE 10 Accessories 37 - Stainless Steel Surfaces 11 Components 37 - Oven Air Vents 37 - Control Panel 37 - Front Manifold Panel and Knobs 38 - Oven Door 38 - Removing and Replacing the Doors 40 Inside of the Oven 40 - SELF CLEAN (Upper &
PRODUCT FEATURES Choose a burner to fit the size of your cookware. Cooking multiple items at once is possible by using different burners at the same time. SAFE, CONVENIENT AND GREEN GAS RANGE Provides safety and convenience for cooking, as well as green technology. Superboil (17000 BTU) can quickly bring a pot of water to a boil. UPPER OVEN / LOWER OVEN Separate upper and lower ovens. Choose to use either oven, or both, depending on the size of your food. SELF CLEAN Good for easy cleaning.
Important Safety Instructions IMPORTANT SAFETY INSTRUCTIONS Always comply with the following precautions to avoid dangerous situations and to ensure the peak performance of your product. WARNING Indicates a hazardous situation which, if not avoided, could result in death or serious injury. CAUTION Indicates a hazardous situation which, if not avoided, could result in minor or moderate injury. WHAT TO DO IF YOU SMELL GAS 1. Open windows. 2. DO NOT try to light any appliance. 3.
Important Safety Instructions 5 Enforcement Act requires the Governor of California to publish a list of substances known to the state to cause birth defects or other reproductive harm, and requires businesses to warn customers of potential exposure to such substances. Gas appliances can cause minor exposure to four of these substances, namely benzene, carbon monoxide, formaldehyde and soot, caused primarily by the imperfect combustion of natural or LP gas.
Important Safety Instructions WARNING yy NEVER use your range as a space heater to heat or warm the room. Doing so may result in carbon monoxide poisoning and overheating of the oven. yy NEVER wear loose fitting or hanging garments while using the appliance. Be careful when reaching for items placed in cabinets over the range. Flammable materials could be ignited if brought in contact with flame or hot oven surfaces and may cause severe burns.
Important Safety Instructions WARNING yy Even if the top burner flame goes out, gas is still flowing to the burner until the knob is turned to the “OFF” position. If you smell gas, immediately open a window and ventilate the area for five minutes prior to using the burner. Do not leave the burners “ON” unattended. yy Use proper pan size - DO NOT use pans that are unstable or that can be easily tipped. Select cookware with flat bottoms large enough to cover burner grates.
Important Safety Instructions BROILER Always use a broiler pan and a grid for excess fat and grease drainage. This will help to reduce splatter, smoke, and flare-ups. The igniter for the infrared ceramic broil burner on the ceiling of the oven will glow orange periodically during normal broil operation. WARNING When using your broiler, the temperature inside the oven will be extremely high.
Important Safety Instructions 9 When opening the door of a hot oven, stand away from the range. The hot air and steam that escape can cause burns to hands, face and eyes. WARNING NEVER block any slots, holes or passages in the oven bottom or cover an entire rack with materials such as aluminum foil. Doing so blocks air flow through the oven and may cause carbon monoxide poisoning. Aluminum foil linings may also trap heat, causing a fire hazard. yy DO NOT heat food in closed containers.
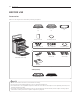
BEFORE USE BEFORE USE Accessories Make sure that all parts are included after purchasing this product. Racks (2) Offset rack (1) Owner’s manual Installation manual Cooktop nozzles (5) Oven nozzles (4) Griddle plate (1) Installation guide LP nozzle conversion kit Gas double oven range Anti-tip Screws (6) Anchors (6) Template Anti-tip kit Sold Separately Broiler pan Grid NOTE yy Contact LG Customer Service if any accessories are missing.
BEFORE USE ENGLISH Components Make sure to understand the names and function of each part. * Throughout this manual, the features and appearance may vary depending on your model. Control panel Grates Oven vent Oval burner Medium burner Large burner Knobs (5) Automatic oven light switch Small burner Extra large burner Self clean latch Rack Upper oven door Convection fan Rack Anti-tip bracket Lower oven door NOTE yy The model and serial tag is located behind the control panel.
HOW TO USE HOW TO USE Gas Surface Burners Before use Read all instructions before using. Make sure that all burners are properly placed. Make sure that all grates are properly placed before using the burner. CAUTION DO NOT operate the burner for an extended period of time without cookware on the grate. The finish on the grate may chip without cookware to absorb the heat.
HOW TO USE Using the gas surface burners Your gas range cooktop has five sealed gas burners. These can be assembled and separated. Follow the guide below. 1 Be sure that all of the surface burners are placed in the correct positions. 2 Put the cookware on the burner. (Example: pot, frying pan, etc.) 3 Push and turn the control knob to the “u” position. 2 1 3 4 1 Medium 2 3 4and Large Burner The medium and large burners are the primary burners for most cooking.
HOW TO USE In Case of Power Failure: Using a Wok: In case of a power failure, you can light the gas surface burners on your range with a match. Surface burners in use when an electrical power failure occurs will continue to operate normally. If using a wok, it is recommended that you use a 14-inch or smaller flat-bottomed wok. Make sure that the wok bottom sits flat on the grate. 1 Hold a lit match to the burner, then push in the control knob. 2 Turn the control knob to the "Lo” position.
HOW TO USE Preheat the griddle according to the guide below and adjust for the desired setting. Type of Food Preheat Conditions Cook Setting none 3 (MED-LOW) Pancakes 7 (MED-HI) 3 min. 7 (MED-HI) Hamburgers 7 (MED-HI) 5 min. 7 (MED-HI) HI 5 min. 4 (MED) Warming tortillas Fried Eggs Bacon none 5 (MED) Breakfast Sausage Links HI 5 min. 5 (MED) Hot Sandwiches (such as Grilled Cheese) HI 4 min.
HOW TO USE How to Use the Oven Before use Read all instructions before using. Make sure the electrical power cord and the gas valve are properly connected. Check it for safety. Check the correct use of the range depending on the type of food you will cook. Make sure you know how to use the oven (temperature setting, time setting and recipe) for best results. CAUTION WHAT TO DO IF YOU SMELL GAS 1. Open windows. 2. DO NOT try to light any appliance. 3. DO NOT touch any electrical switch. 4.
HOW TO USE 17 Your oven is vented through ducts at the center above the burner grate. Do not block the oven vent when cooking to allow for proper air flow. Do not touch vent openings or nearby surfaces during the use of any cooking operation. CAUTION yy DO NOT place plastic or flammable items on the cooktop—they may melt or ignite if left too close to the vent. yy DO NOT place closed containers on the cooktop. The pressure in closed containers may increase, which may cause them to burst.
HOW TO USE Using the Control Panel 9 1 2 19 14 13 10 3 Display 4 11 20 5 6 15 16 23 7 17 21 22 12 Upper Oven: Name Description 1 BAKE Traditional bake function. Refer to “BAKE” in the How To Use section. 2 SPEED BROIL Infrared broil function. Refer to “SPEED BROIL” in the How To Use section. 3 WARM Warms food in the oven. Refer to “WARM” in the How To Use section. 4 KIDS MEAL Use it cook KIDS MEAL such as frozen pizza and chicken nuggets.
HOW TO USE ENGLISH Using the Control Panel (continued) Lower Oven: Name Description 9 CONV.BAKE To use the Convection Baking function, Refer to "CONVECTION BAKE" in the How To Use section. - CONV.ROAST To use the Convection Roast function, Refer to "CONVECTION ROAST" in the How To Use section. q BAKE Traditional bake function. Refer to “BAKE” in the How To Use section. w PROOF To proof bread dough. Refer to “PROOF” in the How To Use section. e WARM Warms food in the oven.
HOW TO USE Operating Instructions The setting value can be changed by pressing the “ ” key. The items are different from each model. Refer to “Setting item chart” SETTING ITEM CHART Operating Instruction LDG3017ST 1 Determine which oven you would like to adjust (upper or lower). 2 Press key 2 times for the lower oven, e will appear in the display. Press key 3 times for the upper oven, f will will appear in the display.
HOW TO USE 21 Minimum & Maximum default settings: The interior oven light automatically turns on when the oven door is opened. Press the M or the Q key to turn the oven lights on or off. All of the features listed have a minimum and a maximum time or temperature setting that may be entered into the control. An entry acceptance beep will sound each time a control key is pressed.
HOW TO USE How to Use the Timer How to Use the Oven Lockout Feature The upper or lower TIMER ON/OFF serves as an extra timer in the kitchen that will sound when the set time has run out. It does not start or stop cooking. The oven lockout feature automatically locks the oven door and prevents most oven controls from being turned on. It does not disable the clock, timer or the interior oven light. The upper or lower TIMER ON/OFF feature can be used during any of the other oven control functions.
HOW TO USE 23 CAUTION yy Replace the oven rack before turning the oven on to prevent burns. yy When removing the oven racks, grab at the handles and pull out. Always wear oven mitts to prevent burns. yy DO NOT cover the rack with aluminum foil, or any other material, or place anything on the bottom of the oven. Doing so will result in poor baking and may damage the oven bottom. yy Only arrange oven racks when the oven is cool.
HOW TO USE BAKE (Upper & Lower Oven) A is used to prepare foods such as pastries, breads, casseroles and roasts. The oven can be programmed to bake at any temperature from 170°F (77°C) to 550°F (288°C). The default temperature is 350°F (177°C). 4 When cooking is complete, press the or key. 5 Remove the food from the oven. To set the oven to BAKE (example to 375°F): 1 Press the upper or lower oven A key.
HOW TO USE yy To preheat, set the oven at the required recipe temperature. Wait until the oven reaches its set temperature before placing the food in the oven. Preheating is necessary for satisfactory results when baking cakes, cookies, pastries and breads. yy For best baking results, pans should be centered on the racks. If baking with more than one pan, place the pans so that each one has at least 1” to 1 1/2” of air space around them.
HOW TO USE To set the upper oven to BROIL BROIL mode display (example) 1 Press the key once for high, twice for medium, and three times for low. 2 Press the q key. High temperature 3 Allow the broiler to preheat for 3 minutes. Medium temperature 4 Place food in the upper oven. 5 Close the oven door. The oven door must be closed during broiling. Low temperature WARNING When using your broiler, the temperature inside the oven will be extremely hot.
HOW TO USE 27 Cut Size/ Thickness 1" Tenderloin/Filet 1 1/2" 2" 3/4" - 1" NY Strip Steak/Striploin 1 1/2" 3/4" - 1" Ribeye/Delmonico 1 1/2" 3/4" - 1" Bone-In Steaks 1 1/2" Skirt Steak 1/2"-3/4" Flank Steak 1" Flank Steak 1 1/2" Hamburgers 3/4" thick Doneness Medium Rare Medium Medium Well Well Done Medium Rare Medium Medium Well Well Done Medium Rare Medium Medium Well Well Done Medium Rare Medium Medium Well Well Done Medium Rare Medium Medium Well Well Done Medium Rare Medium Medium Well
HOW TO USE BROILING CHART Cut Bone-in Chops Salmon portion/ steak, skin-on Salmon portion/ steak, skin-off Halibut portion, skin-off Shrimp, skin on Shrimp, skin off Lobster tail Pork Chop Pork Tenderloin Sausage Ham slices Breast, boneless, skinless Asparagus spears Summer squash, zucchini Toast English muffin Size/ Thickness 6 - 8 oz., 2 bone 3/4" - 1" 1 1/2" Time Medium Broiler Setting High Well done Well done Medium Medium 3/4" - 1" 1 1/2" 3/4" - 1" 1 1/2" <10/lb. 10-20/lb. 21-30/lb.
HOW TO USE 29 DELAYED TIMED COOK (Upper & Lower Oven) The TIMED COOK feature allows you to set the oven to cook for a specific length of time. This feature can only be used while baking. The automatic timer of the DELAYED TIMED COOK will turn the oven ON and OFF at the time you select. This feature can only be used for baking. To set TIMED COOK (example: to BAKE at 300°F for 30 minutes): 1 Press the upper or lower A key. qo will appear in the display.
HOW TO USE How to use convection for the lower oven Convection system uses a fan to circulate the oven’s heat evenly within the oven. This improved heat distribution allows for even cooking and excellent results. CONVECTION BAKE FOR THE LOWER OVEN Convection baking allows for even cooking and excellent results when using multiple racks at the same time. It could also shorten cooking time. NOTE When cooking using the convection cycle, the oven temperature is automatically reduced by 25°F.
HOW TO USE 3 Cookware for convection cooking 1) Paper and Plastic You can use heat-resistant paper and plastic containers that are recommended for use in regular ovens in convection ovens. 2) Metal and Glass Any type of cookware will work in your convection oven. However, metal pans heat the fastest and are recommended for convection baking. • Darkened or matte-finished pans will bake faster than shiny pans. • Glass or ceramic pans cook more slowly.
HOW TO USE Special Features WARM (Upper & Lower Oven) KIDS MEAL (Upper Oven) This function will maintain an oven temperature of 170°F. The WARM function will keep cooked food warm for serving up to 3 hours after cooking has finished. The Warm function may be used without any other cooking operations or can be used after cooking has finished using TIMED BAKE or DELAYED TIMED BAKE.
HOW TO USE 33 FAVORITE (Lower Oven) This feature maintains a warm oven for rising yeast leavened products before baking. This feature may store and recall up to 3 different settings. The favorite setting feature may be used with COOK TIME feature. This feature will not work with any other function including START TIME feature. To set the PROOF function: 1 Use rack B or C for proofing. 2 Press the J key. 3 Press the q key. Display Screen (example): 1 To set FAVORITE 1) Place the food in the oven.
HOW TO USE SABBATH (Upper & Lower Oven) The SABBATH mode is typically used on the Jewish Sabbath and Holidays. When the SABBATH mode is activated, the oven does not turn off until the SABBATH mode is deactivated. In SABBATH mode, all function keys, except for the and keys, are inactive. z will appear in oven display. To set the SABBATH mode: 1 Press the A key. 2 Using the number keys, enter the desired temperature. 3 Press the q key. 4 Press and hold the X key for three seconds.
Care and Cleaning 35 ENGLISH CARE AND CLEANING Gas Surface Burner CAUTION yy DO NOT clean this appliance with bleach. yy To prevent burns, wait until the cooktop has cooled down before touching any of its parts. Removing and Replacing the Gas Surface Burner Grates and burner caps/heads can be removed for care and cleaning.
Care and Cleaning Burner Grates The range consists of three separate professional-style grates. For maximum stability, these grates should only be used when in their proper position. The two side grates can be interchanged from left to right and front to back. The center grate can be interchanged from front to back. side grate center grate side grate NOTE Do not operate a burner for an extended period of time without cookware on the grate.
Care and Cleaning 37 Control Panel To avoid burns, do not clean the cooktop surface until it has cooled. Foods with high acid or sugar content could cause a dull spot if allowed to set. Wash and rinse when the surface has cooled. For other spills such as oil/grease spattering, etc., wash with soap and water when the surface has cooled. Then rinse and polish with a dry cloth. To prevent activating the control panel during cleaning, unplug the range.
Care and Cleaning Oven Door Removing the Upper Oven Door 1 Fully open the door. Lift up the hinge locks toward the oven frame until they stop. Do not hand clean the oven door gasket Hand clean the door Do not hand clean the oven door gasket Hand clean the door yy Use soapy water to thoroughly clean the oven door. Rinse well. DO NOT immerse the door in water. yy You may use a glass cleaner on the outside glass of the oven door. DO NOT spray water or glass cleaner on the door vents.
Care and Cleaning Removing the Lower Oven Door 1 Be sure that the hinges are lined up at a 30 degree 1 Fully open the door. Lift up the hinge locks toward the position. 2 Slide the door back into the hinges until you hear a solid click and the release buttons have engaged. oven frame until they stop. 2 Close the door to the removal position (approximately five degrees). approximately 30° 3 Fully open the door. Push the hinge locks down onto the hinge.
Care and Cleaning Replacing the Lower Oven Door Inside of the Oven 1 Firmly grasp both sides of the door at the top and close Cleaning Guide the door to the removal position (approximately five degrees). Soil Level Cycle Setting Lightly Soiled Oven Cavity 2 Hour Self Clean (p. 40) Moderately Soiled Oven Cavity 3 Hour Self Clean (p. 40) Heavily Soiled Oven Cavity 4 Hour Self Clean (p.
Care and Cleaning To Set Self Clean 1 Press Do not hand clean the oven door gasket or key. The oven defaults to the recommended three hour self clean for a moderately soiled oven. Press twice for a four hour self clean and three times for a two hour self clean. 2 Press the q key. Hand clean the door yy Remove the oven racks, broiler pan, broiler grid, all cookware, aluminum foil or any other material from the oven. yy The kitchen should be well ventilated to minimize the odors from cleaning.
Care and Cleaning Changing the Oven Light The oven light is a standard 40-watt appliance bulb. It will turn on when the oven door is open. When the oven door is closed, press the M or Q key to turn the light on or off. 3 Wash and rinse the broiler pan and grid in hot water with a soap-filled or plastic scouring pad. If food has burnt on, sprinkle the grid with cleaner (while hot) and cover it with wet paper towels or a dishcloth. Soaking the pan will remove burnt-on foods.
BEFORE REQUESTING SERVICE 43 Symptoms and Questions Possible Cause/Solution Top burners do not light or do not burn evenly. yy Make sure that the electrical plug is inserted into a live, properly grounded outlet. yy Remove the burners and clean them. Check the electrode area for burnt-on food or grease. See “Burner caps/burner head cleaning” in the Care and Cleaning section. yy Make sure that the burner parts are installed correctly. See “Burner caps/heads cleaning” in the Care and Cleaning section.
BEFORE REQUESTING SERVICE Symptoms and Questions Possible Cause/Solution Too much smoke during the self clean cycle. Too much soil in the oven. Open the windows to get rid of the smoke from the room. Press the or key. Wait until the m light goes off before trying to open the oven door. Wipe up the excess soil and reset the clean cycle. The oven door does not open after a self clean cycle. The oven temperature is too high. Wait up to one hour to cool down.
Warranty 45 LG Electronics Inc. will repair or replace your product, at LG’s option, if it proves to be defective in material or workmanship under normal use, during the warranty period set forth below, effective from the date of original consumer purchase of the product. This limited warranty is good only to the original purchaser of the product and effective only when used in U.S.A. WARRANTY PERIOD HOW SERVICE IS HANDLED One Year From the date of the original purchase.
MEMO
LG Customer Information Center 1-800-243-0000 USA, Consumer User 1-888-865-3026 USA, Commercial User Register your product Online! www.lg.