ENGLISH ESPAÑOL OWNER’S MANUAL GAS DOUBLE OVEN RANGE Please read this guide thoroughly before operating and keep it handy for reference at all times. LDG3036ST LDG3035ST LDG3035SB MFL33029615 LDG3035SW LDG3031ST www.lg.
TABLE OF CONTENTS TABLE OF CONTENTS 3 PRODUCT FEATURES 30 Preheating and Pan Placement 31 - CONVECTION ROAST FOR THE LOWER OVEN 4 IMPORTANT SAFETY INSTRUCTIONS 32 Special Features 32 - PIZZA (Upper Oven) (LDG3036ST) 10 BEFORE USE 32 - WARM (Upper & Lower Oven) 33 - PROOF (Lower Oven) 10 Accessories 33 - FAVORITE (LDG3036ST Lower Oven) 11 Components 33 - SABBATH (Upper & Lower Oven) 12 HOW TO USE 35 CARE AND CLEANING 12 Gas Surface Burners 35 Gas Surface Burner 12 - Be
PRODUCT FEATURES 3 MULTIPLE GAS BURNER SIZES SAFE AND CONVENIENT GAS RANGE Provides safety and convenience for cooking. Superboil (17000 BTU) can quickly bring a pot of water to a boil. UPPER OVEN / LOWER OVEN Separate upper and lower ovens. Choose to use either oven, or both, depending on the size of your food. SELF CLEAN & easyCLEAN™ Good for easy cleaning. ENGLISH Choose a burner to fit the size of your cookware.
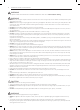
Important Safety Instructions IMPORTANT SAFETY INSTRUCTIONS Always comply with the following precautions to avoid dangerous situations and to ensure the peak performance of your product. WARNING Indicates a hazardous situation which, if not avoided, could result in death or serious injury. CAUTION Indicates a hazardous situation which, if not avoided, could result in minor or moderate injury. WHAT TO DO IF YOU SMELL GAS 1. Open windows. 2. DO NOT try to light any appliance. 3.
Important Safety Instructions 5 Enforcement Act requires the Governor of California to publish a list of substances known to the state to cause birth defects or other reproductive harm, and requires businesses to warn customers of potential exposure to such substances. Gas appliances can cause minor exposure to four of these substances, namely benzene, carbon monoxide, formaldehyde and soot, caused primarily by the imperfect combustion of natural or LP gas.
Important Safety Instructions WARNING yy This product contains chemicals known to the State of California to cause cancer. Wash hands after handing. WARNING yy NEVER use your range as a space heater to heat or warm the room. Doing so may result in carbon monoxide poisoning and overheating of the oven. yy NEVER wear loose fitting or hanging garments while using the appliance. Be careful when reaching for items placed in cabinets over the range.
Important Safety Instructions WARNING yy Even if the top burner flame goes out, gas is still flowing to the burner until the knob is turned to the “OFF” position. If you smell gas, immediately open a window and ventilate the area for five minutes prior to using the burner. Do not leave the burners “ON” unattended. yy Use proper pan size - DO NOT use pans that are unstable or that can be easily tipped. Select cookware with flat bottoms large enough to cover burner grates.
Important Safety Instructions COOK MEAT AND POULTRY THOROUGHLY To protect against foodborne illnesses, cook meat and poultry thoroughly—meat to at least an INTERNAL temperature of 160°F and poultry to at least an INTERNAL temperature of 180°F. SELF CLEANING OVEN Make sure to wipe off excess spillage before operating the self clean function. CAUTION yy DO NOT leave food, cooking utensils, racks, etc. in the oven during the self clean cycle. yy DO NOT use oven cleaners.
Important Safety Instructions READ ALL INSTRUCTIONS BEFORE USING THE APPLIANCE. SAVE THESE INSTRUCTIONS ENGLISH yy If you should have a grease fire in the broiler pan, press the “UPPER CLEAR/OFF” or “LOWER CLEAR/OFF” key, and keep the oven door closed to contain fire until it burns out. yy For safety and better cooking performance, always bake and broil with the oven door closed. Open door baking or broiling can cause damage to the knobs or valves.
BEFORE USE BEFORE USE Accessories Make sure that all parts are included after purchasing this product.
BEFORE USE 11 Components For Model: LDG3031ST Control panel Grates Oven vent Medium burner Large burner Knobs (4) Automatic oven light switch Small burner Extra large burner Self clean latch Rack Upper oven door Anti-tip bracket Rack Lower oven door For Model: LDG3035S Control panel Grates Oven vent Medium burner Large burner Knobs (5) Automatic oven light switch Small burner Extra large burner Self clean latch Rack Upper oven door Anti-tip bracket Rack Lower oven door For Model: LDG3036S Control
HOW TO USE HOW TO USE Gas Surface Burners Before use Read all instructions before using. Make sure that all burners are properly placed. Make sure that all grates are properly placed before using the burner. CAUTION DO NOT operate the burner for an extended period of time without cookware on the grate. The finish on the grate may chip without cookware to absorb the heat.
HOW TO USE Using the gas surface burners Your gas range cooktop has five (four) sealed gas burners. These can be assembled and separated. Follow the guide below. 1 Be sure that all of the surface burners are placed in the correct positions. 2 Put cookware on the burner. (Example: pot, frying pan, etc.) 3 Push and turn the control knob to the “u” position. 1 2 3 4 1 2 3 4 1 2 3 4 LDG3031ST You will hear a clicking noise from the electric spark ignition system.
HOW TO USE In Case of Power Failure: Using a Wok: In case of a power failure, you can light the gas surface burners on your range with a match. Surface burners in use when an electrical power failure occurs will continue to operate normally. If using a wok, it is recommended that you use a 14-inch or smaller flat-bottomed wok. Make sure that the wok bottom sits flat on the grate. 1 Hold a lit match to the burner, then push in the control knob. 2 Turn the control knob to the "Lo” position.
HOW TO USE Preheat the griddle according to the guide below and adjust for the desired setting. Type of Food Preheat Conditions Cook Setting Warming Tortillas Your non-stick coated griddle provides an extra-large cooking surface for meats, pancakes or other food usually prepared in a frying pan or skillet. NOTE yy It is normal for the griddle to become discolored over 1 2 3 4 time. none 5 (MED) Pancakes HI 3 min. HI Hamburgers HI 5 min. HI Fried Eggs HI 5 min. HI Bacon HI 3 min.
HOW TO USE How to Use the Oven Before use Read all instructions before using. Make sure the electrical power cord and the gas valve are properly connected. Check it for safety. Check the correct use of the range depending on the type of food you will cook. Make sure you know how to use the oven (temperature setting, time setting and recipe) for best results. CAUTION WHAT TO DO IF YOU SMELL GAS 1. Open windows. 2. DO NOT try to light any appliance. 3. DO NOT touch any electrical switch. 4.
HOW TO USE 17 Do not block, touch or place items around the oven vent during cooking. CAUTION yy DO NOT place plastic or flammable items on the cooktop—they may melt or ignite if left too close to the vent. yy DO NOT place closed containers on the cooktop. The pressure in closed containers may increase, which may cause them to burst. yy Metal items will become very hot if they are left on the cooktop, and could cause burns.
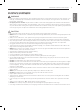
HOW TO USE Using the Control Panel For Model: LDG3031S / LDG3035S 4 1 3 2 21 23 22 11 10 5 24 16 12 Display 8 7 15 25 6 14 9 26 17 13 For Model: LDG3036S 4 18 1 23 22 11 3 2 5 19 21 10 24 16 12 20 Display 8 7 15 25 6 14 13 Upper Oven: Name Description 1 Bake Traditional bake function. Refer to “Bake” in the How To Use section. 2 Broil Traditional broil function. Refer to “Broil” in the How To Use section. 3 Warm Warms food in the oven.
HOW TO USE 19 Using the Control Panel (continued) Name Description - Bake Traditional bake function. Refer to “Bake” in the Operating Instructions section. q Proof To proof a piece of bread. Refer to “Proof” in the Operating Instructions section. w Warm Warms food in the oven. Refer to “Warm” in the Operating Instructions section. e Lower Oven Light Turns on/off the lower oven light. r Lower Self Clean Cleans the inside of the lower oven automatically.
HOW TO USE Operating Instructions The value of setting can be changed by pressing “ ” key. The items are different from each model. Refer to “Setting item chart” 1 Determine which oven you would like to adjust (upper or lower). 2 For the lower oven, Press the appear in the display. For the upper oven, Press the pear in the display.
HOW TO USE 21 Minimum & Maximum default settings: The oven temperature settings can either be set to Fahrenheit or Celsius. The oven defaults to Fahrenheit unless changed by the user. All of the features listed have minimum and maximum time or temperature settings that may be entered into the control. An entry acceptance beep will sound each time a control key is pressed. 1 Press the key until “i” will display. 2 Press the number 1 key to select Fahrenheit or Celsius.
HOW TO USE How to Use the Timer How to Use the Oven Lockout Feature The Upper or Lower Timer On/Off serves as an extra timer in the kitchen that will sound when the set time has run out. It does not start or stop cooking. The oven lockout feature automatically locks the oven door and prevents most oven controls from being turned on. It does not disable the clock, timer or the interior oven light. The Upper or Lower Timer On/Off feature can be used during any of the other oven control functions.
HOW TO USE 23 Removing and Replacing the Oven Racks Remove Replace To Remove Racks To Replace Racks 1 While wearing oven mitts, grasp the oven rack. 1 2 Pull the rack straight out until it stops. While wearing oven mitts, place the end of the rack on the support. 3 Lift up the front of the rack. 2 Tilt the front end of the rack up. 4 Pull out the rack. 3 Push the rack in. 4 Check that the rack is properly in place. *You can also adjust the racks position before using the oven.
HOW TO USE BAKE (Upper & Lower Oven) Baking chart is used to prepare foods such as pastries, bread, casseroles and roasts. The oven can be programmed to bake at any temperature from 170°F (77°C) to 550°F (288°C). The default temperature is 350°F (177°C). This chart is only for reference and can be used for both the upper and lower ovens. Adjust the cook time according to your recipe.
HOW TO USE To set the upper oven to BROIL Your oven is designed for closed door broiling. uses an intense heat radiation from the upper gas burner. The Broil function works best when broiling thin, tender cuts of meat (1” or less), poultry or fish. 1 CAUTION yy DO NOT use a broiler pan without a grid. Oil can cause a grease fire. yy DO NOT cover the grid and broiler pan with aluminum foil. Doing so will cause a fire. Press the key once for l and twice for m. 2 Press the q key.
HOW TO USE BROILING CHART Upper oven Quantity and/or Thickness Second side (Minutes) Shelf Position First side (Minutes) A 5-7 3-5 A 6-7 2-3 1” thick 1 to 1 1/2 lbs. A 7-8 3-4 A 8-9 4-5 Rare Medium Well Done 1 1/2” thick 2 to 2 1/2 lbs. A 8 3-4 A 9 4-5 A 10 5-6 Chicken 1 whole cut up 2 to 21/2lbs., split lengthwise A 8-10 5-7 Food Ground beef Well done Beef Steaks Rare Medium Well Done 1 Ib. (4 patties) 1/2 to 3/4” thick Comments Space evenly.
HOW TO USE 27 DELAYED TIMED COOK (Upper & Lower Oven) The TIMED COOK feature allows you to set the oven to cook for a specific length of time. This feature can only be used while baking. The automatic timer of the DELAYED TIMED COOK will turn the oven ON and OFF at the time you select. This feature can only be used for baking.
HOW TO USE How to use convection for the lower oven (LDG3036ST) Convection system uses a fan to circulate the oven’s heat evenly within the oven. This improved heat distribution allows for even cooking and excellent results. CONVECTION BAKE FOR THE LOWER OVEN (LDG3036ST) Convection baking allows for even cooking and excellent results when using multiple racks at the same time. It could also shorten cooking time.
HOW TO USE 3 Cookware for convection cooking 1) Paper and Plastic You can use heat-resistant paper and plastic containers that are recommended for use in regular ovens in convection ovens. 2) Metal and Glass Any type of cookware will work in your convection oven. However, metal pans heat the fastest and are recommended for convection baking. • Darkened or matte-finished pans will bake faster than shiny pans. • Glass or ceramic pans cook more slowly.
HOW TO USE Preheating and Pan Placement yy To preheat, set the oven at the required recipe temperature. Wait until the oven reaches its set temperature before placing the food in the oven. Preheating is necessary for satisfactory results when baking cakes, cookies, pastry and breads. yy For best baking results, pans should be centered on the racks. If baking with more than one pan, place the pans so that each one has at least 1” to 1 1/2” of air space around them.
HOW TO USE CONVECTION ROAST feature is designed to give optimum roasting performance. CONVECTION ROAST feature combines cooking with the convection fan to roast meats and poultry. The heated air circulates around the food from all sides, sealing in juices and flavors. Foods are crispy brown on the outside while staying moist on the inside. 1 NOTE key to cancel CONVECTION ROAST yyTouch function at any time.
HOW TO USE Special Features WARM (Upper & Lower Oven) PIZZA (Upper Oven) This function will maintain an oven temperature of 170°F. The WARM function will keep cooked food warm for serving up to 3 hours after cooking has finished. The Warm function may be used without any other cooking operations or can be used after cooking has finished using TIMED BAKE or DELAYED TIMED BAKE. This function will automatically preheat the upper oven temperature to cook either regular or rising crust frozen pizza.
HOW TO USE 33 FAVORITE (LDG3036ST Lower Oven) This feature maintains a warm oven for rising yeast leavened products before baking. This feature may store and recall up to 3 different settings. The favorite setting feature may be used with COOK TIME feature. This feature will not work with any other function including START TIME feature. To set the PROOF function: 1 Use rack B or C for proofing. 2 Press the 3 Press the q key. 1 key. To set FAVORITE 1) Place the food in the oven.
HOW TO USE SABBATH (Upper & Lower Oven) To set the SABBATH mode: The SABBATH mode is typically used on the Jewish Sabbath and Holidays. When the SABBATH mode is activated, the oven does not turn off until the SABBATH mode is deactivated. In SABBATH mode, all function keys, except for the 1 Press the 2 Using the number keys, enter the desired temperature. 3 Press the q key. 4 Press and hold the and keys, are inactive. z will appear in oven display. key. key for three seconds.
Care and Cleaning 35 ENGLISH CARE AND CLEANING Gas Surface Burner CAUTION yy DO NOT clean this appliance with bleach. yy To prevent burns, wait until the cooktop has cooled down before touching any of its parts. Removing and Replacing the Gas Surface Burner Grates and burner caps/heads can be removed for care and cleaning.
Care and Cleaning Burner Heads/Caps After Cleaning the Burner Heads/Caps For even and unhampered flame, the slits in the burner heads must be kept clean at all times.The burner heads and (the oval burner head) & Cap assembly can be lifted off. yyWash the burner caps in hot soapy water and rinse with clean water. yyAny spills on or around an electrode must be carefully cleaned. yyTo remove burnt-on food, soak the burner heads in a solution of mild liquid detergent and hot water for 20–30 minutes.
Care and Cleaning 37 Control Panel To avoid burns, do not clean the cooktop surface until it has cooled. Foods with high acid or sugar content could cause a dull spot if allowed to set. Wash and rinse when the surface has cooled. For other spills such as oil/grease spattering, etc., wash with soap and water when the surface has cooled. Then rinse and polish with a dry cloth. To prevent activating the control panel during cleaning, unplug the range.
Care and Cleaning Oven Door Removing the Upper Oven Door 1 Fully open the door. Lift up the hinge locks toward the oven frame until they stop. Do not hand clean the oven door gasket Hand clean the door Do not hand clean the oven door gasket Hand clean the door yy Use soapy water to thoroughly clean the oven door. Rinse well. DO NOT immerse the door in water. yy You may use a glass cleaner on the outside glass of the oven door. DO NOT spray water or glass cleaner on the door vents.
Care and Cleaning 39 Removing the Lower Oven Door 1 Be sure that the hinges are lined up at a 30 degree position. 1 2 Slide the door back into the hinges until you hear a solid click and the release buttons have engaged. 2 Close the door to the removal position (approximately five Fully open the door. Lift up the hinge locks toward the oven frame until they stop. degrees). approximately 30° 3 Fully open the door. Push the hinge locks down onto the hinge.
Care and Cleaning Replacing the Lower Oven Door Inside of the Oven Firmly grasp both sides of the door at the top and close 1 Cleaning Guide the door to the removal position (approximately five degrees). Soil Level Cycle Setting Lightly Soiled Oven Cavity 2 Hour Self Clean (p. 40) Moderately Soiled Oven Cavity 3 Hour Self Clean (p. 40) Heavily Soiled Oven Cavity 4 Hour Self Clean (p.
Care and Cleaning Before Starting SELF CLEAN To Set Self Clean Press the key. The oven defaults to the recommended three hour self clean for a moderately soiled oven. Press twice for a two hour self clean and three times for a four hour self clean. 2 Press the q key. yy Remove the oven racks, broiler pan, broiler grid, all cookware, aluminum foil or any other material from the oven. yy The kitchen should be well ventilated to minimize the odors from cleaning.
Care and Cleaning easyCLEAN LG’s easyCLEAN enamel in your new oven provides flexibility while cleaning the inside of your range. The easyCLEAN feature works with LG’s new enamel to help lift LIGHT soils such as drops of cheese from pizzas or LIGHT grease splatter from small roasts without harsh chemicals for safer and faster hand-cleaning.
Care and Cleaning 43 easyCLEAN INSTRUCTION GUIDE easyCLEAN INSTRUCTION GUIDE NOTES 1 Remove oven racks and accessories from the oven. 2 Scrape off any burnt-on debris with a plastic scraper. Suggested plastic scrapers: • Hard plastic spatula • Plastic pan scraper • Plastic paint scraper • Old credit card 3 Using a spray bottle, spray 1/4 cup (2oz) of water to fully saturate the walls and soils in the corners of the oven.
Care and Cleaning Changing the Oven Light 3 The oven light is a standard 40-watt appliance bulb. It will turn on when the oven door is open. When the oven door is closed, press the key to turn the light on or off. Wash and rinse the broiler pan and grid in hot water with a soap-filled or plastic scouring pad. If food has burnt on, sprinkle the grid with cleaner (while hot) and cover it with wet paper towels or a dishcloth. Soaking the pan will remove burnt-on foods.
BEFORE REQUESTING SERVICE 45 Symptoms and Questions Possible Cause/Solution Top burners do not light or do not burn evenly. yy Make sure that the electrical plug is inserted into a live, properly grounded outlet. yy Remove the burners and clean them. Check the electrode area for burnt-on food or grease. See “Burner caps/burner head cleaning” in the Care and Cleaning section. yy Make sure that the burner parts are installed correctly. See “Burner caps/heads cleaning” in the Care and Cleaning section.
BEFORE REQUESTING SERVICE Symptoms and Questions Too much smoke during the self clean cycle. Possible Cause/Solution Too much soil in the oven. Open the windows to get rid of the smoke from the room. Press the or key. Wait until the m light goes off before trying to open the oven door. Wipe up the excess soil and reset the clean cycle. The oven door does not open after a self clean cycle. The oven temperature is too high. Wait up to one hour to cool down.
BEFORE REQUESTING SERVICE Symptoms and Questions 47 Possible Cause/Solution The easyCLEAN cycle only helps to loosen light soils in your oven range to assist in hand-cleaning of your oven. It does not automatically remove all soils after the cycle. Some scrubbing of your oven range is required after running the easyCLEAN cycle. I tried scrubbing my oven after running easyCLEAN, but some soils still remain.
Warranty WARRANTY LG Electronics Inc. will repair or replace your product, at LG’s option, if it proves to be defective in material or workmanship under normal use, during the warranty period set forth below, effective from the date of original consumer purchase of the product. This limited warranty is good only to the original purchaser of the product and effective only when used in U.S.A. WARRANTY PERIOD HOW SERVICE IS HANDLED One Year From the date of the original purchase.
ESPAÑOL MANUAL DE PROPIETARIO ESTUFA DE GAS CON HORNO DOBLE Lea detenidamente estas instrucciones antes utilizar y guárdelas como referencia para el futuro. LDG3036ST LDG3035ST LDG3035SB P/No.: MFL33029615 LDG3035SW LDG3031ST www.lg.
2 Indice de contenidos INDICE DE CONTENIDOS 3 4 CARACTERÍSTICAS DEL PRODUCTO 30 Precalentamiento y ubicación de las bandejas 31 - CONVECCIÓN ASADO PARA EL HORNO INFERIOR (LDG3036ST) INSTRUCCIONES DE SEGURIDAD IMPORTANTES 10 ANTES DE USAR 10 Accesorios 11 Componentes 32 Características especiales 32 - PIZZA (Horno superior) 32 - CALENTAR (Horno superior e inferior) 33 - LEVAR (Para el horno inferior) 33 - FAVORITOS (Para el horno inferior) 33 - SABBAT (Horno superior e inferior) 3
características del producto 3 DIVERSOS TAMAÑOS DE HORNILLAS A GAS Elija la hornilla que mejor se adapte al tamaño de su batería de cocina. Es posible utilizar varias hornillas a la vez para cocinar distintas cosas al mismo tiempo. Proporciona seguridad y conveniencia para cocinar. Su sistema Superboil ("super hervido") (de 17000 BTU) puede rápidamente hacer hervir una olla de agua. HORNO SUPERIOR / HORNO INFERIOR Hornos superior e inferior separados.
4 INSTRUCCIONES DE SEGURIDAD IMPORTANTES INSTRUCCIONES DE SEGURIDAD IMPORTANTES Cumpla siempre con lo indicado en las siguientes señales de avisos de seguridad para evitar situaciones peligrosas y para asegurarse de obtener el máximo rendimiento de su producto. ADVERTENCIA Indica una situación peligrosa que puede resultar en lesiones graves o aún la muerte si no es evitada. PRECAUCIÓN Indica una situación peligrosa que, de no ser evitada, puede resultar en lesiones menores a moderadas.
INSTRUCCIONES DE SEGURIDAD IMPORTANTES 5 AVISO IMPORTANTE DE SEGURIDAD PRECAUCIONES DE SEGURIDAD Solicite al instalador que le muestre dónde está ubicada la válvula de cierre de gas de la estufa y cómo cerrarla en caso de ser necesario. yy Asegúrese de que su estufa sea correctamente instalada y conectada a tierra por un instalador autorizado, de conformidad con las instrucciones de instalación.
6 INSTRUCCIONES DE SEGURIDAD IMPORTANTES ADVERTENCIA yy Este producto contiene quimicos conocidos por el Estado de California de causar cáncer. Lávese las manos después de manipular. ADVERTENCIA yy NUNCA utilice el artefacto para calentar o aclimatar la habitación. Hacerlo podría causar la intoxicación por monóxido de carbono y el sobrecalentamiento del horno. yy NUNCA use ropa suelta o prendas colgantes mientras utiliza el artefacto.
INSTRUCCIONES DE SEGURIDAD IMPORTANTES 7 HORNILLAS DE LA SUPERFICIE ADVERTENCIA PRECAUCIÓN yy Asegúrese de que todos los controles de la superficie estén en la posición "OFF" (APAGADO) antes de abrir la llave de suministro de gas de la estufa. yy NUNCA desatienda las hornillas de la superficie cuando estén encendidas con llama alta. Los desbordes pueden provocar humo y derrames de grasa que pueden incendiarse.
8 INSTRUCCIONES DE SEGURIDAD IMPORTANTES COCINE COMPLETAMENTE LA CARNE Y EL POLLO Para prevenir cualquier enfermedad transmitida por los alimentos, cocine completamente la carne y el pollo. La carne debe cocinarse a una temperatura INTERNA DE 160°F (71°C) como mínimo, y el pollo debe cocinarse a una temperatura INTERNA mínima de 180°F (82°C). AUTOLIMPIEZA DEL HORNO Asegúrese de quitar los derrames en exceso antes de iniciar la función de auto limpieza.
INSTRUCCIONES DE SEGURIDAD IMPORTANTES 9 yy En caso de que haya fuego en la asadera provocado por grasas, presione la tecla "UPPER CLEAR/OFF" o "LOWER CLEAR/OFF", y mantenga la puerta del horno cerrada para contener el fuego hasta que éste se apague. yy Por razones de seguridad y para lograr un óptimo rendimiento en la cocción, siempre hornee y ase sus comidas con la puerta del horno cerrada. Hornear o asar la comida con la puerta abierta puede dañar las perillas o las válvulas del aparato.
10 ANTES DE USAR ANTES DE USAR Accesorios Asegúrese de que todas las piezas estén incluidas antes de comprar el producto.
ANTES DE USAR 11 Componentes Asegúrese de entender los nombres y función de cada pieza. * A lo largo de este manual, las características y apariencia del producto pueden variar dependiendo de su modelo.
12 CÓMO USAR CÓMO USAR Hornillas a gas de la superficie Antes de usar Lea todas las instrucciones antes de usar el producto. Asegúrese de que todas las hornillas estén correctamente colocadas. Asegúrese de que todas las parrillas están correctamente ubicadas antes de encender las hornillas. PRECAUCIÓN NO encienda la hornillas por un largo período de tiempo sin que haya ninguna batería sobre la rejilla. El acabado de la parrillas puede saltarse si no hay ninguna batería que absorba el calor.
CÓMO USAR Hornillas a Gas La cocina de su estufa tiene cinco(quatro) hornillas selladas a gas. Estas pueden ser ensambladas y separadas. Siga la guía a continuación. 13 Uso de las hornillas a gas de la superficie Asegúrese de que todas las hornillas de la superficie estén ubicadas en la posición correcta. 2 Ponga la batería sobre la hornilla. (Por ejemplo: una olla, sartén, etc.). 3 Empuje y gire la perilla de control a la posición “LITE”.
14 CÓMO USAR En caso de falla en la energía eléctrica: En caso de que haya una falla en la energía eléctrica, puede encender las hornillas superiores con un fósforo. Las hornillas superiores que se encuentren en uso al producirse una falla en la energía eléctrica continuarán funcionando con normalidad. 1 Acerque un fósforo a la hornilla. Luego, presione la perilla de control. 2 Gire la perilla de control a la posición de“Lo”.
CÓMO USAR Uso de la Parrilla (Modelo LDG3036S solamente) Precaliente la parrilla según la siguiente guía y ajuste la potencia que desee. Tipo de alimento Ajuste de cocción sin precalentar 5 (MED) Panqueques HI 3 min. HI Hamburguesas HI 5 min. HI Huevos fritos HI 5 min. HI Bacon HI 3 min. HI Salchichas de desayuno HI 5 min. HI Sándwiches calientes HI 4 min. HI NOTA yy La potencia de la parrilla podría precisar ajuste si se usa durante períodos prolongados.
16 CÓMO USAR Cómo usar el Horno Antes de usar Lea todas las instrucciones antes de usar. Asegúrese de que el cable de alimentación eléctrica y la válvula de gas estén correctamente conectados. Verifíquelo por cuestiones de seguridad. Verifique cómo utilizar de manera correcta la estufa, dependiendo del tipo de comida a cocinar. Asegúrese de que sabe cómo utilizar el horno (configuración de temperatura, tiempo de cocción y receta) para lograr los mejores resultados. PRECAUCIÓN QUÉ HACER SI HUELE GAS 1.
CÓMO USAR 17 No obstruya, toque o coloque objetos alrededor del conducto de ventilación del horno cuando el mismo esté encendido. Su horno es ventilado a través de conductos ubicados en el centro, encima de la parrilla de la hornilla. No obstruya la ventilación del horno cuando éste se encuentre en funcionamiento; de lo contrario, no permitirá la circulación correcta de aire. No toque las aperturas de ventilación o las superficies de alrededor durante su uso.
18 CÓMO USAR Cómo usar el panel de control Para el modelo LDG3031S / LDG3035S 4 1 3 2 21 23 22 11 10 5 24 16 12 Pantalla 8 7 15 6 25 14 9 26 17 13 Para el modelo LDG3036S 4 18 1 23 22 11 3 2 5 19 21 10 24 16 12 20 Pantalla 8 7 15 6 25 14 9 26 17 13 Horno superior: Nombre Descripción 1 Bake Función tradicional de hornear. Consulte “Hornear” en la sección "Cómo usar". 2 Broil Función tradicional de asar. Consulte “Asar” en la sección "Cómo usar".
CÓMO USAR 19 Cómo usar el panel de control Horno inferior: Nombre Descripción q Proof Función para levar piezas/ una pieza de pan. Consulte “Levar” en la sección "Instrucciones de funcionamiento". w Warm Calienta la comida en el horno. Consulte la función “Calentar” en la sección "Instrucciones de funcionamiento". e Lower Oven Light Enciende/ apaga la luz del horno inferior. r Lower Self Clean Limpia el interior del horno inferior automáticamente.
20 CÓMO USAR Instrucciones de Funcionamiento 1 Determine qué horno desea ajustar (el horno superior o el horno inferior). l valor de ajuste puede ser cambiado mediante la tecla E “ ” Los ajustes varían dependiendo de cada modelo. Refiérase a la “Tabla de ajustes”. 2 Presione la tecla una vez para configurar el horno inferior. Hasta que aparezca e en la pantalla. Presione la tecla dos veces para configurar el horno superior. Hasta que aparezca f en la pantalla.
CÓMO USAR Cómo seleccionar Grados Fahrenheit o Celsius: Las temperatura del horno puede configurarse en grados Fahrenheit o Celsius. El ajuste predeterminado de fábrica es en grados Fahrenheit. Éste puede ser cambiado por el usuario. Presione la tecla pantalla.
22 CÓMO USAR Cómo usar el temporizador: El Timer On/Off (TEMPORIZADOR ENCENDIDO/ APAGADO) superior o inferior sirve como un temporizador extra de la cocina que sonará cuando el tiempo establecido se haya completado. No comienza ni detiene la cocción. La característica Timer On/Off superior o inferior puede ser utilizada durante cualquiera de las funciones de control del horno. Los temporizadores superior e inferior funcionan de manera independiente uno de otro.
CÓMO USAR 23 Cómo extraer y volver a colocar los estantes del horno PRECAUCIÓN yy Coloque el estante en el horno antes de encender el horno para evitar quemaduras. yy NO cubra el estante con papel de aluminio ni con ningún otro material; tampoco coloque ningún elemento en la parte inferior del horno. Hacerlo podría provocar un mal funcionamiento del horno o podría dañar la parte inferior del horno. yy Acomode los estantes del horno sólo cuando el horno esté frío.
24 CÓMO USAR HORNEAR (Horno Superior e Inferior) La función de HORNEADO se utiliza para preparar platillos tales como pasteles, panes, guisados y comidas asadas. Se puede programar el horno para que hornee a cualquier temperatura, desde 170°F (77°C) a 550°F (288°C). La temperatura predeterminada es de 350°F (177°C). Para configurar la función de HORNEADO (por ejemplo, a 375°F): 1 Presione la tecla 2 Ingrese la temperatura del horno utilizando las teclas numéricas (por ej., presione 3, 7, 5).
CÓMO USAR 25 ASAR (Horno superior) Su horno está diseñado para asar a puerta cerrada. La función (ASAR) utiliza una intensa radiación de calor proveniente de la hornilla de gas superior. Esta función trabaja mejor cuando se asan cortes finos y tiernos (de 1” o menos) de carne, aves o pescado. NOTA 1 Presione la tecla para m (bajo). una vez para l (alto), y dos veces ESPAÑOL PRECAUCIÓN yy NO utilice asaderas sin rejilla. El aceite puede ocasionar que la grasa se incendie.
26 CÓMO USAR TABLA PARA LA FUNCIÓN DE ASAR Horno superior Posición Primer Segundo Comida Cantidad y/o espesor This chart is only for reference. Adjust cook time according to your preference.
CÓMO USAR COCCIÓN CON TEMPORIZADOR (Horno superior e inferior) La función de COCCIÓN CON TEMPORIZADOR le permite programar el horno para cocinar durante un período de tiempo específico. Esta función solo puede utilizarse mientras se hornea. (ejemplo: para HORNEAR a 300°F durante 30 minutos): COCCIÓN CON TEMPORIZADOR RETARDADO (Horno superior e inferior) El temporizador automático de COCCIÓN CON TEMPORIZADOR RETARDADO hará que el horno se ENCIENDA y se APAGUE a la hora que usted seleccione.
28 CÓMO USAR Como usar la convección del horno inferior (LDG3036ST) El sistema de convección utiliza un ventilador para hacer circular el calor del horno. Esto resulta en una mejora en la distribución del calor permitiendo un cocinado parejo y por lo tanto excelentes resultados. CONVECCIÓN HORNEADO (LDG3036ST) El horneado por convección permite un cocinado parejo y por lo tanto excelentes resultados incluso usando múltiples bandejas al mismo tiempo.
CÓMO USAR 3 Utensilios de cocina para el cocinado por convección. ntes de usar el horno por convección, verifique sus utensiA lios de cocina dejen espacio para que el aire circule dentro del horno. Si va a hornear con varios utensilios de cocina deje espacio entre estos. También, asegúrese de que no haya contacto entre las cacerolas para hornear y/o entre estas con las paredes del horno. 1) Papel y plástico.
30 CÓMO USAR Precalentamiento y ubicación de las bandejas yy Para precalentar, ajuste la temperatura del horno a la indicada en la receta. Espere hasta que el horno alcance la temperatura ingresada antes de poner la comida en el horno. El precalentamiento es necesario para obtener resultados satisfactorios al hornear pasteles, galletas, tartas y panes. yy Para obtener los mejores resultados en el horneado, las bandejas deben centrarse en los estantes.
CÓMO USAR CONVECCIÓN ASADO PARA EL HORNO INFERIOR (LDG3036ST) 1 NOTA yyPara cancelar el modo CONVECCOIÓN ASADO, presione la tecla en cualquier momento. yyPantalla en el modo CONVECCIÓN ASADO (ejemplo). Para accionar el horno inferior en modo CONVECCIÓN ASADO (ejemplo a 375°F). 1) Presione el botón . La pantalla desplegará . Horno inferior solamente. 2) Fije la temperatura del horno (presione 3, 7, 5).
32 CÓMO USAR Características especiales CALENTAR (Horno superior e inferior) PIZZA (Horno superior) Esta función mantendrá la temperatura del horno en 170°F (77°C). La función CALENTAR mantendrá la comida cocida caliente para servirla hasta 3 horas luego de que haya finalizado la cocción. La función Calentar puede utilizarse sin otras operaciones de cocción o puede utilizarse luego de que la cocción haya finalizado utilizando HORNEAR CON TEMPORIZADOR u HORNEAR CON TEMPORIZADOR RETARDADO.
CÓMO USAR FAVORITOS (LDG3036ST Horno inferior) LEVAR (Para el horno inferior) Esta característica mantiene el horno caliente para que los productos con levadura leven antes de hornearlos. Utilice la bandeja B o C para levar. 2 Presione la tecla 3 Presione la tecla q. . Para fijar la función FAVORITOS 1 Visualización en pantalla (ejemplo): 1) Ponga la comida en el horno. 2) Presione el botón de comida.
34 CÓMO USAR SABBAT (Horno superior e inferior) El modo SABBAT es típicamente utilizado en las vacaciones o el Sabbat Judío. Cuando el modo SABBAT esté activado, el horno no se apagará hasta que se desactive el modo SABBAT. En el modo SABBAT, todas las teclas de función, excepto por las teclas y , están inactivas. Para configurar el modo SABBAT: 1 Presione la tecla 2 Utilizando las teclas numéricas, ingrese la temperatura deseada. 3 Presione la tecla q.
CUIDADO Y LIMPIEZA 35 CUIDADO Y LIMPIEZA Hornilla a gas de la superficie PRECAUCIÓN ESPAÑOL yy NO limpie este artefacto con blanqueadores. yy Para prevenir quemaduras, espere hasta que la cocina se haya enfriado antes de tocar cualquiera de sus partes. Cómo extraer y volver a colocar las hornillas a gas de la superficie Las parrillas y tapas/cabezales de las hornillas pueden extraerse para limpiarlos.
36 CUIDADO Y LIMPIEZA Cómo limpiar los cabezales/tapas de las hornillas Luego de limpiar los cabezales/tapas de las hornillas Para lograr una llama pareja y completa, las hendiduras de los cabezales de las hornillas deben estar siempre limpias. Los cabezales de las hornillas y la tapa de la hornalla pueden levantarse. • Lave las tapas de las hornillas con agua caliente y jabón, y enjuague con agua limpia. • Cualquier derrame sobre o alrededor de un electrodo debe limpiarse cuidadosamente.
CUIDADO Y LIMPIEZA 37 Panel de control Para evitar quemaduras, no limpie la superficie de la estufa hasta que se haya enfriado. Los alimentos con alto contenido ácido o los alimentos con alto contenido de azúcar pueden manchar la superficie si se dejan reposar en ésta. Lave y enjuague los alimentos derramados apenas la superficie se haya enfriado. Para otros derrames tales como salpicaduras de grasa y/o aceite, etc., lave con agua y jabón cuando la superficie se haya enfriado.
38 CUIDADO Y LIMPIEZA Puerta del horno No limpie a mano la junta de la puerta del horno Limpie a mano la puerta Cómo extraer la puerta del horno superior. 1 Abra la puerta por completo. Levante los seguros de la bisagra hacia el marco del horno hasta que hagan tope. 2 Cierre la puerta a aproximadamente 30 grados. 3 Presione los botones para liberar cada bisagra a ambos lados de la puerta.
CUIDADO Y LIMPIEZA 39 Cómo quitar la puerta del horno inferior 1 Asegúrese de que las bisagras estén alineadas a una posición de 30 grados. 1 Abra la puerta por completo. Levante los seguros de la bisagra hacia el marco del horno hasta que hagan tope. 2 Deslice la puerta hacia las bisagras hasta que escuche un sonido de encastre y que los botones de liberación se hayan ajustado. 2 Cierre la puerta hasta la posición correcta para extraerla (aproximadamente a cinco grados).
40 CUIDADO Y LIMPIEZA Cómo volver a colocar la puerta del horno inferior. 1 Tome firmemente ambos lados de la puerta por la parte superior y cierre la puerta hasta la posición correcta para extraerla (aproximadamente a cinco grados). Cómo limpiar el interior del horno Guía de limpieza Nivel de suciedad Cavidad del horno ligeramente sucia Cavidad del horno moderadamente sucia Cavidad del horno muy sucia Configuración de ciclo Auto limpieza de 2 horas (p. 40) Auto limpieza de 3 horas (p.
CUIDADO Y LIMPIEZA Antes de comenzar la AUTO LIMPIEZA Para programar la auto limpieza 1 Presione la tecla .. El horno utiliza por defecto la auto limpieza recomendada de tres horas para un horno moderadamente sucio. Presione dos veces para hacer una auto limpieza de dos horas y tres veces para una auto limpieza de cuatro horas. 2 Presione la tecla q. Una vez que se haya programado la auto limpieza, la puerta del horno se bloqueará automáticamente y se mostrará m en la pantalla.
42 CUIDADO Y LIMPIEZA easyCLEAN El esmalte easyCLEAN en su nuevo horno LG proporciona flexibilidad al momento de limpia el interior de su estufa. La función easyCLEAN de LG trabaja con un esmalte nuevo que ayuda a remover suciedad ligera como las gotas de queso de la pizza o ligeras salpicaduras de grasa de asados pequeños sin químicos agresivos para una limpieza manual más rápida y segura.
CUIDADO Y LIMPIEZA 43 GUÍA DE INSTRUCCIÓN easyCLEAN PASO Guía de Instrucción easyCLEAN NOTAS Retire bandejas y accesorios del horno. 2 Raspe cualquier residuo quemado con una espátula de plástico. Espátulas de Plástico Sugeridas: • Paleta de plástico duro • Espátula de plástico de cocina • Espátula de plástico para pintura • Tarjeta de crédito antigua 3 Use de una botella con atomizador 1/4 taza (2 oz) de agua para saturar completamente las paredes y los suelos de las esquinas del horno.
44 CUIDADO Y LIMPIEZA Cómo cambiar la luz del horno 3 La luz del horno es una bombilla estándar para artefactos de 40 vatios (watts). Se encenderá cuando la puerta del horno esté abierta. Cuando la puerta del horno esté cerrada, presione la tecla para prender o apagar la luz. Lave y enjuague la bandeja y la rejilla para asar con agua caliente con una esponja con jabón o con una esponja plástica.
ANTES DE SOLICITAR SERVICIO TÉCNICO 45 ANTES DE SOLICITAR SERVICIO TÉCNICO Síntomas y preguntas Posible causa/ solución yy Asegúrese de que el enchufe eléctrico está correctamente conectado a un tomacorriente con conexión a tierra. yy Extraiga las hornillas y límpielas. Verifique que no haya comida quemada o grasa en el área de los electrodos. Consulte “Cómo limpiar los cabezales/tapas de las hornillas” en la sección "Cuidado y limpieza".
46 ANTES DE SOLICITAR SERVICIO TÉCNICO Síntomas y preguntas Demasiado humo durante el ciclo de auto limpieza. Posible causa/ solución Demasiada suciedad en el horno. Abra las ventanas para deshacerse del humo del ambiente. Presione la tecla o . Espere hasta que la luz m se apague antes de intentar abrir la puerta del horno. Limpie la suciedad en exceso y reinicie el ciclo de limpieza. La puerta del horno no abre luego de un ciclo de auto limpieza. La temperatura del horno es demasiado elevada.
ANTES DE SOLICITAR SERVICIO TÉCNICO Síntomas y preguntas Mi estufa sigue sucia después de ejecutar el ciclo easyCLEAN. ¿Qué más debo hacer? 47 Posible causa/ solución He intentado tallar mi horno después de ejecutar easy- La funcion easyCLEAN es eficiente cuando la suciedad se encuentra CLEAN, pero algunas manchas permanecen intactas. totalmente empapada y sumergida en el agua antes de iniciar el ciclo.
48 GARANTÍA GARANTÍA LG Electronics Inc. reparará o reemplazará su producto, a elección de LG, si sus materiales o mano de obra son defectuosos bajo uso normal, durante el período de garantía establecido a continuación, el que entrará en vigencia a partir de la fecha de compra del producto por parte del consumidor original. Esta garantía limitada solo es válida para el comprador original del producto y tendrá vigencia solo cuando se lo utilice dentro de los EE.UU.
NOTAS
NOTAS
NOTAS
LG Customer Information Center 1-800-243-0000 USA, Consumer User 1-888-865-3026 USA, Commercial User 1-888-542-2623 CANADA Register your product Online! www.lg.