
Owners manual


13
ENGLISH
FEATURES
FEATURES
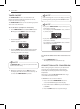
CLOCK
The clock must be set to the correct time of day in order
for the automatic oven timing functions to work properly.
1. Press $-0$,.
2. Press the number buttons to enter the time.
'PSFYBNQMFUPTFUUIFDMPDLGPSQSFTTUIF
numbers: , , and .
3. Press 45"35.
t5IFUJNFPGEBZDBOOPUCFDIBOHFEEVSJOHB5JNFE
Baking or Self Clean cycle.
t5PDIFDLUIFUJNFPGEBZXIFOUIFEJTQMBZJT
showing other information, simply press the
$-0$, button.
t*GOPCVUUPOTBSFQSFTTFEXJUIJOTFDPOETPG
pressing the $-0$, button, the display will revert
to its original setting.
t*GUIFEJTQMBZUJNFJTCMJOLJOHZPVNBZIBWF
experienced a power failure. Reset the time.
NOTE
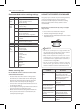
Setting the hour mode on the clock
(12 or 24 hour.)
:PVSDPOUSPMJTTFUUPVTFBIPVSDMPDL*GZPVXPVME
QSFGFSUPIBWFBIPVSUJNFDMPDLGPMMPXUIFTUFQT
below.
1. Press and hold the $-0$, button for 3 seconds.
2. Press the number CVUUPOUPEJTQMBZBIPVSDMPDL
or the CVUUPOGPSBIPVSDMPDL
3. Press the45"35 button to accept the desired
change.
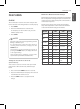
Minimum & Maximum default settings
All of the features listed have a minimum and a maximum
time or temperature setting that may be entered into the
control. An entry acceptance beep will sound each time a
control button is pressed.
An entry error tone (two short tones) will sound if the
entry of the temperature or time is below the minimum
or above the maximum setting for the feature.
'&"563&
.*/5&.1
5*.&
."95&.1
5*.&
%FGBVMU
CLOCK
12 Hr. )S.JO )S.JO
)S )S.JO )S.JO
5*.&3
12 Hr. .JO )S.JO
)S .JO )S.JO
$00,5*.&
12 Hr. .JO )S.JO
)S .JO )S.JO
$0/7&$5*0/
#",&
¡'¡$ ¡'¡$ 12 Hr.
$0/7&$5*0/
ROAST
¡'¡$ ¡'¡$ 12 Hr.
BROIL -P¡' )J¡' 3 Hr.
#",& ¡'¡$ ¡'¡$ 12 Hr.
1300' 12 Hr.
8"3.
¡'¡$
3 hours
4&-'$-&"/ 2 Hr. )S 3 Hr.
ENGLISH