8 PRODUCT OVERVIEW PRODUCT OVERVIEW PARTS interior light hooks for Pants Crease Care moving hanger interior light Pants Crease Care shelf holder door* shelf aroma filter steam nozzle hot air circulation vent water drain tank water supply tank drip tray * The door swing can be reversed by the installer to fit the installation location.
PRODUCT OVERVIEW ENGLISH Accessories Included Accessories shelf drip tray MCK67970601 AHT74073801 2 rear leveling feet 2 hangers* AEE73149701 AEE73189601 pants hanger* AEE73189701 4 carpet install spikes 2 non-skid pads MHK61866301 anti-tip kit 9 2 rear cap covers MBL65818001 wrench 2 hinge covers 3550JA3143A *An ordinary metal/plastic hanger can be used if the hook is less than 5/32 in. (4 mm) thick. The hook must fit in the indentation in the moving hanger snugly.
10 PRODUCT OVERVIEW THE MOVING HANGER THE PANTS CREASE CARE • Use the moving hanger for suits, coats, jackets, blouses, dresses, skirts, and pants that don’t require a crease. Use the Pants Crease Care to crease pants. • Open the door to the Pants Crease Care by pressing the icon on the front. • Anything that can be securely placed on a hanger and steamed or dried without retaining hanger marks or other damage can be placed on the moving hanger.
PRODUCT OVERVIEW 11 THE SHELF • Use the shelf for stuffed toys, pillows, hats, and other accessories. • Use the shelf for sweaters, knits, lingerie, or delicate blouses that can show hanger marks, stretching, or other damage if dried on a hanger. • For best drying performance, do not stack items on the shelf. Dry single items or place items side by side with space between. • When not in use, store the shelf on the shelf holder knobs in the back of the cabinet.
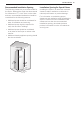
12 INSTALLATION INSTALLATION INSTALLATION OVERVIEW Please read the following installation instructions first after purchasing this product or transporting it to another location. 7 3/4 in. 20cm ov er 2 in. 5cm over 2 in.
INSTALLATION 13 UNPACKING THE Styler Remove tape and any temporary labels from the Styler before using. Do not remove any warning labels, the model and serial number label, or the Tech Sheet that is located under the front of the Styler. • To remove any remaining tape or glue, rub the area briskly with your thumb. Tape or glue residue can also be easily removed by rubbing a small amount of liquid dish soap over the adhesive with your fingers. Wipe with warm water and dry.
14 INSTALLATION INSTALLATION LOCATION REQUIREMENTS Warning Read all installation instructions completely before installing and operating the Styler. It is important to review this entire manual before installing and using the Styler. The installation requires: yy A grounded electrical outlet located within 2 ft. (61 cm) of either side of the appliance. yy A sturdy floor to support the total appliance weight of 183 lbs (83 kg). The combined weight of any other laundry appliances should also be considered.
INSTALLATION 15 Installation Spacing for Special Cases The following clearances are recommended for the Styler. Although the Styler has been tested for clearances of 13/16 inch (3 cm) on the sides and rear, recommended clearances should be considered for the following reasons: Installing the Styler in an area with restricted clearance and/or ventilation could result in reduced performance or product damage. yy Additional space should be considered for ease of installation and servicing.
16 INSTALLATION leveling the styler Warning Warning yyThe Styler is heavy. Use two or more people if installing the rear leveling feet. Failure to do so can result in back injury or other injury. yyKeep the Styler upright when moving and installing it. If you lay the Styler on its side, refrigerant may leak and cause the appliance to malfunction. yy To reduce the risk of injury to persons, adhere to all industry recommended safety procedures including the use of long-sleeved gloves and safety glasses.
INSTALLATION 17 Reversing the Door 5 Warning If the carpet has very deep pile or padding, the front feet may need to be extended slightly to install the drip tray. Warning Do not attempt to reverse the door swing yourself. If the direction of the door swing needs to be changed after installation, contact the LG Customer Information Center at 1-800-243-0000 (USA) or 1-888-542-2623 (Canada). installing on carpeting If installing the Styler on carpeting, follow these instructions.
18 INSTALLATION 3 Place the adhesive side of the non-skid pad on the floor. ASSEMBLING the DRIP Tray Before using the Styler, insert the drip tray onto the bottom of the cabinet. This side up Adhesive side B Remove backing 1 Hold the tray so the arrow and letter on the front of the tray face up. 2 Insert one side of the tray first, then the other. Push the tray until it slides completely in. 4 Recheck the Styler's levelness.
OPERATION 19 BEFORE USE Clean the Styler. Clean the Styler thoroughly and wipe off all dust that accumulated during shipping. See Maintenance, page 37. Do not plug in or operate the appliance until the interior and exterior have thoroughly dried. Caution yy Do not scratch the Styler with a sharp object or use a detergent that contains alcohol, bleach, a flammable liquid or an abrasive when removing any tape or adhesive from the Styler,.
20 OPERATION using the styler 1 PREPARE ITEMS • Wash clothes first, if needed. • No heat-sensitive items or items that can be damaged by exposure to water. See Choosing Styler-Safe Clothing, page 21. • Place items on hangers or the shelf. • Fasten buttons and close zippers to keep items on moving hangers and prevent damage. 2 CLEAN LINT FILTER, CHANGE SHEET IN AROMA FILTER Lift out filter and remove lint from last load for faster and more efficient performance.
OPERATION 21 SORTING LOADS Grouping Similar Items Most articles of clothing feature fabric care labels that include instructions for proper care. Below are some of the symbols that are relevant to choosing appropriate items for the Styler.
22 OPERATION Fabric Care Guide = yes § = check label Refresh cycle *Control *Control Lock Lock fabric vegetable fibers cotton linen, hemp, ramie animal fibers natural fibers alpaca, camel hair, cashmere clothes removing wrinkles towels, socks, underwear, jeans, sportswear, t-shirts, blankets summer clothes, tablecloths coats, suits § scarves, knitwear fur, leather coats, scarves silk silk neckties, ribbons, scarves, blouses, silk velvet/plush winter coats, suits, sportswear, uni
OPERATION 23 Fabric Care Guide (continued) Refresh cycle *Control *Control Lock Lock man-made fibers fabric clothes removing wrinkles removing odors Sanitary cycle Gentle Dry cycle *Control Lock comments acetate suit lining, blouses, neckties, pajamas acrylic thermal underwear, knitwear Lay clothes on shelf stockings, lingerie Lay clothes on shelf sportswear, curtains nylon polyurethane stretchable clothing (containing less than 5%)
24 OPERATION CheckING the filters before every load Checking the Lint Filter Always make sure the lint filter is clean before starting a new load; a clogged lint filter will increase drying times. 1 2 Use a dryer fabric softener sheet to add a refreshing aroma to items. Replace the fabric softener sheet after every use. 1 Remove the aroma filter from the Styler. 2 Open the aroma filter and insert a dryer fabric softener sheet into it. 3 Close the aroma filter and insert it back in the Styler.
OPERATION 25 checking the water tanks 1 Pull the handle of each tank forward to remove the tank and check the level of water. yy Check all pockets to make sure that they are empty. Items such as clips, pens, coins, and keys can damage both the Styler and your clothes. Flammable objects such as lighters or matches could ignite, causing a fire. Failure to do so can result in fire, explosion, or death. Make sure the water supply tank is filled with water.
26 OPERATION Hangers The hangers that come with the Styler are for use with the Styler only. Any plastic or metal hanger that has a hook less than 5/32 in. (4 mm) thick and hooks snugly into the indentations in the moving hanger can be used in the Styler. • Do not use hangers with wool, knitwear, or delicate lingerie. The garments may stretch or be left with hanger marks. Using the Moving Hanger 1 Insert hangers into slots and pull down to secure the hook snugly.
OPERATION 27 Opening and Closing the Pants Hanger crochet To open, fold the hook down toward the hanger blades to unlock and separate the blades. Using the Pants Crease Care 1 Open the Pants Crease Care by pressing on the icon on the side. 2 Hang the pants hanger on the hook above the Pants Crease Care that best fits the length of the pants being pressed.
28 OPERATION Shelf Use the shelf for clothes and items that cannot be placed on hangers. Do not stack items on the shelf. For best drying performance, use the shelf for a single item or smaller items with space between. • Hang the shelf on the shelf holder when treating long clothes such as coats or dresses. Assembling the Shelf 1 Hold the shelf so that the gray trim is toward the front. Front 41.3 in.
OPERATION 29 CONTROL PANEL Control Panel Features Depending on the model, some of the following functions may not be available. Hold to Start *Control Lock SMART DIAGNOSIS™ ICON Place the phone over this icon when diagnosing problems with Smart Diagnosis. See Using Smart Diagnosis, page 43. POWER ON/OFF Touch Power to turn the Styler ON/OFF. Once the cycle is complete, the Styler automatically turns off after 30 minutes if no keys are touched.
30 OPERATION GENTLE DRY CYCLE / *SOUND ON/OFF Touch the icon to select a Gentle Dry cycle, touch repeatedly to toggle through the settings. See the Cycle Guide, page 31. Touch for three seconds to turn the button and alert sounds on/off. See Turning the Alert Sounds On/Off, page 34. SPECIAL CARE / *SMART DIAGNOSIS™ Touch the icon to select the Night Care or Downloaded cycle. The Night Care cycle is a special extended Sanitary Heavy cycle designed to dry clothes overnight.
OPERATION 31 cycle guide SPECIAL CARE GENTLE DRY CYCLE SANITARY CYCLE REFRESH CYCLE Cycle Setting Normal Light Heavy Normal Heavy Normal Clothing / Fabric Type Est. time in Hr.: Min.
32 OPERATION Choosing a cycle Styler cycles are designed to fit a variety of situations. Select the cycle and setting that best match the load contents and desired results for maximum performance and fabric care. For best results, pay attention to garment care labels and choose a cycle that is appropriate for the fabric content of the items. For a guide to the symbols used on fabric care labels, see the chart on page 21 and the Fabric Care Guide on pages 22-23.
OPERATION 33 cycle settings and options To change the settings during the cycle, touch Start/Pause to pause the cycle, then touch the relevant cycle selector icon to change settings. • Touch the Start/Pause button to activate the control panel. The cycle selected and the Start/Pause button start blinking. Selecting a Cycle • If the Sanitary cycle is changed to a Refresh or Gentle Dry cycle during operation, the sanitize process is not performed. CAUTION • • Do not open the door during operation.
34 OPERATION Special Functions Some buttons also activate special functions, including the Control Lock. Locking the Controls Use Control Lock to prevent unwanted use of the Styler or to keep cycle settings from being changed while the Styler is operating. Setting a Delayed Start Time Use the Delay Start function to delay the start time of the cycle. 1 Touch Power 2 Touch the cycle selector icon for the desired cycle. 3 Touch Delay Start to set the start time of the cycle.