0 OPERATION-WASHER OPERATION-WASHER Using the Washer WARNING fire, electric shock, or injury to persons, read the SAFETY INSTRUCTIONS before operating this appliance. Operation Overview 1 on all cycles. A different chime sounds and the LED does not light up if the selection is not allowed. Sort laundry and load the washer. and load size as needed. Open the door and load items into the washer. 6 Begin cycle. Start/Pause button to begin the cycle.
OPERATION-WASHER 11 Sorting Laundry CAUTION re washing the covers. Failure to do so can cause excessive vibration, resulting in damage to the washer, clothes, nearby objects, walls, and floor. Grouping Similar Items For the best washing results, and to reduce the possibility of damage to clothing, sort clothing into loads made up of similar items. Mixing different fabric types and/or soil levels can result in poor wash performance, color transfer, discoloration, fabric damage or linting.
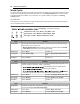
12 OPERATION-WASHER Category Label Directions Hand wash Washing Machine wash, Normal cycle Perm Press/Wrinkle Resistant setting (which has a cool down or cold spray before the slower spin) Gentle/Delicate setting (slow agitation and/or reduced wash time) Do not wash Do not wring Water Temperature Hot Warm Cold/Cool Any bleach (when needed) Bleach Symbols Only non-chlorine bleach (when needed) Do not bleach Loading the Washer load clothes as shown.
OPERATION-WASHER 13 Small Items Single-Use Detergent Packs e single-use detergent pack in the washer. Using too much detergent may cause oversudsing and unsatisfactory performance. Reduce detergent amount or add an extra rinse if detergent residue is left on fabrics. To add an extra rinse, select the Extra Rinse option. items can get caught in the impeller at the bottom of the drum, and brassiere hooks can snag on other clothing or the drum.
14 OPERATION-WASHER 3 Gently close the detergent dispenser drawer before starting the cycle. the detergent overflowing into another compartment or dispensing into the drum earlier than programmed. drawer while closing. l amount of water to remain in the dispenser compartments at the end of the cycle. CAUTION detergent, bleach, or liquid fabric softener, on top of your washer.
OPERATION-WASHER 15 Control Panel Control Panel Features for the Washer ENGLISH a Power On/Off Button the washer on or off. that cycle and any load settings will be lost. NOTE the drum after the washer shuts off, it will drain after a delay. The washer can be restarted at any time before the drain begins. However, once the water begins to drain, all functions will be suspended until the water has been completely drained and the washer shuts off. b Cycles ct the desired cycle.
16 OPERATION-WASHER additional cycle options. Certain buttons also allow you to activate special functions by pressing and holding the button for 3 seconds. Remote Start Use a smartphone to control your washer remotely. - For more information, see SMART FUNCTIONS in this manual. Wi-Fi When the washer is connected to a home Wi-Fi network, the f icon on the control panel is lit. - To connect the washer to the LG ThinQ application, press and hold the Temp. button for 3 seconds.
OPERATION-WASHER 17 NOTE AI DD functionality may vary depending on the environment and model. the active stage will blink, and the LEDs for the remaining stages will remain steady. Once a stage is complete, the LED will turn off. If a cycle is paused, the active stage LED will stop blinking.
18 OPERATION-WASHER Wash Cycles The wash cycles are designed for specific types of wash loads. Select the cycle that best matches the load contents for maximum wash performance and fabric care. See Sorting Laundry section for best results, and follow the fabric care labels on your garments. For a guide to fabric care symbols, see Sorting Laundry section. Cycle Guide Turn the knob or press the button to select the desired cycle.
OPERATION-WASHER 19 Cycle Soil Level Delicates Default: Normal Available: All Description Heavy Duty Suitable for washing heavily soiled laundry, such as cotton fabrics, using more powerful wash motions. 2 minutes or more without agitation. These soak periods are part of normal. Wash Temp.
20 OPERATION-WASHER Cycle Steam Turbo WashTM Extra Rinse Pre-wash # # # # # # # Delicates Heavy Duty Speed Wash Downloaded default: Rinse+Spin # #
OPERATION-WASHER 21 Cycle Modifiers About Modifier Buttons button for the desired modifier until the indicator light for the desired setting is lit. y adjusts the water level for the type and size of wash load for best results and maximum efficiency. y washer, and the water levels may be much lower than you expect. This is normal, and cleaning/rinsing performance will not be compromised. licates, require a slower Soil Adjusting the soil level setting will modify the cycle times and/or wash actions.
22 OPERATION-WASHER t, all buttons are locked except the Power button. WARNING ring steam cycles. The door surface can become very hot and can cause severe burns. Allow the door lock to release before opening the door. CL and the remaining time are alternately shown on the display during the wash cycle. You must deactivate this function before you can access any other options and functions. mechanism or reach into the washer during a steam cycle. Steam can cause severe burns.
OPERATION-DRYER 23 OPERATION-DRYER restarted within 14 minutes of being paused, the dryer will shut off and the settings will be lost. WARNING electric shock, or injury to persons, read the SAFETY INSTRUCTIONS before operating this appliance. Operation Overview 1 Clean the Lint Filter. cleaned, lift out the filter and remove the lint from the last load. This will help ensure the fastest and most efficient drying performance.
24 OPERATION-DRYER NOTE overload the dryer; clothes require room to tumble and dry properly. Grouping Similar Items For the best drying results, and to reduce the possibility of damage to clothing, sort clothes into loads that can be dried with the same drying cycle. Fabric Care Labels Many articles of clothing include a fabric care label. Using the chart below, adjust the cycle and option selections to care for your clothing according to the manufacturer's recommendations.
OPERATION-DRYER 25 Control Panel Control Panel Features for the Dryer ENGLISH a Power Button e appliance on. Press again to turn the appliance off. NOTE Power button during a cycle will cancel that cycle and any load settings will be lost. b Cycles the desired cycle. Once the desired cycle has been selected, the standard presets will be shown in the display. c Start/Pause Button tart the selected cycle. If the appliance is running, use this button to pause the cycle without losing the current settings.
26 OPERATION-DRYER Time and Status Display a Wi-Fi Indicator is connected to a home Wi-Fi network. b Remote Start Indicator Remote Start feature is activated. c Flow Sense Indicator nsing system detects and alerts you to blockages in the ductwork that reduce exhaust flow from the dryer. Maintaining a clean exhaust system improves operating efficiency and helps minimize service calls, saving you money. d Signal Indicator -cycle and button tones are turned on.
OPERATION-DRYER 27 Dry Cycles Cycle Guide Temperature: Low > Medium Low > Medium > Medium High > High Dry Level: Damp > Less > Normal > More > Very Cycle Normal Description Use this cycle for drying all normal items such as cotton, linen, shirts, jeans or mixed loads, except delicate fabrics such as wool or silk. Temp.
28 OPERATION-DRYER Cycle Description Downloaded (Perm. Press) Use a smartphone to download a specialized cycle to this cycle position. Perm. Press. This cycle is also available for download. LG ThinQ application to see the cycles available for download. Temp. Default: Medium Available: Medium Dry level Default: Normal Available: All Available Options d in the cycle and can be deselected. NOTE Energy Saver option is set to on by default.
OPERATION-DRYER 29 Cycle Modifiers light up if the selected option is not allowed for the selected cycle. About Modifier Buttons Steam Adding the Steam option to a dry cycle helps reduce wrinkles and odor in fabrics. WARNING ring steam cycles. The door surface can become very hot. steam cycle. Steam can cause severe burns. Temp. Use this button to adjust the temperature setting. This allows precise care of fabrics and garments. Press the Temp. button repeatedly to scroll through available settings.
30 OPERATION-DRYER t, all buttons are locked except the Power button. NOTE Steam Fresh with items such as wool, wool blankets, leather jackets, silk, wet clothes, lingerie, foam products, or electric blankets. CL and the remaining time are alternately shown on the display during the dry cycle. You must deactivate this function before you can access any other options and functions.
SMART FUNCTIONS 31 SMART FUNCTIONS rrent at the time of publication. The application is subject to change for product improvement purposes without notice to users. The LG ThinQ application allows you to communicate with the appliance using a smartphone. LG ThinQ Application Features Remote Start - Control the appliance remotely from the LG ThinQ application.
32 SMART FUNCTIONS NOTE depending on the Internet service provider. 2 Press the Power button. 3 Press and hold the Remote button for 3 seconds to enable the remote control function. 4 Start a cycle from the LG ThinQ application on your smartphone. make the wireless network service run slowly. problems with the wireless signal transmission, unplug the appliance and wait about a minute before trying again. disable the firewall or add an exception to it. combination of English letters and numbers.
SMART FUNCTIONS 33 Cycle Name Description Optimized for beachwear Blanket Cleans blankets which are used every day. Do not use for wool blankets. Bright Whites Bright whites only Collars and Cuffs Washes collars and cuffs using a high temperature for effective stain removal. Color Care Keeps colors from fading Delicate Dresses Cleans lightly stained cocktail dresses with care Denim Special cycle for jeans Spin Only For spinning dry handwashables.
34 SMART FUNCTIONS Cycle Name Description Full Load Dry Optimized dry settings for full sized loads Half Load Dry Optimized dry settings for half sized loads Gym Clothes Optimized for gym clothes. Kids' Clothes Uses high temperatures to sanitize kids' clothes. Kids' Gym Clothes Optimized for children's cotton sportswear. Lingerie Optimized for lingerie. Low Temp Dry Dries the load while reducing energy consumption. Overnight Dry This energy efficient cycle dries a small load overnight.
SMART FUNCTIONS 35 try to correct the interference by one or more of the following measures: the receiving antenna. an outlet on a circuit different from that to which the receiver is connected. Use this feature to help you diagnose and solve problems with your appliance. NOTE the service may not operate due to external factors such as, but not limited to, Wi-Fi unavailability, Wi-Fi disconnection, local app store policy, or app unavailability. technician for help.
36 SMART FUNCTIONS 3 Press and hold the Steam + Extra Rinse (Washer) / Steam + Reduce Static (Dryer) buttons for 3 seconds or until the audible tones start. Hold the smartphone mouthpiece to the logo until the data transfer is complete. place until the data transfer has finished. Time remaining for data transfer is displayed. 4 After the data transfer is complete, the diagnosis will be displayed in the application. NOTE while the tones are being transmitted.
MAINTENANCE 37 MAINTENANCE ENGLISH WARNING the SAFETY INSTRUCTIONS, before operating this appliance. can cause serious injury, fire, electric shock, or death. ces (benzene, paint thinner, alcohol, acetone, etc.), abrasive cleaners, or detergents with strong chemical components when cleaning the appliance. Doing so may cause discoloration or damage to the appliance, or may cause a fire. lly not grounded and may present a risk of electric shock only during servicing.
38 MAINTENANCE from the stainless steel drum using a soft cloth soaked in stainless steel cleaner. recommendations. adding bleach or powdered cleaners. Powdered cleaners may remain in the drum after cleaning. 3 Close the door and press the Power button. 4 Select the Tub Clean cycle and press the Start/Pause button to begin the cycle. 5 After the cycle ends, open the door and allow the drum interior to dry completely.
MAINTENANCE 39 7 WARNING the delicate parts of the inlet valve from being damaged by particles that could enter the valves with the water supply. Operating the washer with these filters removed could cause a valve to open continuously, resulting in flooding and/or property damage. Replace the drawer. CAUTION thout the inlet filters. Doing so will cause leaks and malfunction. area with hard water, the inlet filter may clog due to lime buildup and require more frequent cleaning.
40 MAINTENANCE 7 Flush then reattach the water hoses. water inlet hoses, flush them by running several gallons of water through them into a bucket or drain, preferably with the faucets wide open for maximum flow. NOTE IE error message may blink on the display when the water pressure is low or an inlet filter is clogged with dirt. Clean the inlet filter. 4 Cleaning the Drain Pump Filter Remove the pump filter. remove. The washer fails to drain if the drain pump filter is clogged.
MAINTENANCE 41 Add 1 gallon of nontoxic recreational vehicle (RV) antifreeze to the empty drum and close the door. 6 Turn on the washer and press the Spin button. 7 Press the Start/Pause button to start the drain pump for 1 minute. Close the drain pump filter cover. of the antifreeze, leaving enough to protect the washer from damage. NOTE OE message blinks on the display when the drain pump filter is clogged with dirt. Clean the drain pump filter.
42 MAINTENANCE 5 Reconnect the water inlet hoses to the water inlets of the washer and to the faucets. Connecting the Water Inlet Hoses for details. 6 Turn on the faucets. 7 Press the Power button to turn on the washer. 8 Press the Spin button to operate spin only cycle for draining and spinning. Dryer Regular Cleaning Cleaning the Exterior Proper care of your appliance can extend its life. The outside of the appliance can be cleaned with warm water and a mild, nonabrasive household detergent.