OPERATION 25 Before use Clean the refrigerator. Clean the refrigerator thoroughly and wipe off all dust that accumulated during shipping. Caution yy Do not scratch the refrigerator with a sharp object or use a detergent that contains alcohol, a flammable liquid or an abrasive when removing any tape or adhesive from the refrigerator,. yy Do not peel off the model or serial number label or the technical information on the rear surface of the refrigerator.
6 OPERATION Control Panel * Depending on the model, some of the following functions may not be available. Control Panel Features Led Display Indicator Dispenser Selection Indicator & Button Displays whether the dispenser is set to dispense water, cubed or crushed ice. Refrigerator Temperature Indicates the set temperature of the refrigerator compartment in Celsius (°C) or Fahrenheit (°F). The default refrigerator temperature is 37°F (3°C).
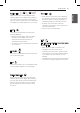
OPERATION 27 Replace Filter [ ( On some models) ] Ice Plus yy When power is connected to the refrigerator, the door alarm is initially set to ON. Press the Door Alarm button to change the display to OFF and deactivate the door alarm function. yy An alarm tone sounds when either the refrigerator or the freezer door is left open for more than 60 seconds. yy Close the door to stop the alarm. This function increases both ice making and freezing capabilities.
28 OPERATION Control Panel Features (continued) Connect Power Saving Mode The Connect button, when used with the LG Smart Refrigerator smart phone app, allows the refrigerator to connect to your home’s Wi-Fi network. Refer to the Smart Functions section for information on the initial setup of the application. yy When the refrigerator is in the Power Saving Mode, the display will remain off until a door is opened or a button is pressed. Once on, the display will remain on for 20 seconds.
OPERATION 29 In-Door Ice Bin 2 Caution To remove the in-door ice bin, grip the front handle, slightly lift the lower part, and slowly pull out the bin as shown. yy Keep hands and tools out of the ice compartment door and dispenser chute. Failure to do so may result in damage or personal injury. yy The icemaker will stop producing ice when the in-door ice bin is full. If you need more ice, empty the ice bin into the extra ice bin in the freezer compartment.
30 OPERATION Automatic Icemaker Depending on the model, some of the following functions may not be available. Ice is made in the automatic icemaker and sent to the dispenser. The icemaker will produce 70-182 cubes in a 24-hour period, depending on freezer compartment temperature, room temperature, number of door openings and other operating conditions. Warning Personal Injury Hazard DO NOT place fingers or hands on the automatic ice making mechanism while the refrigerator is plugged in.
OPERATION Caution yy Throw away the first few batches of ice. This is also necessary if the refrigerator has not been used for a long time. yy Never store beverage cans or other items in the ice bin for the purpose of rapid cooling. Doing so may damage the icemaker or the containers may burst. yy If discolored ice is dispensed, check the water filter and water supply. If the problem continues, contact a qualified service center. Do not use the ice or water until the problem is corrected.
32 OPERATION Operating the Dispenser Dispensing Crushed Ice Press the dispenser selection button repeatedly until the crushed ice icon illuminates. Press the dispenser switch with a glass or other container to dispense crushed ice. Caution yy Hold the container as close to the ice or water chute as possible to avoid spilling and splashing. yy Do not dispense ice into fine china or crystal glasses. China or crystal can be broken.
OPERATION 33 Ice and Water Dispenser Incorrect Way Correct Way ENGLISH Depending on the model, some of the following functions may not be available. Water Caution Keep children away from the dispenser. Children may play with or damage the controls. Ice Dispenser Caution Throw away the first few batches of ice (about 24 cubes). This is also necessary if the refrigerator has not been used for a long time.
34 OPERATION Storing Food Food Preservation Location Each compartment inside the refrigerator is designed to store different types of food. Store your food in the optimal space to enjoy the freshest taste. Vegetable storage (Crisper) Preserves vegetables and fruit. Ice storage bin If a large amount of ice is needed, transfer the ice in the in-door ice bin to the ice storage bin. Durabase® Largest storage space in the freezer.
OPERATION 35 Food Storage Tips Wrap or store food in the refrigerator in airtight and moisture-proof material unless otherwise noted. This prevents food odor and taste transfer throughout the refrigerator. For dated products, check date code to ensure freshness. Food How to Butter or Margarine Keep opened butter in a covered dish or closed compartment. When storing an extra supply, wrap in freezer packaging and freeze. Cheese Store in the original wrapping until you are ready to use it.
36 OPERATION Storing Frozen Food (continued) Packaging Successful freezing depends on correct packaging. When you close and seal the package, it must not allow air or moisture in or out. If it does, you could have food odor and taste transfer throughout the refrigerator and could also dry out frozen food.
OPERATION 37 Glide‘N’Serve and Humidity Controlled Crisper To Remove the Glass (Pantry drawer not shown for clarity) Lift up the glass from under the crisper cover, and pull up and out. To remove the Humidity Controlled Crisper and the Glide’N’Serve, pull out the Crisper and Glide’N’Serve to full extension, lift the front up, and pull straight out. Left Door Bins The door bins on the left door are removable for easy cleaning and adjustment.
38 OPERATION InstaView Door-in-Door Door-in-Door Case The InstaView Door-in-Door compartment allows for easy access to commonly used food items. To open the Door-in-Door case, slightly push the marked area to pop it open. The Door-inDoor case is removable for easy cleaning and adjustment. Knock twice on the glass to turn the LED light inside the InstaView on or off. •• The LED light turns off automatically after 10 seconds. •• The LED light does not turn on if the right refrigerator door is open.
OPERATION 39 Door-in-Door Lower Shelf 1 To remove the lower shelf, lift the shelf retainer up and out. 2 Remove the two screws from the shelf and pull it straight out. 3 Reverse the procedure to replace the shelf. 1 2 3 ENGLISH The Door-in-Door’s lower shelf is removable for easy cleaning.
40 OPERATION Adjusting the Refrigerator Shelves The shelves in the refrigerator are adjustable to meet your individual storage needs. Your model may have glass or wire shelves. Using the Folding Shelf You can store taller items, such as a gallon container or bottles, by simply pushing the front half of the shelf underneath the back half of the shelf. Pull the front of the shelf toward you to return to a full shelf.
SMART FUNCTIONS 41 Smart Functions Search for the Smart ThinQ application from the Google Play Store on a smart phone. Follow instructions to download and install the application. Product Registration 1. Run the Smart ThinQ application on a smart phone. 2. Create an account and sign in. 3. Select Register. 4. Select Refrigerator. 5. F ollow the instructions on the smart phone to register the appliance and connect it to a Wi-Fi network.
42 SMART FUNCTIONS Smart Functions (continued) LG Smart Refrigerator App - What’s Included Refrigerator Manager Allows you to control the refrigerator and freezer temperature settings, air filter, water filter, Ice Plus, Smart Saving, and Energy Monitoring from your smart phone. Manage Food This feature helps track items in the refrigerator and freezer, sends alerts when items are near their use by dates, generates grocery lists, and links to related recipes.
SMART FUNCTIONS 43 Smart Grid Application Features If you want the refrigerator to ignore the Demand Response signal from the utility company, you can override the Smart Grid function by pushing the Smart Grid button while the refrigerator is in Smart Grid mode. 1 You can lower energy usage based on Demand Response (DR) signals from the utility company. If the refrigerator is operating in Smart Saving mode according to the DR signal, you can see a pop up.
44 SMART FUNCTIONS FCC Notice (For transmitter module contained in this product) This equipment has been tested and found to comply with the limits for a Class B digital device, pursuant to Part 15 of the FCC Rules. These limits are designed to provide reasonable protection against harmful interference in a residential installation.
SMART FUNCTIONS 45 Using Smart Diagnosis™ 2 Open the right refrigerator door. 3 Hold the mouthpiece of your phone in front of the speaker that is located on the right hinge of the refrigerator door, when instructed to do so by the call center. 4 Press and hold the Freezer temperature button for three seconds while continuing to hold your phone to the speaker. 5 After you hear three beeps, release the Freezer temperature button. 6 Keep the phone in place until the tone transmission has finished.
46 MAINTENANCE MAINTENANCE Cleaning yy Both the refrigerator and freezer sections defrost automatically; however, clean both sections about once a month to prevent odors. yy Wipe up spills immediately. yy Always unplug the refrigerator before cleaning. General Cleaning Tips yy Unplug refrigerator or disconnect power. yy Remove all removable parts, such as shelves, crispers, etc. yy Use a clean sponge or soft cloth and a mild detergent in warm water. Do not use abrasive or harsh cleaners.
MAINTENANCE 47 Replacing the Water Filter Replace the air filter: Replace the water filter: yy Approximately every six months. yy When the REPLACE FILTER indicator appears in the display. 1 yy Approximately every six months. yy When the water filter indicator appears in the display. yy When the water dispenser output decreases. yy When the ice cubes are smaller than normal. Remove the old filter. Turn the filter cover to the left to detach it from the refrigerator wall.
48 MAINTENANCE 1 Remove the old water filter. 3 After the water filter is replaced, dispense 2.5 gallons of water (flush for approximately 5 minutes) to remove trapped air and contaminants from the system. Do not dispense the entire 2.5 gallon amount continuously. Depress and release the dispenser pad for cycles of 30 seconds ON and 60 seconds OFF. 4 Water Filter Bypass Plug Lower or remove the top left shelf to allow the water filter to rotate all the way down.
MAINTENANCE 49 Performance Data Sheet Use Replacement Cartridge: ADQ36006101 System tested and certified by NSF International against NSF/ANSI Standard 42 and Standard 53 for the reduction of substances listed below. Max NSF Average Avg % Permissible Reduction Product Water Reduction Product Water equirements Concentration Concentration Contaminant Reduction Average Influent NSF specified Challenge Concentration Chlorine Taste and Odor 2.1 mg/L 2.0 mg/L ± 10% 97.2% 0.
50 MAINTENANCE Application Guidelines/Water Supply Parameters Service Flow 0.5 gpm (1.9 lpm) Water Supply Potable Water Water Pressure 20 -120 psi (138 - 827 kPa) Water Temperature 33°F - 100°F (0.6°C - 38°C) It is essential that the manufacturer’s recommended installation, maintenance and filter replacement requirements be carried out for the product to perform as advertised. NOTE yy While the testing was performed under standard laboratory conditions, actual performance may vary.
MAINTENANCE 51 ENGLISH