DR265-M_EVENT_ENG DVD RECORDER OWNER’S MANUAL MODEL: DR265 Before connecting, operating or adjusting this product, please read this instruction booklet carefully and completely.
CAUTION RISK OF ELECTRIC SHOCK DO NOT OPEN CAUTION: TO REDUCE THE RISK OF ELECTRIC SHOCK DO NOT REMOVE COVER (OR BACK) NO USER-SERVICEABLE PARTS INSIDE REFER SERVICING TO QUALIFIED SERVICE PERSONNEL. This lightning flash with arrowhead symbol within an equilateral triangle is intended to alert the user to the presence of uninsulated dangerous voltage within the product’s enclosure that may be of sufficient magnitude to constitute a risk of electric shock to persons.
Introduction IMPORTANT SAFETY INSTRUCTIONS CAUTION: PLEASE READ AND OBSERVE ALL WARNINGS AND INSTRUCTIONS IN THIS OWNER’S MANUAL. AND THOSE MARKED ON THE PRODUCT. RETAIN THIS BOOKLET FOR FUTURE REFERENCE. This product has been designed and manufactured to assure personal safety. Improper use can result in electric shock or fire hazard. The safeguards incorporated in this product will protect you if you observe the following procedures for installation, use, and servicing.
Contents Introduction . . . . . . . . . . . . . . . . . . . . . . . . . . . . .5-9 About the Symbol Display . . . . . . . . . . . . . . .5 Symbol Used in this Manual . . . . . . . . . . . . . . . .5 Notes on Discs . . . . . . . . . . . . . . . . . . . . . . . . . .5 Recordable and Playable Discs . . . . . . . . . . . . .6 Playable Discs . . . . . . . . . . . . . . . . . . . . . . . . . .7 Regional Code . . . . . . . . . . . . . . . . . . . . . . . . . .7 Front Panel . . . . . . . . . . . . . . . . . . . . .
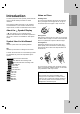
Notes on Discs To ensure proper use of this product, please read this owner’s manual carefully and retain for future reference. Handling Discs Do not touch the playback side of the disc. Hold the disc by the edges so that fingerprints do not get on the surface. Never stick paper or tape on the disc. Introduction Introduction This manual provides information on the operation and maintenance of your recorder. Should the unit require service, contact an authorized service location.
Recordable and Playable Discs DVD-RW (Digital Video Disc - ReWritable): DVD-RW discs can be formatted for VR mode recording or Video mode recording. These Discs can be recorded on repeatedly. Recordings can be erased, then you can record again on the same Disc.
Introduction Playable Discs DVD (8 cm / 12 cm disc) Discs such as movies that can be purchased or rented Audio CD (8 cm / 12 cm disc) Music CDs or CD-Rs/CD-RWs in music CD format that can be purchased Video CD (VCD) (8 cm / 12 cm disc) VIDEO CDs or CD-Rs/CD-RWs in VIDEO CD/Super VIDEO CD format CD-R/CD-RW (8 cm / 12 cm disc) CD-R/CD-RW discs that contain audio titles, DivX, MP3, WMA, or JPEG files.
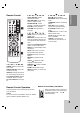
Front Panel a b d e f g h i j k l a 1 POWER Switches the recorder ON or OFF. g N (PLAY) Starts playback. b Disc Tray Insert a disc here. h STOP Stops playback or recording. c Display window Shows the current status of the recorder. i z (REC) Starts recording. Press repeatedly to set the recording time. REC: The recorder is recording. TV: Indicates when the recorder is in TV tuner mode. j CH (V/v) Scans up or down through memorized channels.
b d SCAN (m / M): Search backward or forward. SKIP (. / >): Go to next or previous chapter or track. PAUSE/STEP (X) : Pause playback or recording temporarily. a c REC (z): Starts recording. REC MODE: Selects the recording mode. THUMBNAIL: Selects a thumbnail picture. PLAY (N): Starts playback. CHP. ADD: Inserts a chapter marker when playing/recording. STOP (x): Stops playback or recording. PLAY MODE: Selects a play mode. CLEAR: Removes a mark on the Marker Search menu.
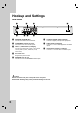
Hookup and Settings Rear Panel a e b f g c d h a ANTENNA IN (FROM ANT) Connect the antenna to this terminal. f COAXIAL (DIGITAL AUDIO OUTPUT) Connect to digital (coaxial) audio equipment. b COMPONENT OUTPUT (Y PB PR) Connect to a TV with Y PB PR inputs. g c INPUT 1 (VIDEO/AUDIO (Left/Right)) Connect the audio/video output of an external source (Audio system, TV/Monitor, VCR, Camcorder). AUDIO OUTPUT (Left/Right) Connect to a TV or other equipment with audio inputs.
Connecting an Antenna or Cable TV a Antenna a Antenna: Disconnect the antenna from the rear of the TV and identify the antenna cable. If it is a round 75 ohm coaxial cable connect it directly to the jack marked ANTENNA IN on your Recorder. If your antenna cable is flat connect it to a 300-ohm to 75-ohm antenna adaptor (not supplied) and slip the adaptor over the ANTENNA IN jack. Don’t attempt to screw it into to the Recorder.
Connections to Your TV Make one of the following connections, depending on the capabilities of your existing equipment. Component Video connection Connect the COMPONENT OUTPUT jacks on the recorder to the corresponding input jacks on the TV using an Y PB PR cable (C). Tips Depending on your TV and other equipment you wish to connect, there are various ways you could connect the recorder. Use only one of the connections described below.
Connecting to an Amplifier Rear of Recorder Connecting to an amplifier equipped with two channel analog stereo or Dolby Pro Logic ll/ Pro Logic Connecting to an amplifier equipped with two channel digital stereo (PCM) or to an Audio/ Video receiver equipped with a multi-channel decoder (Dolby Digital™, MPEG 2, or DTS) X Hookup and Settings Connect the Left and Right AUDIO OUTPUT jacks on the recorder to the audio left and right in jacks on your amplifier, receiver, or stereo system, using the audio ca
Accessory Audio/Video (A/V) Connections Connecting to the INPUT 1 or AV IN 2 Jacks Connect the input jacks (AV1, AV2) on the recorder to the audio/video out jacks on your accessory component, using audio/video cables.
Auto Set Up Using the Home Menu After the POWER is pressed for the first time to turn on the unit or resetting the unit, the Initial Setup Wizard function sets the language, clock and tuner channels automatically. From the Home Menu screen you can access all the Media for playback and recording of the recorder. 2. Use b / B buttons to select a main option you want. Sub options appears. Hookup and Settings 1. Select a language for the Setup menu and onscreen display.
Initial Settings In this menu system, there are several ways to customize the settings provided. Most menus consist of three levels to set up the options, but some require greater depth for the variety of settings. General Operation 1. Press HOME and select [Setup] option. 2. Select [Start] option then press ENTER. The Setup menu appears. Auto Channel Set Connect the Recorder to the desired type of antenna or cable TV system as shown on page 11.
1. Select [Clock set] option then press B. 2. Enter the necessary information for year, date and time. b / B (left/right): Moves the cursor to the previous or next column. v / V (up/down): Changes the setting at the current cursor position. 3. Press ENTER to confirm your setting. TV Aspect Selects the aspect ratio of the connected TV (4:3 standard or wide). [4:3 Letter Box] Select this when connecting to a 4:3 screen TV. Displays a wide picture with bands on the upper and lower portions of the screen.
Language Settings Audio Settings Each DVD disc has a variety of audio output options. Set the recorder’s Audio Output according to the type of audio system you use. Display Menu Select a language for the Setup menu and on-screen display. Disc Menu/Audio/Subtitle [Original]Refers to the original language in which the disc was recorded.
Lock (Parental Control) Settings Set Password Hookup and Settings 1. Select [Set Password] option then press B. 2. Follow step 2 as shown “Rating”. To change the password, select the [Change], press ENTER and input the new password twice after inputting the current password. To delete the password, select [Delete] then input the password. If you forget your 4-digit code If you forget your password, to clear the current password, follow the procedure below.
Recording Settings Disc Settings Initialize Rec Mode Set If you load a completely blank disc, the recorder will initialize the disc. DVD-R: The recorder initialize the disc to Video mode. The recording mode will always be Video mode. DVD-RW/DVD+RW/DVD+R : The Initialize menu will appears. Select [OK] then press ENTER. DVDRW disc is initialized to Video mode. Also, you can reformat the DVD-RW/DVD+RW from the Setup menu as below.
Finalize Finalizing ‘fixes’ the recordings in place so that the disc can be played on a regular DVD player or computer equipped with a suitable DVD-ROM drive. Finalizing a Video mode disc creates a menu screen for navigating the disc. This is accessed by pressing MENU/LIST or TITLE. Caution Once you have finalized a DVD-R and DVD+R disc, you cannot edit or record anything else on that disc except DVD+RW. However, you can record and edit a DVD-RW disc by choosing [Unfinalize] option.
General Explanation of On-Screen Display This manual gives basic instructions for operating the recorder. Some DVDs require specific operation or allow only limited operation during playback. When this occurs, the symbol appears on the TV screen, indicating that the operation is not permitted by the recorder or is not available on the disc. Displaying Information While Watching TV During viewing the TV, press DISPLAY to display/remove the information displayed on-screen.
Playback General Playback Features 1. Load your chosen disc in the tray, with the playback side down. 2. Starts playback using HOME menu (see page 15). 3. To stop the playback, press STOP (x). The unit records the stopped point, depending on the disc. “Xx” appears on the screen briefly. Press PLAY (N) to resume playback (from the scene point). If you press STOP (x) again or unload the disc (“x” appears on the screen.), the unit will clear the stopped point. 4. Press OPEN/CLOSE (Z) to remove the disc.
General Playback Features (Continued) Buttons Operations PLAY MODE For repeat playback During playback, press PLAY MODE repeatedly to select a desired repeat mode. DVD (Chapter/Title/Off) VR mode DVD-RW (Chapter/Title/All/Off) Video CD, Audio CD (Track/All/Off) MP3/WMA (Track/Folder/Off) Notes: On a Video CD with PBC, you must set PBC to [OFF] in the Setup menu to use the Repeat function. See page 21. If you press SKIP (>) once during Repeat Chapter (Track) playback, the repeat playback cancels.
VCD The menu screen may be displayed first after loading a DVD or Video CD which contains a menu. DVD Use the b / B / v / V buttons to select the title/chapter you want to view, then press ENTER to start playback. Press TITLE or MENU/LIST to return to the menu screen. VCD Use the number buttons to select the track you want to view. Press RETURN (O) to return to the menu screen. Menu setting and the exact operating procedures for using the menu may differ depending on the disc.
Playing a DivX Movie File Movie List menu options The recorder can play DivX files. Before playing DivX files, read “DivX file requirement” on right. 1. Press v / V to select a folder/file on the [Movie List] menu then press ENTER. [Movie List] menu options appear. 1. Press HOME. 2. Press v / V / b / B to select an option, and press ENTER. 2. Select [Movie] option. 3. Select a media that contains DivX file(s) then press ENTER. The [Movie List] menu appears on the TV screen.
Playing an Audio CD or MP3/WMA file Audio CD and Music List menu options The recorder can play audio CDs and MP3/WMA files. Before playing MP3/WMA files, read “MP3/WMA audio file requirement” on right. 1. Press v / V to select a folder/file on the [Music List] menu then press ENTER. The menu options appear. The menu options displayed differ depending on the selected media. 1. Press HOME. The HOME menu appears. 2. Press v / V / b / B to select an option, and press ENTER. 2. Select [Music] option.
Viewing a JPEG File Photo List menu options The recorder can play JPEG files. Before playing JPEG recordings, read “Photo file requirement” on right. 1. Press v / V to select a file on the [Photo List] menu then press ENTER. The menu options appear. The menu options displayed differ depending on the selected media. 1. Press HOME. The HOME menu appears. 2. Select [Photo] option. 3. Select a media that contains JPEG file then press ENTER. The [Photo List] menu appears on the TV screen. 2.
View Slide Shows 1. Select [Slide Show] option on the [Photo List] menu (Refer to “Photo List menu options” on page 28). 2. Press ENTER. The Slide Show menu appears. 3. Use b / B / v / V to set the options. [Speed] option: Sets the Slide Show speed to [Slow], [Normal], or [Fast]. Playback 4. Select the [Start] option then press ENTER to start the Slide Show. The slide show continues until you press STOP. 5. Press STOP to stop the Slide Show and returns to the [Photo List] menu. To Pause the Slide Show 1.
Recording About DVD recording Notes: This recorder cannot make recordings on CD-R or CD-RW discs. Our company takes no responsibility for recording failure due to power outages, defective discs, or damage to the Recorder. Fingerprints and small scratches on a disc can affect playback and/or recording performance. Please take proper care of your discs.
Some video material is copy-once protected: If you want to record copy-once protected material to DVD, you must use a VR mode DVD-RW disc compatible with CPRM Ver. 1.1. You can identify copy-once protected material during playback by displaying disc information on-screen. PAL format signals from the analog or the DV inputs is not recorded correctly with this recorder. Video that is ‘copy-once only’ can only be recorded using DVD-RW disc in VR mode disc with CPRM (see below).
Basic Recording from a TV Instant Timer Recording Follow the instructions below to record a TV program. Recording starts immediately and continues until the disc is full or you stop the recording. Instant Timer Recording allows you to make a recording easily of a preset length without using the program timer. Notes: You must load a recordable disc for DVD recording. This unit can record only a mono audio content from the built-in tuner system. 1.
This recorder can be programmed to record up to 16 programs within a period of 1 month. For unattended recording, the timer needs to know the channels to be recorded, the starting and ending time. Note: If you use a completely blank disc for timer recording, you must format the disc before starting timer recording. (Refer to “Initialize” on page 20.) 1. Press HOME and select [TV] option. 2. Press v / V to select [Timer Record] option then press ENTER. The [Timer Record List] will appear. 3.
Checking Timer Recording Details Programming can be checked whenever the recorder is turned on. 1. Press HOME and select [TV] option. 2. Press v / V to select [Timer Record] option then press ENTER. The [Timer Record List] will appear. Use v / V to select a timer recording. Press ENTER to edit the selected program. Timer Record menu appears. Press CLEAR to delete the selected program from the Timer Record List. You cannot enter a timer program when: A recording is already underway.
Editing 12 3 4 5 6 Title List and Chapter List Menu Overview Using the Title List menu you can edit video content. The editing features available in the Title List menu depend on whether you are editing video on DVD, and whether you’re editing Original content, or a Playlist. There are two ways to edit VR mode DVD-RW discs. You can directly edit the Original content of the disc, or you can create and edit a Playlist.
VR Mode: Original and Playlist Editing Titles, Chapters and Parts Titles in the disc’s original content contain one or more chapters. When you insert a disc’s title into the Playlist, all the chapters within that title also appear. In other words, chapters in the Playlist behave exactly as chapters on a DVD-Video disc do. Parts are sections of Original or Playlist titles. From the Original and Playlist menu you can add or delete parts.
Making a New Playlist -RWVR Use this function to add an Original title or chapter to the Playlist. When you do this, the whole title or chapter are put into the Playlist (you can delete bits you don’t need later — see Deleting an Original or Playlist title/chapter on page 38). The title appears in the Playlist complete with the chapter markers that appear in the Original. However, if you add more chapter markers to the Original later, these are not automatically copied over into the Playlist title.
Deleting an Original or Playlist Title/Chapter When you erase a title or chapter from the Playlist menu, you only remove it from the Playlist; the title/chapter remains in the Original menu. If you choose to delete a title or chapter from the Original (title/chapter) menu, the title or chapter is actually deleted from the disc and the remaining time available for recording increases. Titles/chapters deleted from the Original are also removed from the Playlist.
Naming a Title Time Search You can name the titles. You can select start point of the title. 1. Choose the title you want to name on the Title List menu, then press ENTER. The menu options appears on the left side of the menu. 1. Use b / B / v / V to choose a title on the Title List menu then press ENTER. The options appears on the left side of the menu. 2. Select [Title Name] in the [Edit] option then press ENTER. Keyboard menu appears. 2. Select [Time] option then press ENTER.
Divide One Titles Into Two +RW Use this command to split a title up into two new titles. 1. On the Title List menu, select a title you want to divide then press ENTER. The menu options appears on the left side of the screen. 2. Select [Divide] option. Combining Two Chapters Into One -RWVR +RW +R Use this function to combine two adjacent chapters into one. 1.
-RWVR Use this function to re-arrange the playing order of Playlist chapters on the Title List-Playlist menu. Note: This function is not available if there is only one chapter. 1. Select a chapter on the Chapter List-Playlist menu. 2. Press ENTER. The menu options appears on the left side of the menu. 3. Use v / V to select [Move] option from Playlist options then press ENTER. 4. Use b / B / v / V to choose the place you want to move the chapter to then press ENTER.
Reference Additional Information Overwriting Recording +RW 2. Press TITLE in play or stop mode. Title List menu will appear as shown below. Tip You can remove the Title List menu by pressing STOP (x). To overwrite a new video recording on a previously recorded title, follow these steps. This feature is not available for DVD+Rs, that always record at the end of the Disc. 1. Select input source you want to record (TV channel, AV1-2). 2. Press MENU/LIST to display the Title List menu. 3.
Language Codes Use this list to input your desired language for the following initial settings: Disc Audio, Disc Subtitle, Disc Menu.
Controlling Your TV with the Supplied Remote Control Controlling other TVs with the Remote Control You can control the sound level, input source, and power switch of your TV with the supplied Remote Control. You can control the sound level, input source, and power switch of non-LG TVs as well. If your TV is listed in the table below, set the appropriate manufacturer code. You can control your TV using the buttons below. 1.
Troubleshooting Check the following guide for the possible cause of a problem before contacting service. Cause Solution The power cord is disconnected. Plug the power cord into the wall outlet securely. No picture. The TV is not set to receive recorder signal output. Select the appropriate video input mode on the TV so the picture from the recorder appears on the TV screen. The video cable is not connected securely. Connect the video cable securely. The connected TV power is turned off.
Cannot play a disc recorded using this recorder on another player. Cannot record or did not record successfully. Timer recording is not possible. The remote control does not work properly. The disc was recorded in Video mode. Finalize the disc. (page 21) Some players will not play even a finalized disc recorded in Video mode. No solution. The disc was recorded in VR mode, The other player must be RW compatible in order to play it.
Specifications General Power requirements Power consumption Dimensions (approx.) Net Weight (approx.) Operating temperature Operating humidity Television system Recording format AC 110-240V, 50/60Hz 18W 430 X 54 X 275 mm (w x h x d) without foot 2.
DR265M_HA1PLLB_SPA REPRODUCTOR Y GRABADOR DE DVD MANUAL DE INSTRUCCIONES MODELO: DR265 Antes de conectar, hacer funcionar o ajustar este producto, lea el manual de instrucciones completa y cuidadosamente.
PRECAUCIÓN NO ABRIR, EXISTE RIESGO DE DESCARGA ELÉCTRICA. PRECAUCIÓN: PARA REDUCIR EL RIESGO DE DESCARGA ELÉCTRICA NO RETIRE LA CUBIERTA (NI LA CUBIERTA POSTERIOR). NO EXISTE NINGUNA PIEZA EN EL INTERIOR QUE EL USUARIO PUEDA REPARAR. ASIGNE LAS TAREAS DE REPARACIÓN AL PERSONAL DE SERVICIO CUALIFICADO.
Introducción IMPORTANTES INSTRUCCIONES DE SEGURIDAD ADVERTENCIA: LEA Y SIGA TODAS LAS ADVERTENCIAS E INSTRUCCIONES EN ESTE MANUAL DEL USUARIO Y AQUÉLLAS INDICADAS EN LA UNIDAD. CONSERVE ESTE MANUAL PARA FUTURAS CONSULTAS. Esta unidad ha sido diseñada y fabricada para garantizar la seguridad personal. Su uso inadecuado podría provocar descargas eléctricas o incendios.
Índice Introducción . . . . . . . . . . . . . . . . . . . . . . . . . . . .5-9 Acerca de la visualización del símbolo . . . . . .5 Símbolos utilizados en este manual . . . . . . . . . .5 Notas sobre los discos . . . . . . . . . . . . . . . . . . . .5 Discos grabables y reproducibles . . . . . . . . . . . .6 Discos reproducibles . . . . . . . . . . . . . . . . . . . . .7 Código de región . . . . . . . . . . . . . . . . . . . . . . . .7 Panel frontal . . . . . . . . . . . . . . . . . . . . . . . . . . . .
Notas sobre los discos Para garantizar un uso correcto de este producto, por favor, lea detenidamente el manual y guárdelo para futuras consultas. Manejo de los discos No toque la cara a reproducir del disco. Sujete el disco por los bordes para no dejar huellas dactilares en la superficie. No pegue papel ni cintas en el disco. Introducción Introducción Este manual facilita información sobre el funcionamiento y mantenimiento de su grabadora.
Discos grabables y reproducibles DVD-RW (disco de video digital - Regrabable): Los discos DVD-RW se pueden formatear para una grabación en modo VR o grabación en modo Video. Estos discos se pueden regrabar repetidamente. Puede borrar lo grabado y, a continuación, volver a grabar en el mismo disco. [modo VR] En estas grabaciones se pueden hacer muchos cambios.
Introducción Discos reproducibles DVD (disco de 8 cm / 12 cm) Discos como los de las películas, que se pueden comprar o alquilar. CD de video (VCD) (disco de 8 cm / 12 cm) CDs de video o CDs grabables/regrabables, en formato CD de video/súper CD de video. CD de audio (disco de 8 cm / 12 cm) Los CDs de música o CDs grabables/regrabables en formato de CD de música, que pueden comprarse CD-R/CD-RW (disco de 8 cm / 12 cm) Los discos CD-R/CD-RW que tienen títulos de audio, DivX, MP3, WMA, o archivos JPEG.
Panel frontal a b d e f g h i j k l a 1 POWER Enciende (ON) y apaga (OFF) el grabador. g N (PLAY) Inicia la reproducción. b Bandeja de discos Inserte aquí un disco. h STOP (x) Detiene la reproducción o grabación. c Ventana de visualización Muestra el estado actual del grabador. i z (REC) Empieza la grabación. Presione repetidamente para ajustar el tiempo de grabación. REC: el grabador está grabando. TV: Indica cuando el grabador está en modo de sintonización del televisor.
Botones de control del televisor: Consulte la página 44. SETUP: Accede o sale del menú de configuración b SCAN (m / M): Busca hacia delante o hacia atrás. d SKIP (. / >): Va al capítulo o pista siguiente o anterior. a PAUSE/STEP (X) : Detiene temporalmente la reproducción o la grabación. PLAY (N): Inicia la reproducción. b STOP (x): Detiene la reproducción o grabación. HOME: Accede o sale del menú HOME (Inicio).
Conexión y configuraciones Panel posterior a e b f g c d h a ANTENNA IN (FROM ANT) Conecte la antena a este terminal. f COAXIAL (SALIDA DE AUDIO DIGITAL) Conecte un equipo de audio digital (coaxial). b COMPONENT OUTPUT (Y PB PR) Conecte a un televisor con entradas Y PB PR. g c INPUT 1 (VIDEO/AUDIO (Izquierda/Derecha)) Conecte la salida de audio/video de una fuente externa. (Sistema de audio, televisor/monitor, VCR, videocámara).
a a Antena: Desconecte la antena de la parte posterior del televisor e identifique su cable. Si es un cable coaxial redondo de 75 ohms, conéctelo directamente a la entrada marcada ANTENNA IN en su grabadora. Si el cable es plano, conéctelo a un adaptador de antena de 300 ohms a 75 ohms (no incluido) y conecte el adaptador a la entrada ANTENNA IN. No intente atornillarlo a el grabador.
Conexión a su televisor Realice una de las siguientes conexiones, dependiendo de la capacidad del equipo al que se va a conectar. Sugerencias Dependiendo del modelo de su televisor y del otro equipo que desee conectar, encontrará varios modos de conectar el grabador. Utilice únicamente una de las conexiones descritas abajo. Consulte los manuales de su televisor, VCR, sistema estéreo u otros dispositivos según considere necesario para conectar del mejor modo posible.
Conexión a un amplificador Panel Rear ofposterior Recorder del grabador Conexión a un amplificador equipado con dos canales estéreo analógicos o Dolby Pro Logic II/ Pro Logic Conexión a un amplificador equipado con dos canales estéreo digitales (PCM) o a un receptor de audio/video equipado con un descodificador multicanal (Dolby DigitalTM, MPEG 2 o DTS) X Conexión y configuraciones Conecte las tomas izquierda y derecha de AUDIO OUTPUT del grabador a las tomas izquierda y derecha de su amplificador, re
Conexiones adicionales de audio/video (A/V) Conexión a las tomas INPUT 1 o AV IN 2 Conecte las tomas de entrada (AV1, AV2) del grabador a las tomas de salida de audio/video de su componente adicional usando cables de audio/video. Panel de tomas de equipo adicional (VCR, videocámara, etc.
Uso del menú Home Una vez pulsado POWER por primera vez para encender la unidad o para reiniciarla, la función del asistente realizará los ajustes necesarios para el idioma, el reloj y la sintonización de canales automáticamente. Desde la pantalla del menú Home, podrá acceder a todos los soportes de reproducción y grabación del grabador. 1. Seleccione un idioma para el menú de configuración y mensajes en pantalla. Use v / V para seleccionar un idioma y, a continuación, presione ENTER. 1.
Configuraciones iniciales Auto Programación En este sistema de menús, existen diferentes maneras de personalizar los ajustes proporcionados. La mayoría de menús disponen de tres niveles para ajustar las opciones, pero algunos necesitan más profundidad por la variedad de ajustes. Conecte el grabador al tipo de antena o sistema de TV por cable deseado como se muestra en la página 11 Esta grabadora está equipada con un sintonizador sintetizado de frecuencias capaz de recibir hasta 181 canales.
Si su estación local de televisión no envía información sobre la fecha y la hora, o envía información incorrecta, puede ajustar el reloj manualmente. 1. Seleccione la opción [Ajuste de reloj] y, borrar , después, presione B. 2. Entre la información necesaria para la fecha y hora. b / B (izquierda/derecha): desplaza el cursor a la columna anterior o posterior. v / V (arriba/abajo): cambia el ajuste que indica la posición actual del cursor. 3. Presione ENTER para confirmar la configuración.
Configuraciones de idioma Configuraciones de audio Todos los discos DVD tienen una variedad de opciones de salida de audio. Ajuste la salida de audio del grabador de acuerdo con el tipo de sistema de audio utilizado. Display Menú Seleccione un idioma para el menú de configuración y los mensajes en pantalla. Disco Menú/Audio/Subtítulo [Original] Hace referencia al idioma original en el que se grabó el disco.
Indice Bloqueo de reproducción de DVDs clasificados según su contenido. No todos los discos están clasificados. 1. Seleccione la opción [Indice] y presione B. 2. Para acceder a las características de clasificación, contraseña y código de área, deberá Entrar el código de seguridad creado por usted. Si no ha entrado un código de seguridad, se le pedirá que lo haga. Entre un código de 4 dígitos Éntrelo de nuevo para verificar.
Configuraciones de grabación Configuración del disco Iniciar Modo Rec Ajustado Puede ajustar la calidad de la imagen para grabar; XP (alta calidad), SP (calidad estándar), LP (baja calidad), EP (calidad ampliada). MLP (Máx. rep. de larga duración) Si carga un disco completamente en blanco, el grabador inicializará el disco. DVD-R: El grabador inicializará el disco a modo de video. El modo de grabación siempre será modo de video. DVD-RW/DVD+RW/DVD+R: Aparecerá el menú Initialize (Iniciar).
Finalizar La finalización “fija” la grabación en su sitio de modo que el disco pueda reproducirse en un reproductor de DVD habitual u ordenador equipado con una unidad de DVD-ROM adecuada. Al finalizar un disco en modo video crea una pantalla de menú para navegar por el disco. Se puede acceder a éste presionando MENU/LIST o TITLE. Precaución Una vez finalizado un disco DVD-R y DVD+R, no podrá editar o grabar nada más en ese disco excepto DVD+RW.
Explicación general de los mensajes en pantalla Este manual ofrece instrucciones básicas para hacer funcionar el grabador de DVD. Algunos DVD requieren un funcionamiento específico o permiten sólo determinadas operaciones durante su reproducción. Cuando esto ocurra, el símbolo aparecerá en la pantalla del televisor, indicando que la operación no está permitida por el grabador o no está disponible en el disco.
Reproducción Características generales de reproducción. Botones Operaciones Discos OPEN / CLOSE (Z) Abre o cierra la bandeja de discos. Todos los discos PAUSE/STEP (X) Durante la reproducción, presione PAUSE/STEP (X) para realizar una pausa. Todos los discos Presione PAUSE/STEP (X) repetidamente para reproducir DVD ALL fotograma a fotograma. Consejo: Podrá avanzar o retroceder en la imagen, fotograma a fotograma, pulsando b / B repetidamente durante el modo PAUSE.
Características generales de reproducción (continuación) Discos Botones Operaciones PLAY MODE Para repetir la reproducción DVD ALL VCD Durante la reproducción, presione PLAY MODE repetidamente MP3 WMA para seleccionar un modo de repetición deseado.
DVD VCD La pantalla de menús puede aparecer la primera vez después de cargar un DVD que contenga un menú. DVD Utilice los botones b / B / v / V para seleccionar el título o capítulo que desee ver y, a continuación, presione ENTER para iniciar la reproducción. Presione TITLE o MENU/LIST para volver a la pantalla de menús. VCD Utilice los botones numerados para seleccionar la pista que desea visualizar. Presione RETURN (O) para volver a la pantalla de menús.
Reproducción de un archivo de película DivX El grabador puede reproducir ficheros DivX. Antes de reproducir ficheros DivX, lea “Requisitos para los ficheros DivX” en la columna derecha. 1. Presione HOME. 2. Seleccione la opción [PELÍCULA]. 3. Seleccione un soporte que contenga fichero(s) DivX y, a continuación, presione ENTER. El menú [lista de películas] aparecerá en la pantalla del televisor. Opciones del menú lista de películas 1.
Reproducción de un CD de audio o archivo MP3 Opciones del menú CD de audio y lista de cancíones El grabador puede reproducir CDs de audio y ficheros MP3/WMA. Antes de reproducir ficheros MP3/WMA, lea “Requisitos para los ficheros audio MP3/WMA” en la columna derecha. 1. Presione v / V para seleccionar una carpeta/fichero en el menú [lista de cancíones] y, a continuación, presione ENTER. Aparecerán las opciones del menú.
Visualización de un archivo JPEG Opciones del menú lista de fotos El grabador puede reproducir ficheros JPEG. Antes de reproducir ficheros JPEG, lea “Requisitos para los ficheros Photo” en la columna derecha. 1. Presione v / V para seleccionar un fichero en el menú [lista de fotos] y, a continuación, presione ENTER. Aparecen las opciones del menú. Las opciones del menú que aparecen en pantalla difieren dependiendo del tipo de soporte. 1. Presione HOME. Aparecerá el menú HOME. 2.
Visualizar presentaciones en diapositivas 1. Seleccione la opción [Slide Show] en el menú [lista de fotos] (consulte las “Opciones del menú lista de fotos” en la página 28). 2. Presione ENTER. Aparecerá el menú Slide Show. Reproducción 3. Utilice b / B / v / V para ajustar las opciones. Opción [Velocidad]: Establece la velocidad de la Exhibición de diapositivas a [Lento], [Normal] o [Rápido]. 4. Seleccione la opción [Comenzar] y, a continuación, presione ENTER para iniciar. la presentación.
Grabación Acerca de la grabación de un DVD Notas: Esta grabadora no puede realizar grabaciones en discos CD-R o CD-RW. Nuestra empresa no se hace responsable de los daños de grabación debidos a caídas de tensión, discos defectuosos o daños a el grabador. La huellas dactilares y pequeños arañazos en el disco pueden afectar a la reproducción y/o rendimiento de la grabación. Cuide los discos.
Algunos videos está protegidos con la función copiaronce (una sola copia). Si desea transferir material protegido contra una copia al DVD, necesitará usar un disco DVD-W en modo compatible con VR con CPRM Ver. 1.1. Puede identificar el material protegido contra una copia durante la reproducción visualizando la información del disco en pantalla. Las señales del formato PAL provenientes de las entradas analógicas o DV no se graban correctamente en esta grabadora.
Grabación básica desde un televisor Grabación temporizada instantánea Siga las siguientes instrucciones para grabar un programa de TV. La grabación comienza inmediatamente y continúa hasta que el disco está lleno o detiene la grabación. La grabación temporizada instantánea le permite efectuar una grabación de un periodo preestablecido de tiempo mediante el temporizador de programas. Notas: Debe cargar un disco grabable para la grabación de DVD.
Esta grabadora puede programarse con hasta 16 programas para un período de 1 mes. En la grabación sin supervisión, el temporizador necesita conocer qué canales grabar y sus horas de inicio y fin. Nota: Si utiliza un disco completamente virgen para la grabación del temporizador, deberá formatear antes el disco para iniciar la grabación. (Consulte “Iniciar” en la página 20.) 1. Presione HOME y seleccione la opción [TV]. 2.
Comprobación de los datos de la grabación temporizada La programación puede chequearse siempre que el grabador de DVD está encendida. 1. Presione HOME y seleccione la opción [TV]. 2. Presione v / V para seleccionar la opción [Grabación reservada] y, a continuación, presione ENTER. Aparecerá la lista [Lista de gb. Resv.]. Utilice v / V para seleccionar una grabación temporizada. Presione ENTER para editar el programa seleccionado. Aparece el menú Grabación reservada.
Edición 12 3 4 5 6 Menú Lista de títulos y Lista de capítulos – Generalidades Utilizando el menú lista de títulos podrá editar el contenido del video. Las prestaciones de edición disponibles en el menú Lista de títulos dependen de si está editando video en un DVD en modo VR y si está editando contenidos originales o una lista de reproducción. 1. Presione MENU/LIST para visualizar el menú de la lista de títulos. Debe para la reproducción cuando haga esto.
Modo VR: Edición de original y lista de reproducción Títulos, capítulos y partes Los títulos del contenido original del disco contienen uno o más capítulos. Cuando inserta un título del disco en la Lista de reproducción, también aparecerán todos los capítulos contenidos en ese título. En otras palabras, los capítulos de la lista de reproducción se comportan exactamente igual que los capítulos de un disco de video DVD. Las partes son secciones de los títulos de original o de la lista de reproducción.
Crear una nueva lista de reproducción -RWVR Use esta función para agregar un título Original o un capítulo a la lista de reproducción. Al hacerlo, la totalidad del título o capítulo pasará a la lista de reproducción (más adelante podrá eliminar ciertas partes que no necesite - consulte el apartado Eliminar un título/capítulo original o de la Lista de reproducción en la página 38). El título aparece en la Lista de reproducción completo con los marcadores de capítulo que aparecen la Original.
Eliminar un título/capítulo de Original o Lista de reproducción Cuando borre un título o capítulo del menú “Lista de reproducción”, sólo lo elimina de la lista; el título/capítulo permanece en el menú “Original”. Si desea borrar un título o capítulo del menú “Original” (título/capítulo), estos se eliminarán realmente del disco y el tiempo disponible para grabaciones aumentará. Los títulos/capítulos eliminados del Original también se eliminarán de la lista de reproducción.
Nombrar un título Búsqueda por tiempo Es posible nombrar los archivos. Puede seleccionar el punto de inicio del título. 1. Seleccione el título que desea nombrar en el menú Lista de títulos y, a continuación, presione ENTER. Las opciones de menú aparecen en la parte izquierda del menú. 2. Seleccione [Nom. Titulo] en la opción [Editar] y, a continuación presione ENTER (Acceder). Aparecerá el menú teclado. 1.
Dividir un título en dos +RW Utilice este comando para dividir un título en dos nuevos títulos. 1. En el menú de la “Lista de títulos”, seleccione el título que desee dividir y, a continuación, presione ENTER. Las opciones del menú aparecen en la parte izquierda de la pantalla. 2. Seleccione la opción [Dividir]. Combinar dos capítulos en uno -RWVR +RW +R Use esta función para combinar dos capítulos adyacentes en uno solo. 1.
Mover un capítulo de la lista de Reproducción -RWVR Utilice esta función para reorganizar el orden de reproducción de los capítulos de la lista de reproducción de la lista de títulos-lista de reproducción. Proteger un título +R -RWVR 1. Presione MENU/LIST para mostrar el menú “Lista de títulos”. 1. Seleccione un capítulo del menú “Lista de Capítulos-Lista de reproducción”. 2. Utilice v V b B para escoger un título que desee proteger y presione ENTER.
Referencia Información adicional de referencia Sobrescribir la grabación +RW 2. Presione TITLE en modo de reproducción o parada. El menú “Lista de títulos” aparecerá como se muestra a continuación. Sugerencia Puede retirar el menú “Lista de títulos” presionando STOP (x). Para sobrescribir una nueva grabación de video en un título grabado anteriormente, siga estos pasos. Esta característica no está disponible para DVD+R, que están siempre grabados al final del disco. 1.
Códigos de idiomas Utilice esta lista para introducir el idioma deseado para las siguientes configuraciones iniciales: Audio del disco, subtítulos del disco, menú del disco.
Control de su televisor con el control remoto suministrado Controlar su televisor con el control remoto Puede controlar el nivel de sonido, fuente de entrada e interruptor de alimentación de su televisor con el control remoto suministrado. Si su televisor aparece en la lista de la siguiente tabla, introduzca el código del fabricante adecuado. Puede controlar su TV utilizando los siguientes botones. 1.
Solución de problemas Compruebe la siguiente guía en busca de la posible causa a un problema antes de ponerse en contacto con el servicio. Ausencia de imagen. Causa El cable de alimentación está desconectado. El televisor no está ajustado para recibir la salida de la señal. El cable de video no está conectado firmemente. La TV conectada está apagada. Ausencia de sonido. El equipo conectado con el cable de audio no está ajustado para recibir la salida de señal.
No se puede reproducir un disco grabado usando esta grabadora en otro reproductor. Solución Causa Problema El disco se grabó en modo video. Finalice el disco. (página 21) Algunos reproductores no reproducirán incluso un disco finalizado grabado en modo video. No hay solución. El disco se grabó en modo VR. El otro reproductor deberá ser compatible con RW para reproducirlo. No hay solución. Los discos grabados con material de una sola copia no se pueden reproducir en otros reproductores.
Especificaciones General Requisitos de alimentación Consumo de energía Dimensiones (Aprox). Peso neto (Aprox).