
Owner's Manual


17
Hookup and
Settings
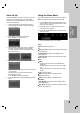
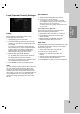
Clock Set
1. Select [Clock set] option then press B.
2. Enter the necessary information for year, date and
time.
b / B (left/right): Moves the cursor to the previous
or next column.
v / V (up/down): Changes the setting at the
current cursor position.
3. Press ENTER to confirm your setting.
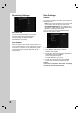
TV Aspect
Selects the aspect ratio of the connected TV (4:3
standard or wide).
[4:3 Letter Box] Select this when connecting to a 4:3
screen TV. Displays a wide picture with bands on
the upper and lower portions of the screen.
[4:3 Pan Scan] Select this when connecting to a 4:3
screen TV. Automatically displays a wide picture on
the entire screen and cuts off the portions that do
not fit.
[16:9 Wide] Select this when connecting to a wide-
screen TV or TV with a wide mode function.
Progressive Scan
Progressive Scan Video provides the highest quality
pictures with less flickering.
If you are using the COMPONENT OUTPUT jacks,
but are connecting the recorder to a standard (analog)
television, set Progressive Scan to [OFF].
If you are using the COMPONENT OUTPUT jacks for
connection to a TV or monitor that is compatible with
a progressive scan signal, set Progressive Scan to
[ON].
Caution
Once the setting for Progressive Scan output is
entered, an image will only be visible on a
Progressive Scan compatible TV or monitor. If you set
Progressive Scan to [ON] in error, you must reset the
recorder. First, remove the disc in the recorder. Next,
press STOP (x) and hold it for five seconds before
releasing it. The video output will be restored to the
standard setting, and a picture will once again be
visible on a conventional analog TV or monitor.
Power Save Mode
You can set up the unit into an economic power save
mode. Nothing is displayed in the display window
when the unit is turned off.
[OFF] Power Save Mode is not active.
[ON] Power Save Mode is active.
Factory Set
If you need to, you can reset the recorder to all its
factory settings. Select ‘‘ENTER’’ icon then press
ENTER, a menu appears with “Cancel”
highlighted.
Arrow left to highlight the “OK” then press ENTER and
auto setup menu will appear, see page 15.
Note:
Some options can not be reset. (Rating, Password
and Area Code)