DR386M-P.BGBRLLK_ENG 6/13/08 9:59 AM Page 1 ENGLISH DRT389H FOR THE GUARANTEE TERMS & CONDITIONS, PLEASE REFER TO BACK COVER OF THIS MANUAL.
DR386M-P.BGBRLLK_ENG 6/13/08 9:59 AM Page 2 CAUTION RISK OF ELECTRIC SHOCK DO NOT OPEN CAUTION: TO REDUCE THE RISK OF ELECTRIC SHOCK DO NOT REMOVE COVER (OR BACK) NO USER-SERVICEABLE PARTS INSIDE REFER SERVICING TO QUALIFIED SERVICE PERSONNEL.
DR386M-P.BGBRLLK_ENG 6/13/08 9:59 AM Page 3 POWER: This unit operates on a mains supply of 200-240V~, 50/60Hz. WIRING: This unit is supplied with a BSI 1363 approved 13 amp mains plug, fused at 5 amp. When replacing the fuse always use a 5 amp BS 1362, BSI or ASTA approved type. Never use this plug with the fuse cover omitted. To obtain a replacement fuse cover contact your dealer.
DR386M-P.BGBRLLK_ENG 6/13/08 9:59 AM Page 4 Contents Before you start . . . . . . . . . . . . . . . . . . . . . . . . . . . . . . . . . . .5-6 Remote control . . . . . . . . . . . . . . . . . . . . . . . . . . . . . . . . . . . .7 Main Unit . . . . . . . . . . . . . . . . . . . . . . . . . . . . . . . . . . . . . . . . .8 Hooking up the unit . . . . . . . . . . . . . . . . . . . . . . . . . . . . . .9-14 Operating USB Flash Drive . . . . . . . . . . . . . . . . . . . . . . . . . .14 Auto setup . . . . .
DR386M-P.BGBRLLK_ENG 6/13/08 9:59 AM Page 5 Before you start Recordable and Playable discs This unit can play and record all widely-used DVD types. The table below shows some specific compatibility differences depending on the disc types.
DR386M-P.BGBRLLK_ENG 6/13/08 9:59 AM Page 6 Notes on discs About the Depending on the conditions of the recording equipment or the CD-R/RW (or DVD±R/RW) disc itself, some CD-R/RW (or DVD±R/RW) discs cannot be played on the unit. “ ” may appear on your TV display during operation and indicate that the function explained in this owner’s manual is not available on that specific media. Do not attach any seal or label to either side (the labeled side or the recorded side) of a disc.
DR386M-P.BGBRLLK_ENG 6/13/08 9:59 AM Page 7 Remote control a a AV: Changes the input source (Tuner, AV1-3, or DV IN). SUBTITLE: Selects a subtitle language. TV/DVD: Press to switch between ‘TV mode’, in which you can operate the picture and sound from the TV, and ‘DVD mode’, in which you can operate the picture and sound from the DVD recorder. TEXT: Switches between digital text mode and normal TV viewing.
DR386M-P.BGBRLLK_ENG 6/13/08 9:59 AM Page 8 Main Unit a b c d e f j a 1 / I (POWER button) Switches the unit ON or OFF. g k h i l b Disc Tray Insert a disc here. f N / X (PLAY / PAUSE) Starts playback. Pause playback or recording temporarily, press again to exit pause mode. c OPEN/CLOSE (Z) Opens or closes the disc tray. g x (STOP) Stops playback or recording. d Remote Sensor Point the remote control here. h z (REC) Starts recording. Press repeatedly to set the recording time.
DR386M-P.BGBRLLK_ENG 6/13/08 9:59 AM Page 9 Hooking up the unit d Power cord connection Connect the mains lead to the AC IN terminal on the DVD recorder. Then plug the power cord into the mains. c SCART connection Connect one end of the scart cable into the AV1 SCART jack on the DVD recorder and the other end to the corresponding in jack on your TV. a Antenna connection Connect the Terrestrial TV antenna to the ANTENNA IN jack on the unit.
DR386M-P.BGBRLLK_ENG 6/13/08 9:59 AM Page 10 Hooking up the unit - more you can do General about connection Picture and sound Digital TV is a transmission technology that replaces the traditional analogue technique. This means that several TV channels, radio channels and other digital services can be transmitted on the same space as just one analogue channel. As a consumer you get access to many more channels and services with perfect picture and audio quality.
DR386M-P.BGBRLLK_ENG 6/13/08 9:59 AM Page 11 S-Video connection Connect one end of the S-Video cable to the S-VIDEO OUTPUT jack on the DVD recorder and the other end to the S-Video INPUT jack on your TV. Connect one end of the audio cable (red and white) to the analog AUDIO OUTPUT jack on the DVD recorder and the other ends to the AUDIO INPUT jack on your TV. Digital audio connection Connecting to an amplifier/receiver, Dolby Digital/MPEG/DTS decoder or other equipment with a digital input.
DR386M-P.BGBRLLK_ENG 6/13/08 9:59 AM Page 12 HDMI connection If your TV is not equipped with a DTS decoder, set the [DTS] options to [OFF] on the setup menu (See page 19). To enjoy DTS multi channel surround, you must connect this unit to a DTS compatible receiver via one of this unit’s digital audio outputs. If there is noise or lines on the screen, please check the HDMI cable. Changing the resolution when the unit is connected with HDMI connector may result in malfunctions.
DR386M-P.BGBRLLK_ENG 6/13/08 9:59 AM Page 13 Connecting a PAY-TV/Canal Plus Decoder You can watch or record PAY-TV/Canal Plus programmes if you connect a decoder (not supplied) to the unit. Disconnect the unit’s mains lead from the mains when connecting the decoder. You do not need to turn on the unit to view the signals from the connected tuner on your TV. SCART AV Pictures containing copy protection signals that prohibit any copying cannot be recorded.
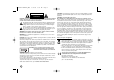
DR386M-P.BGBRLLK_ENG 6/13/08 9:59 AM Page 14 Connecting to the AV IN 3 Jacks Operating USB Flash Drive Connect the input jacks (AV IN 3) on the DVD recorder to the audio/video out jacks on your accessory component using audio/video cables. ON REMOTE 1.
DR386M-P.BGBRLLK_ENG 6/13/08 9:59 AM Page 15 Auto setup During the first use of the DVD recorder, the initial setup wizard sets the language, clock and channels automatically. 1 Turn on the unit: The initial setup wizard appears on the screen.
DR386M-P.BGBRLLK_ENG 6/13/08 9:59 AM Page 16 Switching the program list on the channel editing screen Setting the AV1 Decoder You can switch the program list on the channel editing screen. Sets the AV1 scart jack for inputting encoded video signals. This option sets the unit to output the encoded signal from AV1 scart jack to AV2 (DECODER) scart jack for decoding. The decoded signal is then sent back through the AV2 (DECODER) jack so you can record or watch PAY-TV/Canal Plus programs.
DR386M-P.BGBRLLK_ENG 6/13/08 9:59 AM Page 17 Using the Home Menu - more you can do Adjust the SETUP settings MOVIE DISC – Displays [Title List] menu, which shows recorded titles on the disc. (page 33) – Displays [Movie List] menu, which shows DivX® movie files on the disc. (page 28) – Plays DVD-Video disc (page 26). USB – Displays [Movie List] menu, which shows DivX® movie files on the USB Flash Drive. (page 28) PHOTO DISC – Displays [Photo List] menu, which shows photo files on the disc.
DR386M-P.BGBRLLK_ENG 6/13/08 9:59 AM Page 18 Adjust the SETUP settings - more you can do Adjust the general settings TV Aspect – Selects the aspects ratio of the connected TV. [4:3 Letter Box]: Select this when connecting to a standard 4:3 screen TV and prefer the wide picture with bands on the upper and lower portions of the screen. [4:3 Pan Scan]: Select this when connecting to a standard 4:3 screen TV and prefer the wide picture on the entire screen cuts off the portions that do not fit.
DR386M-P.BGBRLLK_ENG 6/13/08 9:59 AM Page 19 Adjust the language settings Adjust the audio settings Display Menu – Select a language for the Setup menu and on-screen display. Dolby Digital / DTS / MPEG – Selects the type of digital audio signal when using the DIGITAL AUDIO OUTPUT jack. Disc Menu/Audio/Subtitle – Select a language for the Menu/Audio/Subtitle. [Original]: Refers to the original language in which the disc was recorded.
DR386M-P.BGBRLLK_ENG 6/13/08 9:59 AM Page 20 Adjust the lock settings Area code – Select a code for a geographic area as the playback rating level. This determines which area’s standards are used to rate DVDs controlled by the parental lock. See the Area Codes on page 36. DivX Reg. Code– We provide you with the DivX® VOD (Video On Demand) registration code that allows you to rent and purchase videos using the DivX® VOD service. For more information, visit www.divx.com/vod.
DR386M-P.BGBRLLK_ENG 6/13/08 9:59 AM Page 21 TV Record Audio – Select an audio channel to record when recording a bilingual program. [Main+Sub]: Main language and sub language [Main]: Main language only [Sub]: Sub language only Auto Chapter – When recording, chapter markers are added automatically in every specified interval (5, 10 or 15 min.). AV2 Recording – Selects a method of inputting video signals for the AV2(DECODER) jack.
DR386M-P.BGBRLLK_ENG 6/13/08 9:59 AM Page 22 Adjust the network settings Software Update – Your recorder is able to keep the built-in digital tuner up to date with the latest software. You can either check for updates manually, or have the unit do it automatically at regular intervals. While the DVD recorder is updating, there may be a disruption in reception for a few hours. The reception should return to normal after the update is complete. This unit must be plugged into AC power to receive updates.
DR386M-P.BGBRLLK_ENG 6/13/08 9:59 AM Page 23 Moving to another title DVD ALL Displaying disc information ON REMOTE 1 Play the disc loaded on the unit: PLAY When a disc has more than one title, you can move to another title. Press INFO (i) twice during playback then use v / V to select the title icon. Then, press the appropriate numbered button (0-9) or b / B to select a title number.
DR386M-P.BGBRLLK_ENG 6/13/08 9:59 AM Page 24 Displaying information while watching TV Changing TV program Whilst using the DVD recorder to watch TV, Press INFO (i) to display the information displayed on-screen. Use PR(+/-) on the remote control to change the program or use numbered (0-9) buttons to select a program directly. Changing TV program with program list e a b c You can display the TV program list using the PR LIST button and switch to other TV programs on the channel list.
DR386M-P.BGBRLLK_ENG 6/13/08 9:59 AM Page 25 Switching the EPG menu Using the digital EPG ON REMOTE 1 Displays the EPG menu: GUIDE 2 Select a TV program: vV 3 Displays the next/previous menu list: .> 4 Shows the selected program currently on air: OK ( 5 Exit the EPG menu: EPG or BACK (O) The EPG screen provides two search menus. Press the yellow coloured button when the EPG menu is displayed. Now/Next: This screen shows now and next programs.
DR386M-P.BGBRLLK_ENG 6/13/08 9:59 AM Page 26 Viewing a digital text service Many digital TV channels broadcast information via their text service. This digital service includes high quality digital text and graphics along with advanced navigation options. Additionally, this recorder has access to dedicated text channels transmitted by the broadcasters. The appearance, content and navigation methods of all digital text services are decided by the broadcaster.
DR386M-P.BGBRLLK_ENG 6/13/08 9:59 AM Page 27 Pause a playback Playing repeatedly DVD ALL Press PAUSE/STEP (X) to pause playback. Press PLAY ( N) to continue playback. Press REPEAT repeatedly to select an item to be repeated. The current title, chapter, folder or track will be played back repeatedly. To return to normal playback, press REPEAT repeatedly to select [OFF]. Frame-by-Frame playback DVD ALL Press PAUSE/STEP (X) repeatedly to play Frame-by-Frame playback.
DR386M-P.
DR386M-P.BGBRLLK_ENG 6/13/08 9:59 AM Page 29 Selecting all files and folders on the current list Listening to a music If you want to select all files and folders on the list, press CLEAR on any file or folder on the list. Press CLEAR again to deselect the files or folders. This function is not available for Audio CD.
DR386M-P.BGBRLLK_ENG 6/13/08 9:59 AM Page 30 Skip to the next/previous photo Viewing a photo ON REMOTE Press SKIP (. or >) to view the previous/next photo when the photo is fully displayed on the screen. 1 Displays the HOME menu: HOME Rotate a photo 2 Selects a [PHOTO] option: bB Use vV to rotate the photo when the photo is fully displayed on the screen.
DR386M-P.BGBRLLK_ENG 6/13/08 9:59 AM Page 31 Setting a timer record Recording Follow the instruction below to record a TV channel or other source. The recording continues until the media is full, you stop the recording or the progress of recording is more than 12 hours. 1 Selects a recording mode: You can select a recording mode on the SETUP menu. (XP, SP, LP, EP or MLP) This DVD recorder can be programmed to record up to 16 recordings within a month.
DR386M-P.BGBRLLK_ENG 6/13/08 9:59 AM Page 32 Canceling a timer recording You can cancel a timer recording before the timer actually starts. Select a timer recording that you want to cancel on the [Timer Record List] menu and press CLEAR. Editing a title Using the Title list menu,you can edit video contents. ON REMOTE Timer Recording Troubleshooting 1 Displays a [Title List] menu: MENU/LIST Even though the timer is set, the unit will not record when: – There is no disc loaded.
DR386M-P.BGBRLLK_ENG 6/13/08 9:59 AM Page 33 Before editing Chapter search -RWVR This DVD recorder offers various editing options for various disc types. Before you edit, check the disc type, and select the option available for your disc. You can select the start of a title by searching a chapter. Select a title that you want to search and press OK( ). Select [Chapter] in the [Search] option from the menu on the left of the screen, and press OK( ) to display the [Chapter List] menu.
DR386M-P.BGBRLLK_ENG Time search -RWVR 6/13/08 -RWVideo 9:59 AM +RW +R Page 34 -R RAM You can select the start of a title by searching through the time duration. Select a title that you wish to search and press OK( ). Select [Time] in the [Search] option from the menu on the left of the screen and press OK( ) to display the [Search] menu. Protect a title -RWVR +RW +R RAM Use this function to protect a title against accidental recording, editing or deleting.
DR386M-P.BGBRLLK_ENG 6/13/08 9:59 AM Page 35 Viewing Title List menu displayed on another unit +RW +R You can view the Title List menu displayed on the another unit that is capable of playing DVD+RW or DVD+R discs. Press TITLE in play or stop mode. Title List menu will appears on the screen. When the TITLE button is not available due to the digital broadcasts, press and hold the MENU/LIST for 3 seconds to display the Title List.
DR386M-P.BGBRLLK_ENG 6/13/08 9:59 AM Page 36 Language Codes Use this list to input your desired language for Disc Audio, Disc Subtitle and Disc Menu.
DR386M-P.BGBRLLK_ENG 6/13/08 9:59 AM Page 37 Troubleshooting General The power does not turn on. b Plug the power cord into the wall outlet securely. There is no picture. b Select the appropriate video input mode on the TV so the picture from the unit appears on the TV screen. b Connect the video connection securely. b Check the [Video Output Format] in SETUP menu is set to the appropriate item that conforms to your video connection. Picture noise appears.
DR386M-P.BGBRLLK_ENG 6/13/08 9:59 AM Page 38 Recording Cannot record or does not record successfully. b Check the remaining space on the disc. b Check that the source you are trying to record in not copy protected. b The power may have failed during recording. b Use a VR mode formatted disc for copy-once material. Timer record does not record successfully. b Clock is not set to correct time. b The start time of the timer recording is past.
DR386M-P.BGBRLLK_ENG 6/13/08 9:59 AM Page 39 Playback Specifications Frequency response General Power requirements Power consumption Dimensions (approx.) Net weight (approx.) Operating temperature Operating humidity Television system Recording format AC 200-240V, 50/60 Hz 18W 430 X 49 X 245 mm (w x h x d) without foot 2.
DR386M-P.BGBRLLK_ENG 6/13/08 9:59 AM Page 40 Technology with the human touch GUARANTEE ● LG Electronics U.K. Ltd. will provide the following services in order to ● REQUIREMENTS TO MAINTAIN WARRANTY COVERAGE: expedite this Guarantee. 1. All faulty components which fail due to defective manufacture will be replaced free of charge for a period of 12 months from the original date of purchase. RETAIN YOUR RECEIPT TO PROVE DATE OF PURCHASE.